Journey Builder in Campaign Manager
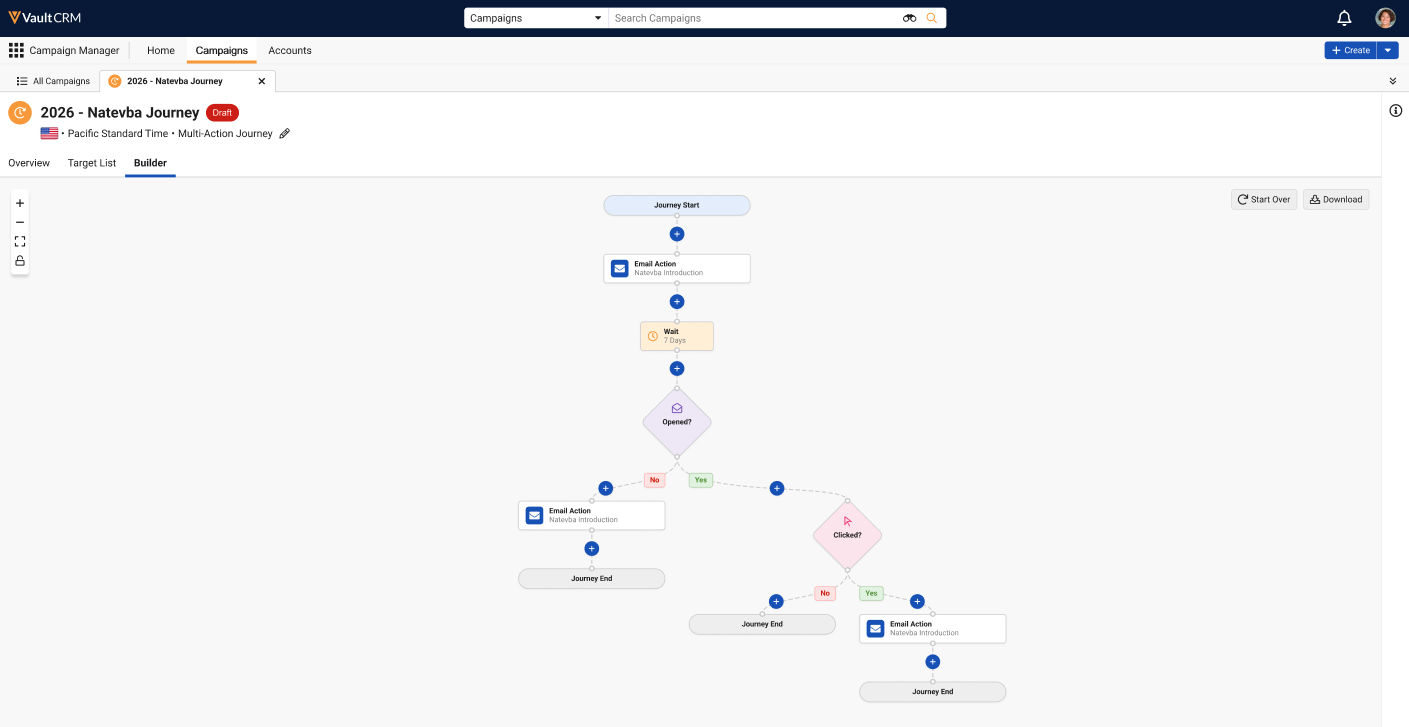
Marketing users can use the Journey Builder tool to create complex, multi-action journeys in an easy to understand visual flow. Marketing users can quickly add nodes to a journey to represent channel actions, scheduled delays, and branching engagement splits within the timeline.
Segmentation is not supported when using the Journey Builder.
Who can use this feature?
- Marketing Users – Browser
- Viewing the Journey Builder
- Building Journeys
- Users require a Campaign Manager license
Configuring Journey Builder for
To configure this feature, ensure Configuring Campaign Manager is complete.
Viewing the Journey Builder as
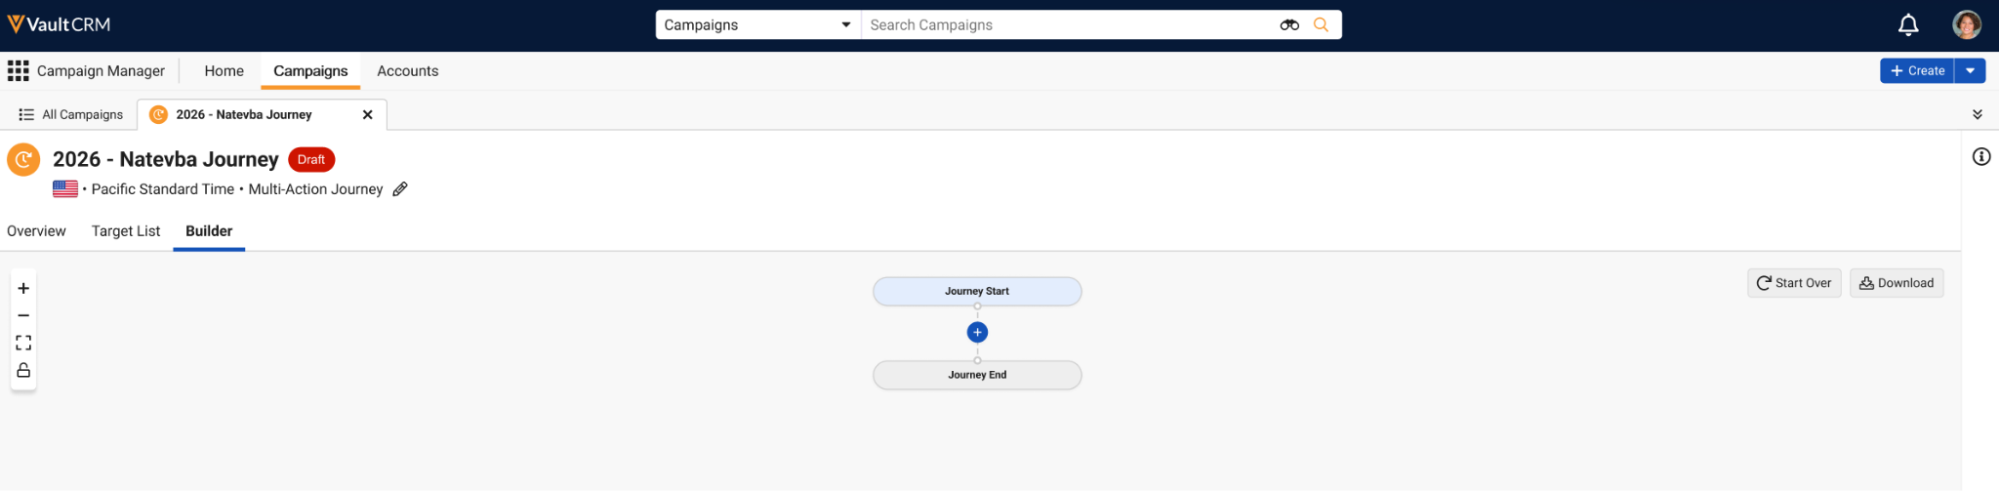
To use the Journey Builder, navigate to or create the appropriate multi-action journey.
For multi-action journeys created after the 26R1.4 release, this is the default way to build journeys.
The following controls are available:
- Zoom in and Zoom out (+/-) – Controls the zoom level. Zooming using a mouse wheel or trackpad is also supported.
- Fit View (
 ) – Select this button to automatically reset the zoom and pan settings so that all rendered nodes completely fill the canvas tab area
 - Lock and Unlock (
 ) – Select this button to lock or unlock the canvas controls, disabling or re-enabling zoom and pan adjustments
Marketing users can select the Start Over button on drafted journeys to remove all added nodes and revert the journey to its default state, with a single connection between the Journey Start and Journey End nodes.
Select the Download button on the toolbar to save an image of the entire journey as an .svg file.
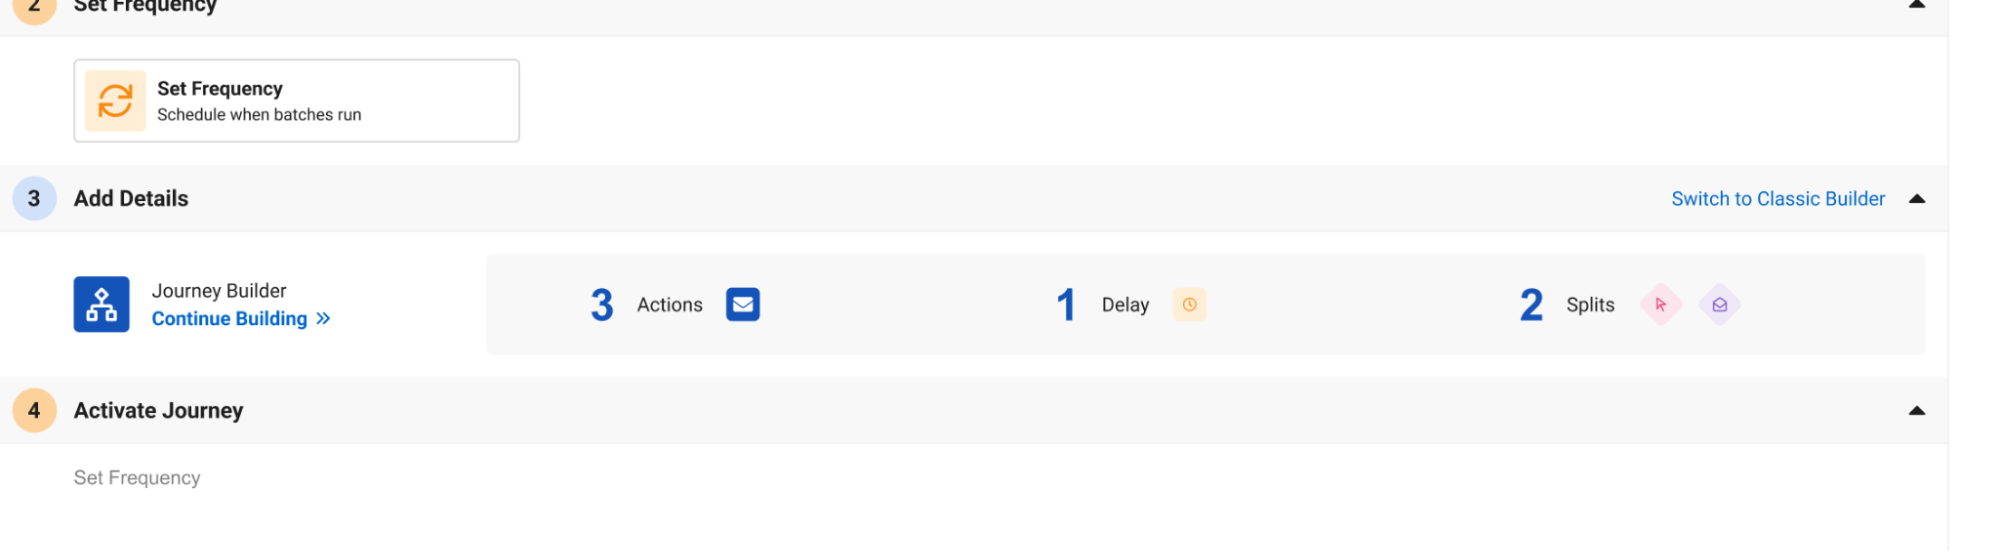
Switching to the Classic View
To switch to the classic list view, select the Switch to Classic Builder link in the Add Details section of the Overview sub-tab.
Switching to the Classic Builder removes any saved progress in building the journey and reverts the journey to its initial state in the Classic Builder UI.
Switching to the Journey Builder for Existing Journeys
To switch journeys created prior to the 26R1.4 release to the Journey Builder, select the Switch to Journey Builder link in the Add Details section of the Overview sub-tab.
Selecting this link removes all existing flows, actions, and segmentation.

Building Journeys as
Marketing users can use the Builder sub-tab to add nodes to the journey timeline by selecting the + button in the appropriate place in the journey’s timeline.
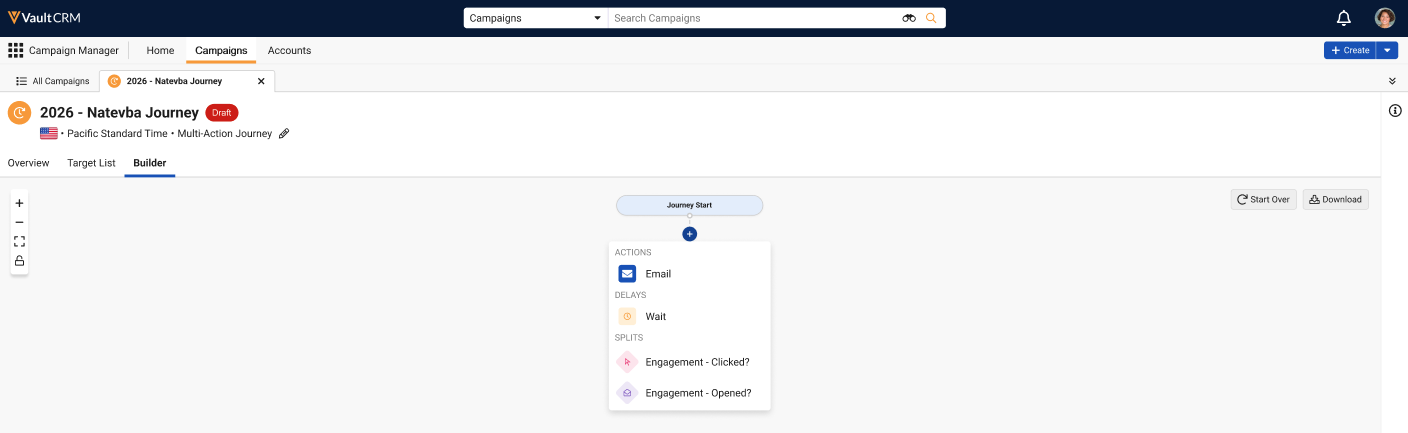
The following nodes are available:
- Actions – Enables adding a channel action or followup action. See Adding Action Nodes for more information
- Delays – Enables adding a delay of a specified time before proceeding in the timeline. See Adding Delays for more information
- Splits – Enables adding splits in the journey timeline based on certain interaction requirements. See Adding Splits for more information.
Adding Action Nodes
Action nodes enable adding channel actions to the timeline. Users can add either primary journey actions or actions associated with follow-ups.
Currently, Email is the only supported channel.
To add an action node:
-
Select the + button in the appropriate place in the timeline.
- Select the appropriate channel action.
-
Populate the appropriate action information based on the selected channel:
- Action Name – Enter the appropriate action name
- Email Template – Select the Select Template button to view, search for, and select the appropriate email template
- Sender and Reply To – Select the appropriate marketing email addresses to serve as the sender and reply to addresses for the email
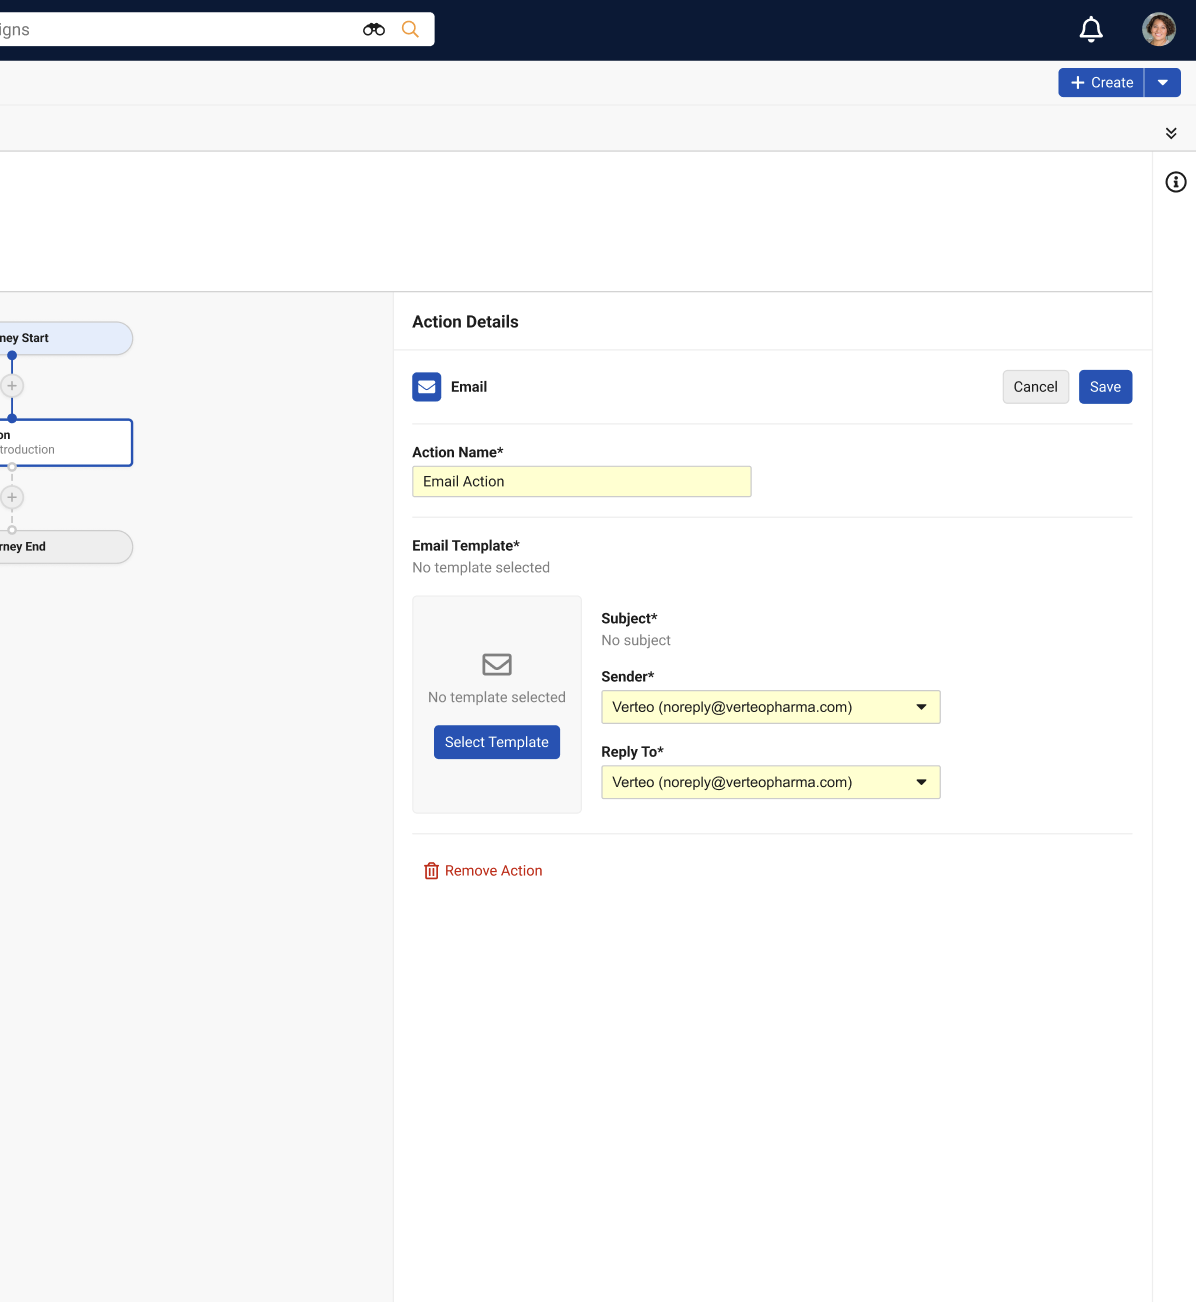
- Select Save.
Adding Delays
Delay nodes enable adding a time delay in the timeline prior to initiating the next node in the action. For example, adding a delay of seven days after the initial Send Email action before initiating another action.
To add a delay node:
-
Select the + button in the appropriate place in the timeline.
- Select Wait in the Delay section.
-
Populate the Wait Duration field with the appropriate wait in days.
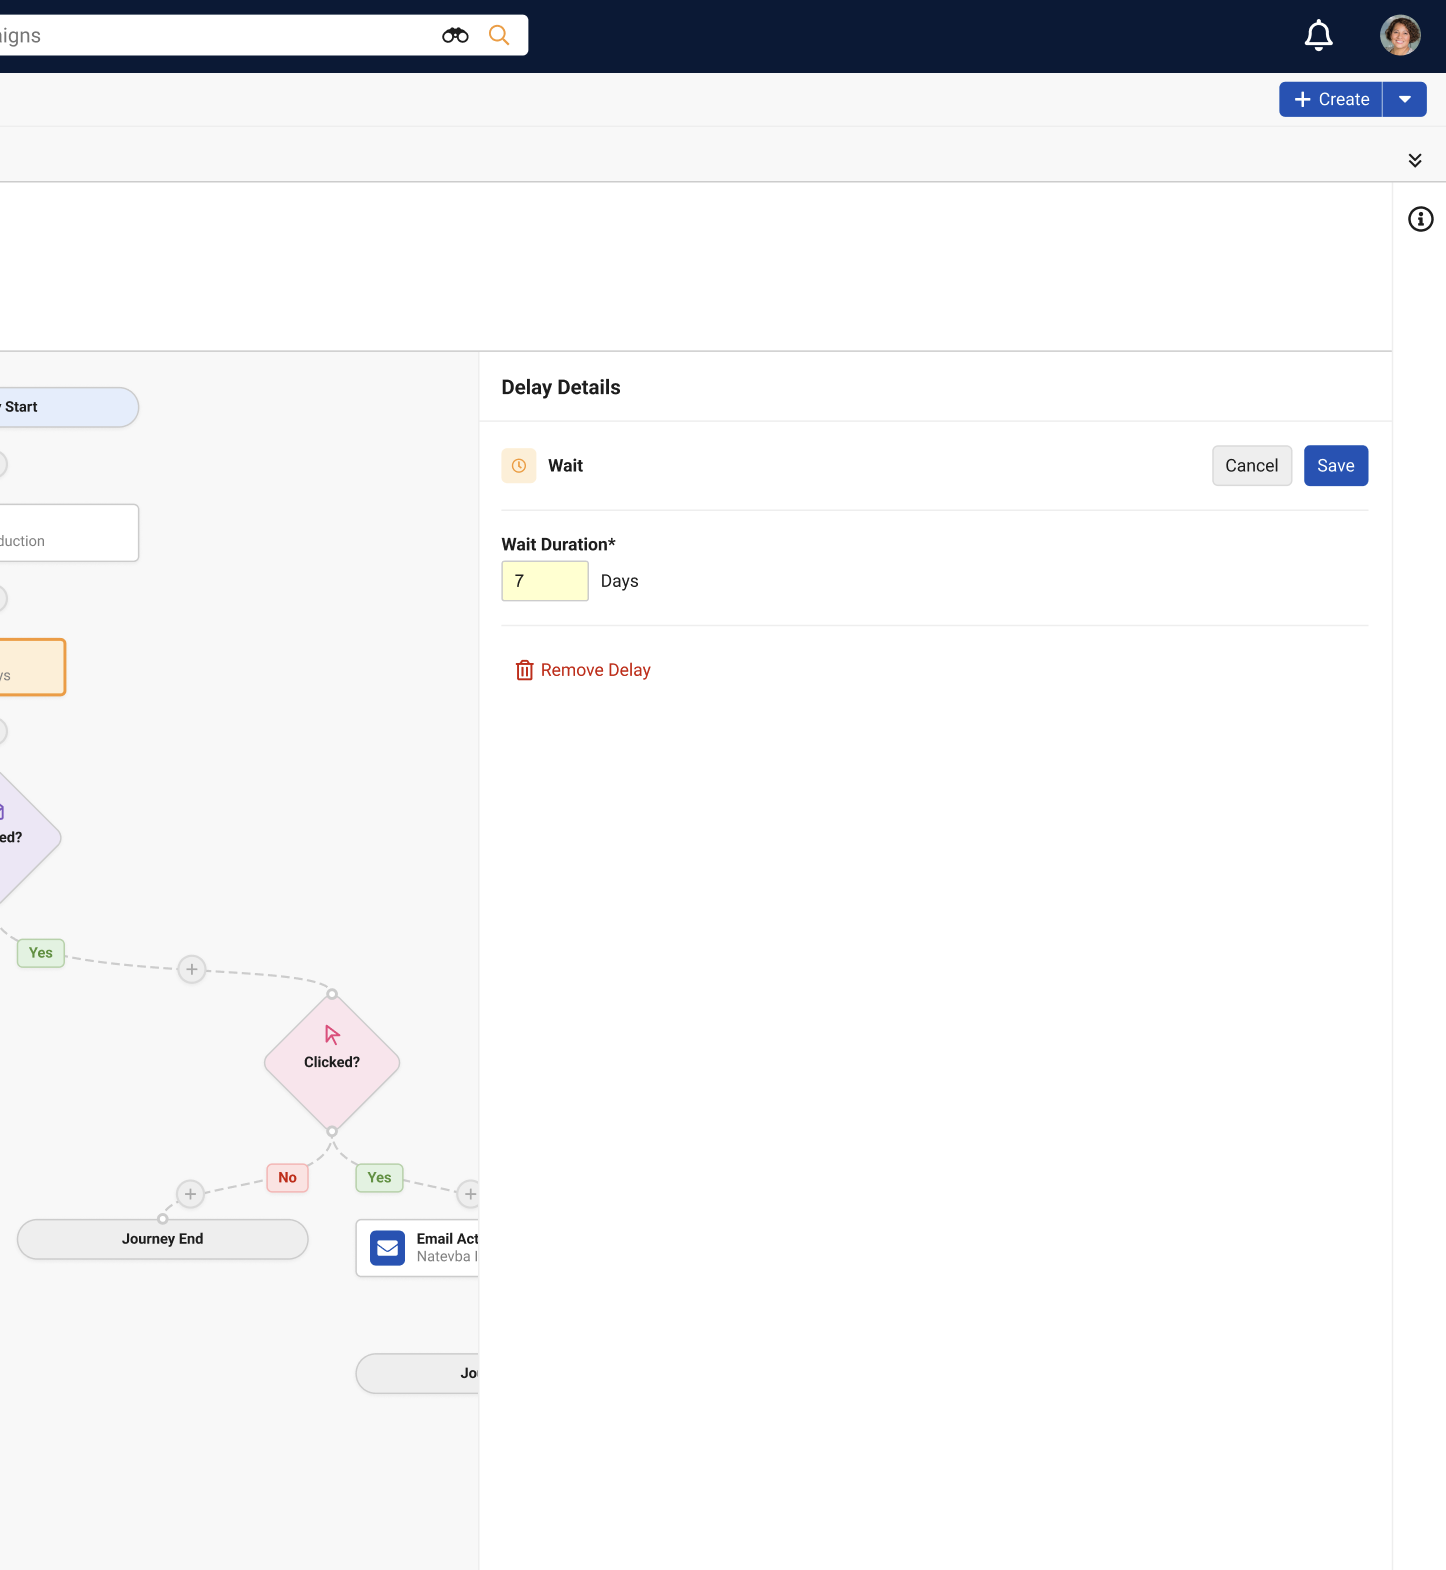
- Select Save.
Adding Splits
Splits are branching points in the journey timeline based on interaction requirements by targets within the journey.
To add splits:
-
Select the + button in the appropriate place in the timeline.
-
Select the appropriate split. The following types of split are available:
- Engagement - Clicked? – Creates branching nodes based on if a target has or has not clicked a particular link or links in a previous email
- Engagement - Opened? – Creates branching nodes based on if a target has or has not opened a previous email
-
Enter the appropriate details based on the selected split type:
- Engagement - Clicked?
- Check Action – Select the appropriate upstream Action node that the split is checked against
-
Check URLs – Enter the appropriate URLs to check. Up to 10 URLs can be added, checked using Starts With logic.

- Engagement - Opened?
-
Check Action – Select the appropriate upstream Action node that the split is checked against
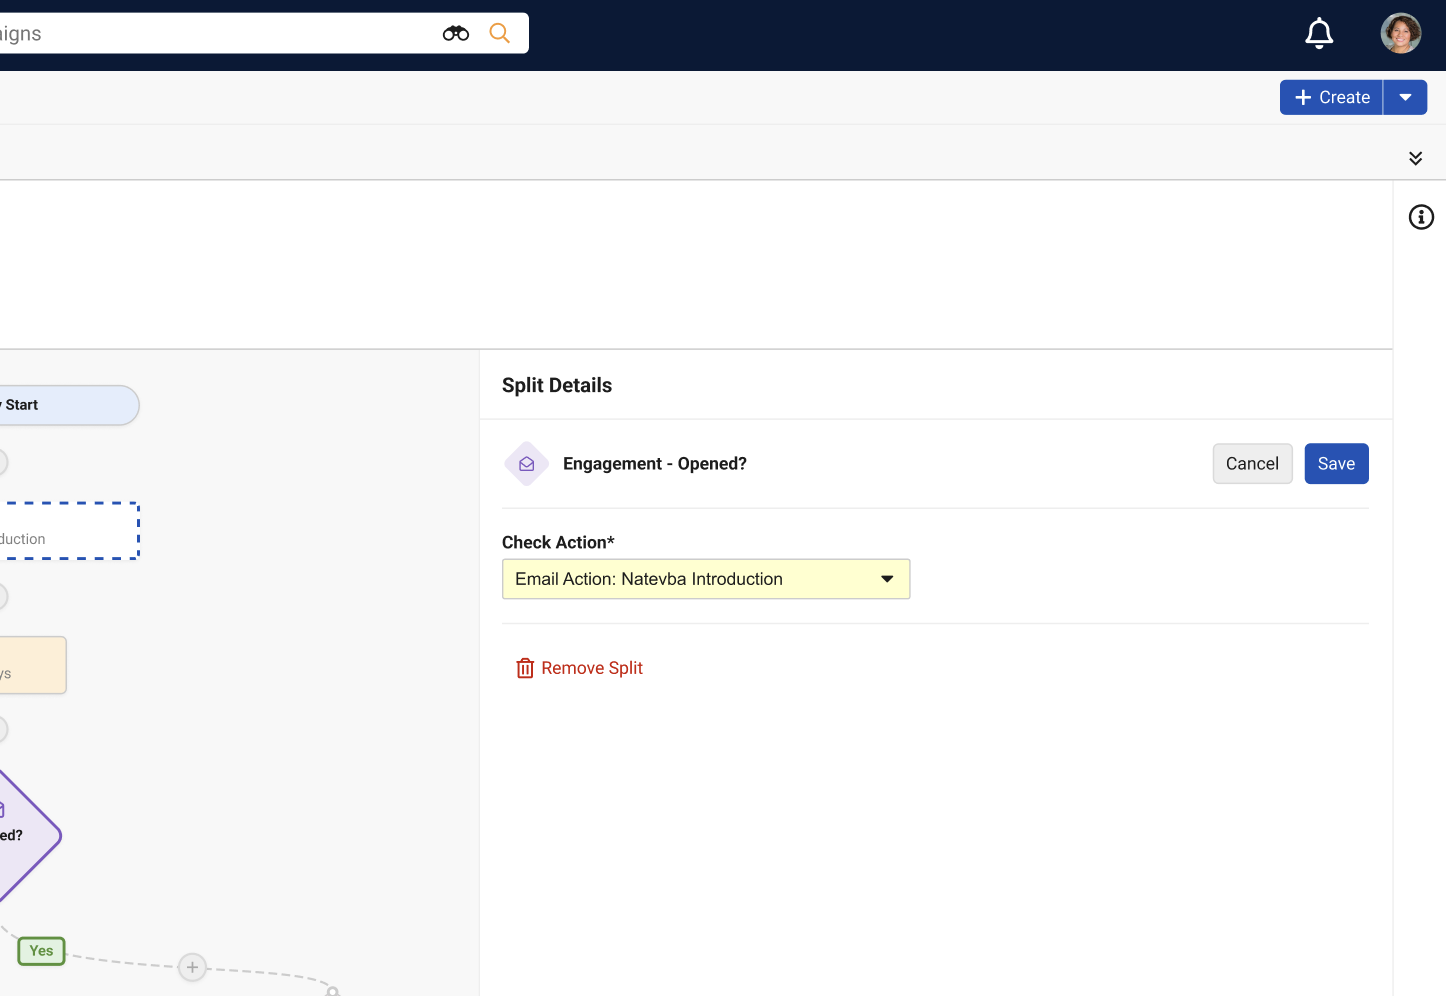
- Select Save. Two branches are created after the newly created node, one for targets who meet the interaction requirement, and one for targets who do not.

