Adding Patient Targets to Campaigns and Journeys
Enabling disease awareness information, treatment option education, and brand messaging to reach patients directly, marketing users can build campaign and journey target lists from patients.
Who can use this feature?
- Marketing Users — Browser
- Adding Patients to a Campaign or Journey
- Reviewing Target Lists with Patients
- Splitting a Journey by Patient Fields
- Users require a Campaign Manager license
Configuring Patient Campaign Targets for
 Marketing Users
To configure this feature:
- Ensure Adding Patient Targets to Campaigns and Journeys is complete.
- Navigate to Admin > Users & Groups > Permission Sets.
- Select the appropriate Permission Set.
- Select Objects.
-
Grant the following permissions:
Object
Object Permission
Object Types
Fields
Field Permission
account__v
R
account_patient__v
All applicable fields
Read
patient_attribute__v
R
n/a
- email__v
- gender__v
- has_caregiver__v
- name__v
- state_province__v
- Any other fields used for filtering
Read
Adding Patients to a Campaign or Journey as
Marketing Users
Marketing users can define the target types for a campaign or journey when creating filters for their target list via the Target List Builder.
Patient accounts are excluded from Account Search. Account Search results, the result count, and the selectable rows return non-patient accounts only. This applies to the Search tile. Importing and copying patient targets is supported.
To add patients to a campaign or journey:
- Navigate to the Target List Builder of the appropriate campaign or journey.
-
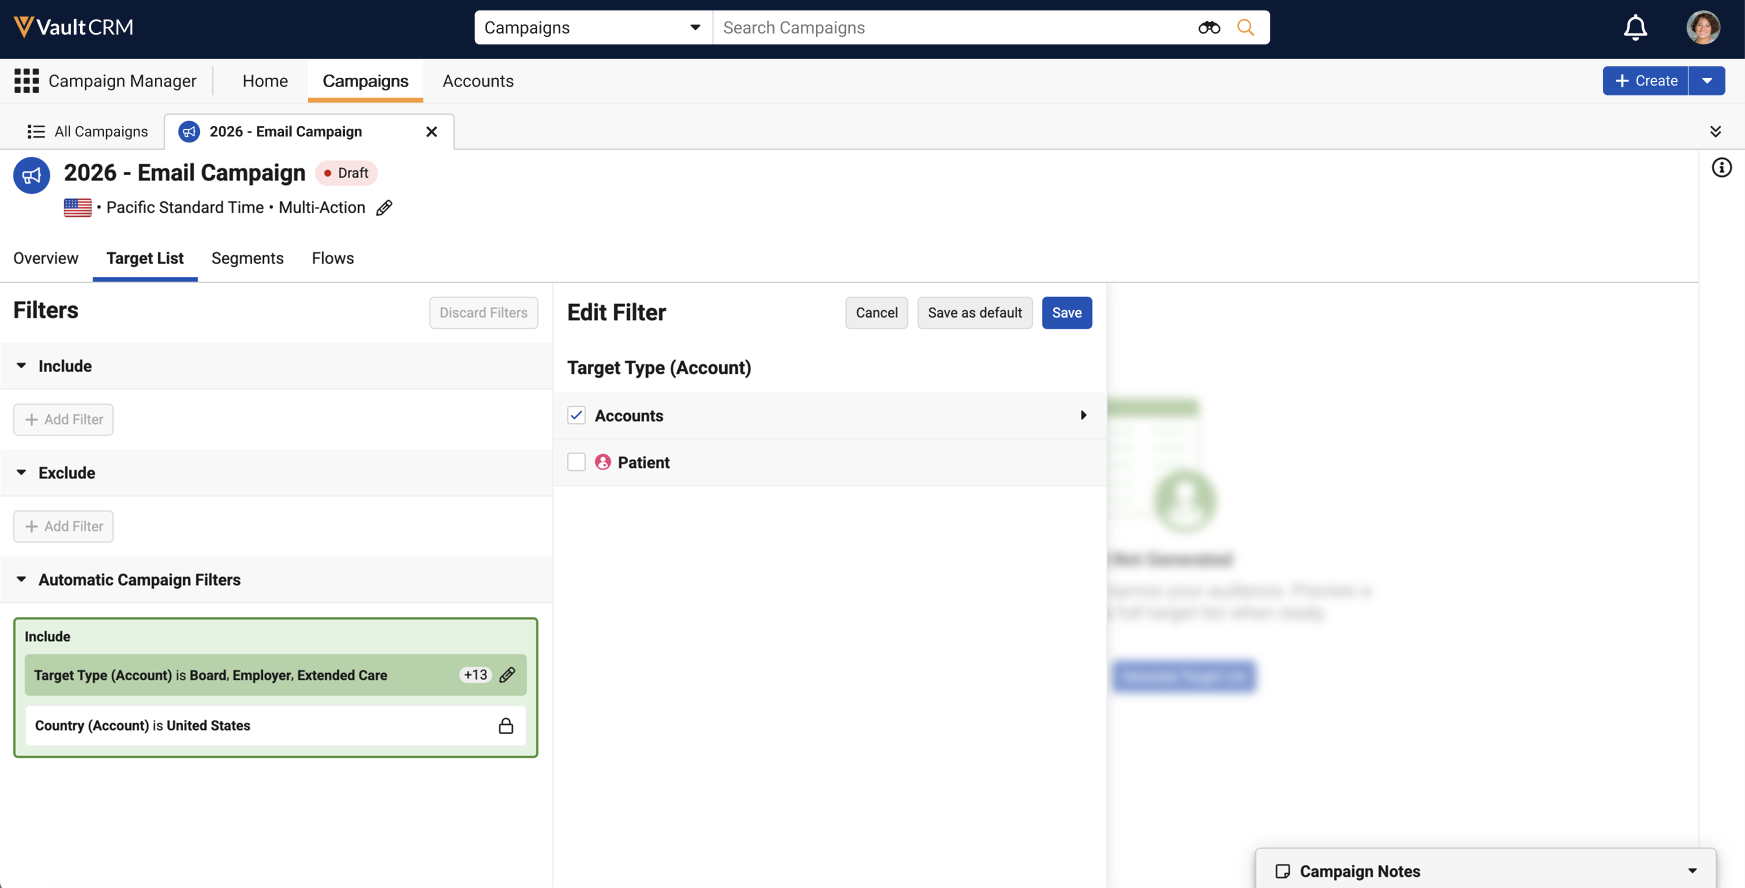
Edit the Target Type in the Automatic Filters.
-
Select the Patient option.
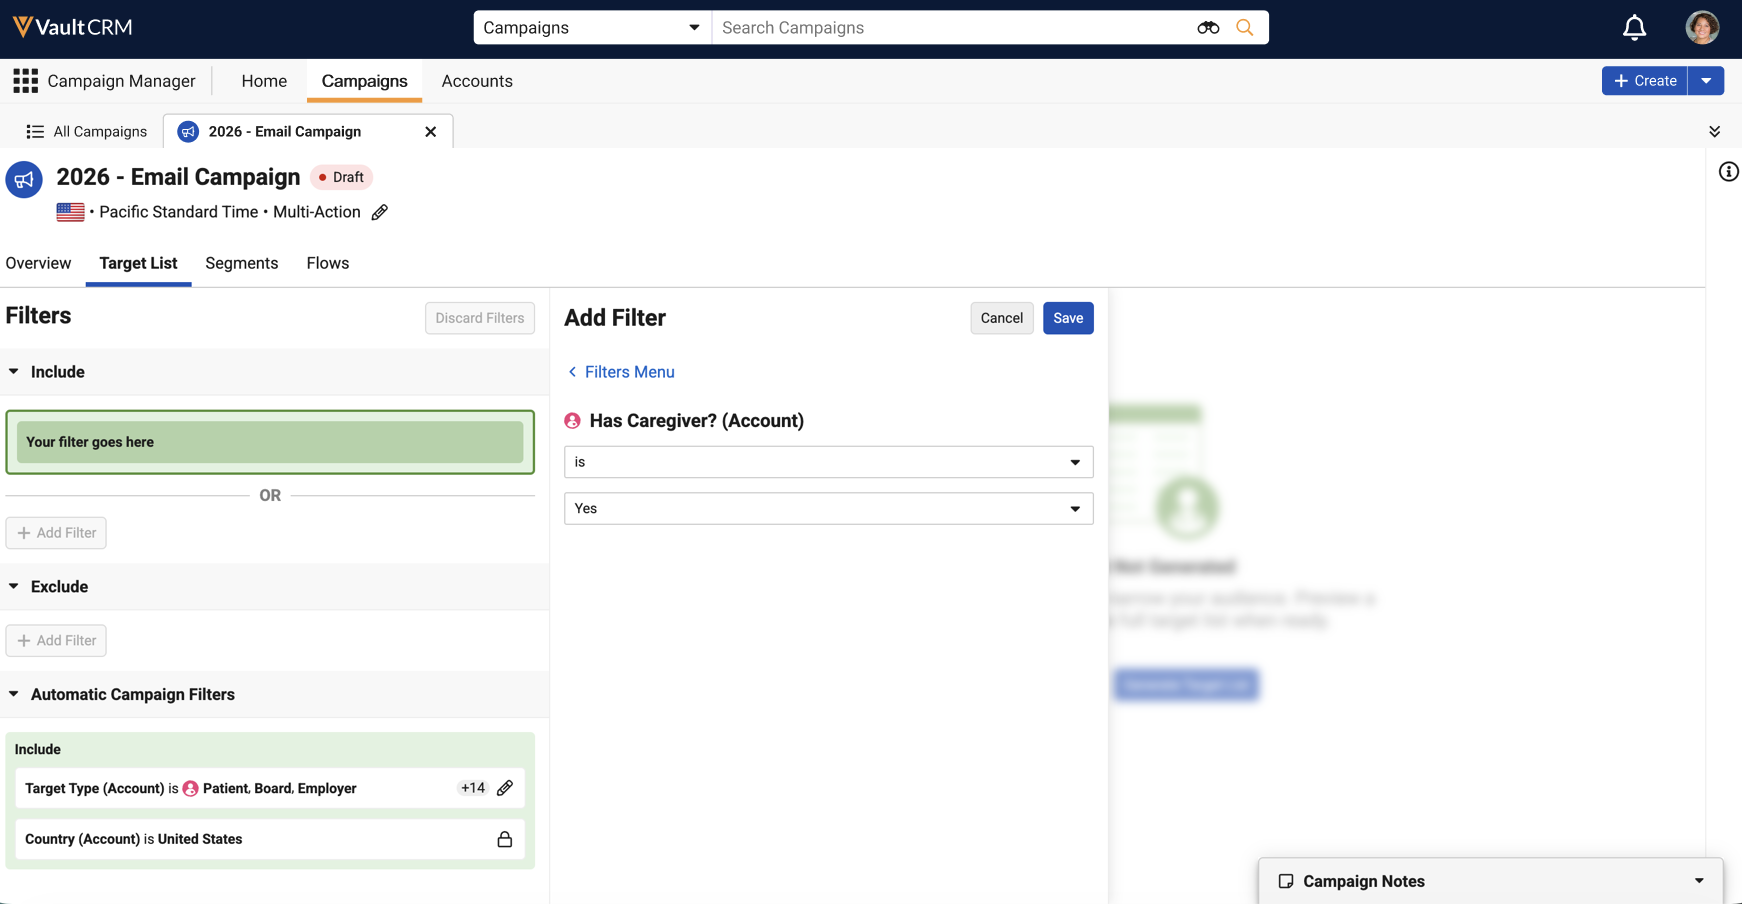
- Select Save to apply the target types to the current campaign or journey, or select Save as Default to apply them and store the selection as the default for future campaigns and journeys.
Filtering on Patient Attributes
After including Patients as a target type, marketing users can narrow the patient audience by filtering on fields from the Patient Attribute object.
To add a patient attribute filter:
-
Select the Account object in the Add Filter panel. Patient attribute fields display under the Account object in alphabetical order, each with a patient icon.
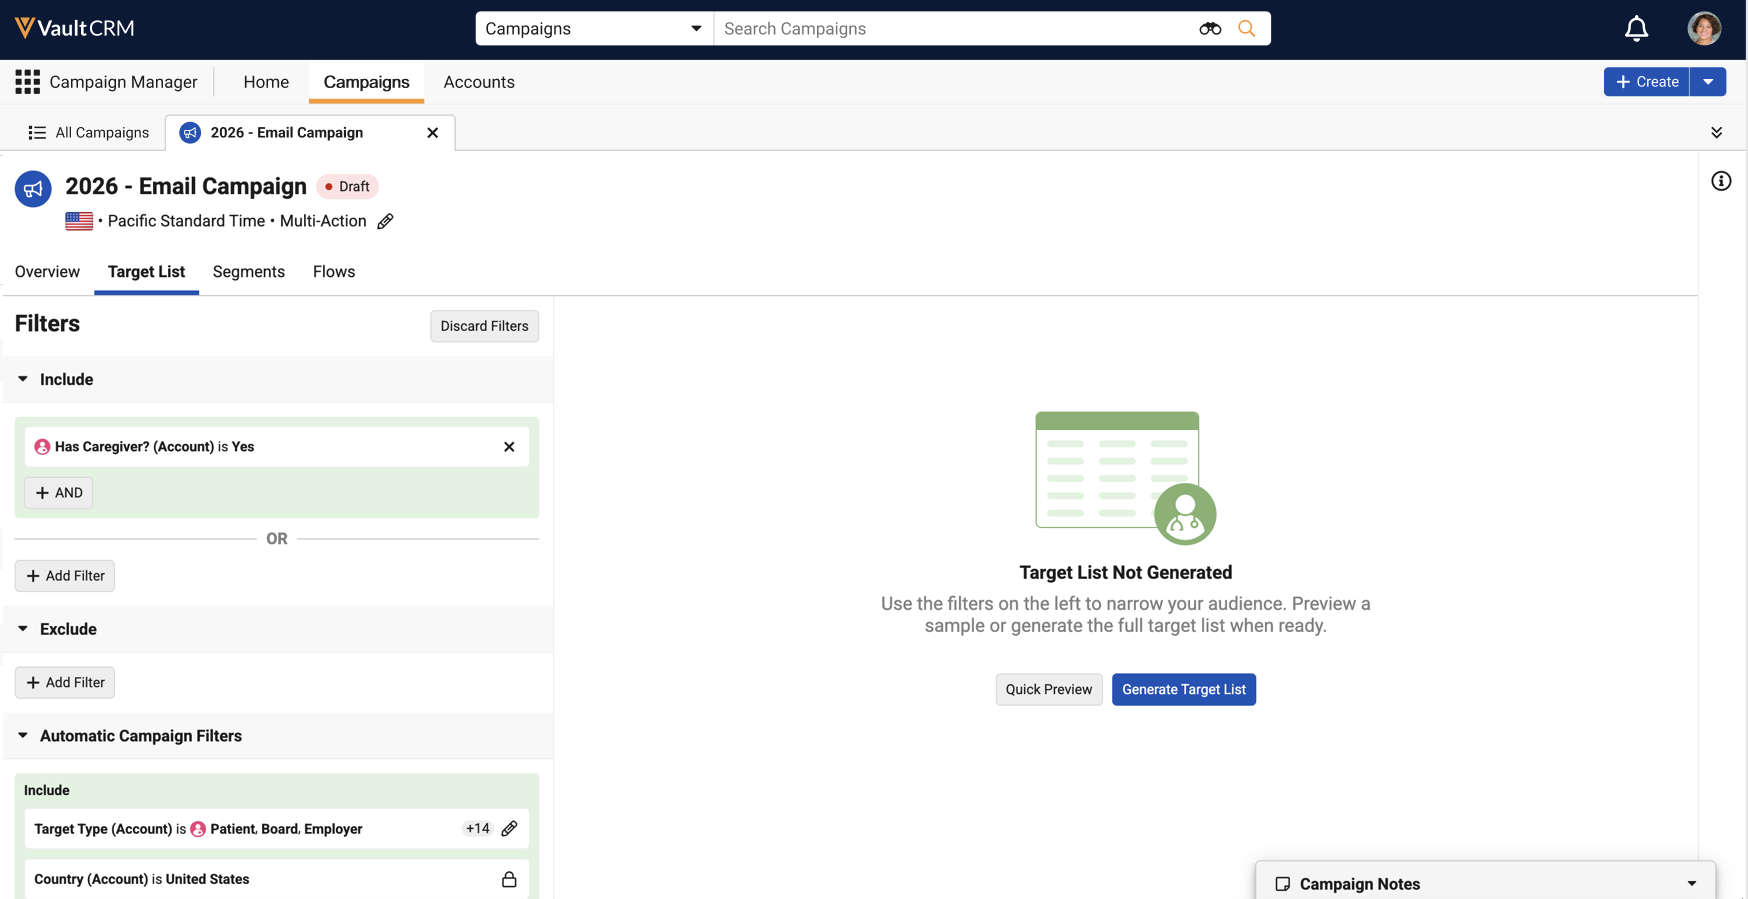
- Select the appropriate patient attribute field. Only fields the user has Read permission for display.
-
Select the appropriate operator.
For standard patient_attribute__v fields with the Contains PHI/PII attribute selected, only the is blank and is not blank operators are available, regardless of field type. Custom patient_attribute__v fields offer the full set of operators for their field type, whether or not Contains PHI/PII is selected.
- Enter the appropriate value or values.
- Select Save.
Previewing Patient Targets
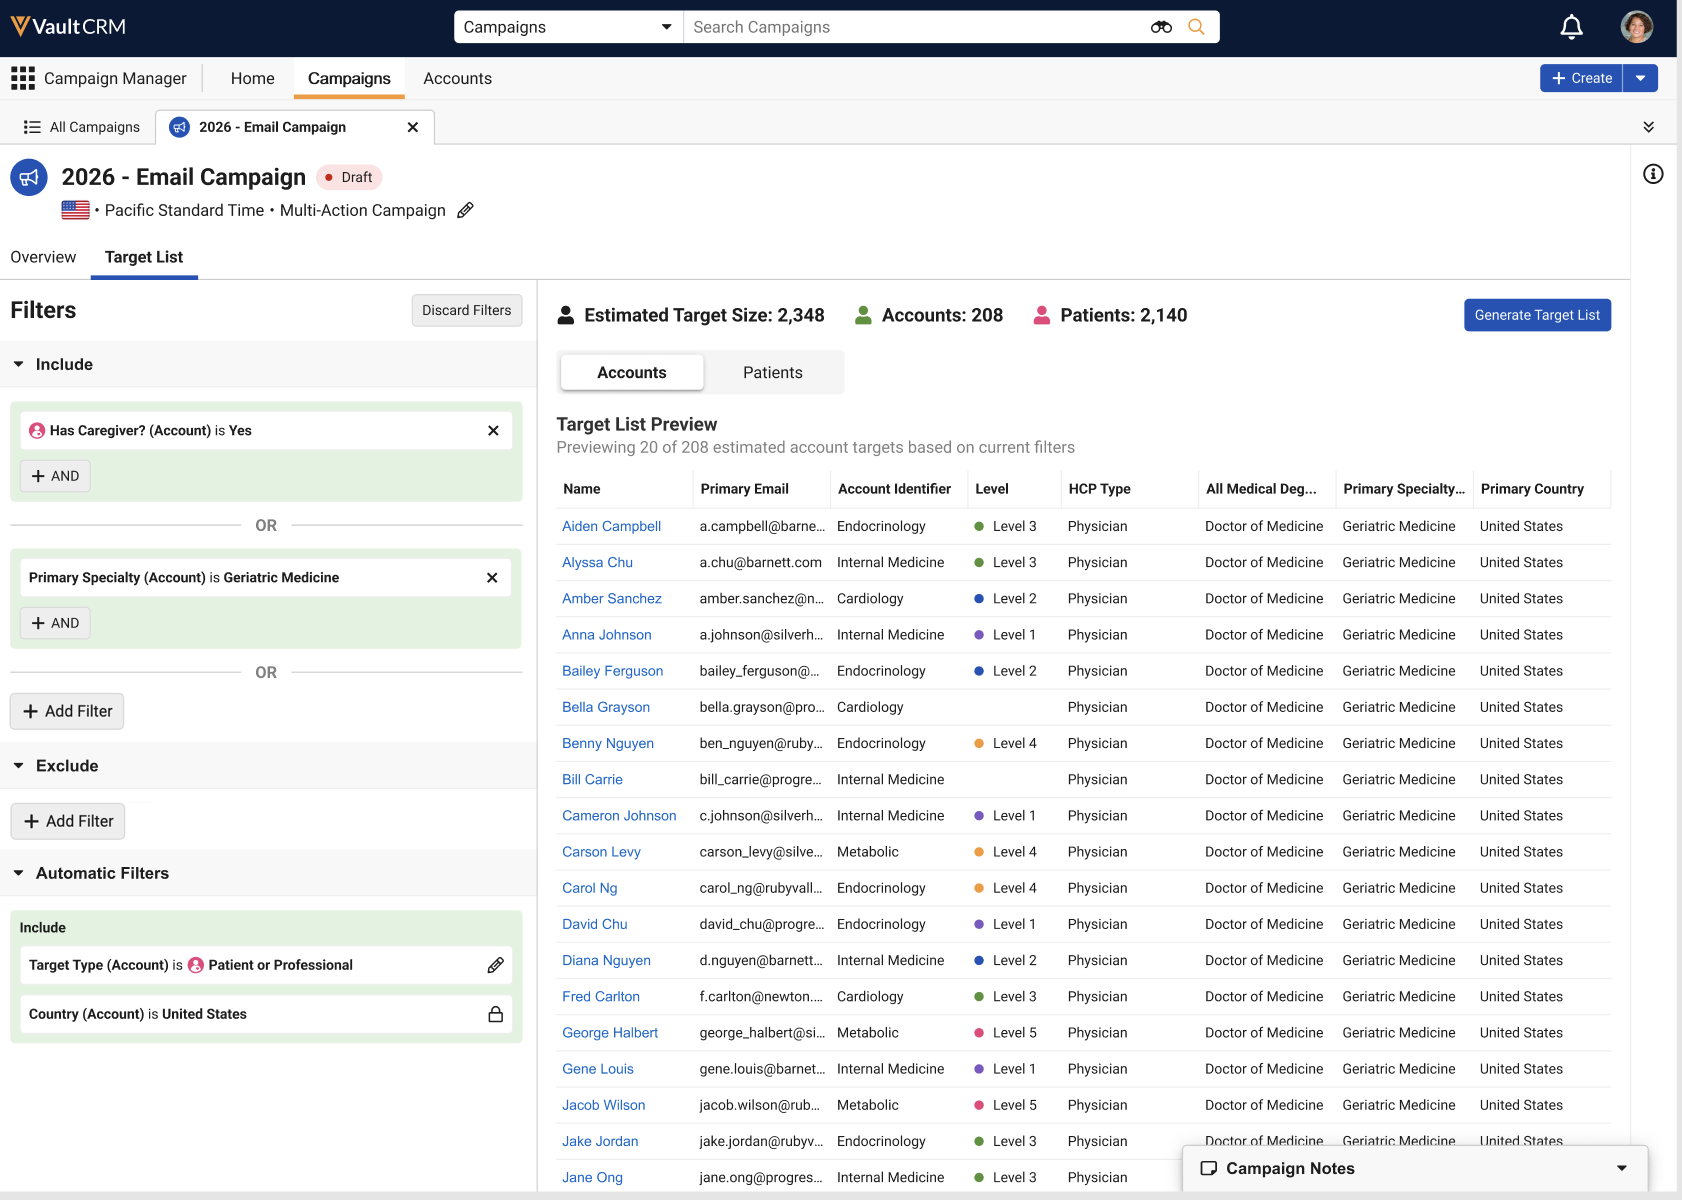
After defining filters, preview the resulting targets to confirm the audience before generating the target list. The preview reflects the target types in the campaign or journey.
To preview patient targets, select Quick Preview.
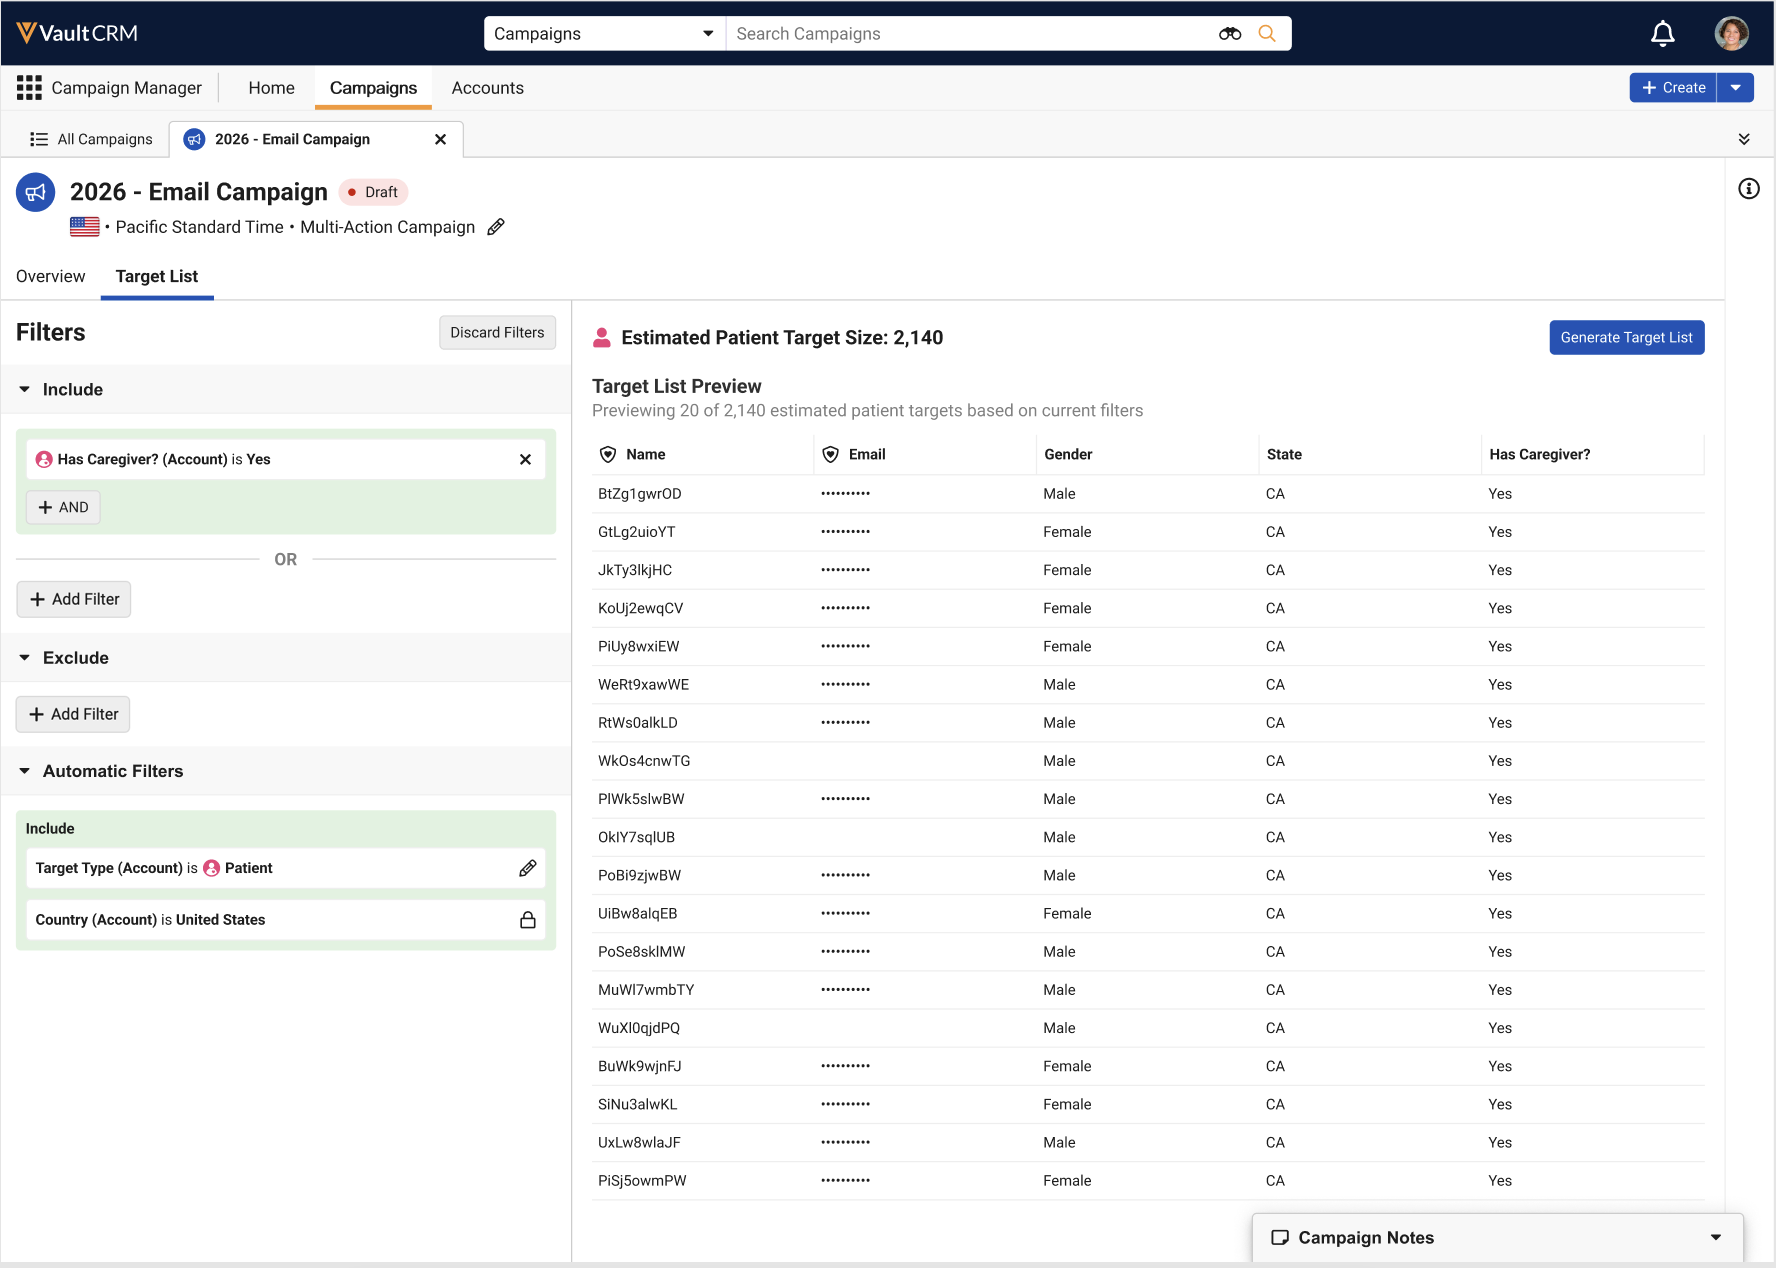
When the targets include patients only, the following information displays:
- Estimated Patient Target Size - The total number of targets with the account_patient__v object type
- Target List Preview - The first 20 matching patient targets. The patient preview table contains the following columns representing fields from patient_attribute__v records:
- name__v
- email__v
- gender__v
- state_province__v
- has_caregiver__v
Fields marked as containing PHI or PII display a sealed icon, preventing marketing users from viewing patient PII/PHI information. The Name is masked and email is anonymized.
When the targets include both accounts and patients, the preview displays the total Estimated Target Size, an Accounts count, and a Patients count, along with an Accounts tab and a Patients tab, enabling marketing users to view matching targets for both target types.
Reviewing Target Lists with Patients as
Marketing Users
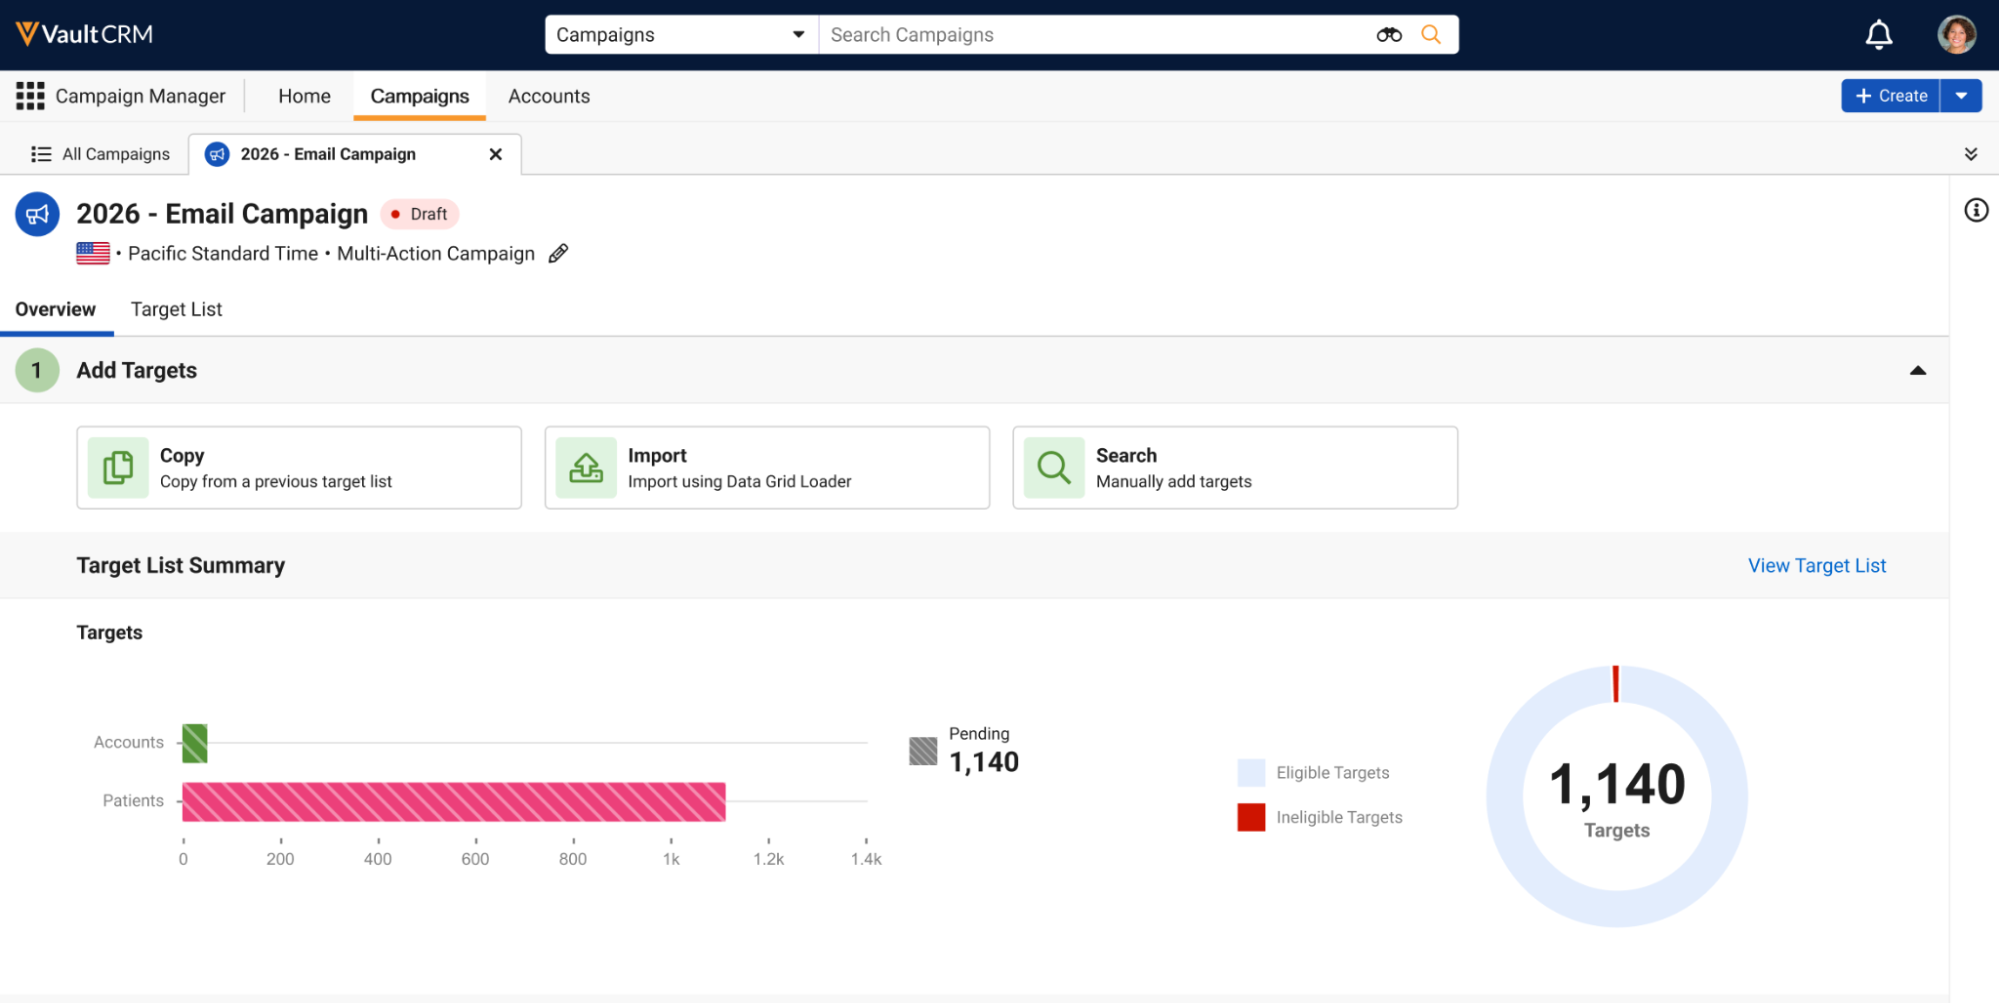
After generating the target list, the Overview subtab of the campaign or journey displays target list summaries for both patient and account targets.
After reviewing the summary, open the Target List tab to remove individual patient targets or all patient targets. When the targets include both accounts and patients, an Accounts tab and a Patients tab display.
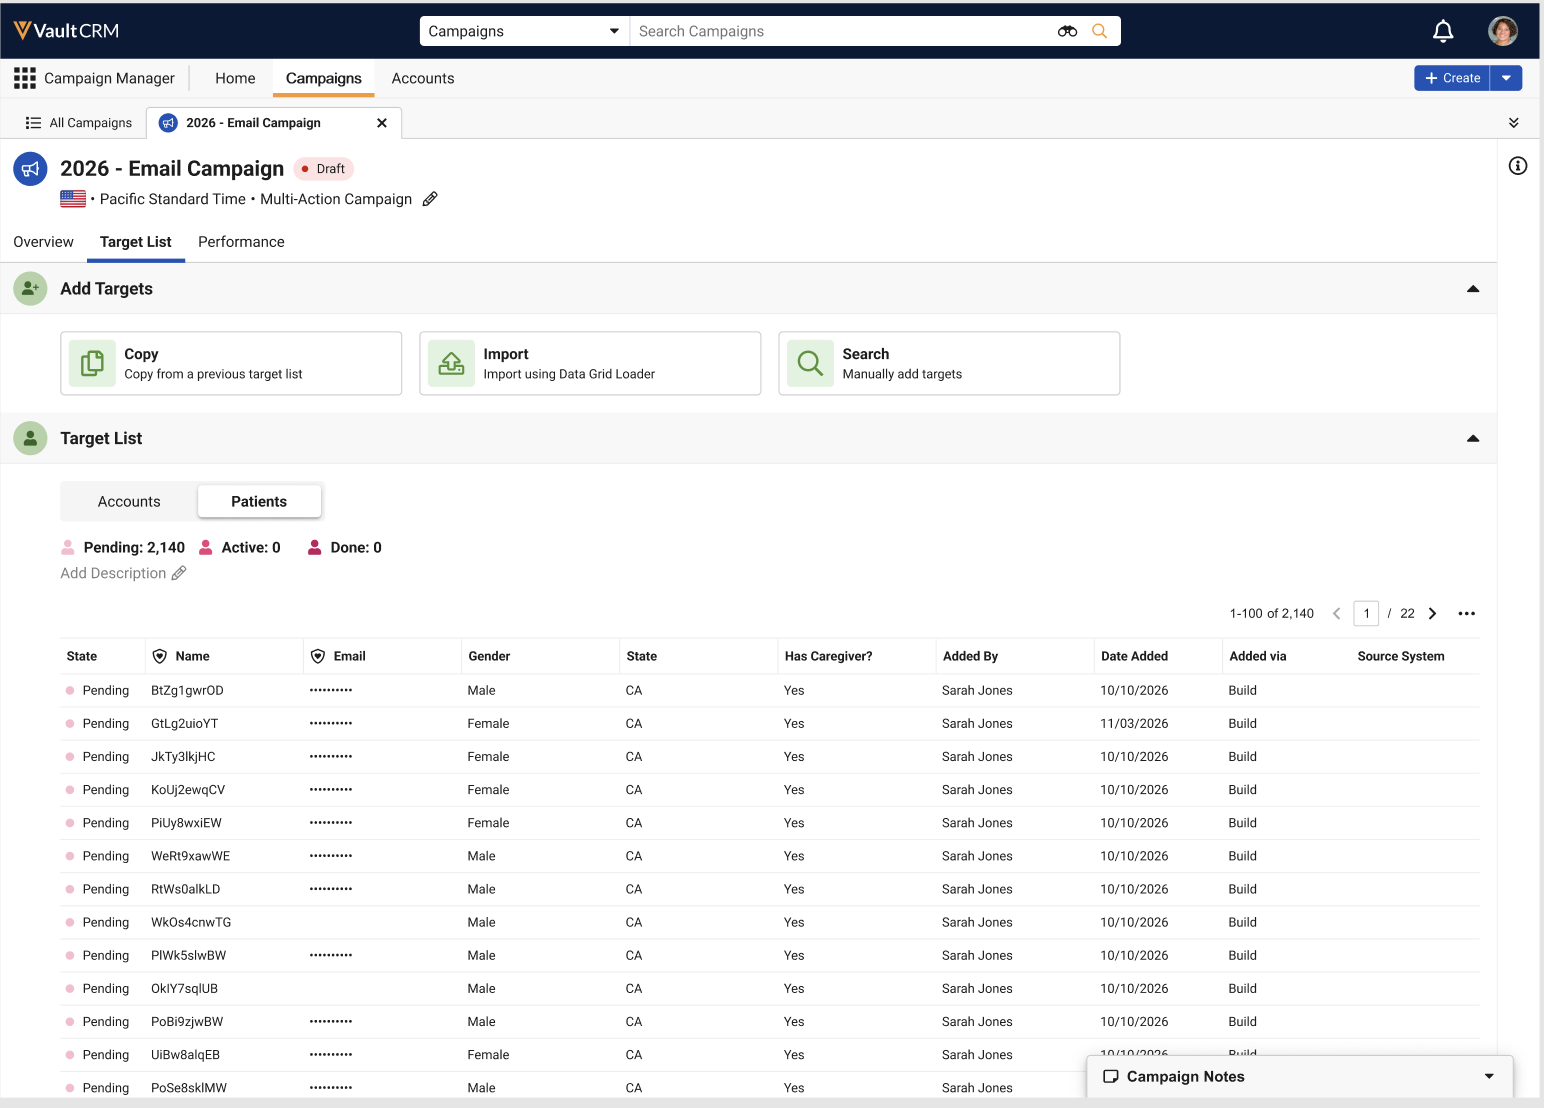
From here, users can remove individual patient targets just as they would account targets. Additionally, the All Actions menu also displays the following actions:
- Remove All Patient Targets – Removes all patient targets from the campaign or journey
- Remove All Account Targets – Removes all account targets from the campaign or journey
Journey Branching with Patient Attribute Fields as
Marketing Users
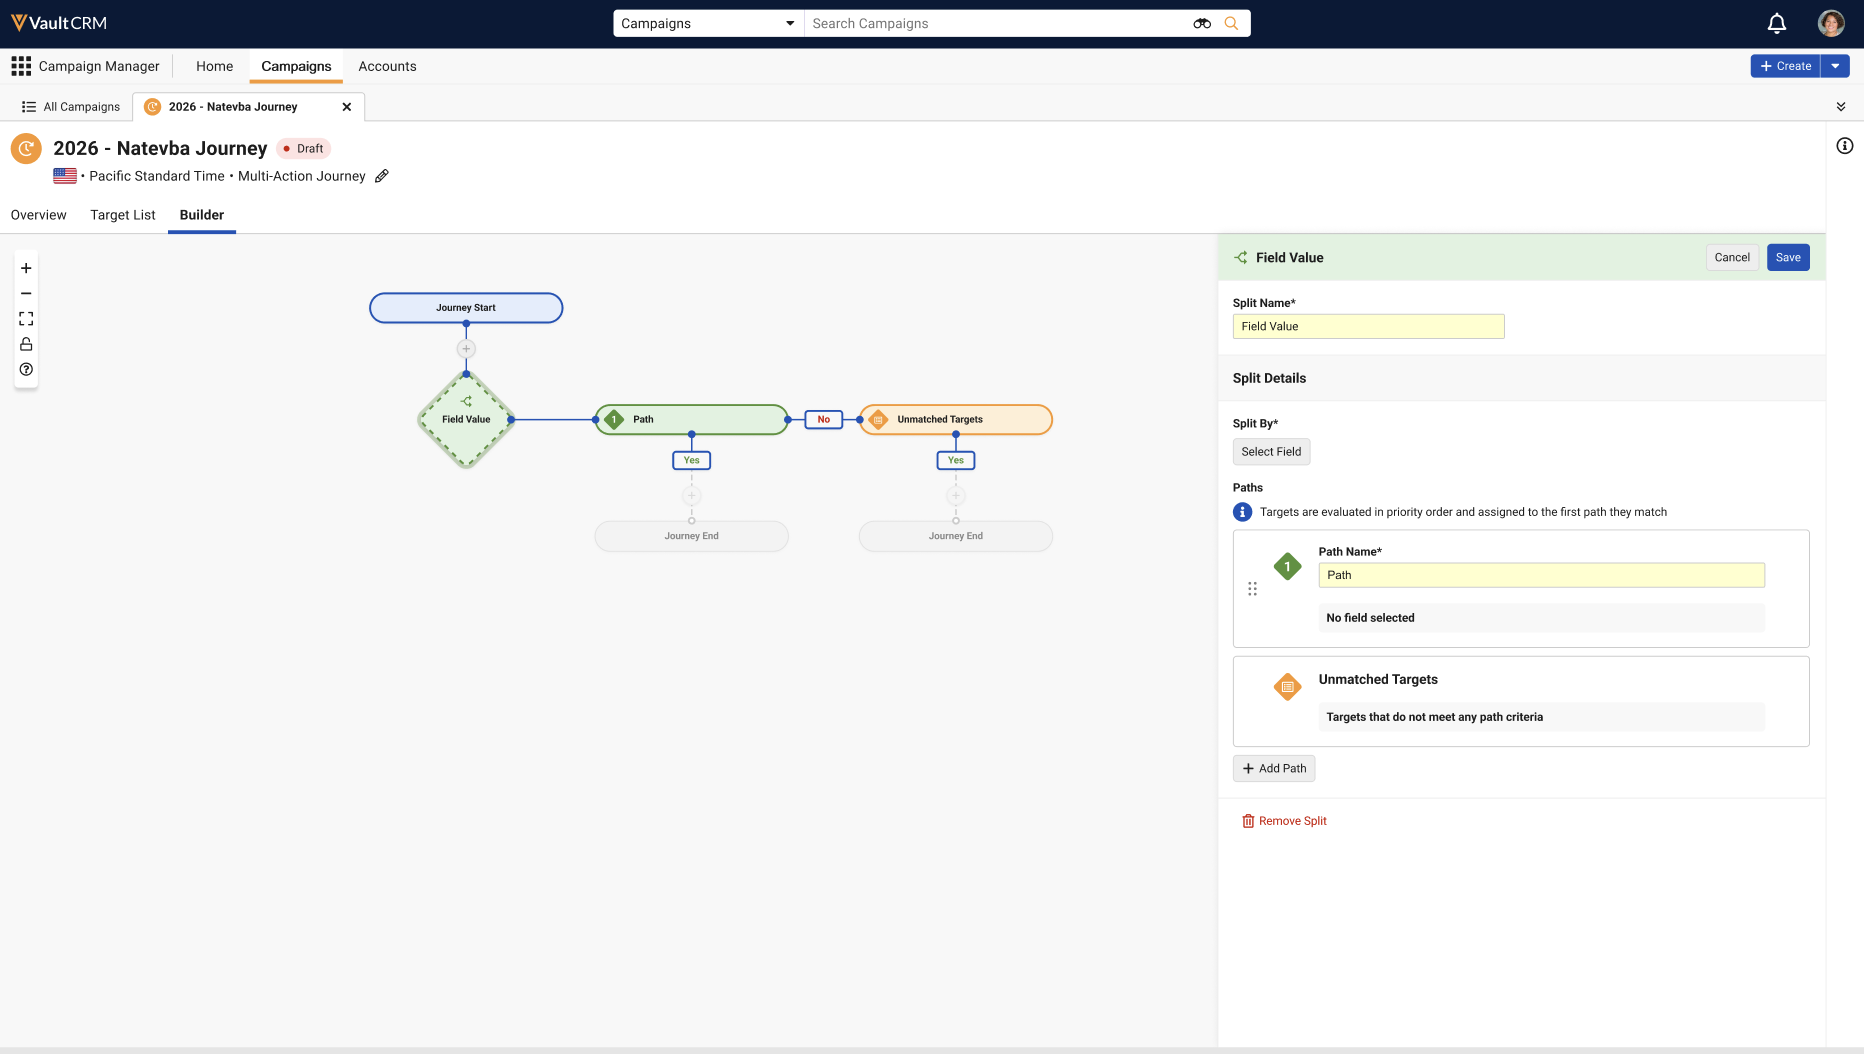
After building a patient audience in a multi-action journey, marketing users can use the Journey Builder to split downstream actions based on patient_attribute__v fields:
- Navigate to the Builder tab of the appropriate multi-action journey.
- Select the + button at the appropriate point in the canvas.
-
Select Field Value in the Splits section.
-
Select the Select Field button in the split by section.
-
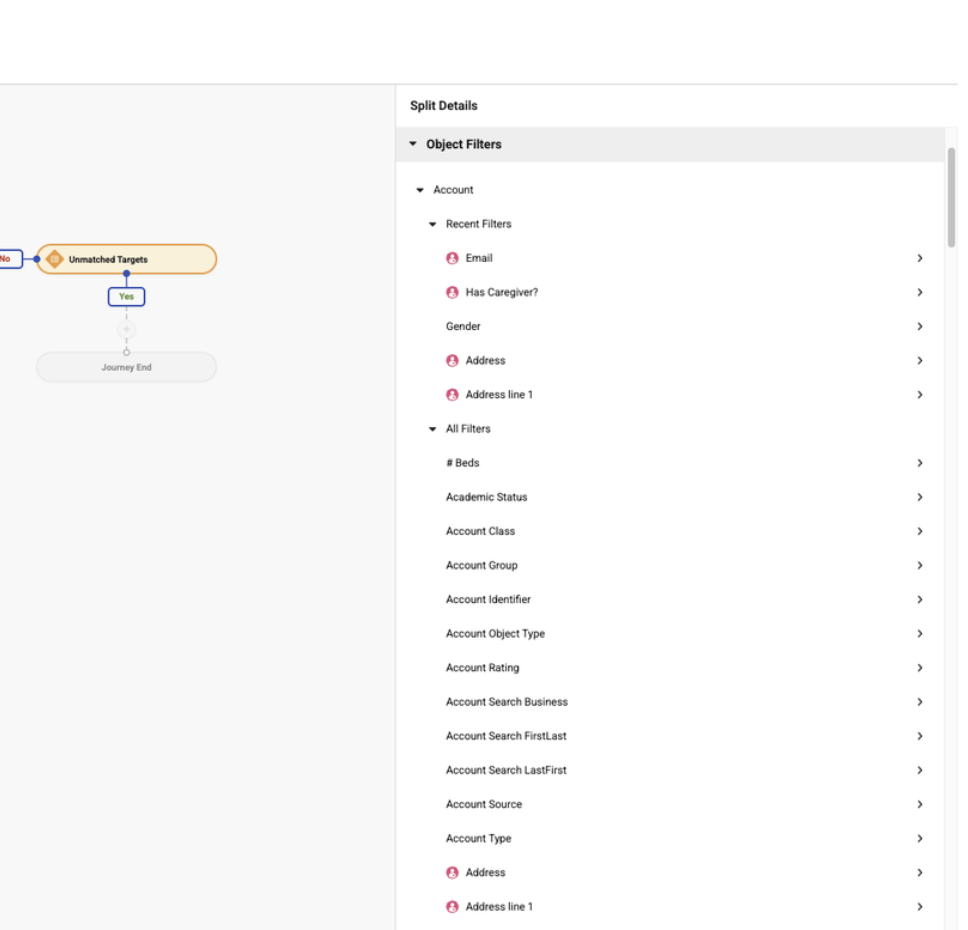
Select the appropriate patient attribute field. Patient attribute fields display with the Patient (
 ) icon. The Split By label displays the object as Account, with a patient icon indicating the field comes from the Patient Attribute object.
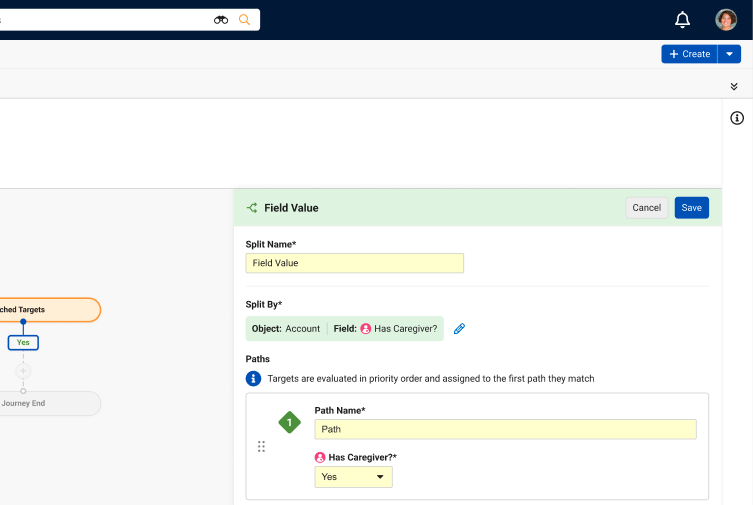
- Define each path and its criteria.
- Select Save.