Using the Target List Builder
Marketing users can create filters on various fields and objects to create target lists for their campaigns and journeys. Creating target lists in this manner saves time during the planning process, reduces errors associated with manually selecting large numbers of targets, and increases engagement by ensuring only the appropriate accounts are targeted.
Who can use this feature?
- Marketing Users - Browser
- Using the Target List Builder
- Generating a Target List from Filters
- Users require a Campaign Manager license
Configuring Target List Builder for
To configure this feature:
-
Ensure the following features are configured:
- Configuring Campaign Manager
- Dynamic Attributes for Accounts – Only required when using Dynamic Attributes in the Target List Builder
- Configuring Product Metrics for Accounts – Only required when using Product Metrics in the Target List Builder
- Navigate to Admin > Users & Groups > Permission Sets.
- Select the appropriate Permission Set.
- Select the Objects tab.
-
Grant the following permissions:
Object
Object Permission
Object Types
Fields
Field Permission
vcountry__v
R
All n/a
n/a
account__v
R
All supported object types to be targeted
All supported fields used for filtering
Read
address__v
R
All supported object types to be targeted
All supported fields used for filtering
Read
dynamic_attribute_query__v R
All supported object types to be targeted
All supported fields used for filtering
Read
product_metrics__v R
All supported object types to be targeted
All supported fields used for filtering
Read
tsf__v
R
All supported object types to be targeted
All supported fields used for filtering
Read
Using the Target List Builder as
Marketing users can build, manage, and generate target lists directly from a campaign or journey. To begin building a target list:
- Navigate to the Add Targets section of the appropriate campaign or journey.
-
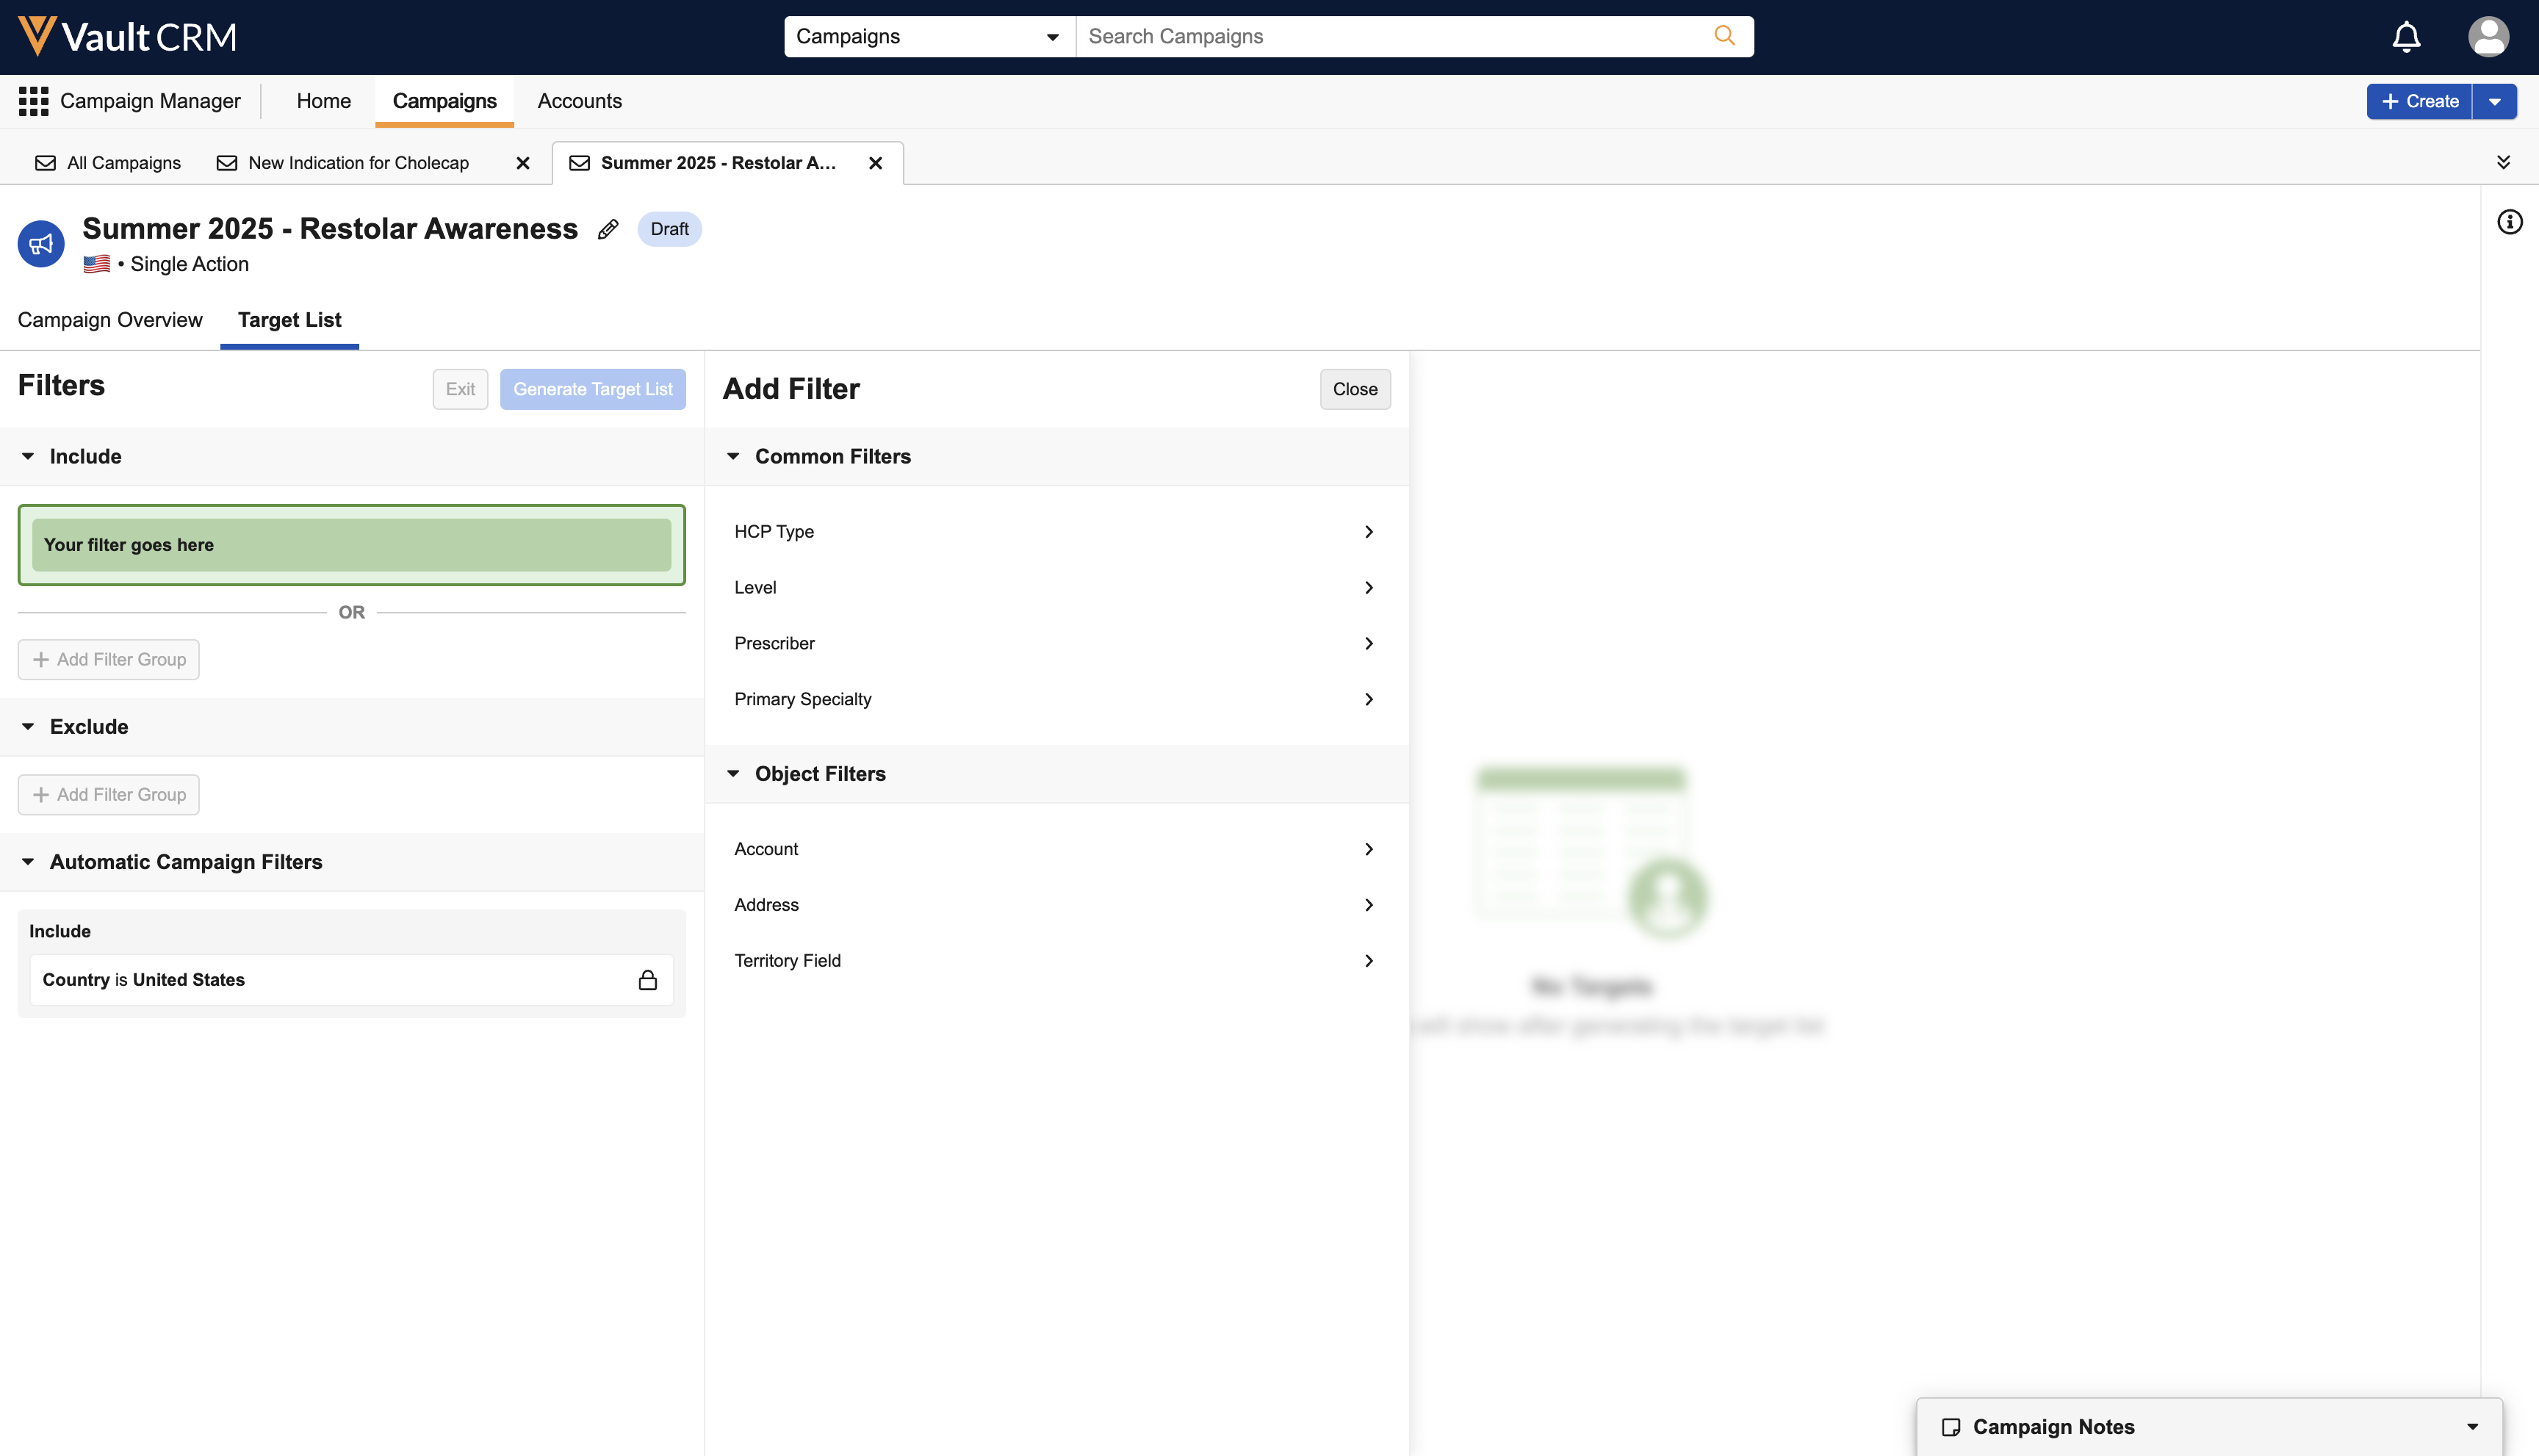
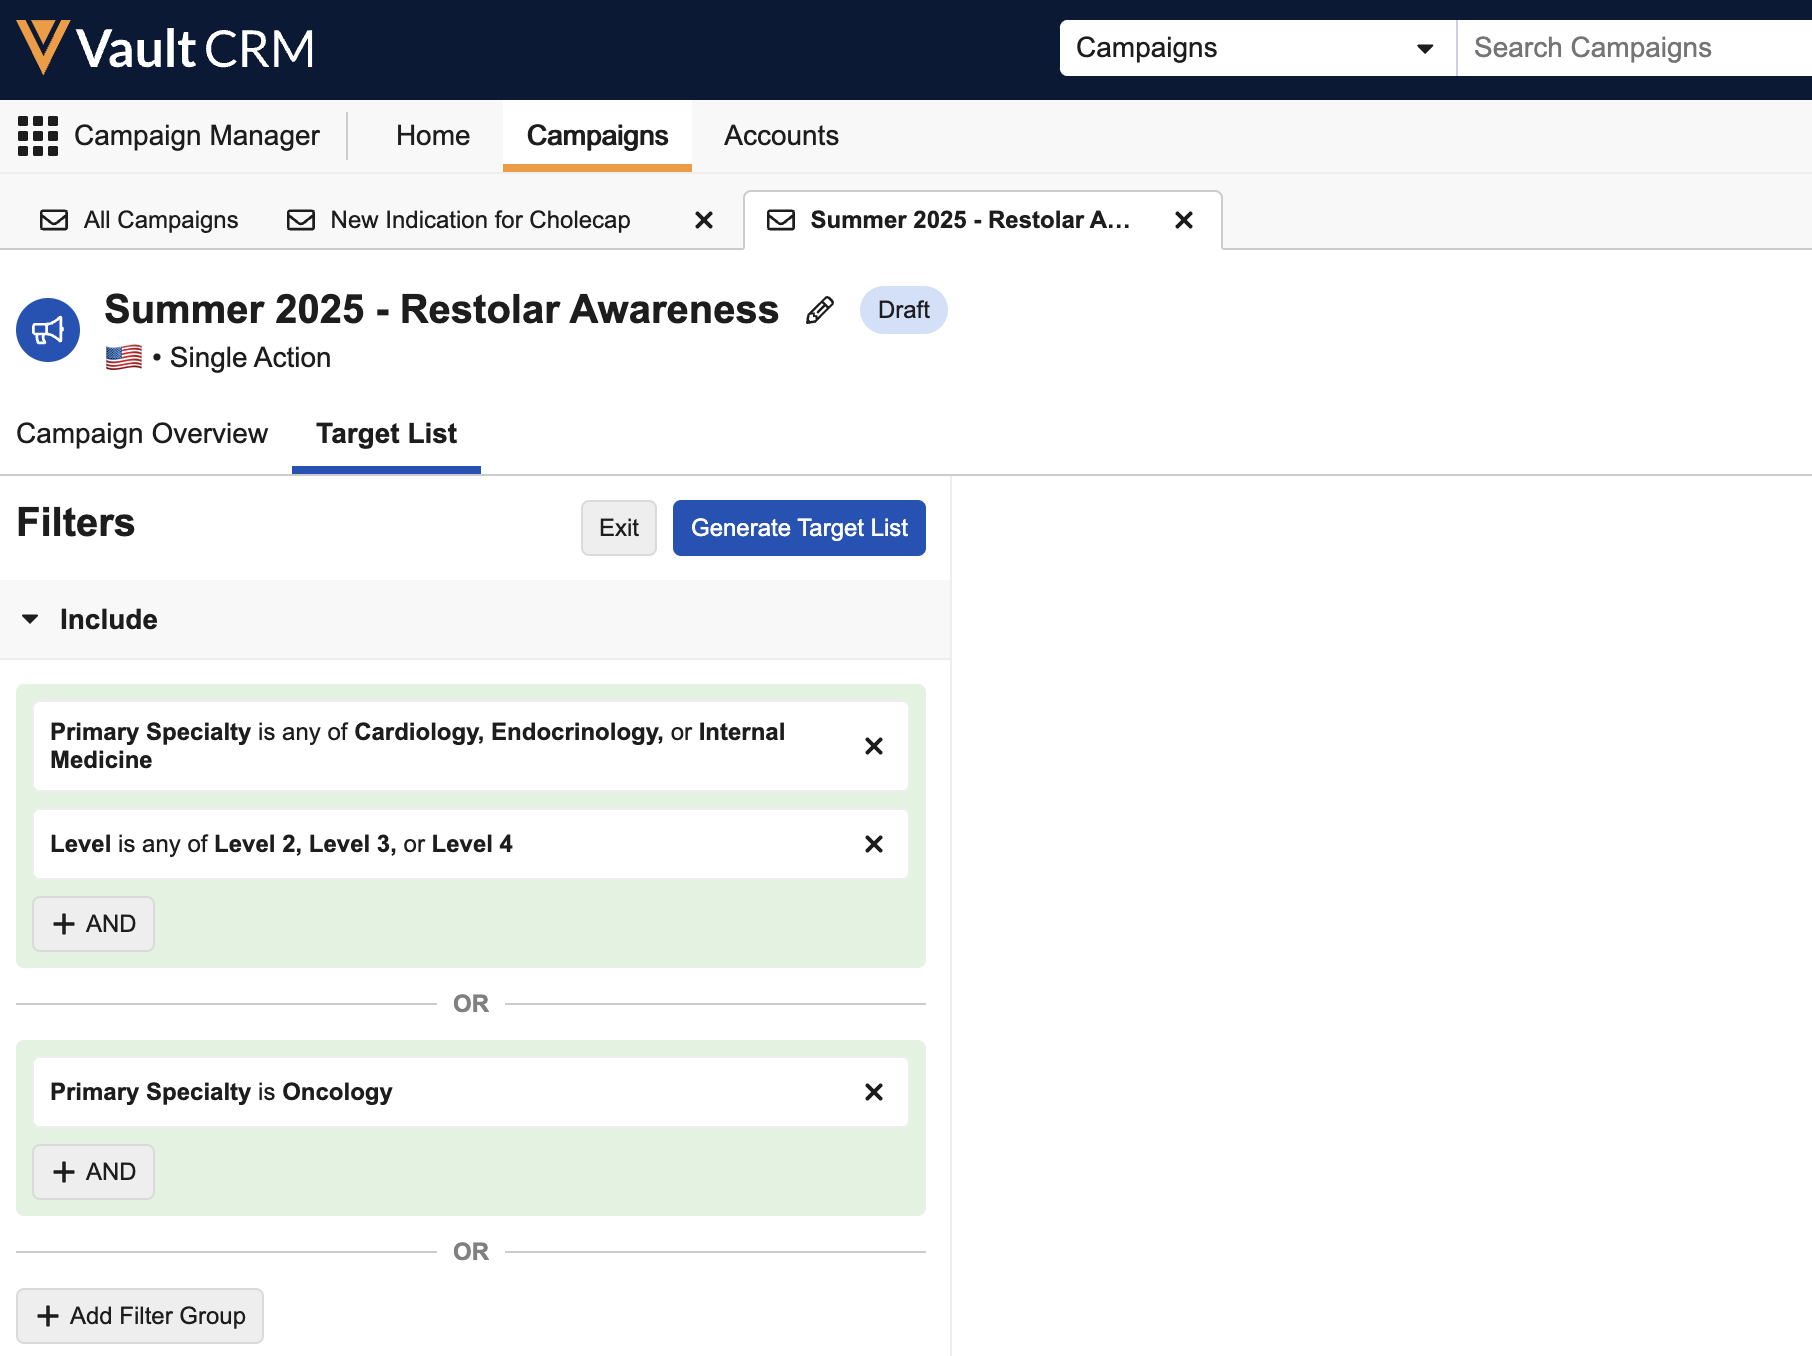
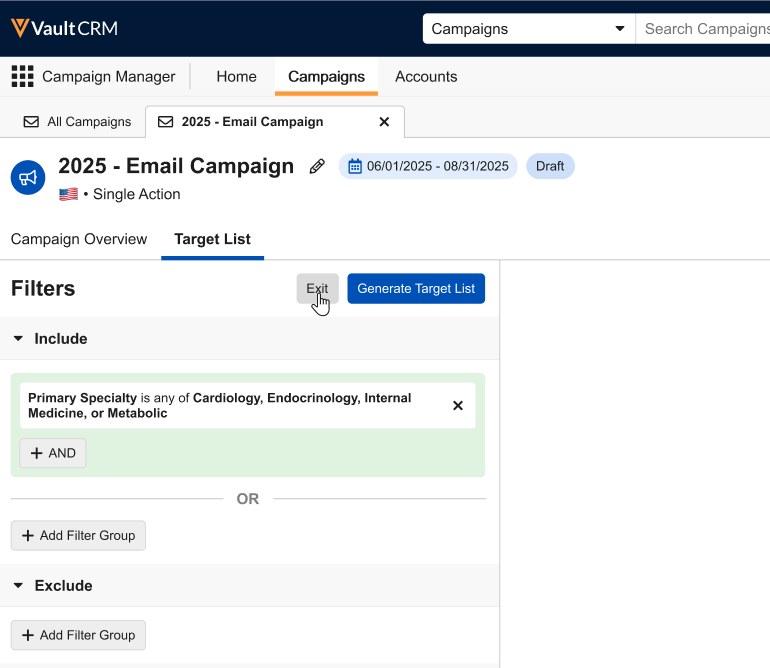
Select Build. The Target List sub-tab displays with the Filters and Add Filter sections.
-
Select the appropriate filter. The following filters are available:
- Common Filters – This section provides the following common filters used in Campaign Manager:
- HCP Type – Filters based on the hcp_type_cda__v field on the account__v object
- Level – Filters based on the level_cda__v field on the account__v object
- Prescriber – Filters based on the prescriber_cda__v field on the account__v object
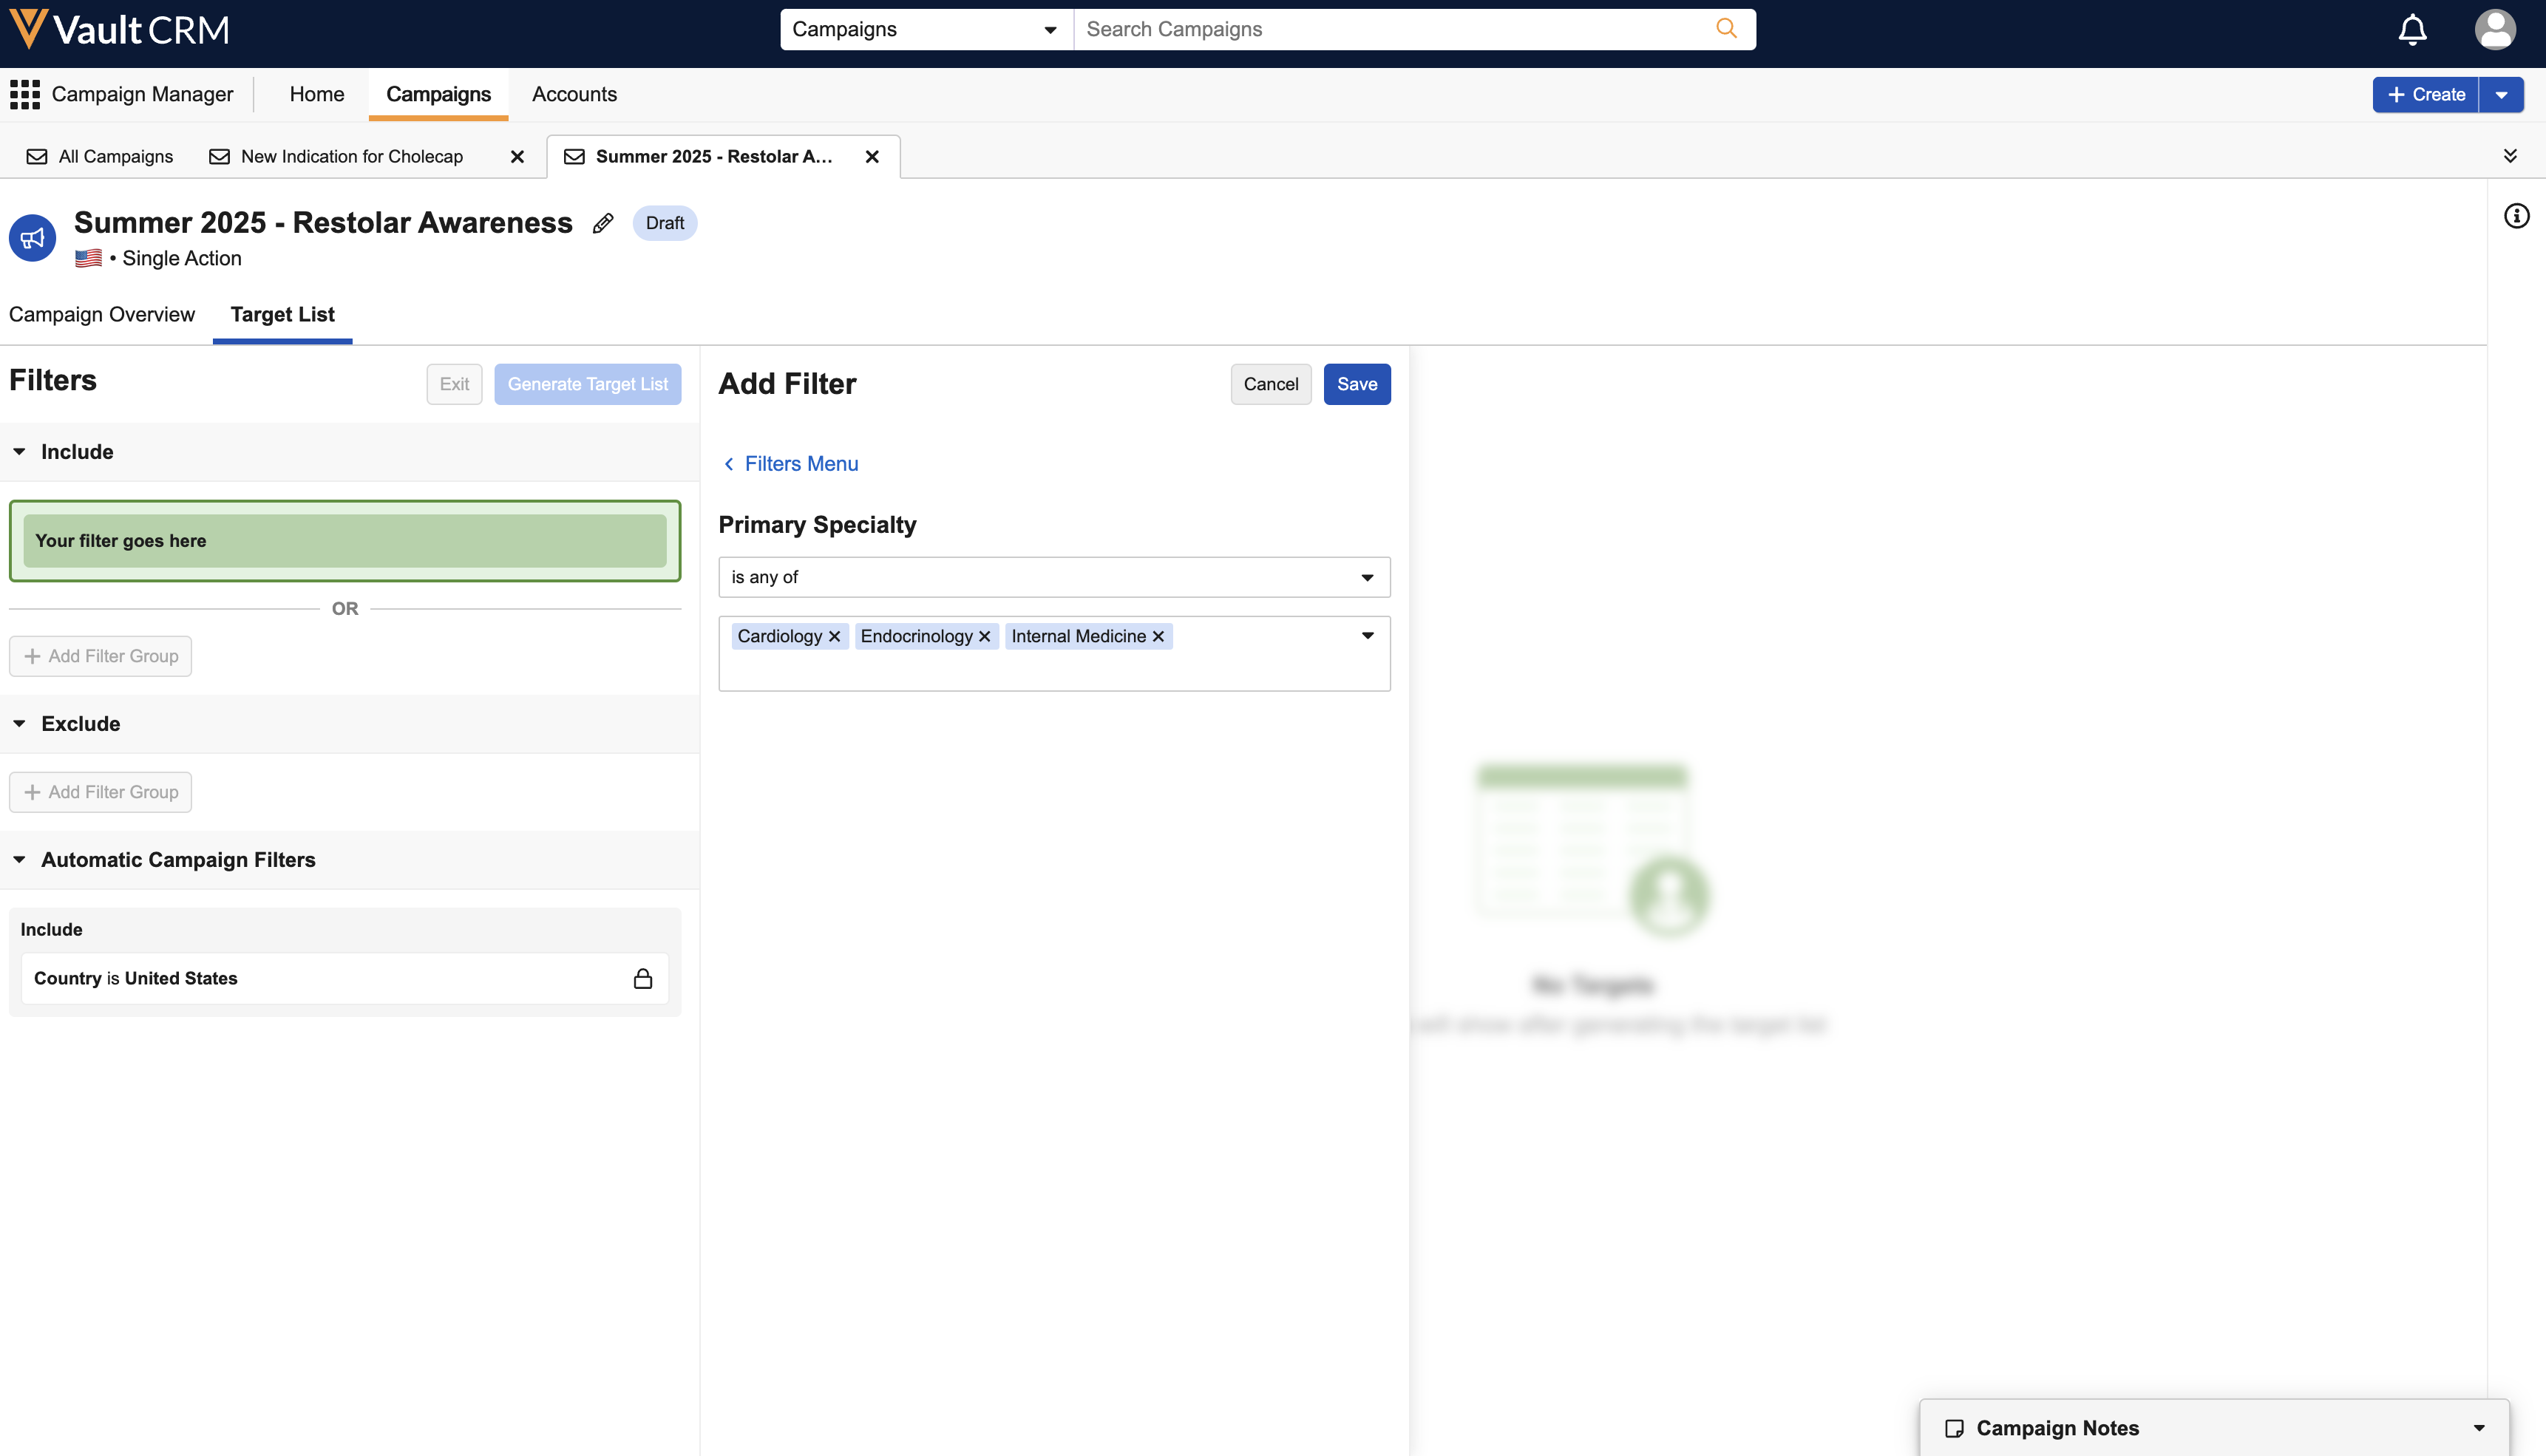
- Primary Specialty – Filters based on the spec_1_cda__v field on the account__v object
- Object Filters – Enables filtering on supported fields on the following objects:
- Account (account__v)
- Address (address__v)
- Territory Specific Fields (tsf__v)
- Product Metrics (product_metrics__v)
- Dynamic Attributes (dynamic_attribute_query__v)
See Supported Field Types and Operators for a list of supported field types.
-
Enter the following information for the selected filter:
- Operator – The list of available operators depends on the selected field. See Supported Field Types and Operators for more information.
- Value – Enter the appropriate value or values
-
Select Save to add the filter to the Filters section.
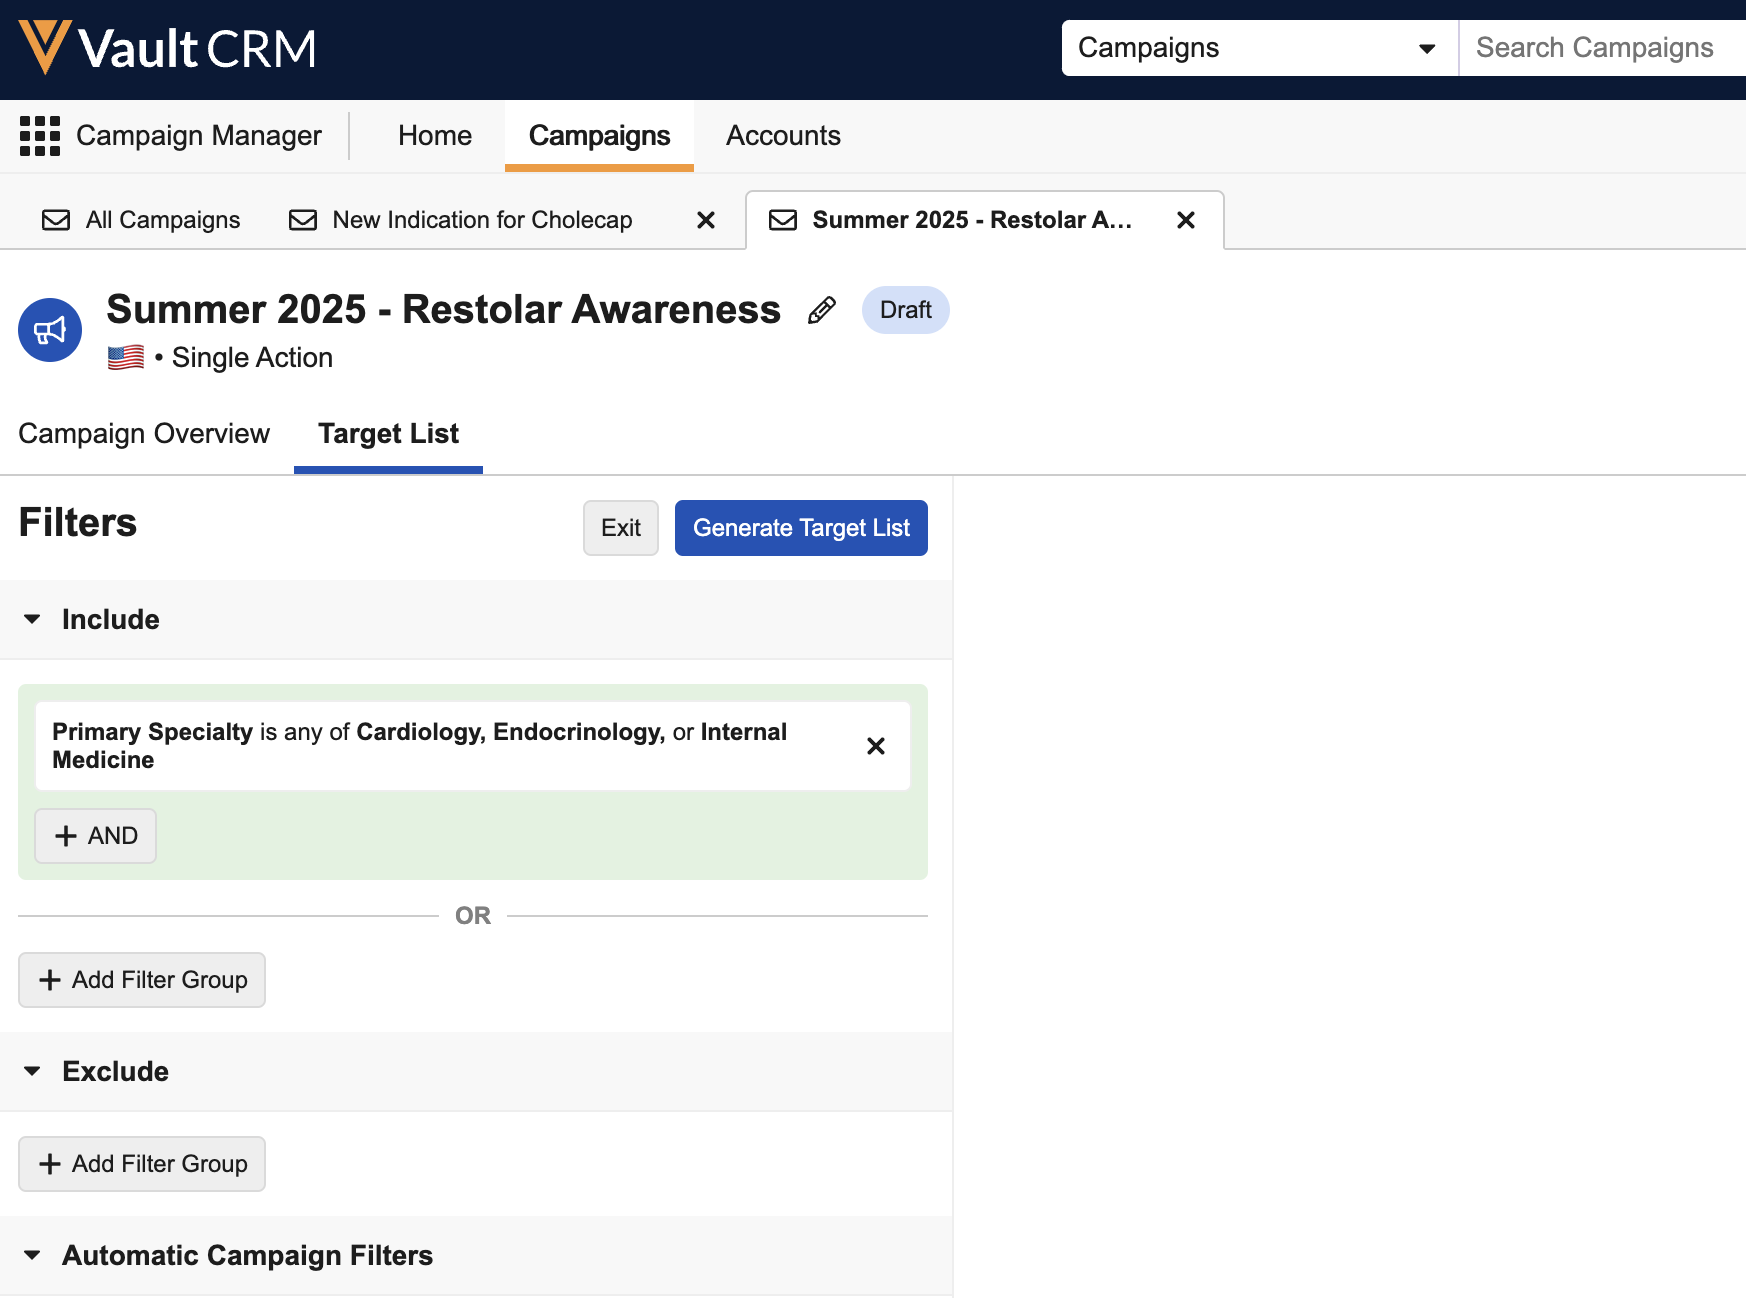
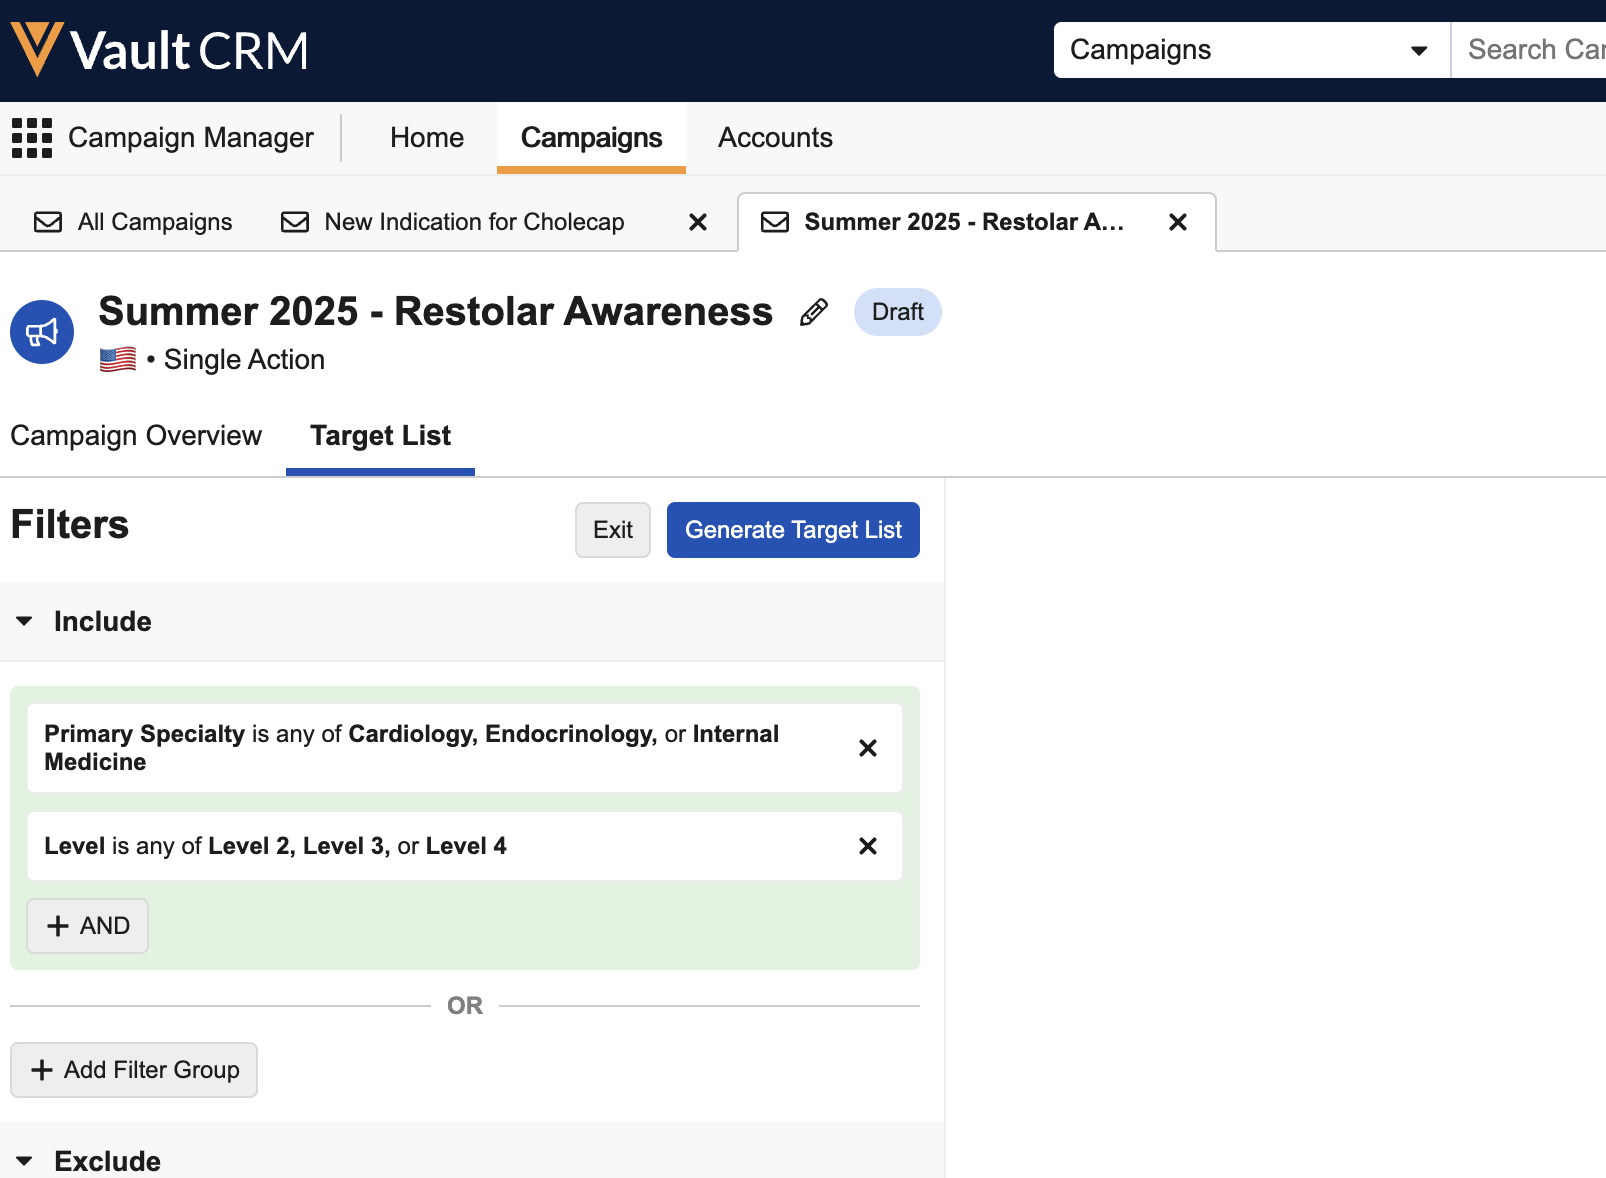
Once the initial filter is created, marketing users can perform the following actions to create more complex and specific filters for their target list:
-
Select the + AND button to add additional filtering conditions to the default filter group
-
Select the + Add Filter Group button in the Includes section to create additional filters that evaluate as part of an OR expression with other filter groups
-
Select the + Add Filter Group button in the Excludes section to create filters that disqualify accounts from the list of accounts that match the include filters from being added to the target list
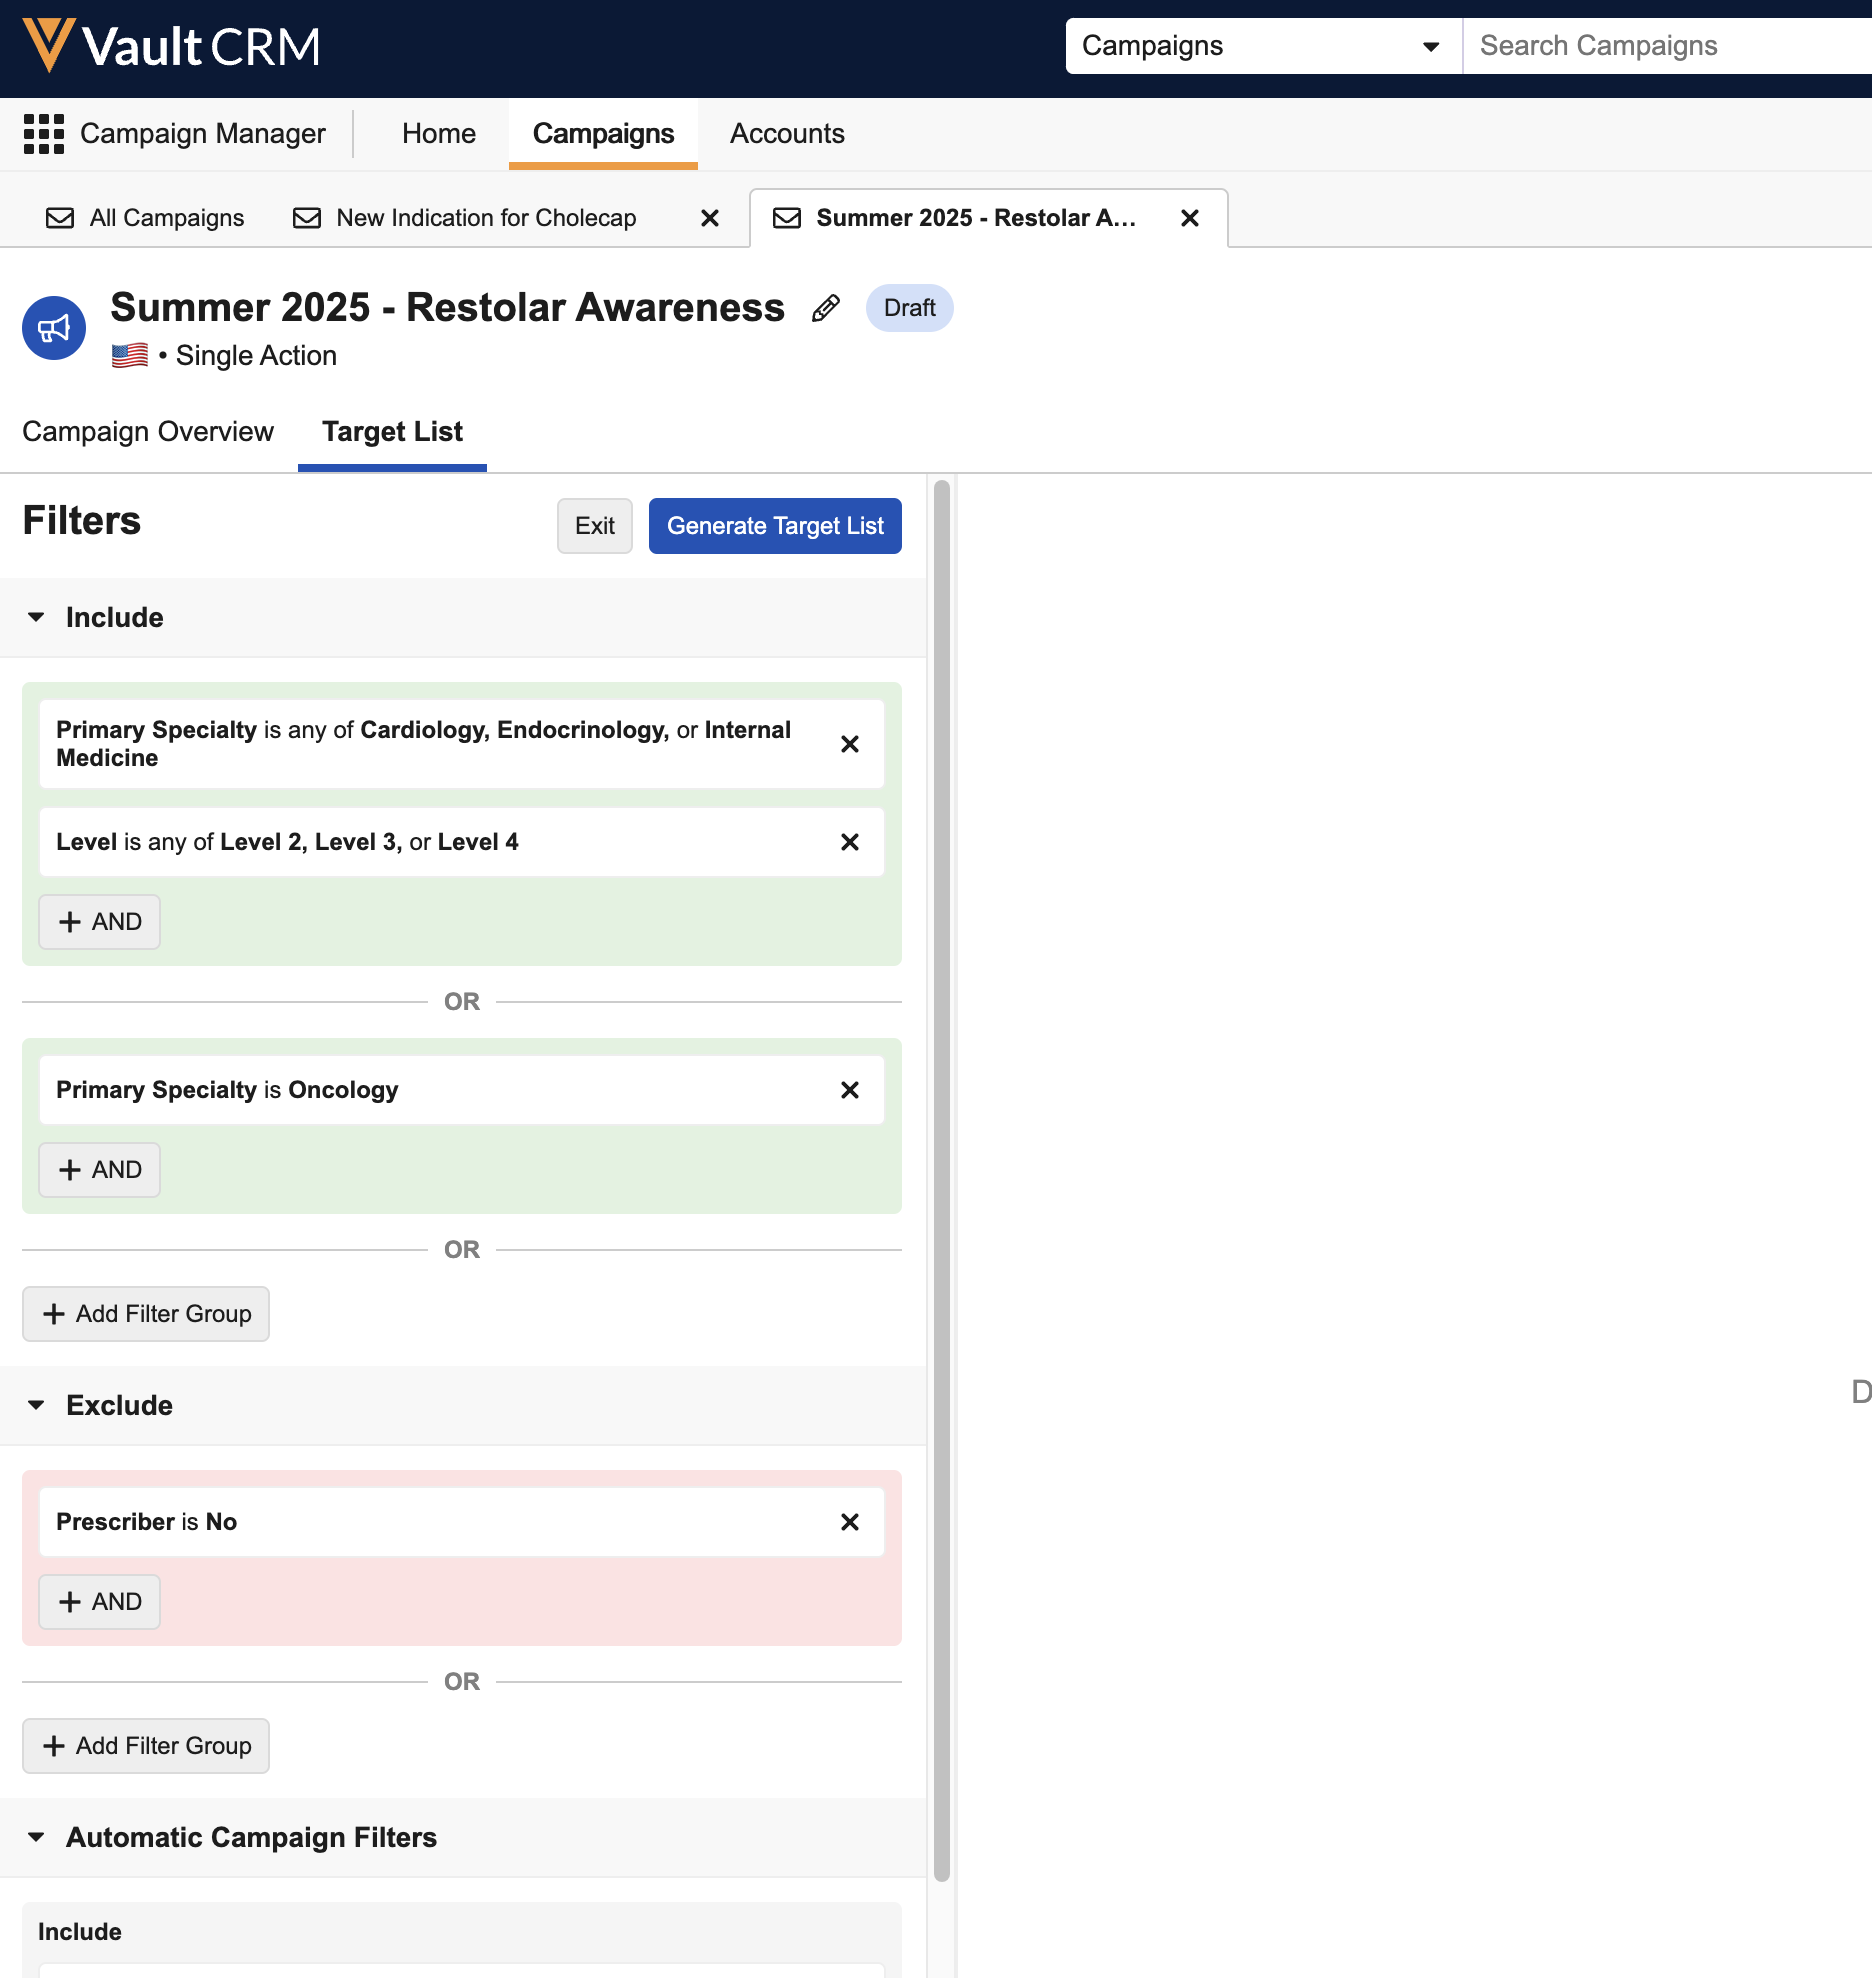
An automatic Include filter for the campaign or journey’s country is added by default and cannot be removed. This filters accounts based on their vcountry__v field. Up to 25 filtering conditions are supported, in addition to the automatic Include filter.
Continue Building Target List
Marketing users can continue to adjust filters in the Target List Builder over time by accessing Target List Builder via one of the following places:
- Selecting Edit from the Continue Building Target List section from the Overview tab
- Selecting the Target List sub-tab
Target List Builder displays saved filters added by any user.
Exiting and Discarding the Target List Builder
Marketing users can discard their saved filters to start over via one of the following processes:
-
Selecting Exit from the Filters section within the Target List sub-tab
-
Selecting Discard from the Continue Building Target List section of the Overview tab
Supported Field Types and Operators
Standard fields of certain types on the following objects are available for filtering:
- Account (account__v)
- Address (address__v)
- Territory Specific Fields (tsf__v)
- Product Metric (product_metrics__v)
- Dynamic Attributes (dynamic_attribute_query__v)
Each available field type has a distinct list of supported operators when defining filter criteria:
|
Field Type |
Filter Operators |
|---|---|
|
Text – Including the following subtypes:
|
|
|
Picklist (single value) |
|
|
Picklist (multi-value) |
|
|
Yes/No (boolean) |
|
|
Number – Including the following subtypes:
|
|
|
Lookup |
|
|
Date |
|
|
DateTime |
|
The following field types are not supported:
- ID
- Rich Text
- Long Text
- Date
- Datetime
- Attachment
- Formula
- Time
- Lookup
Generating a Target List from Filters as
Once all appropriate filters are defined, marketing users can generate their target list based on those filters:
- Select the Generate Target List button from the Filters section. A confirmation modal displays.
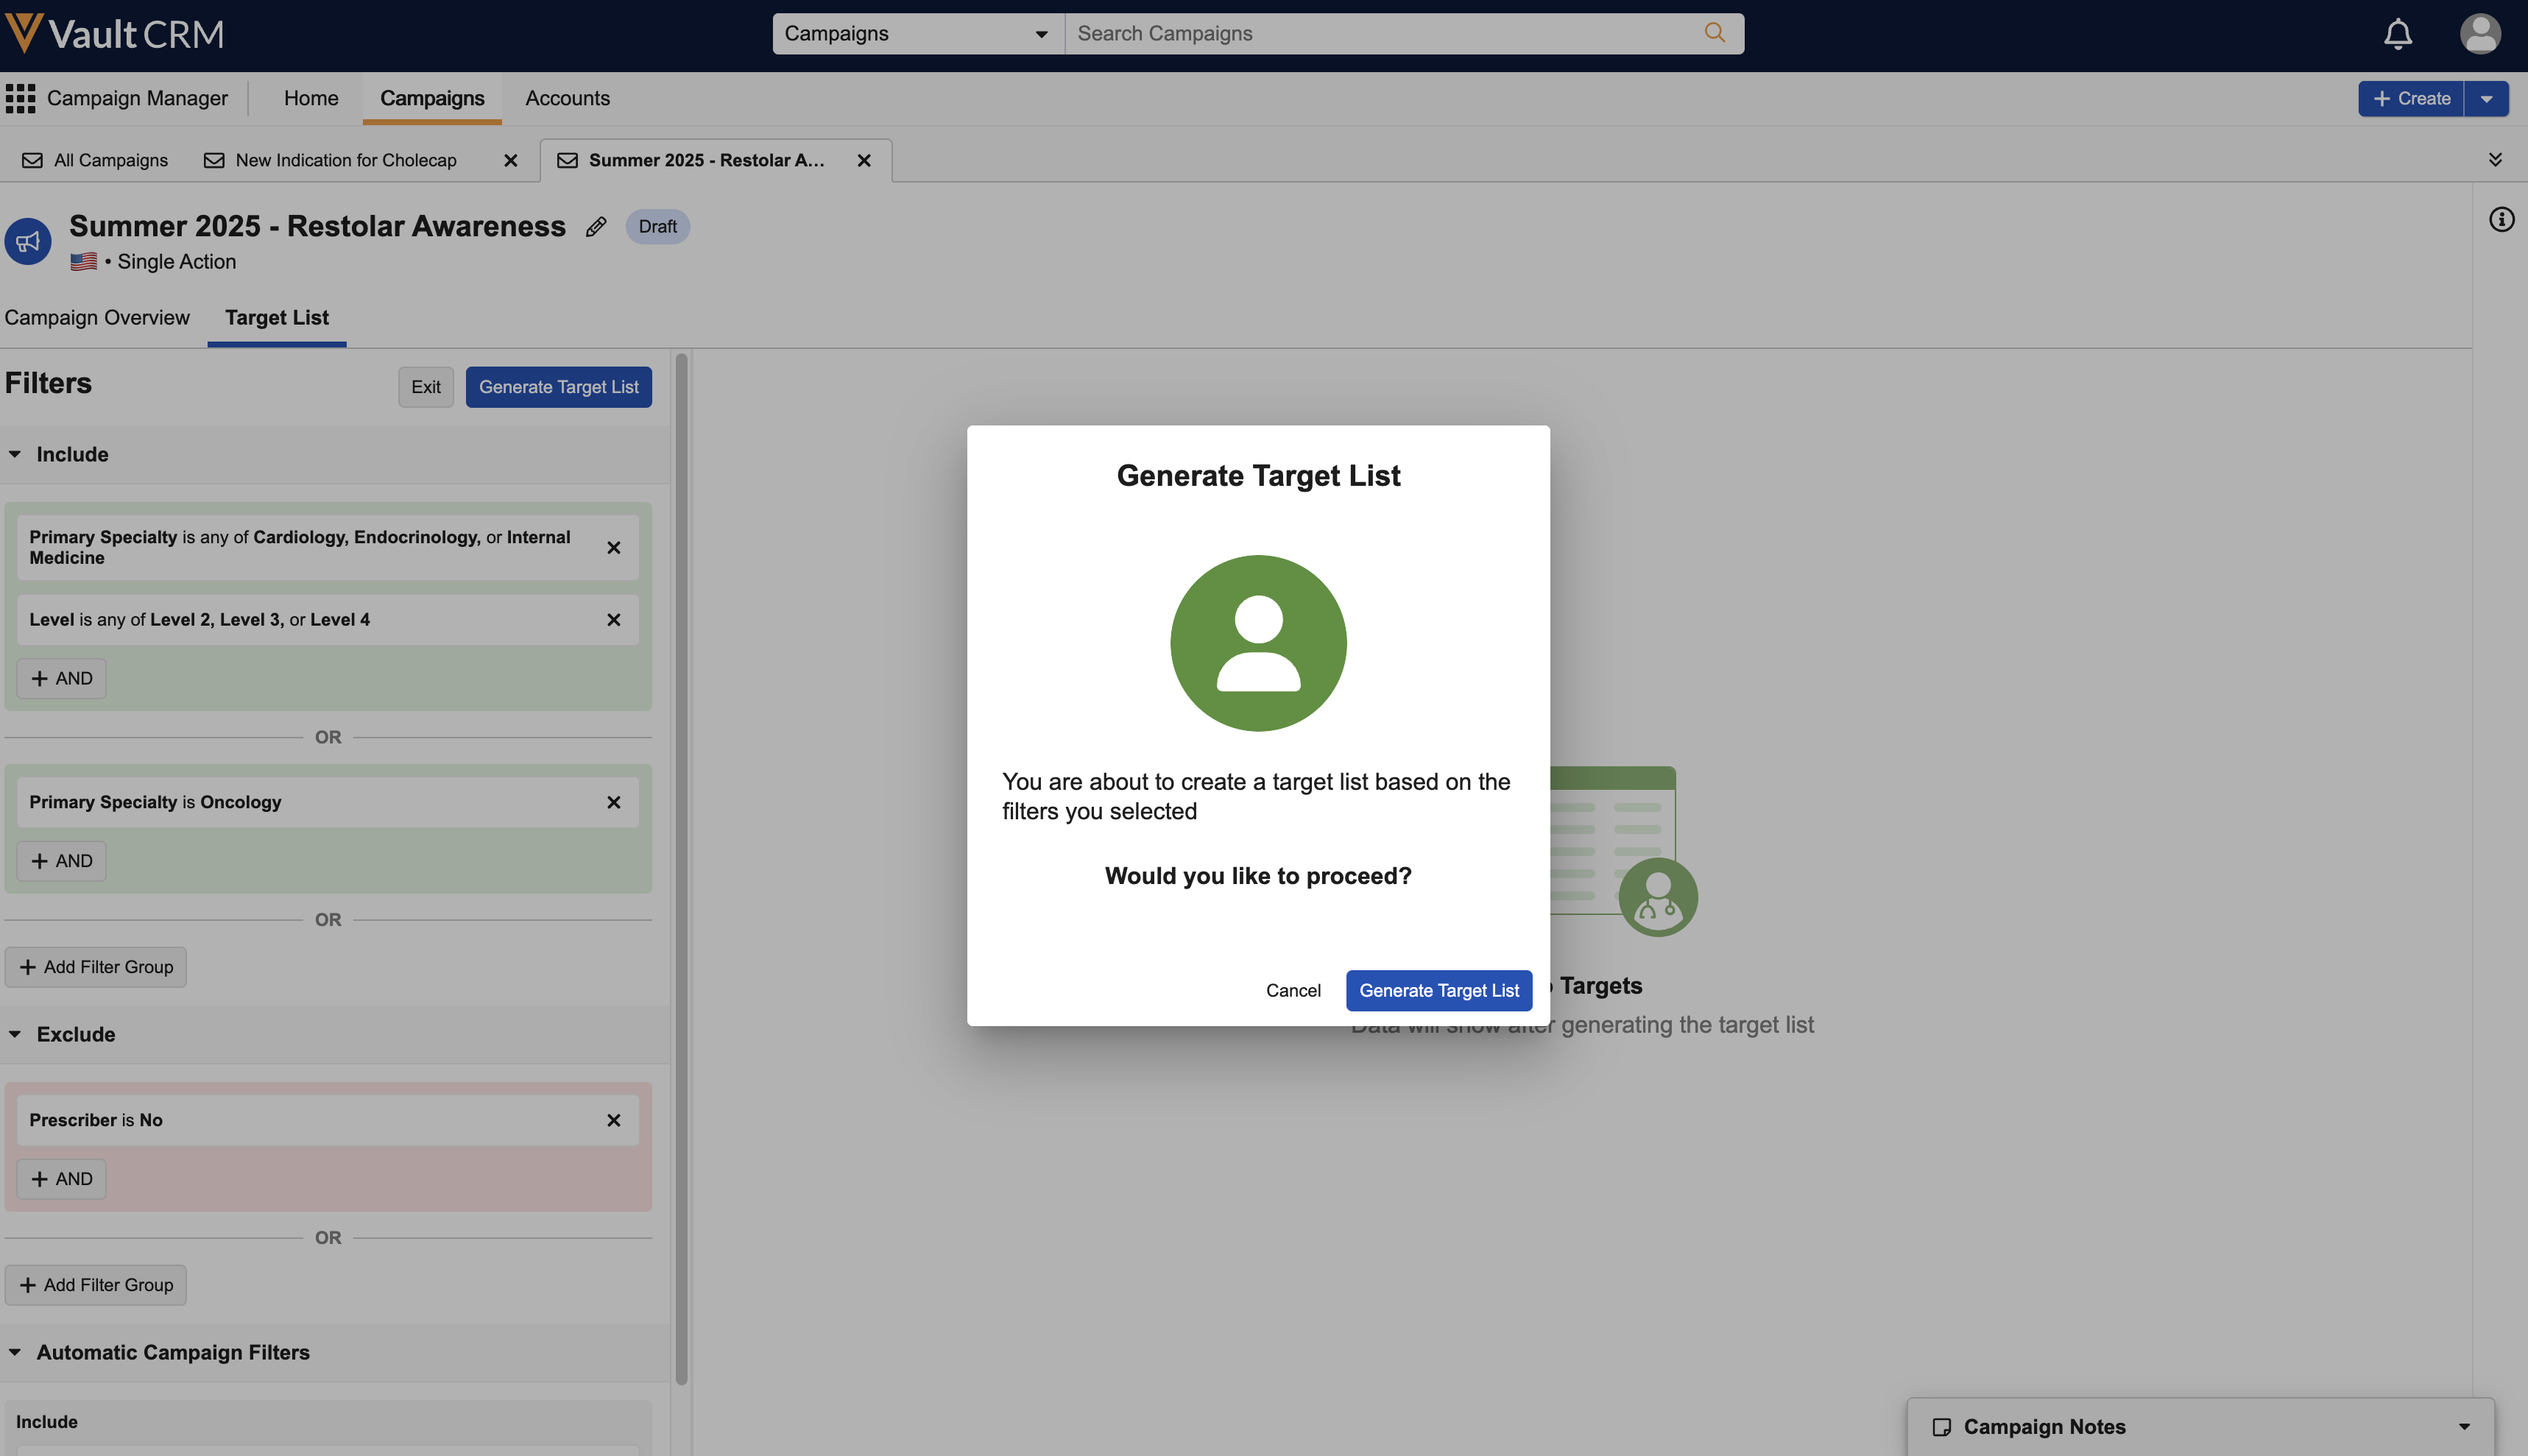
- Select Generate Target List.
Users are notified via a toast notification, a Vault bell notification, and an email when the job completes. Once complete, the Target List tab displays all of the campaign or journey’s targets. See Managing Target Lists for more information.
Once Targets are added, they remain in the Target List even if they no longer meet the criteria used when generating the list.
If the user decides they want to add or change the filters used, they can delete all targets to start over. See Removing All Targets from a Target List for more information.
Editing Target List Builder Filters
To edit the Target List Builder filters:
- Navigate to the Target List tab.
- Select the All Actions menu.
- Select Remove All Targets.
The original filters display, enabling marketing users to edit the filters before generating the new list.
Regenerating a Target List
After a target list is generated, marketing users can regenerate it to add or remove targets based on the most current data:
- Navigate to the Target List sub-tab.
- Select the All Actions menu.
- Select Regenerate Target List.
- Select Regenerate Target List in the confirmation modal.
The defined filters are reapplied to the target list, appropriately adding new accounts that now meet the criteria as well as removing accounts that no longer meet the criteria.
Users are notified when the regeneration completes, which includes a summary of targets added, removed, and unchanged.

