My Engage Portal
My Engage Portal is a centralized, browser-based website to facilitate secure interactions between life sciences companies and their external stakeholders. A single My Engage Portal domain is available for each Vault CRM instance, where customers manage the domain and branding for their portals.
Who can use this feature?
- Business Admin Users — Browser
- Managing the Portal Domain
- Managing Individual Portals
- Deploying Portals
- Managing Translations for Portals
- Assigning Portals to Accounts
- Users require an Engage license
Configuring My Engage Portal for
 Business Admin Users
To configure this feature:
- Ensure the Engage app is enabled for the Vault CRM instance.
- Navigate to Admin > Users & Groups > Permission Sets.
- Select the appropriate permission set.
- Select the Objects tab.
- Grant the following permissions:
Object
Object Permission
Object Types
Fields
Field Permission
account__v
CRE
All applicable object types
- assigned_engage_portal__v
- assigned_engage_portal_domain__v
Edit
customer_message__v
CRED
engage_portal__v
- category__v
- description__v
- engage_portal__v
- engage_portal_domain__v
- language__v
- name__v
- text__v
- vexternal_id__v
Edit
engage_portal_domain__v
CRE
None
- domain__v
- domain_favicon__v
- domain_logo__v
- domain_secondary_theme_color__v
- domain_theme_color__v
- has_unpublished_changes__v
- last_successful_publish_date__v
- publishing_details__v
- publishing_end_date__v
- publishing_start_date__v
- publishing_status__v
Edit
engage_portal__v
CRE
None
- company_name__v
- country__v
- deployment_details__v
- deployment_status__v
- display_name__v
- enable_inbox__v
- engage_portal_domain__v
- engage_portal_status__v
- favicon__v
- has_undeployed_changes__v
- last_deployment_end_date__v
- last_deployment_start_date__v
- last_successful_deployment_date__v
- logo__v
- name__v
- privacy_policy__v
- secondary_theme_color__v
- support_email__v
- support_phone__v
- terms_of_use__v
- theme_color__v
- url_path__v
Edit
- Select the Pages tab.
- Grant access to the My Engage Portal Administration page.
- Navigate to Admin > Configuration > Objects > Account > Object Types.
- Select Edit Object Type Fields from the All Actions Menu.
- Enable the Assigned Engage Portal (assigned_engage_portal__v) and Assigned Engage Portal Domain (assigned_engage_portal_domain__v) fields for the appropriate object types (for example, Professional).
- Select Save.
- Navigate to Admin > Configuration > Objects > Account > Layouts.
- Place the assigned_engage_portal__v and assigned_engage_portal_domain__v fields on the appropriate account__v layouts.
Managing My Engage Portal as
Business Admin Users
In the My Engage Portal Administration page, business admin users can manage the settings for My Engage Portal, including the portal domain, org-wide branding information, and country-specific portals.
Managing the Portal Domain
Business admin users must define the portal domain for their company, including the domain name and general settings, and publish it every time changes are made to the general settings. This domain is used for all portals created in the same Vault CRM instance and must be unique across all Vault CRM instances.
The portal domain name cannot be edited after publishing.
To define and publish a portal domain:
- Navigate to Admin > Configuration > Application Configurations > Channels > My Engage Portal.
- Select Edit in the Portal Domain section.
- Populate the Domain field with the appropriate domain name. This name is prepended to the base URL for the My Engage Portal. For example, entering Verteo as the Domain in a US-based Vault CRM instance creates the URL verteo.us.myengageportal.com. The following conditions must be met:
- The domain name must be unique across all Vault CRM instances. An error message displays if the domain name is not unique and it cannot be saved.
- The domain name only contains alphanumeric characters and single hyphens. It cannot begin or end with a hyphen.
- The maximum length is 55 characters
- Upload a JPG, JPEG, or PNG file in the Logo field.
- Upload an SVG, ICO, or PNG file in the Favicon field.
- Populate the Theme Color field with a 6-character hexadecimal color code or select a color from the palette.
- (Optional) Populate the Secondary Theme Color field with a 6-character hexadecimal color code or select a color from the palette.
- Select Save.
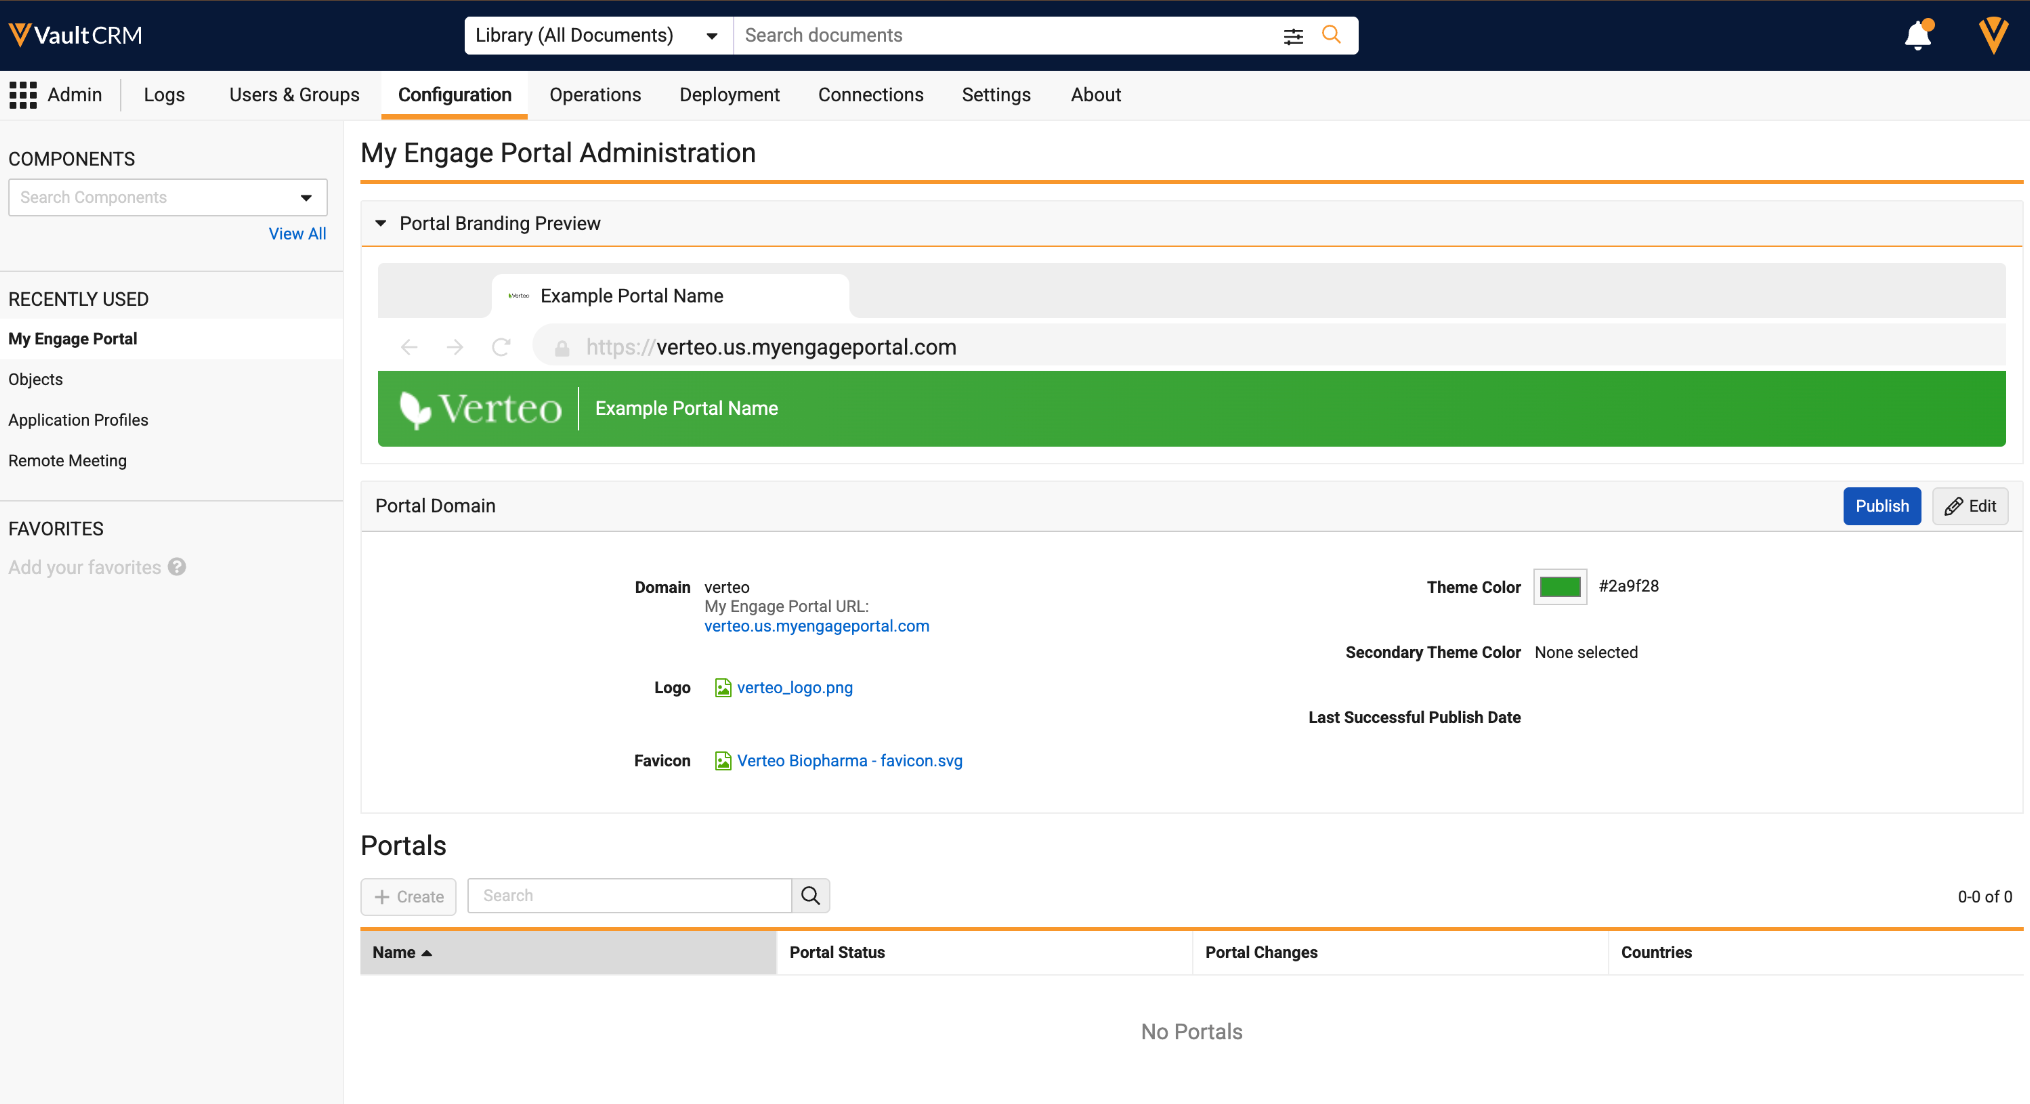
To publish the portal domain with the general settings:
- Select Publish in the Portal Domain section.
- Review the information in the Confirm Domain and Publish modal.
- Select Confirm.
Once the domain is published, customers must submit a support ticket in order to change or delete it.
A blue banner displays at the top of the Portal Domain section indicating publishing is in progress. The blue banner also displays a Refresh to Check Progress button, which business admins can select to refresh the page and check for a change to the publishing status.
Once the domain is published, the Last Successful Publish Date is populated and a preview of the general branding settings displays in the Portal Branding Preview section.
Managing Individual Portals
Business admin users can create and manage multiple portals under the same portal domain. Each portal is controlled by its own settings, allowing users to display different branding to different types of HCPs or different markets. The Portals section of the My Engage Portal Administration page displays a digestible overview of the status and undeployed changes for each portal.
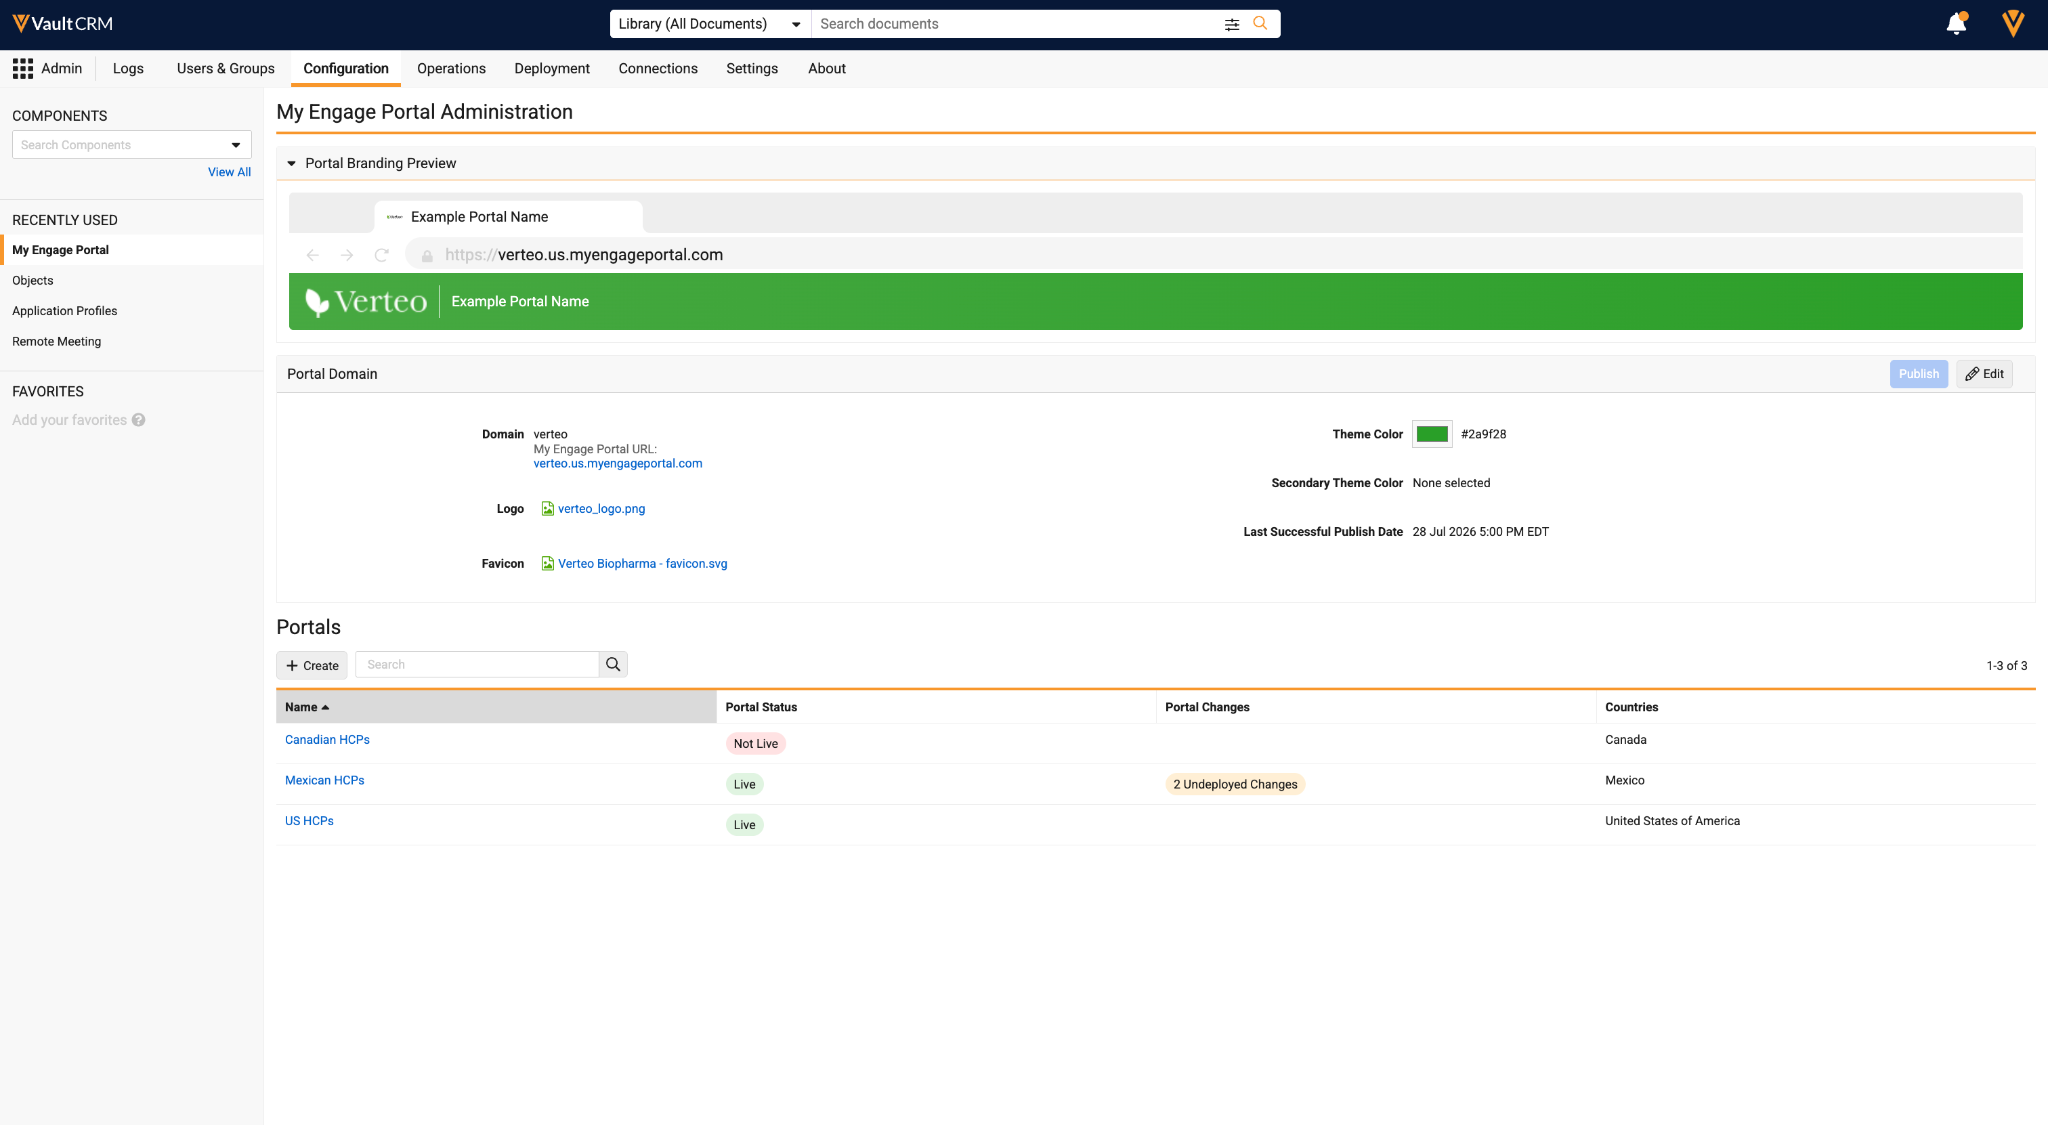
To create a portal:
- Navigate to Admin > Configuration > Application Configurations > Channels > My Engage Portal.
- Select Create in the Portals list. By default, the Portal Branding Preview displays a preview of the general branding settings defined for the portal domain.
- Populate the Name field with a unique name.
- (Optional) Populate the Country field with one or more countries to indicate where this portal is intended for use.
- Populate the name to display in the Website Display Name field.
- Set to WEBSITE_EXTERNAL_DISPLAY_NAME to use the translations from the corresponding Customer Message record. See Managing Translations for Portals for more details.
- Alternately, set the desired text that will be shown to all users accessing the portal regardless of their browser language.
- Populate the URL Path field with the name of the portal. This displays in the URL after the domain name, for example, verteo.us.myengageportal.com/us-hcpsl or verteo.us.myengageportal.com/ca-hcps.
- Populate the Company Display Name field.
- (Optional) Populate the Override Logo, Override Favicon, Override Theme Color, and/or Override Secondary Theme Color fields to override the branding for the portal domain.
- Populate the Support Email and Support Phone fields with the appropriate contact information.
- Select the appropriate HTML files for the Terms of Use and Privacy Policy attachment fields. JavaScript is not supported when HCPs view the files.
-
Select the checkbox for each feature that should be enabled for this portal from the Portal Features section of the page. Currently available features include the following:
- Enable Inbox - See Sending Secure Messages via Approved Email for information
- Select Save.
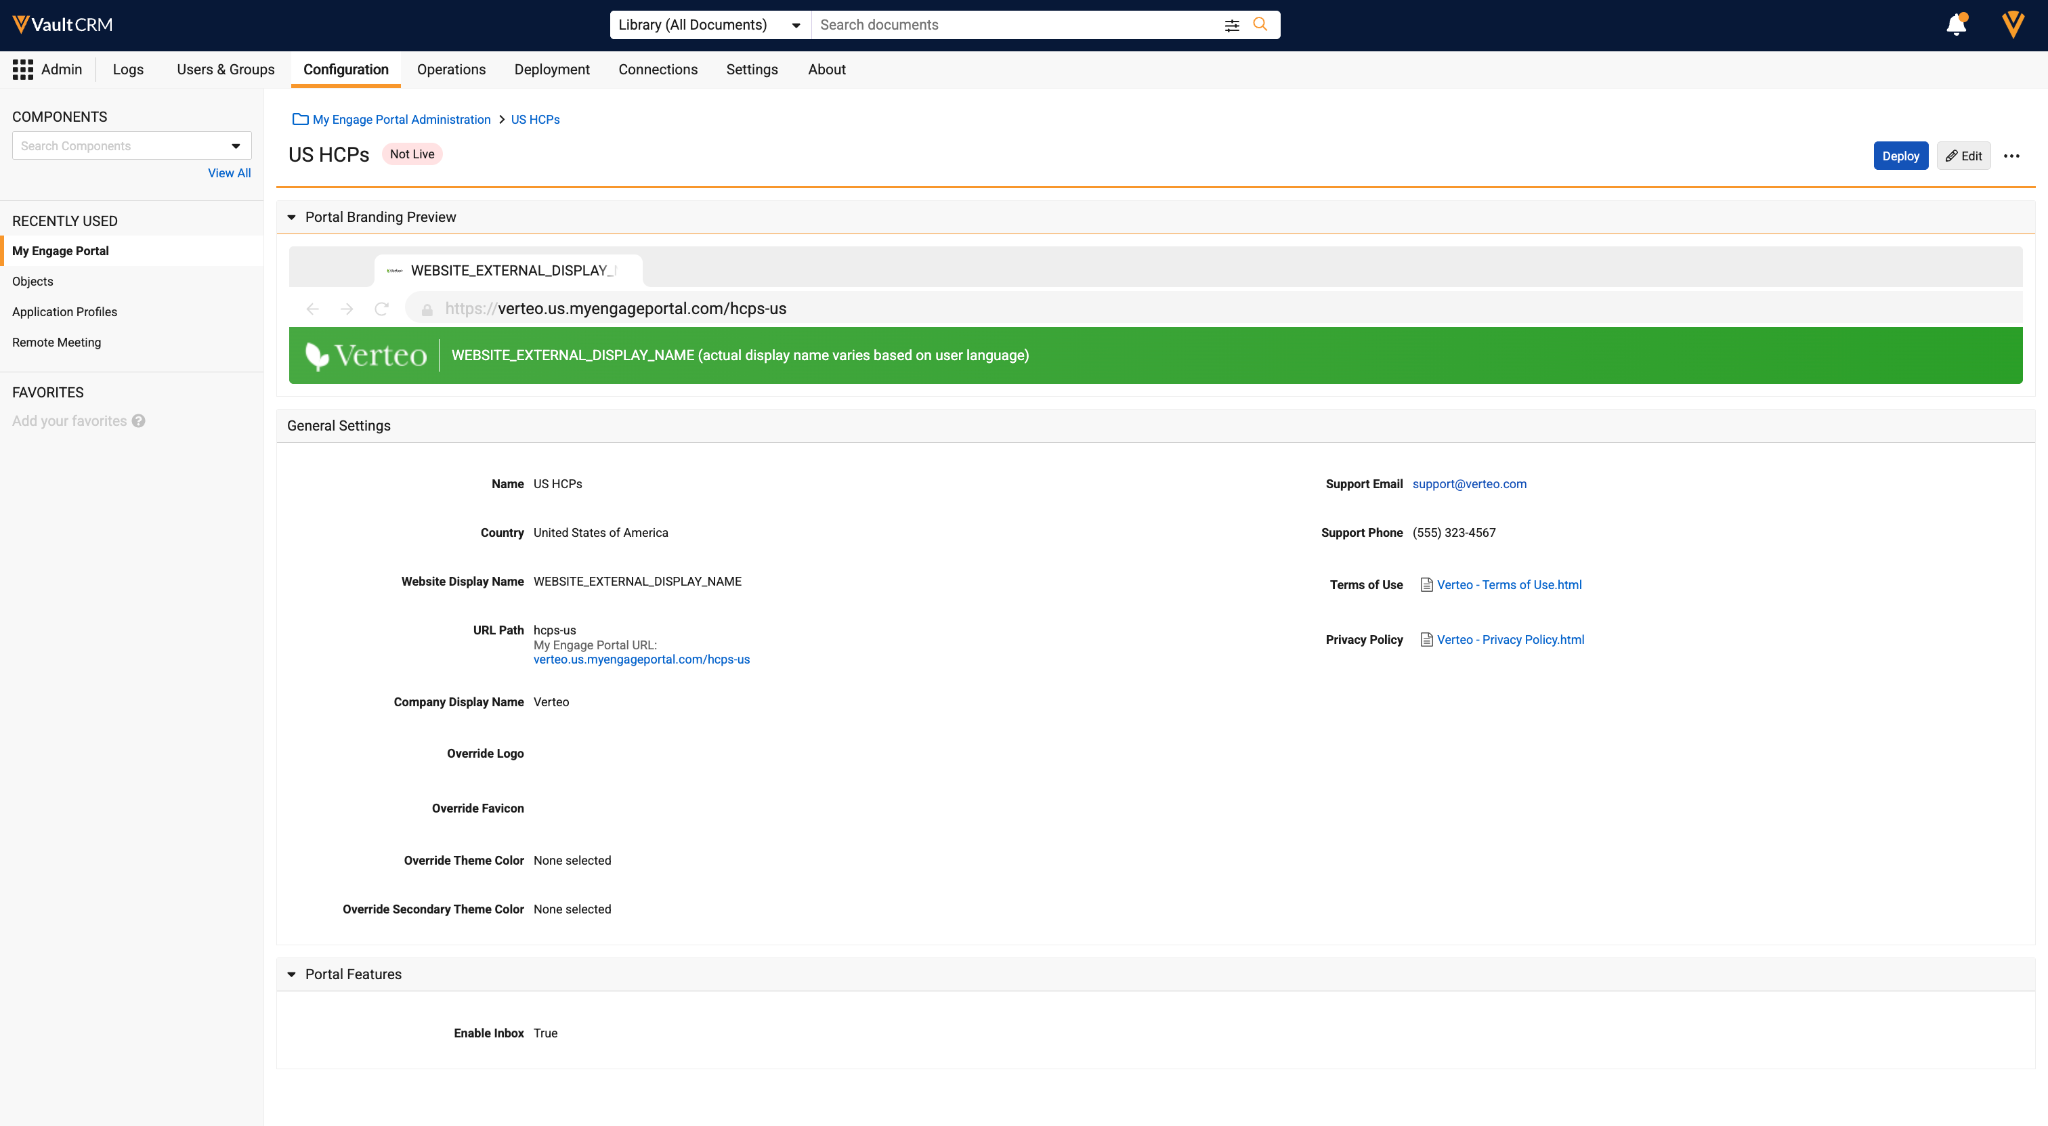
In the Portal Features section, select the checkbox for each feature that should be enabled for this portal. Currently available features include the following:
- Enable Inbox - See Sending Secure Messages via Approved Email for information
Deploying Portals
Portals must be deployed every time changes are made. Portals without any portal features enabled cannot be deployed. To deploy a portal:
- Select Deploy.
- Review the information in the Confirm Deployment modal.
- Select Confirm.
A blue banner indicates that the deployment is in progress. Once complete, a green banner confirms the deployment was successful and a preview of the portal-specific branding settings displays in the Portal Branding Preview section.
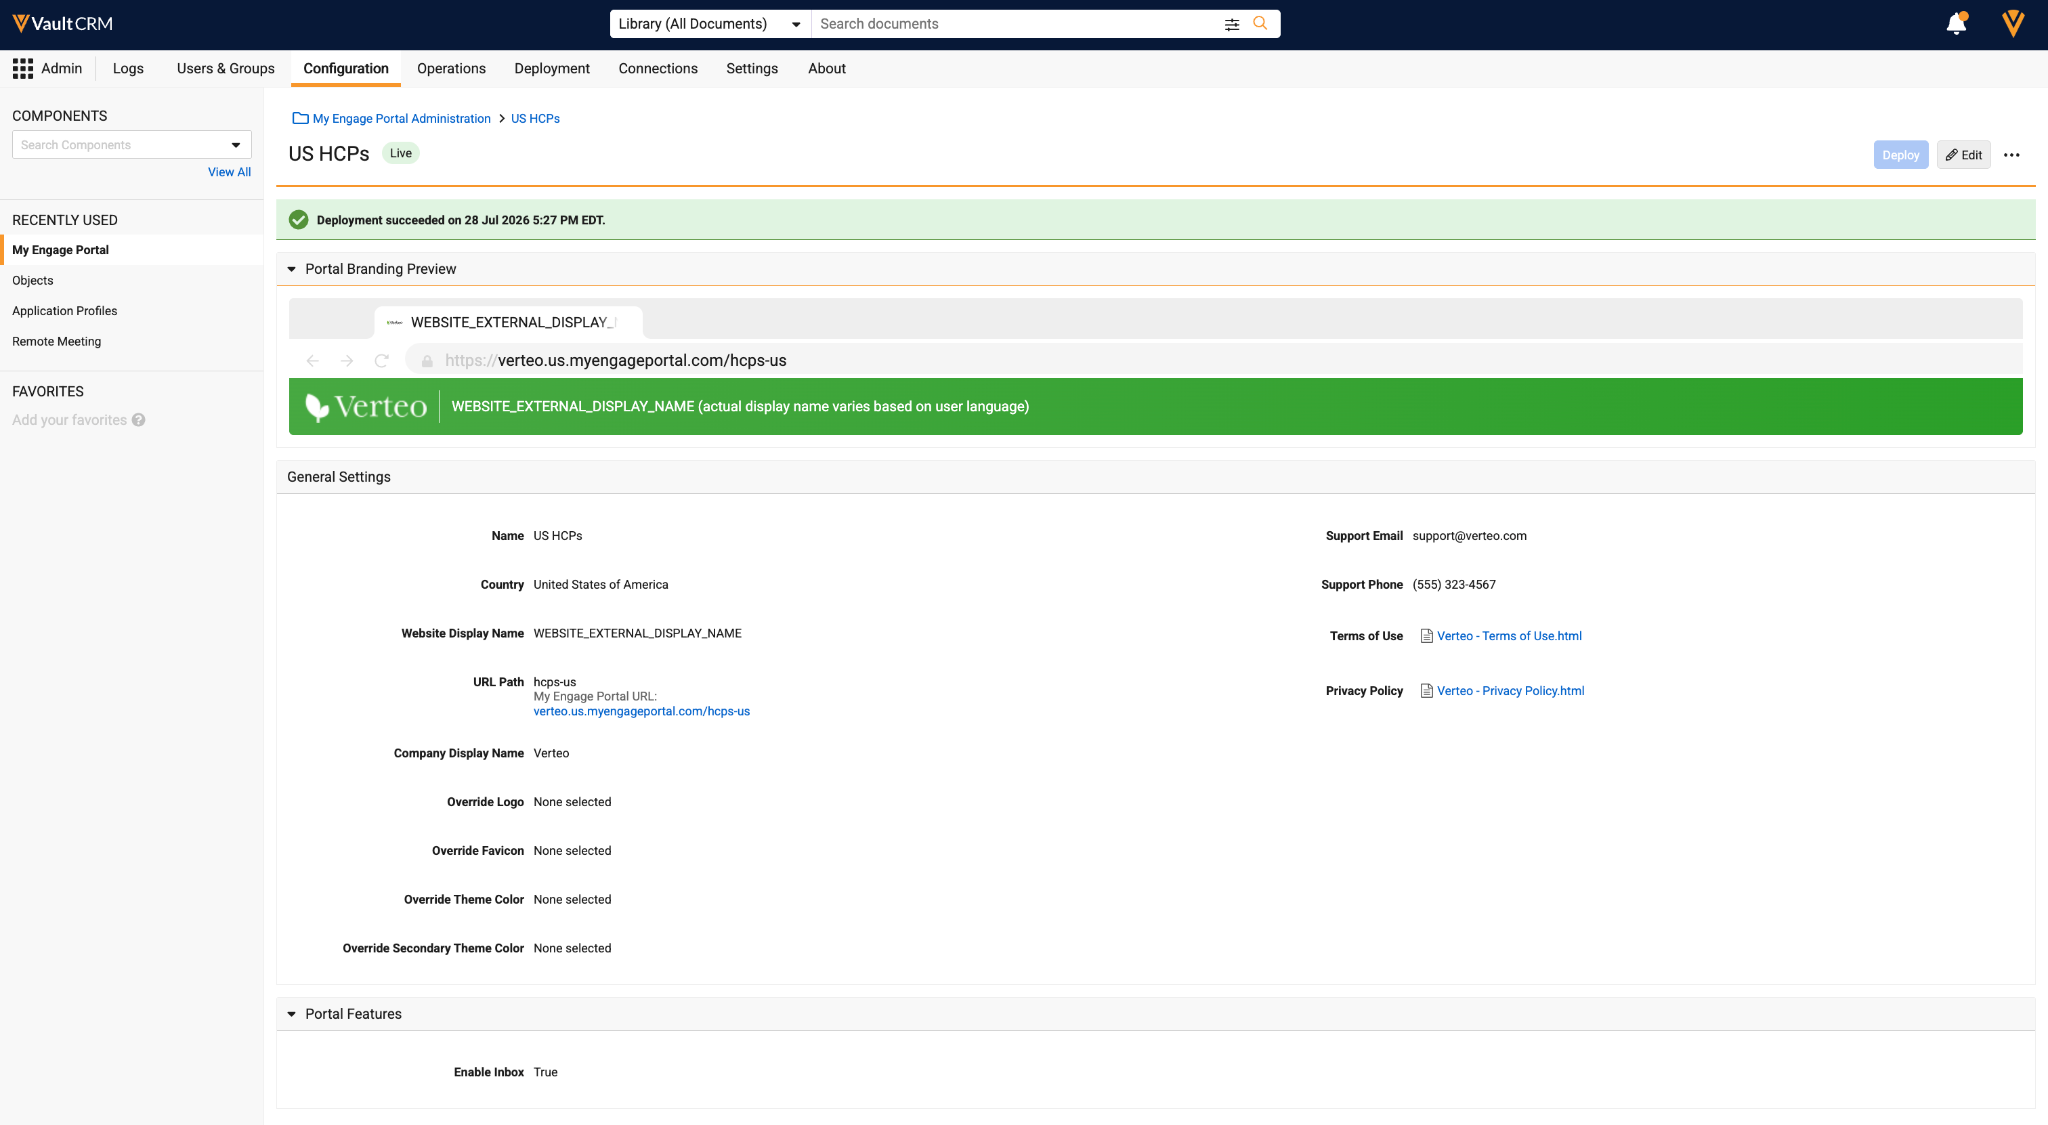
- To deactivate a portal, select Deactivate Portal from the All Actions menu and confirm.
- To delete a portal, select Delete Portal from the All Actions menu and confirm. Only deactivated portals can be deleted. Portals referenced by Customer Message records or assigned to accounts cannot be deleted.
Managing Translations for Portals
Business admin users can manage the translations for tab names, labels, and messages in each portal by creating or editing Customer Message records. The Vault CRM instance will contain default Customer Message records in all Vault CRM-supported languages. These can be edited directly if a translation change should be applied across all portals, or the user can create portal-specific translations that will only be applied to the defined portal.
Translations Across Portals
To edit a translation for use across all portals:
- Navigate to Business Admin > Objects > Customer Messages.
- Select the appropriate Customer Message record to edit. The following Customer Message records are available in each Vault CRM Supported Language, by default:
|
Message Name |
Usage |
|---|---|
|
CHANGE_PASSWORD |
Profile menu option for updating password. |
|
DONE |
Common label for closing modals. |
|
EXPIRED_MESSAGE |
Error message shown when a secure message link references an email that is no longer available. |
|
INBOX |
Menu option label for displaying the Sent Emails (including secure messages) for an Account. |
|
LOG_OUT |
Profile menu option for logging out. |
|
MESSAGE_COUNT |
Subheader in the message list under the "Inbox" title showing the total number of messages. |
|
MESSAGES_DOCUMENTS |
Menu label for functionality related to messages or documents. |
|
NEED_SUPPORT |
Link label for accessing support information (email or phone). |
|
NO_MESSAGE_SELECTED |
Empty state text for the message content pane. |
|
NO_MESSAGES |
Empty state text for the message list pane. |
|
PRIVACY_POLICY |
Link label for opening the privacy policy document. |
|
TERMS_OF_USE |
Link label for opening the terms of use document. |
|
VIEW_SENDER_DETAILS |
Link label for opening the sender's detailed contact information. |
|
WEBSITE_EXTERNAL_DISPLAY_NAME |
Display Name of the portal, displayed in the header and browser tab. |
- Ensure the Customer Message Type is Engage Portal.
- Populate the Text field with the appropriate translation.
- Ensure the Status is set to Active.
- Select Save.
Business admin users must re-publish the domain for the updated Customer Message records to be displayed on any portals.
Translations for Individual Portals
To create an override translation for use on an individual portal only:
- Navigate to Business Admin > Objects > Customer Messages.
- Make a copy of the desired Customer Message record.
- Ensure the Customer Message Type is Engage Portal.
- Populate the Text field with the appropriate translation.
- Populate the Engage Portal Domain and Engage Portal fields appropriately.
- Ensure the Status is set to Active.
- Select Save.
Business admin users must deploy the appropriate portal for the updated Customer Message records to be displayed on that portal.
Assigning Portals to Accounts
Business admin users can assign portals to accounts to determine which portal as HCP can access. To assign a portal to an account:
- Navigate to Business Admin > Objects > Accounts.
- Select the appropriate account.
- Select Edit.
- Populate the Assigned Engage Portal Domain field.
- Populate the Assigned Engage Portal field with the appropriate portal.
When the HCP associated with this account logs into the portal, the branding settings for the assigned portal display.
Viewing My Engage Portal as
HCPs
In order to access their content on a portal, the HCP must initially register from a link that establishes their identity from the Vault. For example, when Sending Secure Messages via Approved Email is enabled, the HCP receives an account-specific link to sign in to their assigned portal. After their initial registration, the HCP's VeevaID login is now associated with the appropriate account. At this point, they are able to go directly to the portal and log in to access their content.
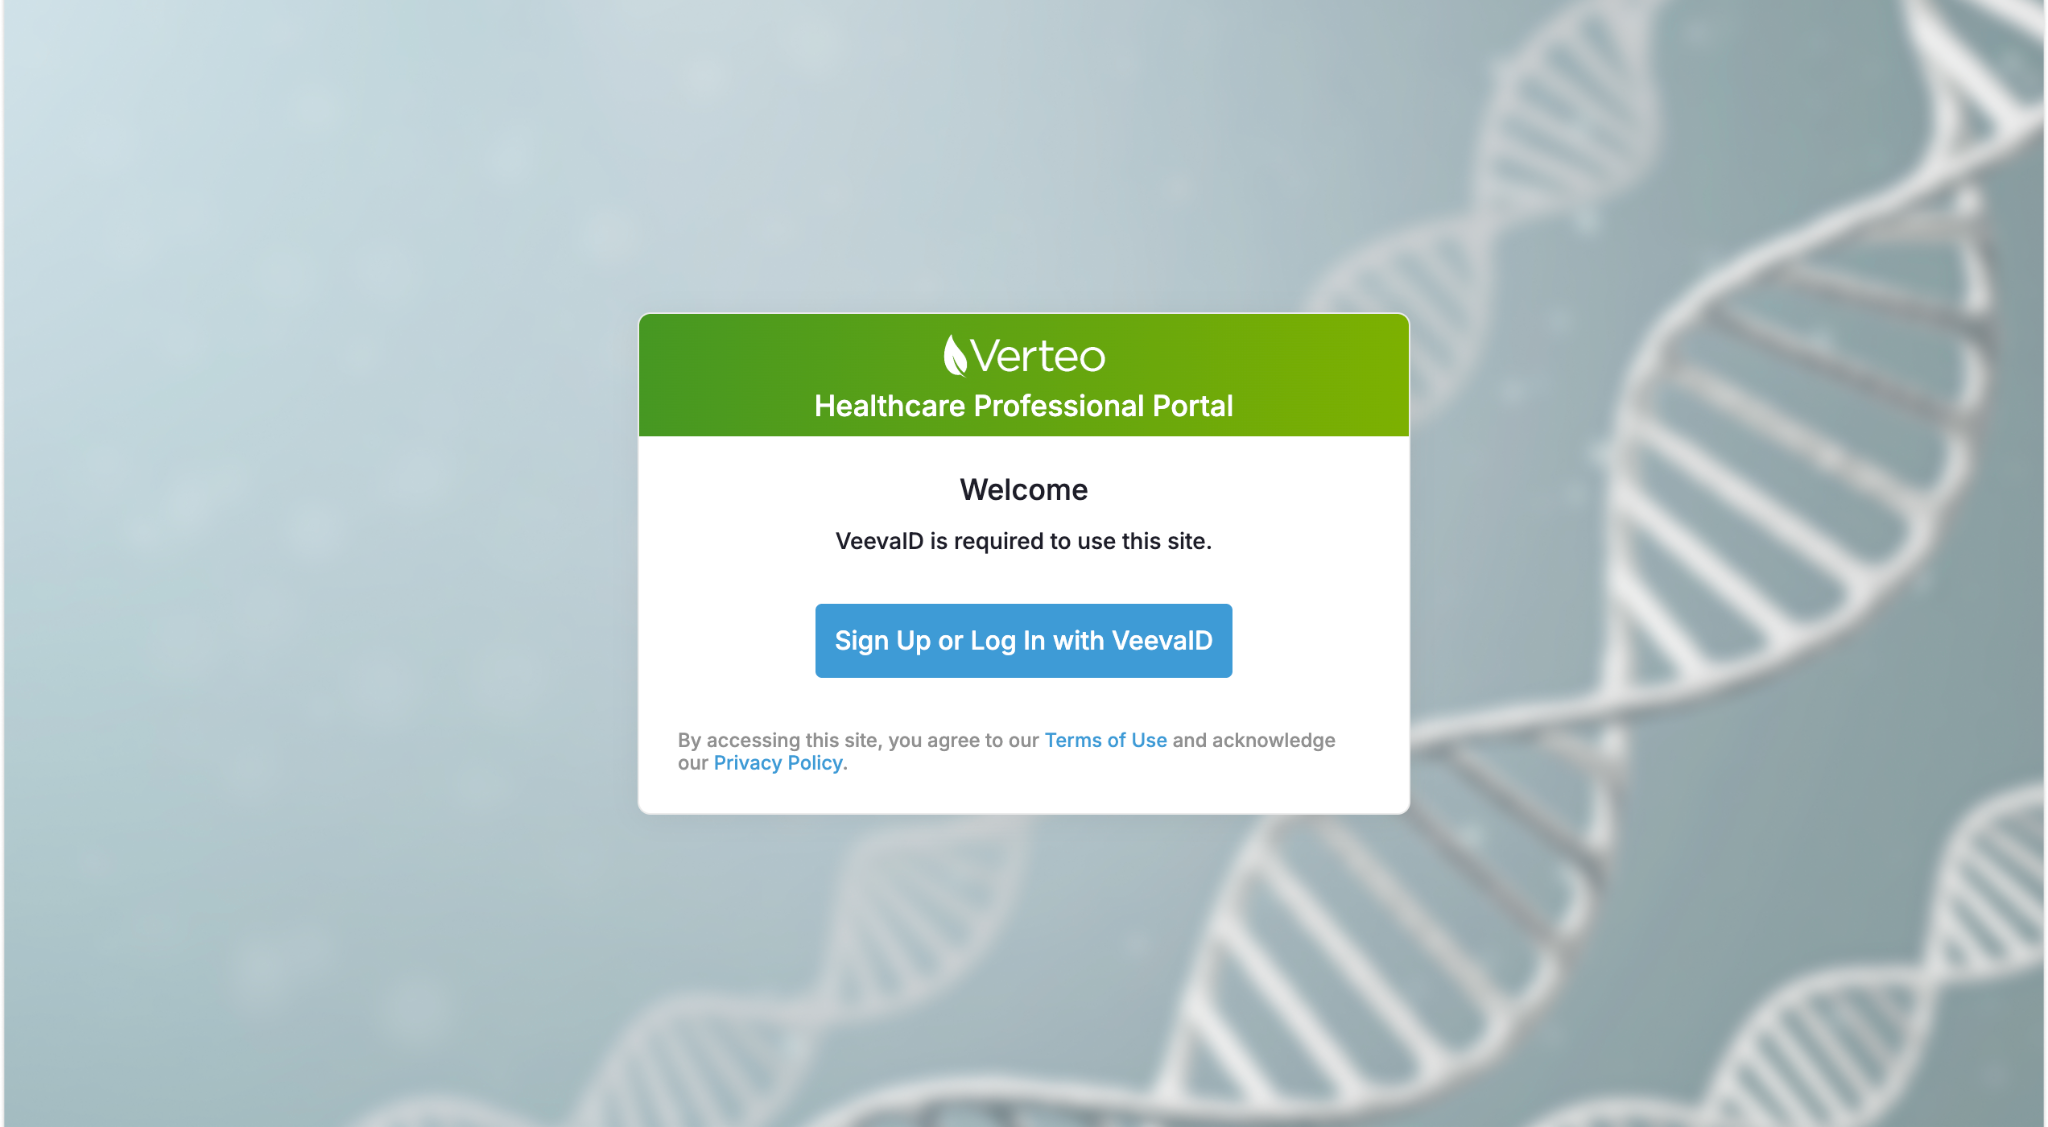
Select the Sign Up or Log In with VeevaID button to register or log in with an existing account. After logging in, the portal displays.
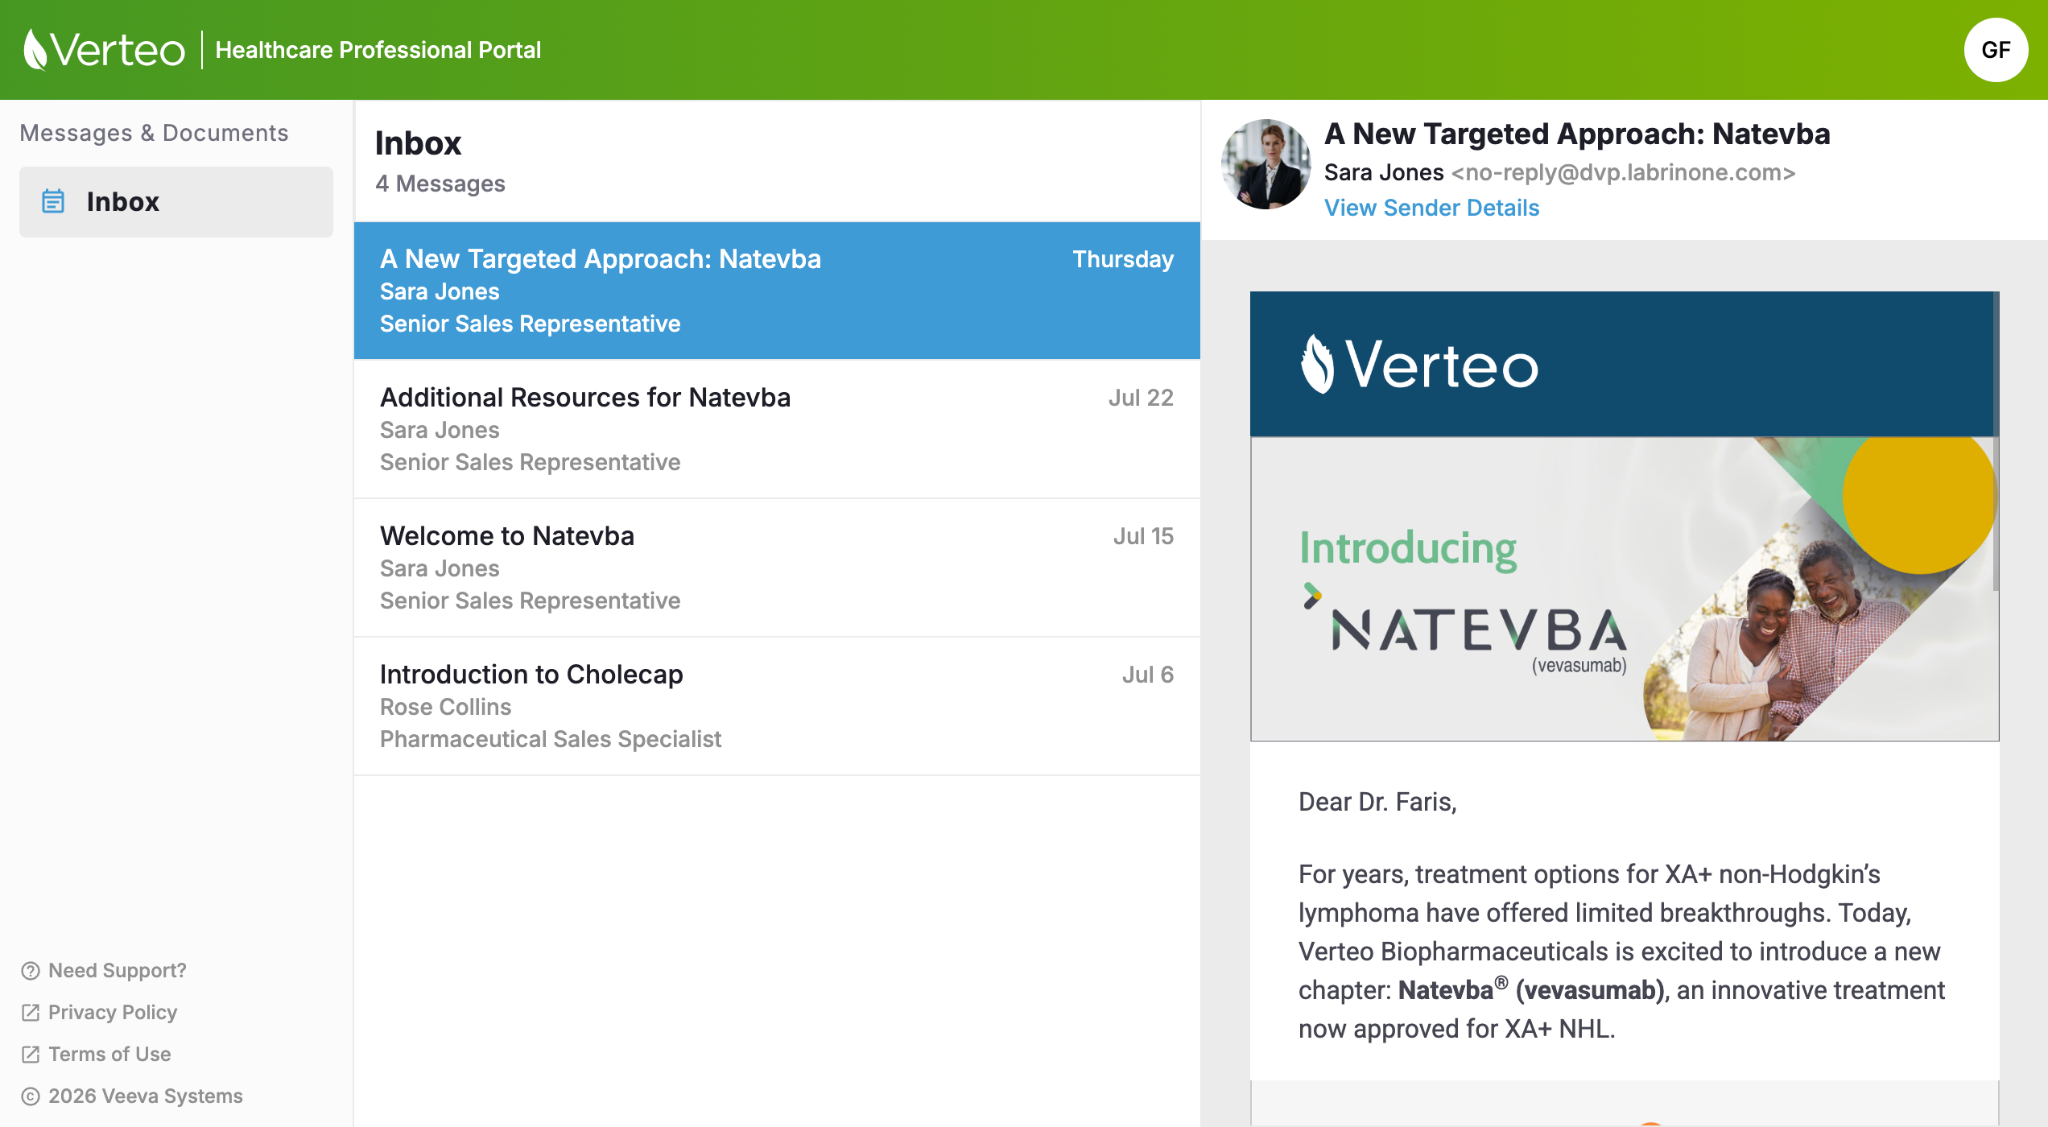
The navigation menu of the portal can include the following sections and links, depending on features enabled in the portal's settings:
- Sections:
- Messages & Documents - Displays when the Inbox (Secure Messaging) feature is enabled. Contains the tab for Inbox.
- Links:
- Need Support? - Displays when a support email and/or phone number are populated
- Privacy Policy - Displays when a privacy policy HTML file is selected.
- Terms of Use - Displays when a terms of use HTML file is selected.
An example with Inbox (Secure Messaging) enabled:
When an HCP selects the link to view Privacy Policy or Terms of Use files, any JavaScript included in the HTML is blocked.
Supported Browsers
The following browsers are supported for viewing My Engage Portal as an HCP:
- Edge Chromium
- Google Chrome
- Firefox
- Safari