Opportunity Management
Opportunity Management allows end users to manage sales opportunities for each of their accounts. End users can track opportunity progress and advance opportunities through stages of development. Opportunities can be created in advance of customer visits from the Opportunity tab or Account Detail page to prepare. If enabled, end users can also add competitor information to an Opportunity.
Content developers can use the Using the Opportunity Management Page Template to create a home page for the Opportunity Management dashboard.
For example, to prepare for an account visit to discuss a new medical device an end user thinks the customer will be interested in, the end user creates an Opportunity. The end user adds the customer information, then adds the device to the Opportunity Lines and includes pricing information.
Who can use this feature?
- Browser Users
- Does not require an additional license
- Business Admin Users, End Users
Configuring Opportunity Management for
To configure this feature:
- Ensure Configuring the Product Catalog is complete.
Products for Opportunities must be product type Order with the parent product (product type Detail) selected in the user's My Setup.
- Navigate to Admin > Users & Groups > Permission Sets.
- Select the appropriate permission set.
- Select Objects.
-
Grant the following permissions:
Object Object Permissions Object Types Fields Field Permissions opportunity__v CRED opportunity__v All fields Edit opportunity_line__v
CRED
opportunity_line__v
All fields Edit competitor__v CRED competitor__v All fields Edit opportunity_competitor__v
CRED
opportunity_competitor__v
All fields Edit person__sys R n/a All fields Read - Grant view access to the opportunity_line_section__v object control on the opportunity__v object.
- Create an Opportunity tab.
- Grant view permission to the Opportunity tab.
- Ensure the opportunity_line_section__v app section is added to the appropriate opportunity__v object type layout.
- Add the opportunity_competitor_section__v app section to the appropriate opportunity__v object type layout. This step is optional.
- Add the opportunity__v app section to the appropriate Account layout. This step is optional.
- Activate the Opportunity Overview tab, if using the Opportunity Management Page Template. This step is optional.
- Grant view permission to the Opportunity Overview tab, if using the Opportunity Management Page Template. This step is optional.
- Grant view permission to the Opportunity Overview page, if using the Opportunity Management Page Template. This step is optional.
Using Opportunity Management as
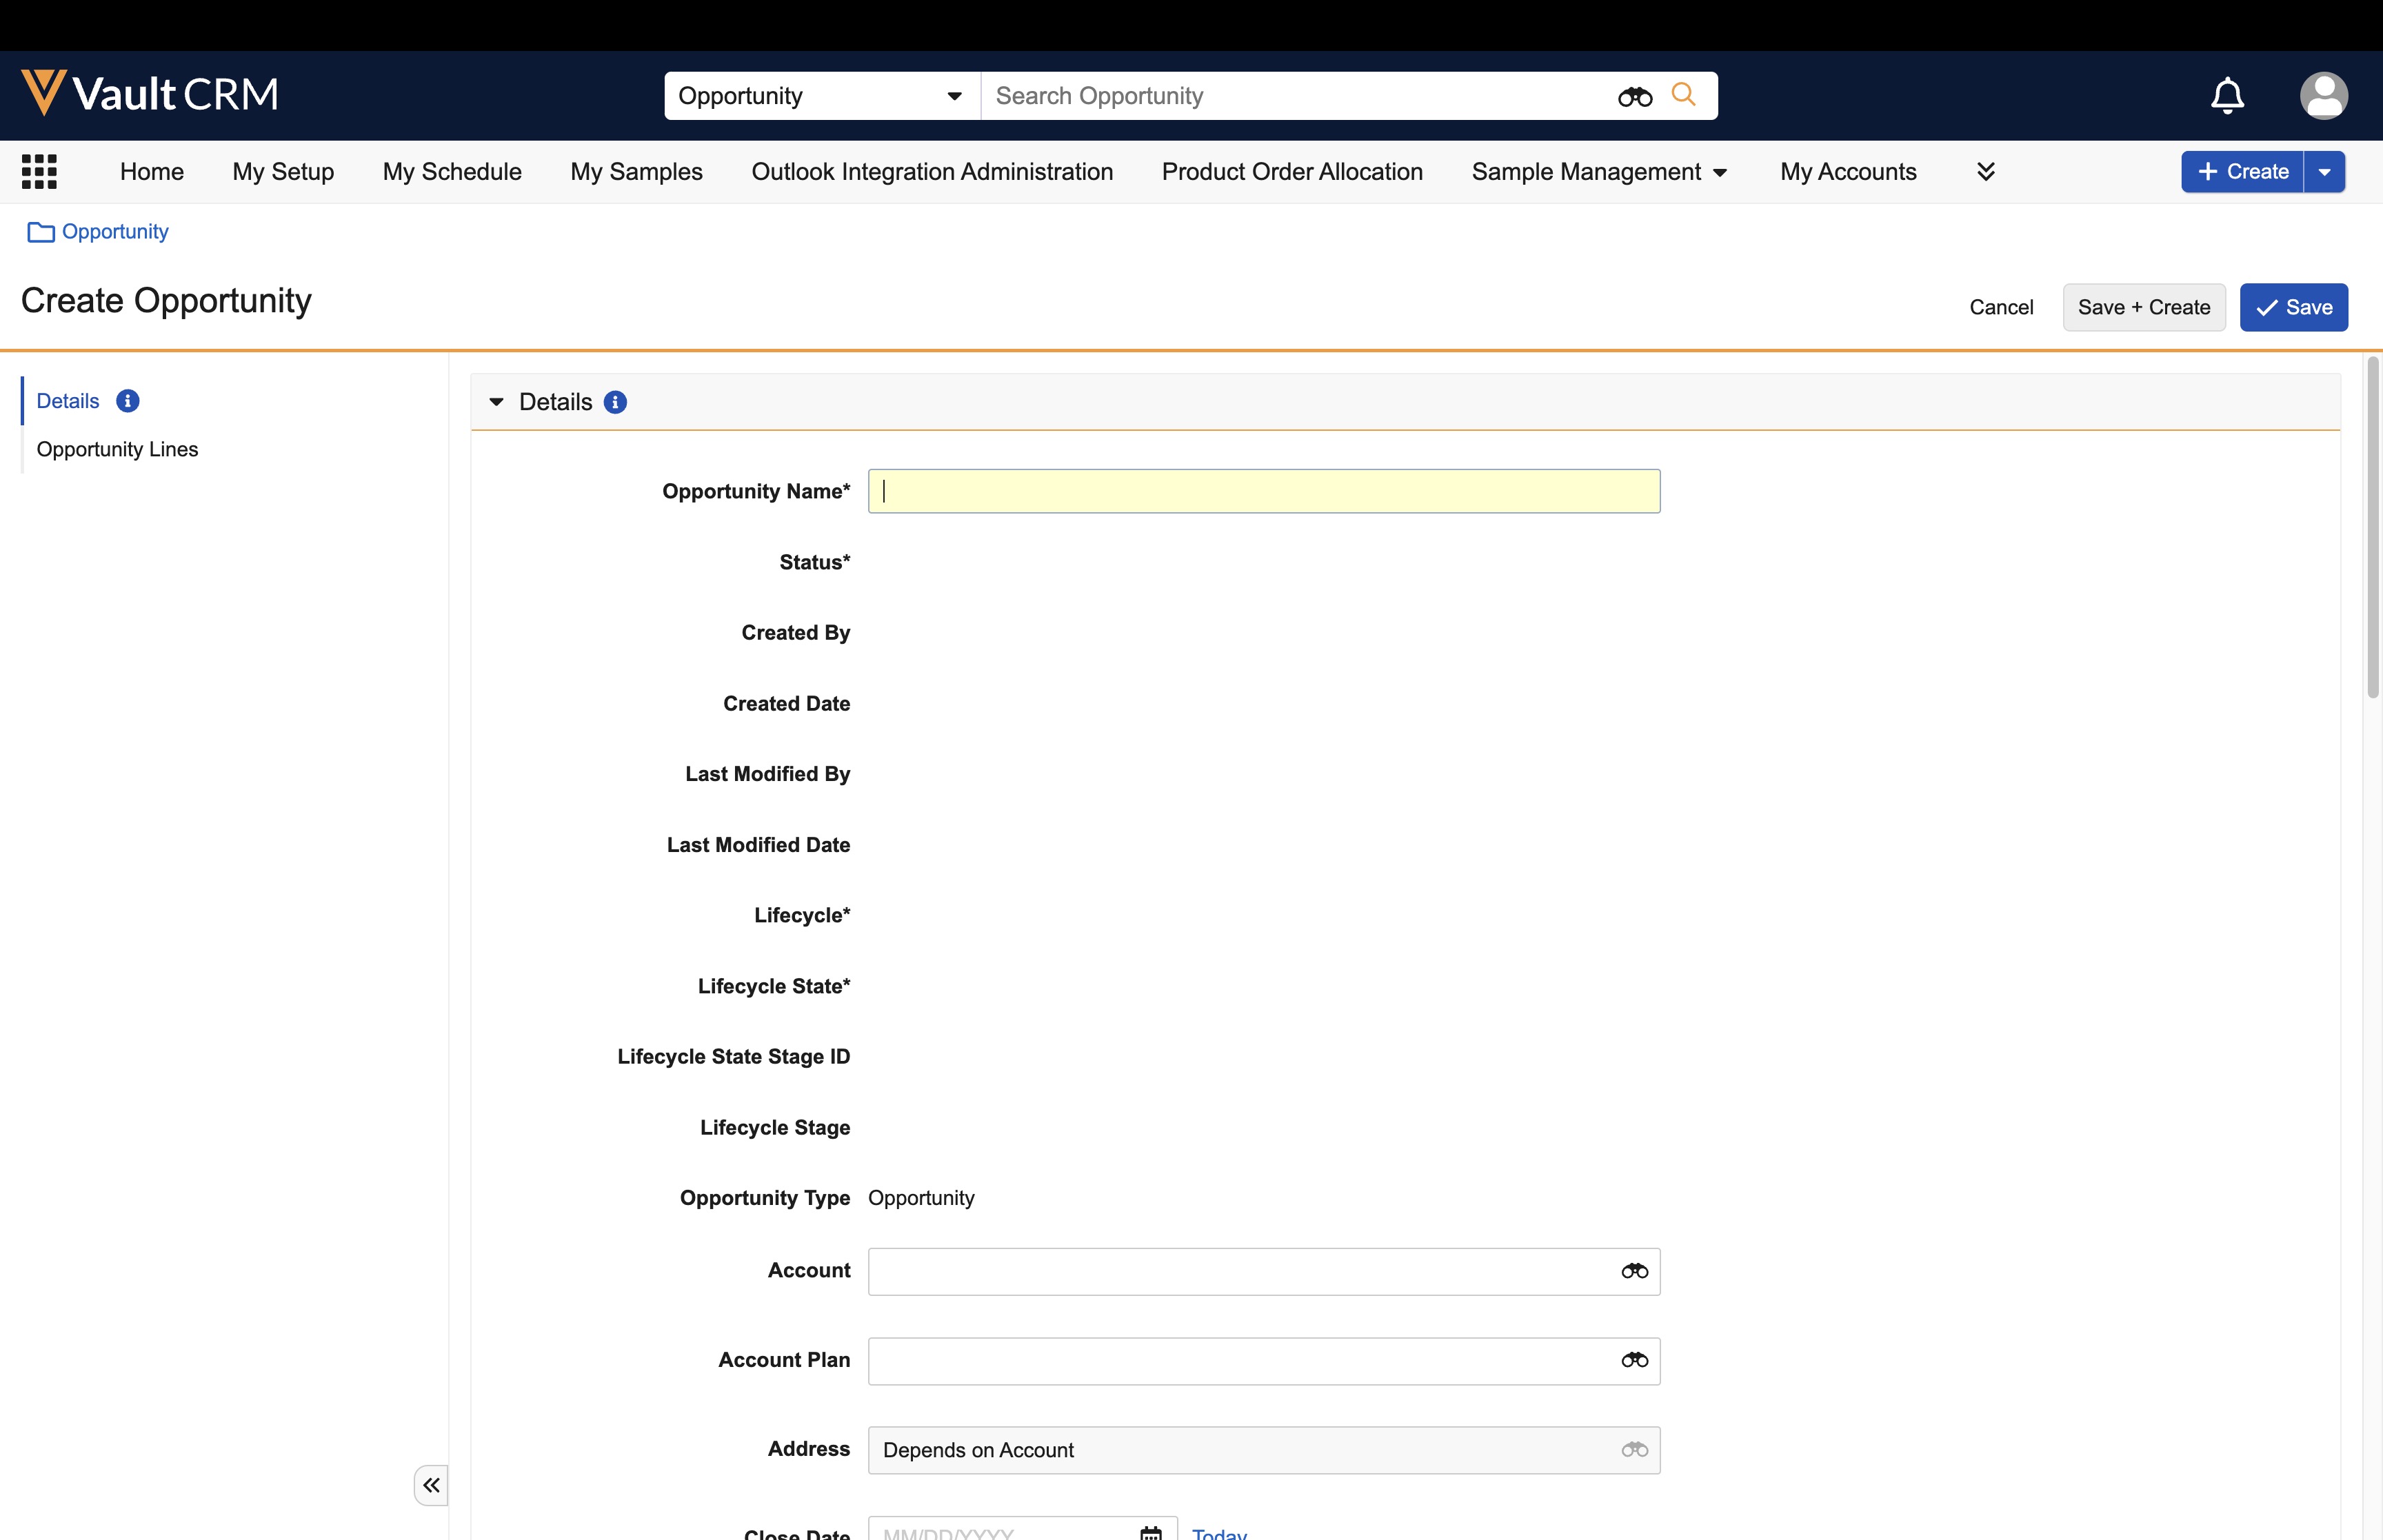
To create an Opportunity:
-
Select Create on the Opportunity tab or the Account Detail page.

-
Enter an Opportunity Name.
-
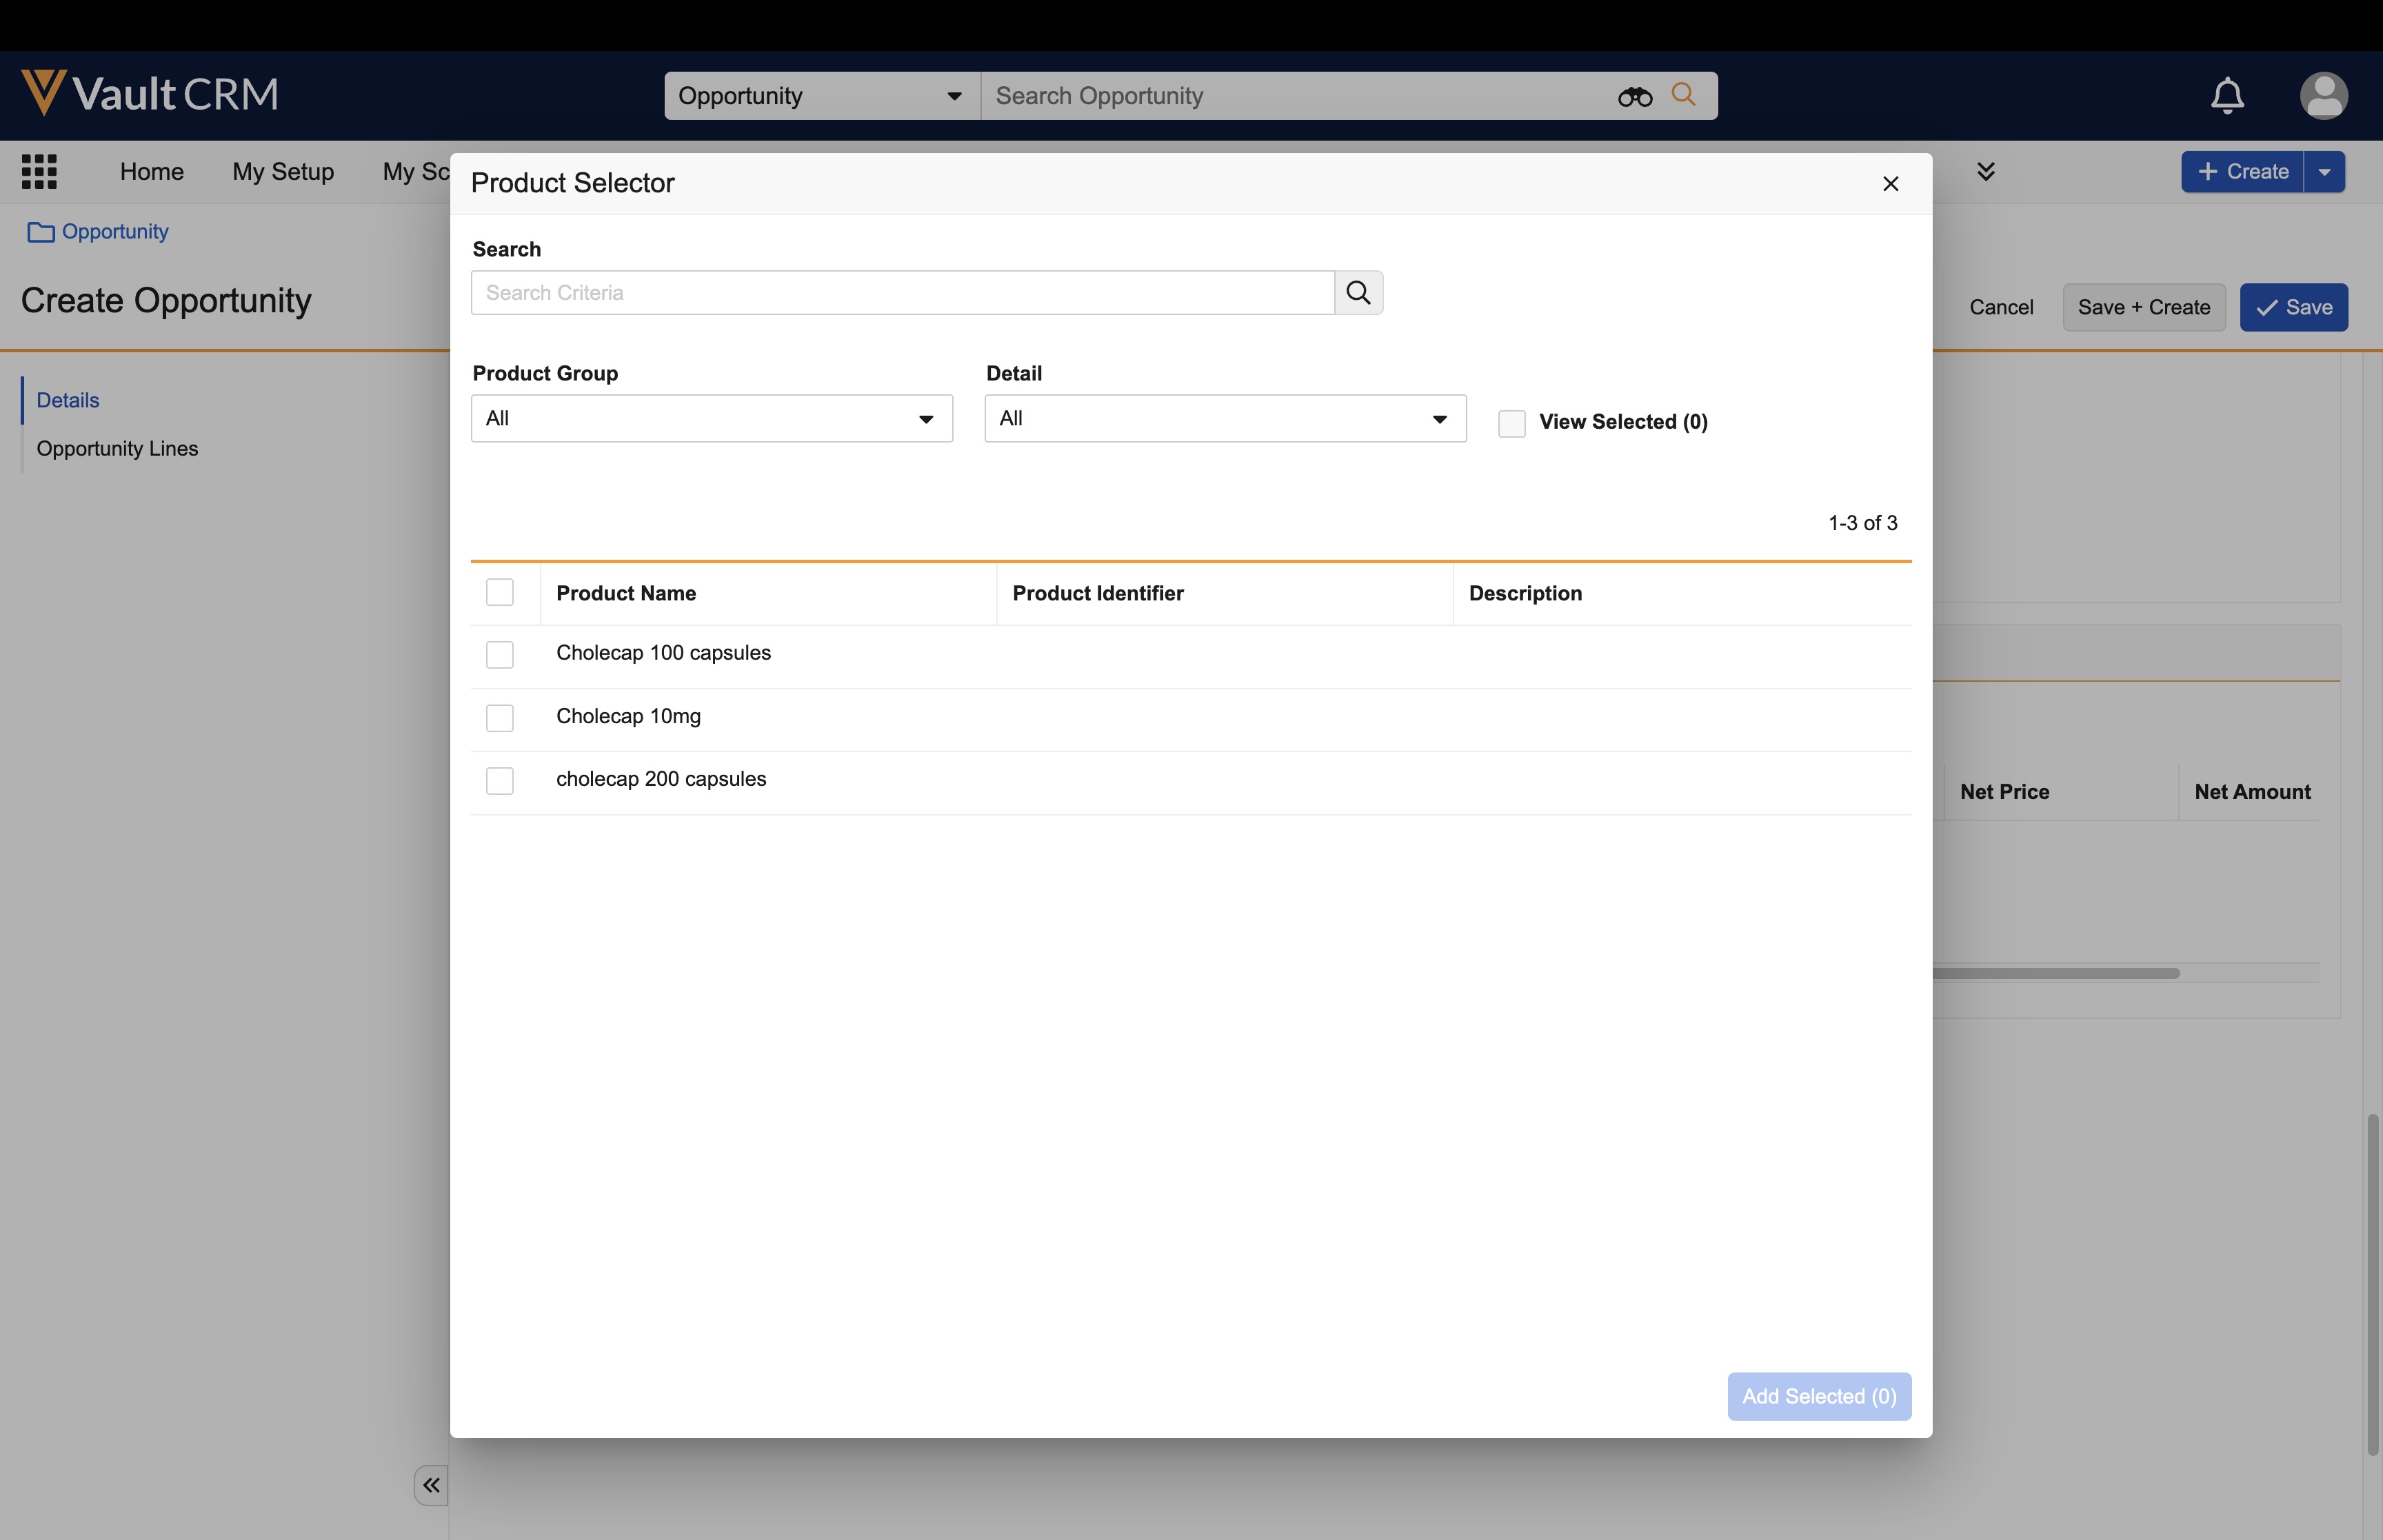
Select Product Selector in the Opportunity Lines section. The Product Selector displays. Available products are assigned using My Setup.

-
Select one or more products to add. Searching and filtering by Product Group or Detail is available.
-
Select Add Selected.

-
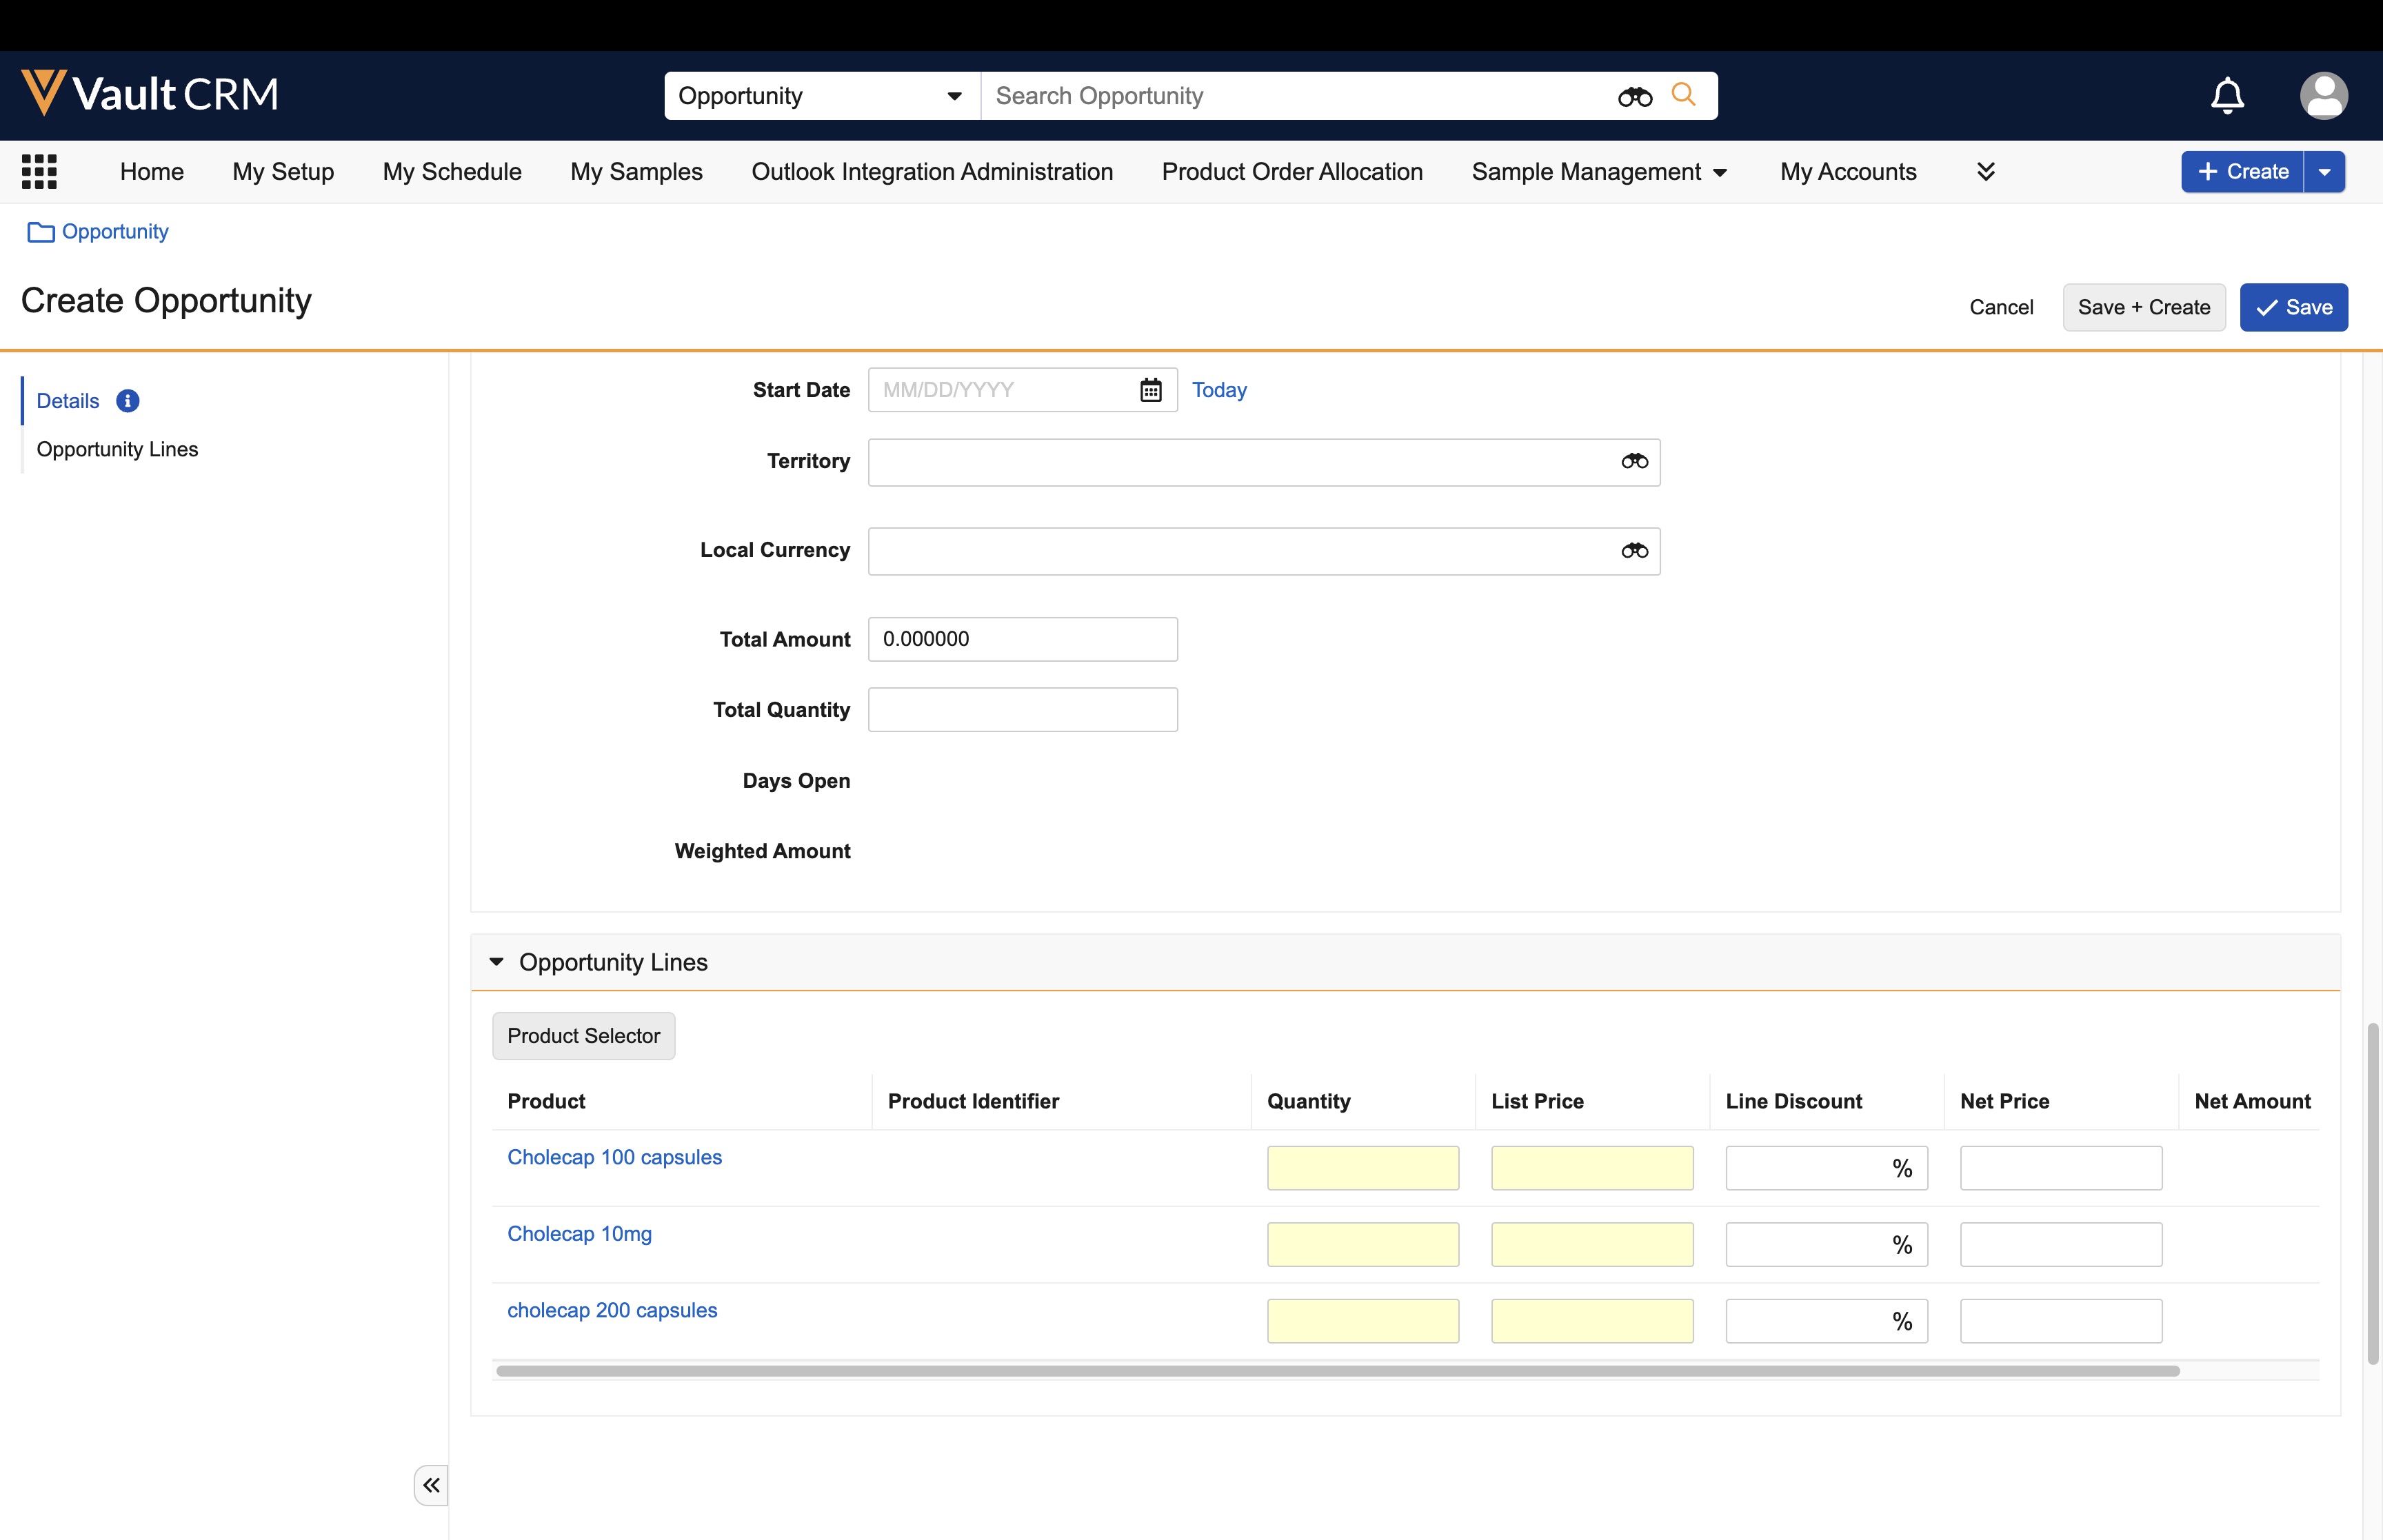
Enter the Quantity and List Price for each Opportunity Line.
-
Enter a Discount. This step is optional.
The Net Price is calculated automatically from the List Price and Discount. The Net Amount is calculated automatically from the Quantity and Net Price. -
Select Save.
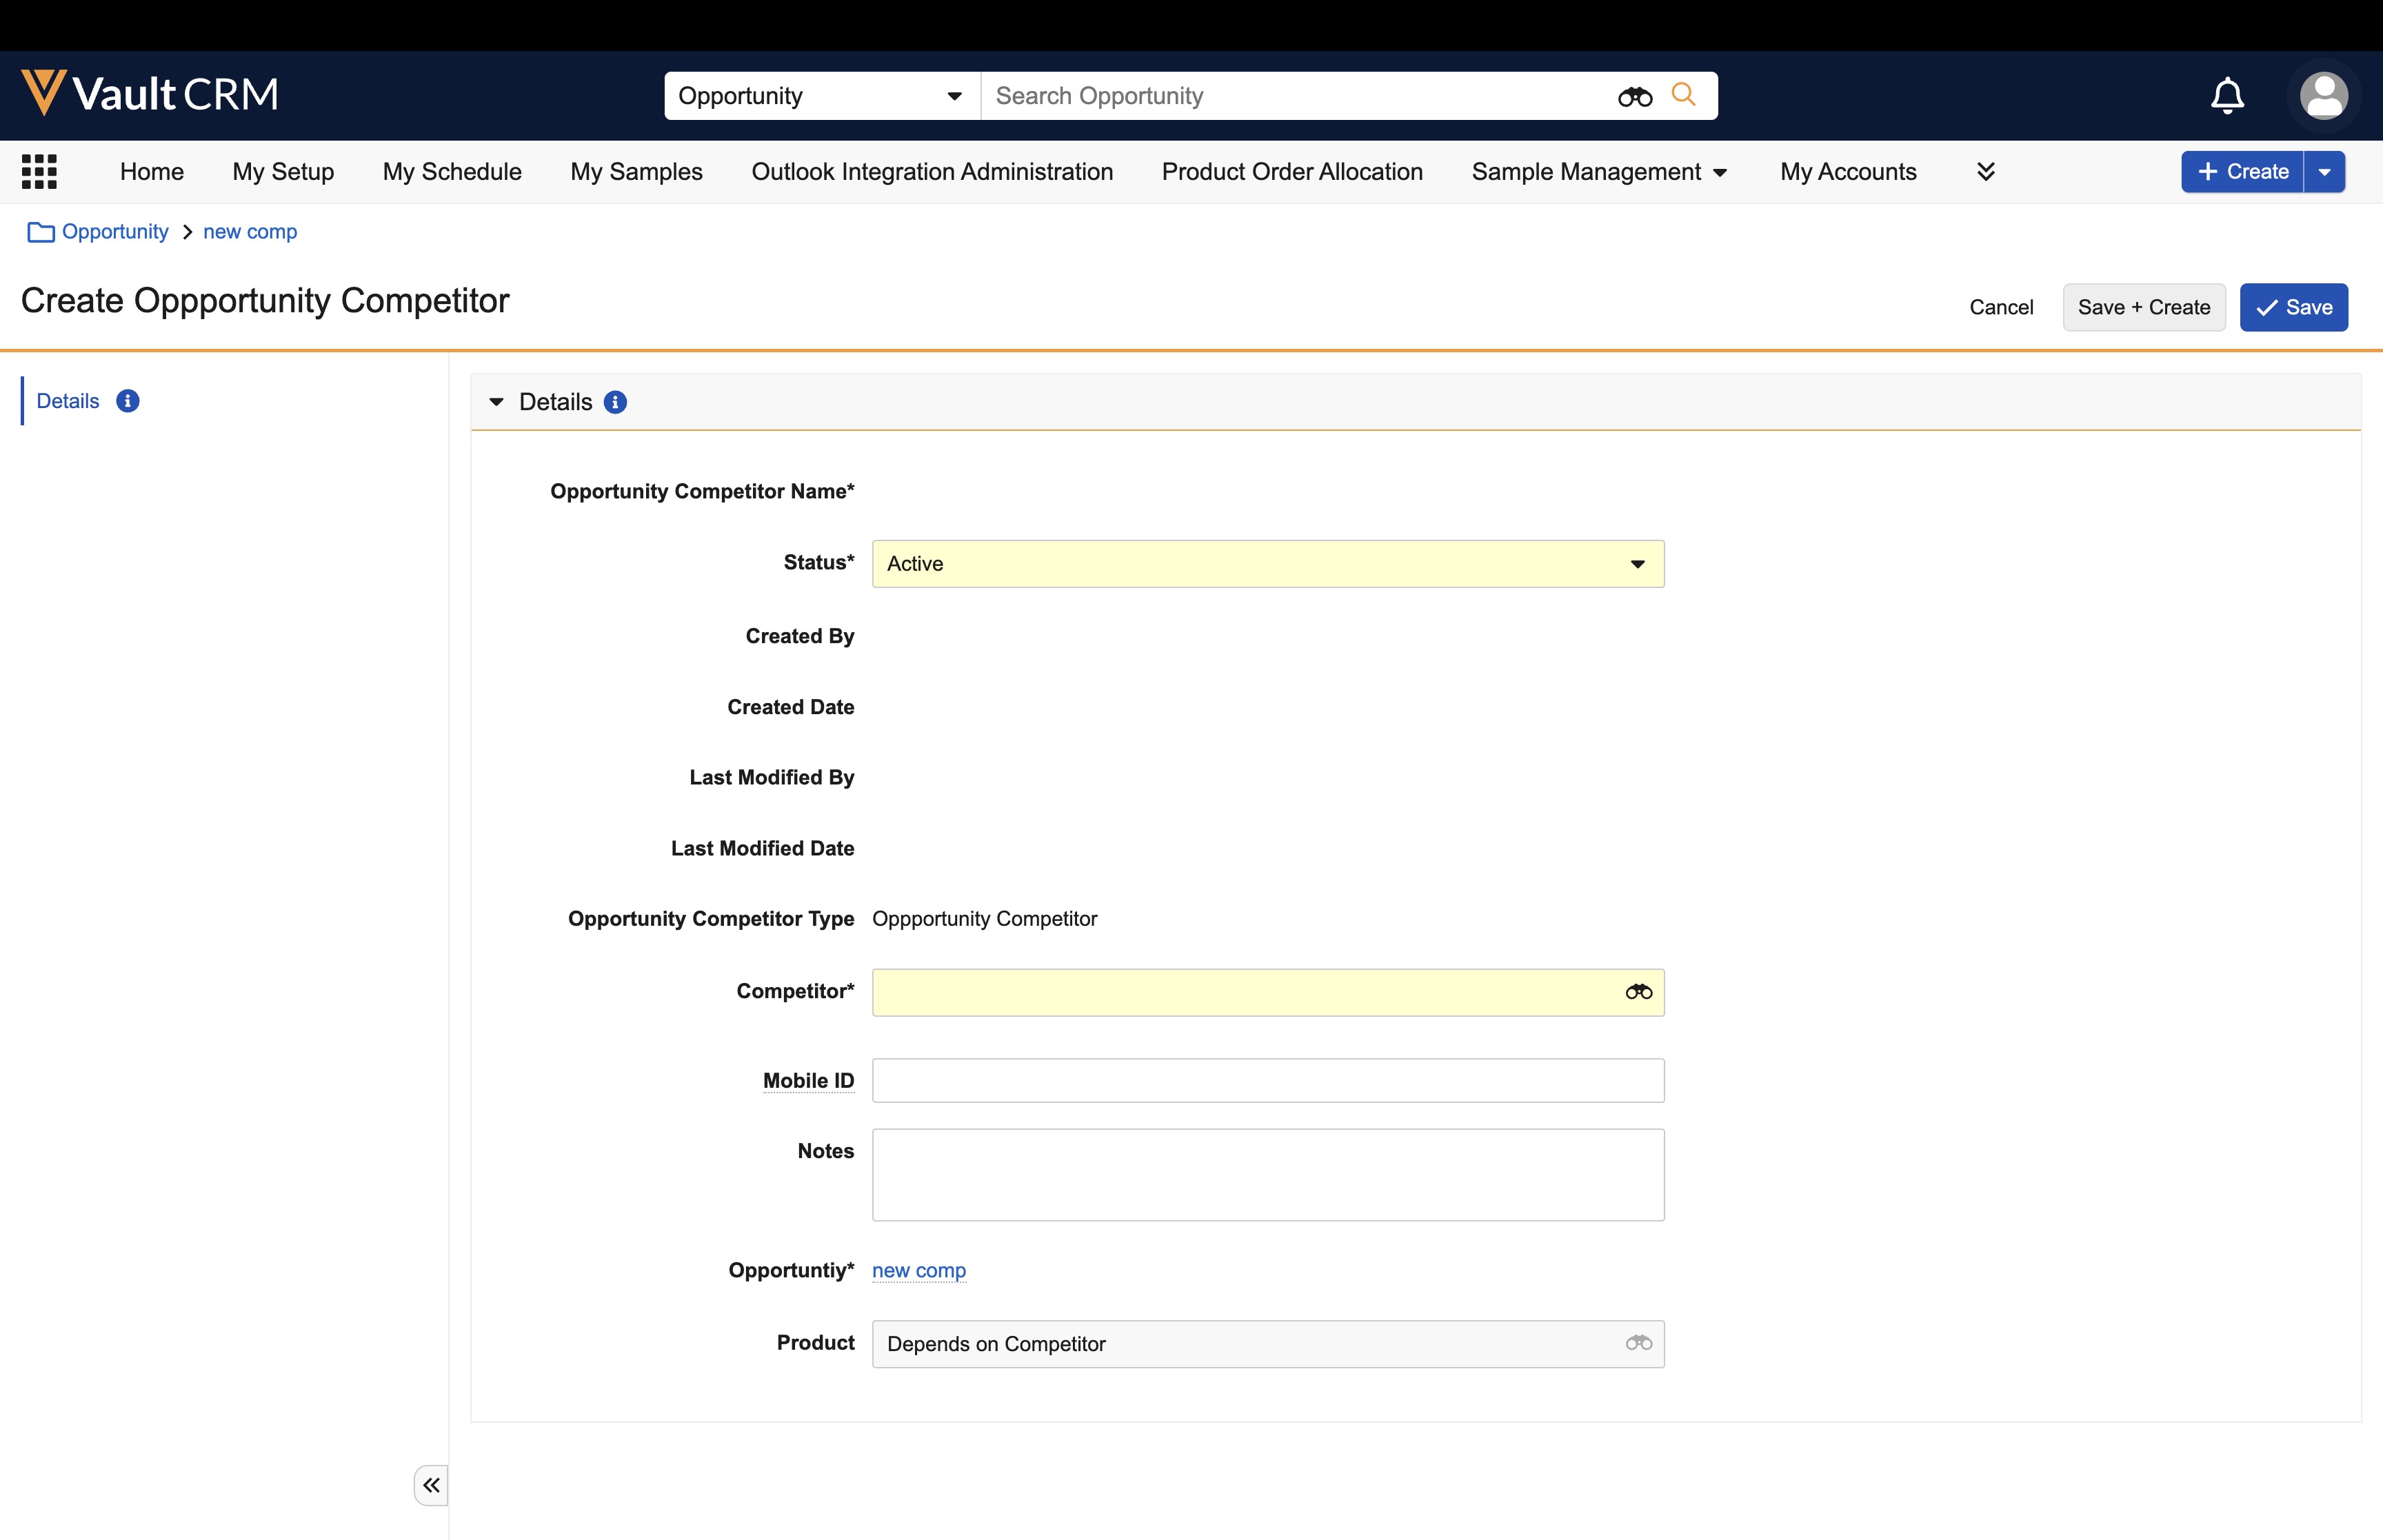
To add competitor information:
-
Select an opportunity from the Opportunity tab or the Account Detail page.
-
Select Edit.
-
Select Create from the Opportunity Competitors related list.

- Enter the competitor name.
- Select the appropriate product.
- Select Save.
To move an Opportunity to a different state, select the  icon. Available states include:
- New
- Needs Analysis
- Proposal
- Negotiation/Review
- Closed (Won)
- Closed (Lost)

