Genesys Cloud for Service Center
Genesys Cloud is a Contact Center as a Service (CCaaS) application, integrated with Veeva Omnichannel as a telephony interface, that allows Service Center reps to place, receive, and transfer phone calls within Service Center.
Genesys Cloud is compatible with the following browsers:
- Google Chrome
- Mozilla Firefox
- Microsoft Edge
Who can use this feature?
- Service Center Reps - Browser
- Using Genesys Cloud with Omnichannel
- Users do not require an additional license
Configuring Genesys Cloud with Service Center for
 Service Center Reps
To configure Genesys Cloud in Vault CRM, admins must complete the following configuration within the Genesys Cloud Admin Directory, before finalizing the configuration in Vault CRM.
Configuring Genesys Cloud in the Genesys Cloud Admin Directory
To configure Genesys Cloud via the Genesys Cloud Admin Directory:
- Ensure your Vault CRM domain is whitelisted as an Allowed Embeddable Domain. See Manage Genesys Cloud Embedding with the Genesys Cloud Embedded Clients for more information.
- Identify and capture the Omnichannel URL based on the Genesys Cloud hosting region. This will be used later in the configuration process. See AWS regions for Genesys Cloud for more information.
- Configure an OAuth Client to enable calling APIs and capture call transfer metadata. See Create an OAuth Client for more information. Populate the following fields:
- Token Duration - Enter the maximum length of a user’s session before they must relogin and reauthenticate
- Grant Type - Select Token Implicit Grant (Browser)
- Authorized Redirect URIs - Add the following endpoints with your specific region domain to prevent Cross-Origin Resource Sharing errors:
- Your Vault CRM domain address
- https://apps.mypurecloud.com/crm/authWindow.html
- https://apps.mypurecloud.com/crm/embeddableFramework.html
- https://apps.mypurecloud.com/crm/index.html
- Scope - Select the appropriate uses. See Administrator Requirements for the Genesys Cloud Embedded Clients for more information on scopes.
- Client ID - Capture and store the clientId to add to the framework.js file
- Optionally, configure and upload a custom framework.js file to capture additional call metadata:
- Purchase and set up the Direct Inward Dialing (DID) number(s) to act as the collective inbound phone number. See Purchase DID Numbers for more information.
- Assign Service Center reps to a role with the required WebRTC and routing permissions. See Grant a Role and Division to a User for more information.
- Assign a WebRTC Phone as the default phone for each Service Center rep.
- Optionally, see Overview of Multi-Factor Authentication to enable MFA for users.
Configuring Genesys Cloud in Vault CRM
To configure Genesys Cloud in Vault CRM:
- Ensure Configuring Service Center is complete.
- Navigate to Admin > Configuration > Object > Veeva Omnichannel > Layouts.
- Select the appropriate layout.
- Add the following fields:
- Omnichannel Integration Name
- Omnichannel Integration Type
- Integration Platform
- Integration URL
- Select Save.
- Navigate to Business Admin > Objects > Veeva Omnichannel.
- Select Create.
- Select the Genesys Cloud Omnichannel Integration Type.
- Populate the following fields:
- Omnichannel Integration Name - Enter a name for the integration
- Integration Platform - Ensure Genesys is selected
- Integration URL - Enter the URL provided by Genesys Cloud
- Select Save.
- Navigate to Business Admin > Objects > Case Queues.
- Select the appropriate Genesys Cloud record.
- Populate the External Queue ID field with the unique hexadecimal ID from the URL when accessing Genesys Cloud Admin > Queues > the Service Center Queue. For example, https://apps.mypurecloud.com/directory/#/admin/organization/queues/External Queue ID/general
To configure Service Center Rep:
- Navigate to Admin > Users & Groups > Permission Sets.
- Select the appropriate permission set.
-
Grant the following permissions:
Object Label (API) Object Permission Object Types Fields Field Permission Conversation (case_conversation__v) CRE transfer__v - created_by__v
- created_date__v
- global_id__sys
- id
- last_initiated_by__sys
- modified_by__v
- modified_date__v
Read - call__v
- called_party_phone_number__v
- calling_party_phone_number__v
- case__v
- collaboration_channel__v
- collaboration_configuration__v
- conversation_direction__v
- conversation_group__v
- end_time__v
- external_conversation_id__v
- external_conversation_segment_id__v
- external_queue_id__v
- external_queue_name__v
- external_user_id__v
- external_resource_id__v
- initiating_user__v
- link__sys
- message_node__v
- name__v
- platform__v
- object_type__v
- recording_url__v
- response_time__v
- sent_fax__v
- start_time__v
- status__v
- talk_time__v
- transcript__v
- transcript_target__v
- transcript_type__v
Edit Veeva Omnichannel (omniconnect_integration__v) R genesys_cloud__v All applicable fields Read - Navigate to Admin > Configuration > Objects > User > Layouts.
- Select the appropriate layout.
- Add the following fields:
- Veeva Omnichannel
- CCaaS External User ID
- Select Save.
- Navigate to Admin > Users & Groups > Vault Users.
- Select the appropriate user.
- Select the edit icon.
- Populate the following fields:
- Veeva Omnichannel - Select Genesys Cloud
- CCaaS External ID - Enter the unique hexadecimal ID from the URL when accessing Genesys Cloud Admin > Peoples & Permission > the appropriate user. For example, https://apps.mypurecloud.com/directory/#/admin/directory/peopleV3/CCaaS External ID/roles
- Select Save.
Using Genesys Cloud to Manage Phone Calls in Service Center as
Service Center Reps
If Omnichannel is configured, you are able to answer inbound and place outbound calls from within the Service Center console using the Genesys Cloud embedded UI.
Users must log into Genesys Cloud from a Service Center page. Logging in while using another Vault CRM tab or page, for example, the Call Report modal, can result in unexpected behavior.
To log into Genesys Cloud via Service Center:
- Log in to Vault CRM.
- Navigate to Service Center.
- Select the Omnichannel button in the lower left corner.
- Enter the Genesys Cloud login credentials provided by your IT Admin in the Login browser tab.
- If configured, complete the Multi-Factor Authentication.
- Users can remain in the Genesys Cloud embedded UI or collapse it to use Service Center while remaining logged in.
Answering a Call
When a call comes in, the embedded Genesys Cloud UI expands, if not already expanded. Users can select the Answer Phone icon to accept the inbound call.
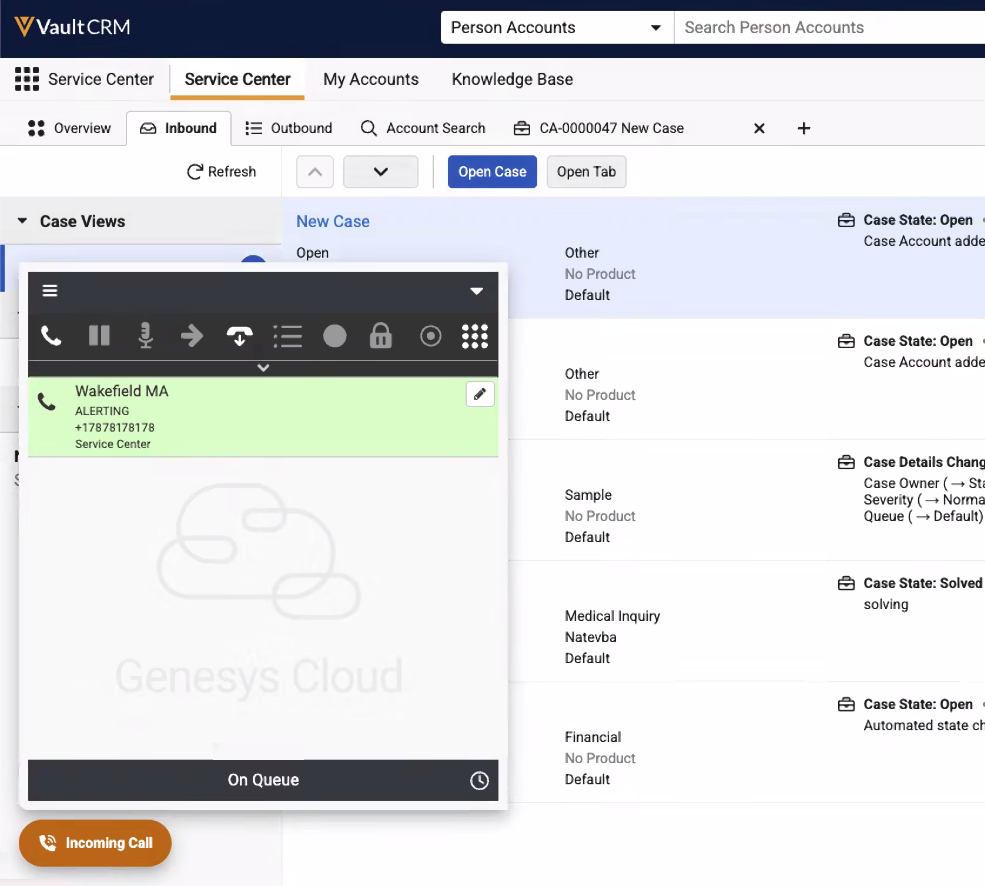
When a user answers a call:
- The user is navigated to the Account Search tab of Service Center with the caller’s phone number auto-populated to easily access the caller’s account.
- The Omnichannel button indicates you are in a call and displays buttons for muting the call and placing it on hold. Select the Omnichannel button to collapse or expand the embedded Genesys Cloud UI as needed.
Ending a Call
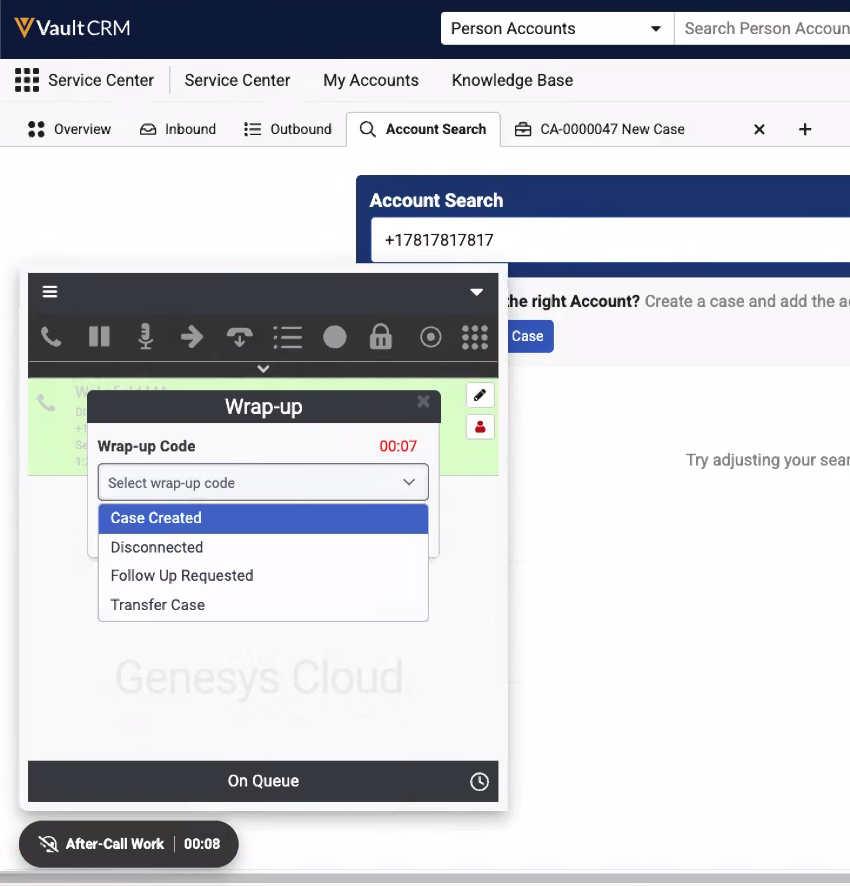
When the call ends, whether by the caller or the user selecting the Disconnect Phone icon, the embedded Genesys Cloud UI displays a Wrap Up modal to capture the call outcome. The Omnichannel status changes to After-Call Work, during which, users do not receive calls.
Transferring a Call
Service Center reps can initiate a call transfer while on an active, connected call.
For internally transferred calls, the open case tab, created when the Service Center Rep answered the call, follows the call to the next agent and displays the case associated with the transferred call. The new agent is assigned to the call when they answer. For call transfers to external numbers, the Case Conversation record for the initial call segment is updated with the End Time and Talk Time.
When a Service Center rep initiates a call transfer, the system tracks the start and end times for each call segment and calculates the talk time. An entry is created on the timeline for each conversation and transfer action for transferred calls.
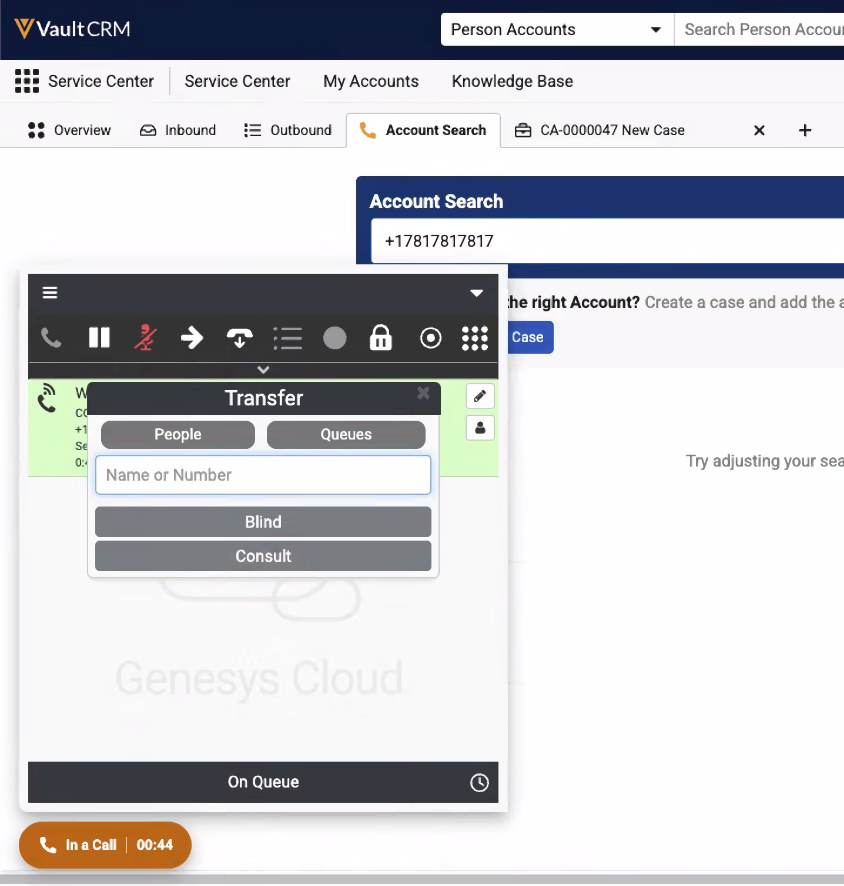
The following call transfer types are supported:
- User-to-User - Transfer a call directly to another user, with or without consulting with the joining party. Agents can select a target user to transfer to from a list of available CRM users.
- User-to-System - Transfer a call to a designated queue or to a specified IVR (Interactive Voice Response). For a queue transfer, users can select a target ACD (Automatic Call Distribution) queue from a predefined list. For an IVR transfer, Service Center reps input the destination phone number for the IVR before transferring.
- External - Transfer a call to an external phone number, which the Service Center Rep inputs. External transfers can be blind (no agent remains on the call to facilitate the transfer) or consult transfers, however, with external transfers subsequent conversation, tracking is not possible.