Configuring Service Center
Complete the following steps to configure the Service Center application:
Complete additional configurations as appropriate:
- Configure Omnichannel to enable Service Center reps to initiate outgoing and receive incoming calls with Service Center
- Integrate with Microsoft to enable Service Center reps to use Microsoft Teams and/or Microsoft OneNote with Service Center
Configuring Service Center Settings for
Ensure the Service Center tab is visible in the appropriate Vault. If it is not, contact Veeva Support.
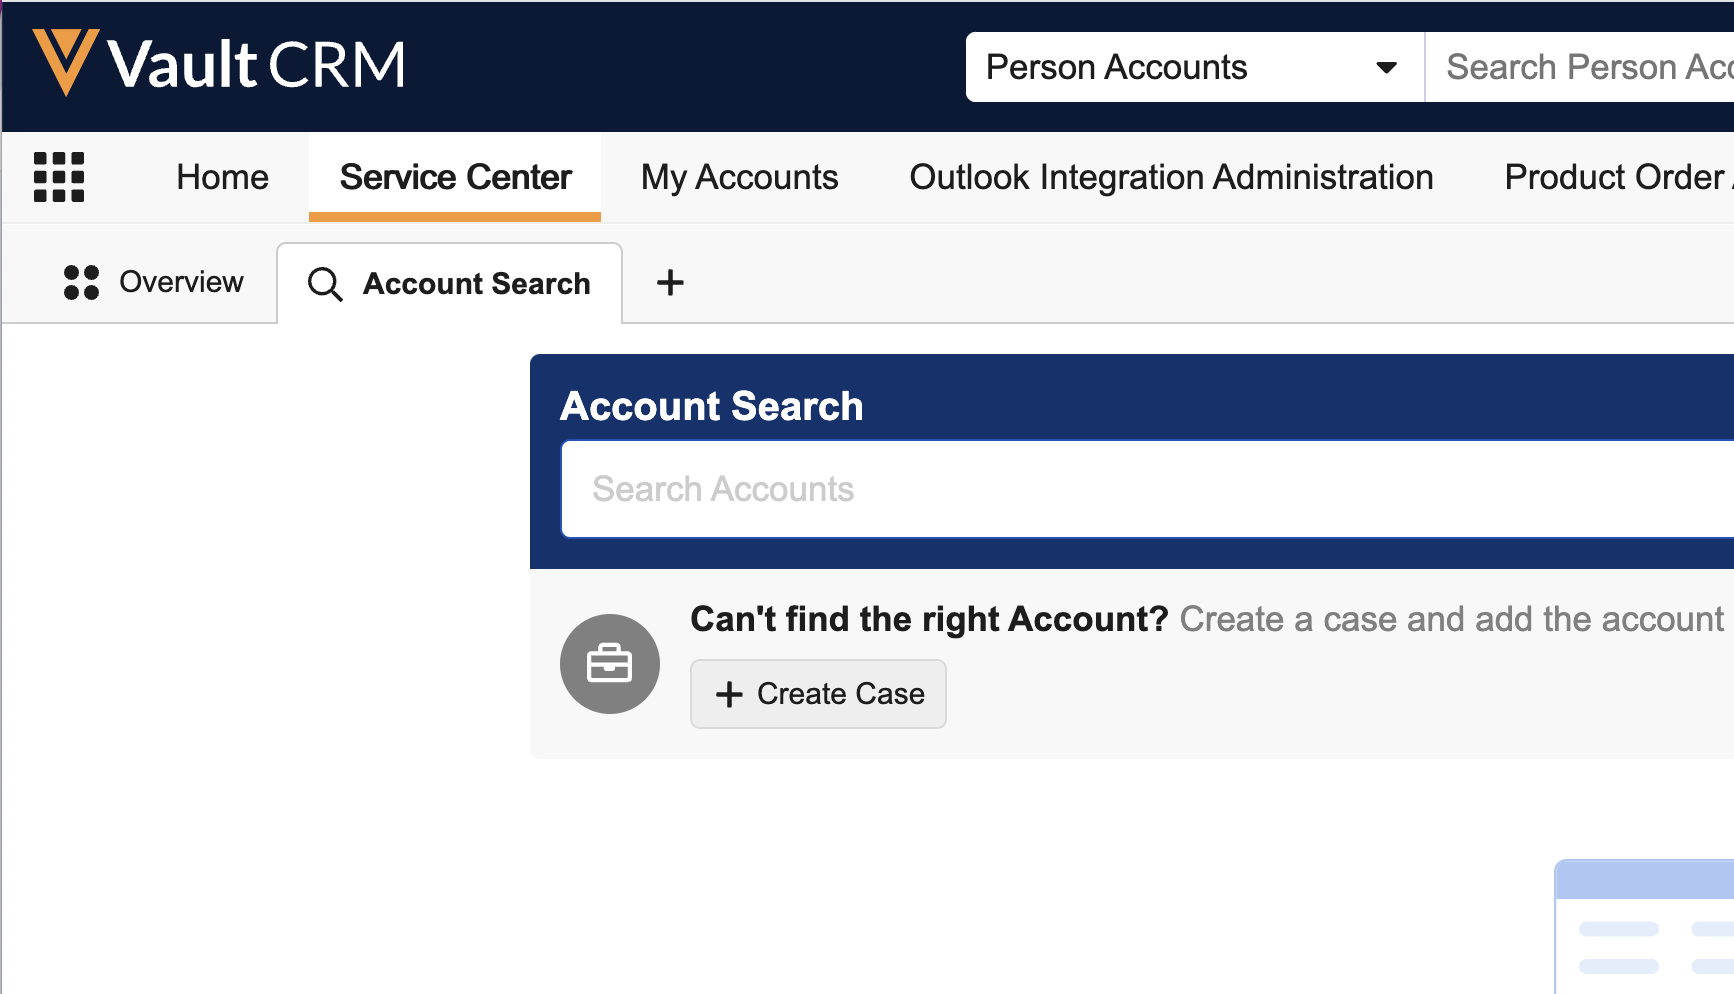
Configuring the Console Application Settings Object
- Navigate to Business Admin > Objects.
- Select the Console Application Settings object.
- Select Create.
- Select Service Center as the settings type.
- Enter 'Default' as the name. The default queue can be named anything; however, there can be only one Default Queue.
- Indicate which account, user, and associate contact information to display in the left panel of each case. The data in each setting is stored as a semicolon-delimited list and is scoped to the object to which it refers.
- Account Fields (account__v) - Contact information for the HCP. The fields listed here display in addition to Name, Specialty, and Primary Parent, which always display and cannot be modified.
- Associate Fields* (person__sys) - Display in the Case Contact (Associate) pane. This is the contact information for an associate calling on behalf of the HCP (for example, a nurse or receptionist).
Permissions to edit and create the person__sys record are managed through standard Vault permissions and are not included in the Service Center Permission Set.
- HCO Result Card Fields (account__v) - Contact information for HCOs in Service Center search results. For example, in Service Center Account Search or when adding targets to active lists.
- HCP Result Card Fields (account__v) - Contact information displayed for HCPs in Service Center search results. For example, in Service Center Account Search or when adding targets to active lists.
Regardless of fields entered in HCO and HCP Result Cards settings, the results cards always include the account Formatted Name and Primary Parent values, if populated on the Account record. In addition, HCP result cards display the account Specialty (spec_1_cda__v), if populated on the Account record.
- User Fields (user__sys) - Display in the Case Contact (User) pane. This is the contact information for a member of your organization reporting an issue on behalf of the HCP.
-
Select Save.
The fields display in the order in which they are listed in the Console Application Settings object. If greater than five fields are included in the setting (four fields for User Fields, HCP Result Card Fields, and HCO Result Card Fields), values only display for the number of fields supported by the setting.
Ensure field values are spelled correctly and are valid for the specified object. If a field is spelled incorrectly or is not valid for the specified object, it does not display in the Case UI.
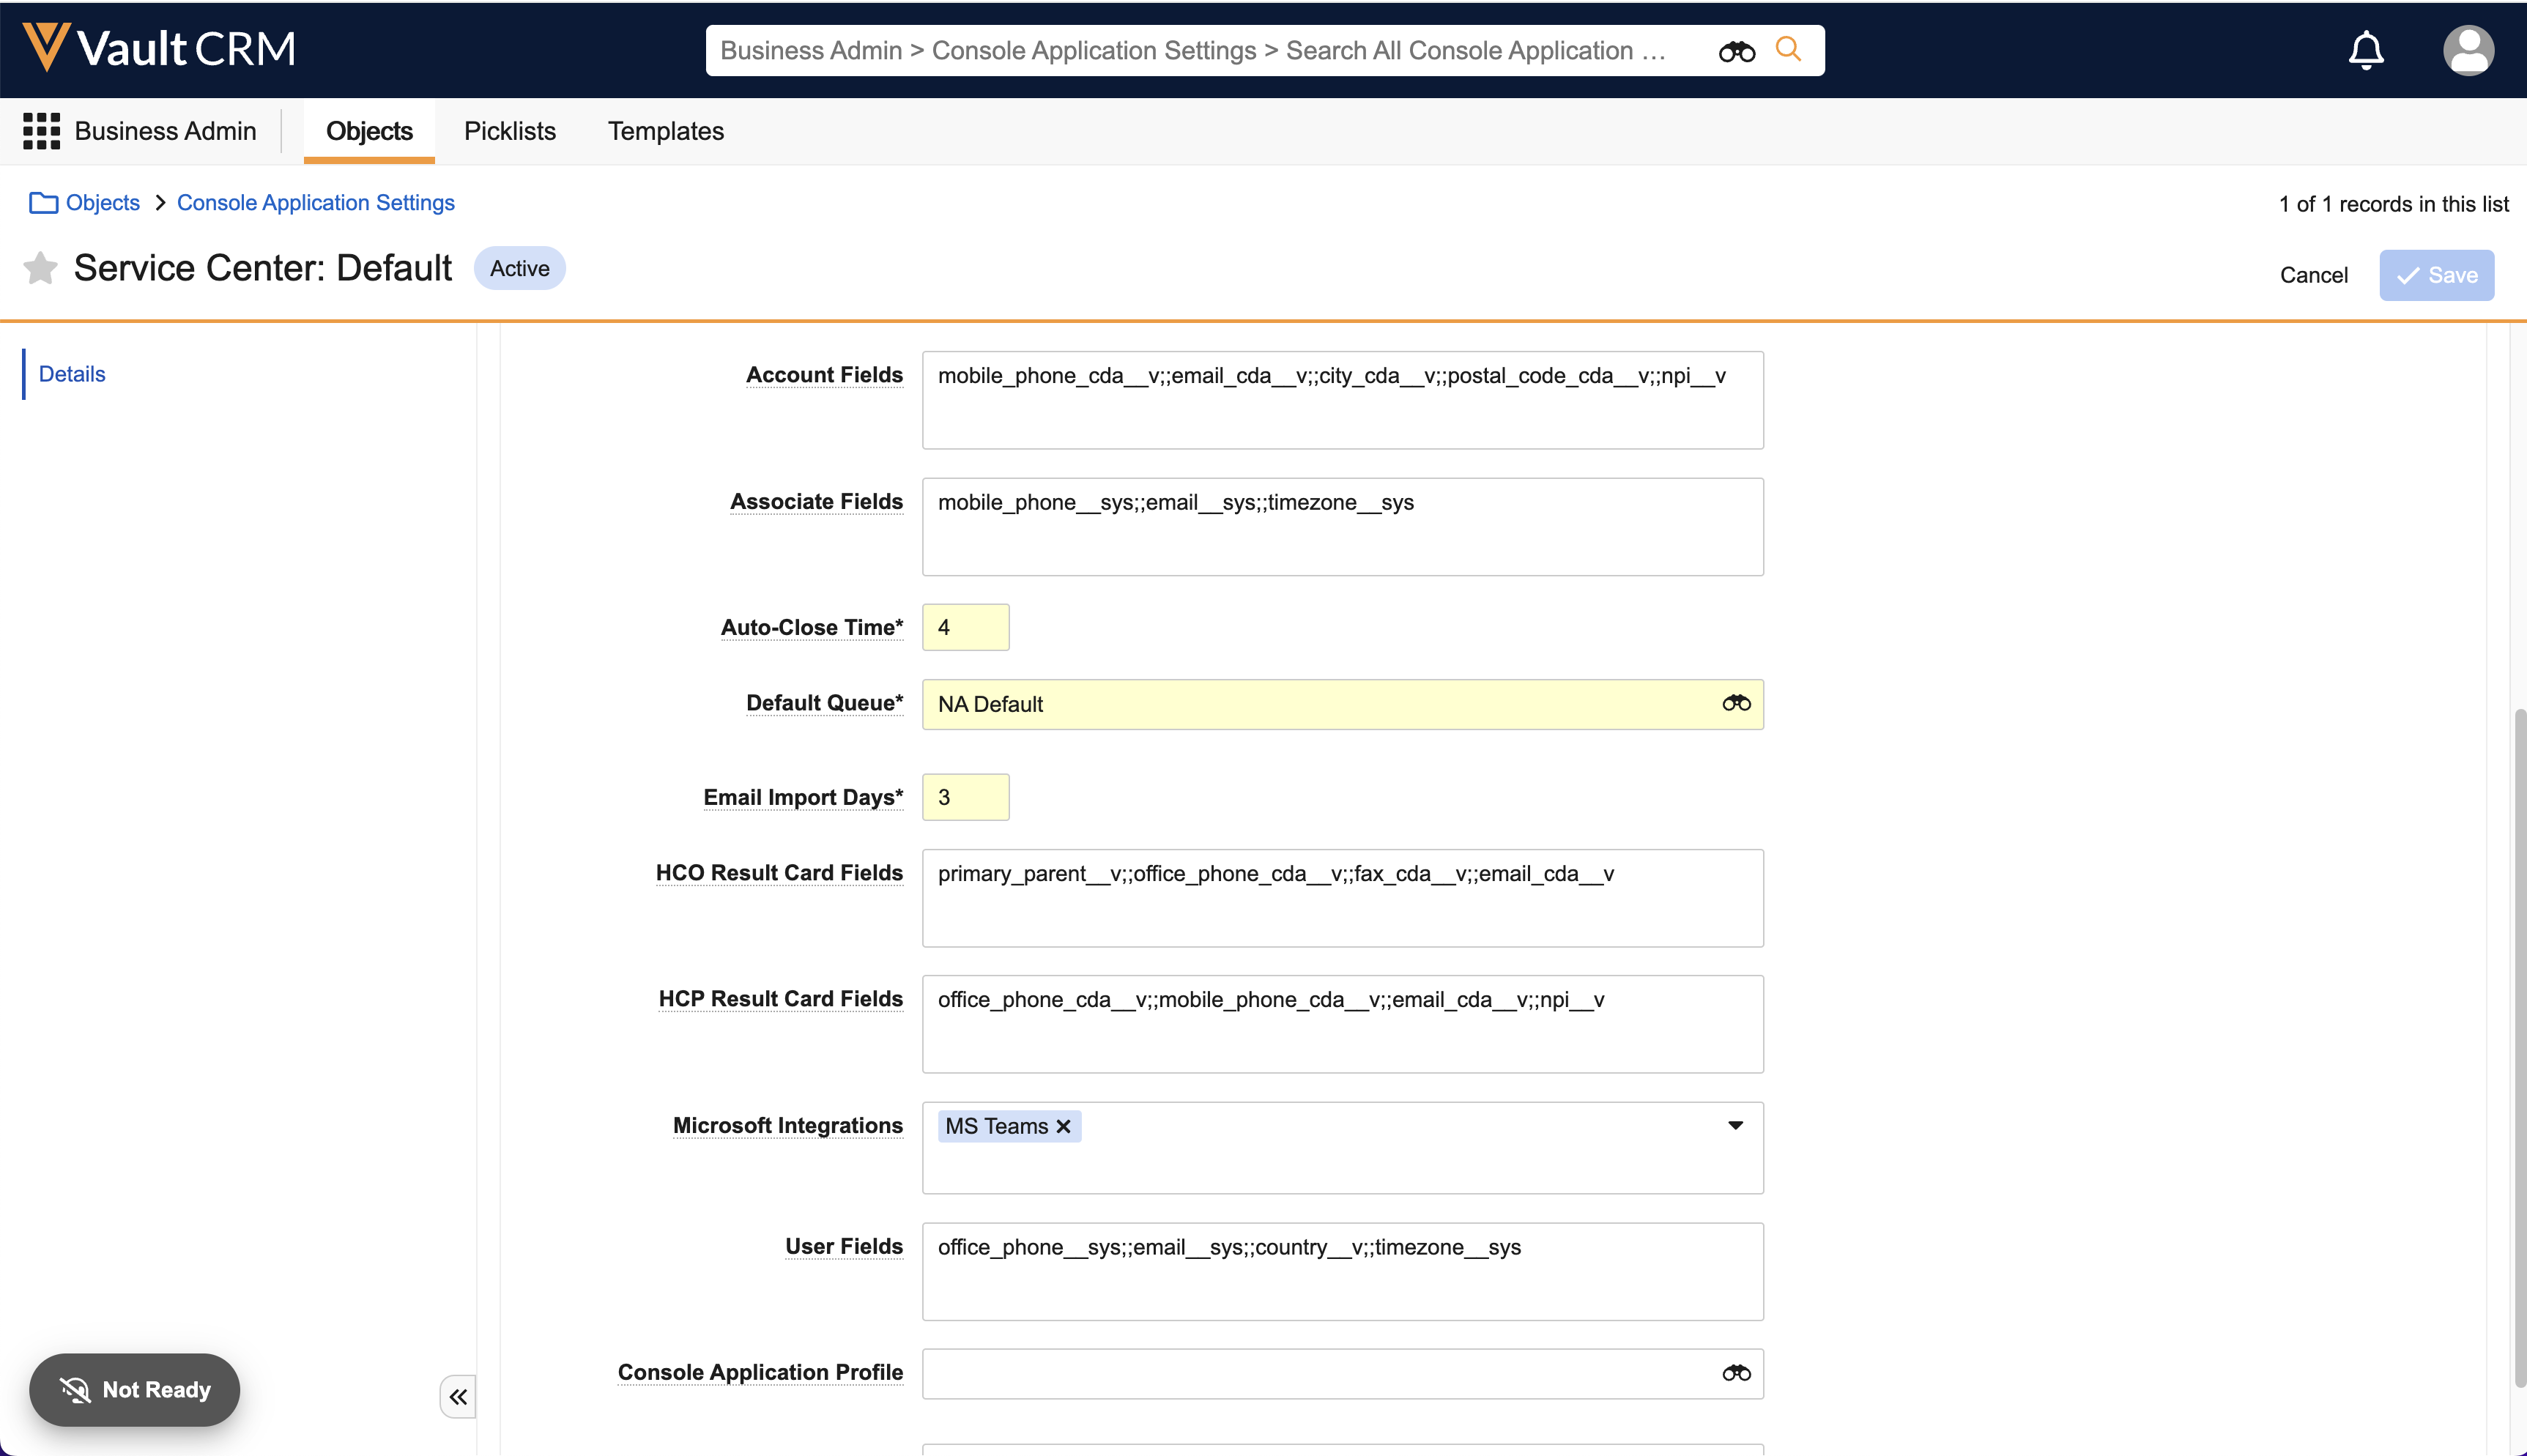
Do not populate the Console Application Profile and Console Tab Access fields on the default Console Application Settings record. These fields are only used when configuring Console Application Settings for Inbound and Outbound tabs.
Configuring the Inbound Tab
- Navigate to Admin > Configuration> Application Configurations > Application Profiles.
- Select Create
- Enter Service Center Inbound in the Label field
- Enter service_center_inbound in the Name field
- Select Save
- Ensure the Service Center Inbound application profile is assigned to users:
- Select the Users tab
- Select Add
- Select the appropriate user(s)
- Select Save
- Navigate to Business Admin > Objects.
- Select the console_application_settings__v object
- Select Create
- Create a new Service Center Console Application Settings Type:
- Enter Service Center Inbound in the Name field
- Select Service Center Inbound for the Console Application Profile
- Select Inbound for the Console Tab Access
- Select Save
Setting the Time for Moving a Case from Solved to Closed
Service Center uses states to indicate where the case is in the resolution process. Cases are designated as New after they are created. Service Center reps can move cases to Open, Pending, On Hold, Escalated, or Solved.
A Solved case automatically moves to Closed after the number of hours designated by the Business Admin.
To set the number of hours:
-
Navigate to Business Admin > Objects.
-
Select the Console Application Settings object.
-
Select the Edit icon.
-
Set the Auto-Close Time.
-
Select Save.
Then enable the batch process for moving the Solved cases to Closed:
-
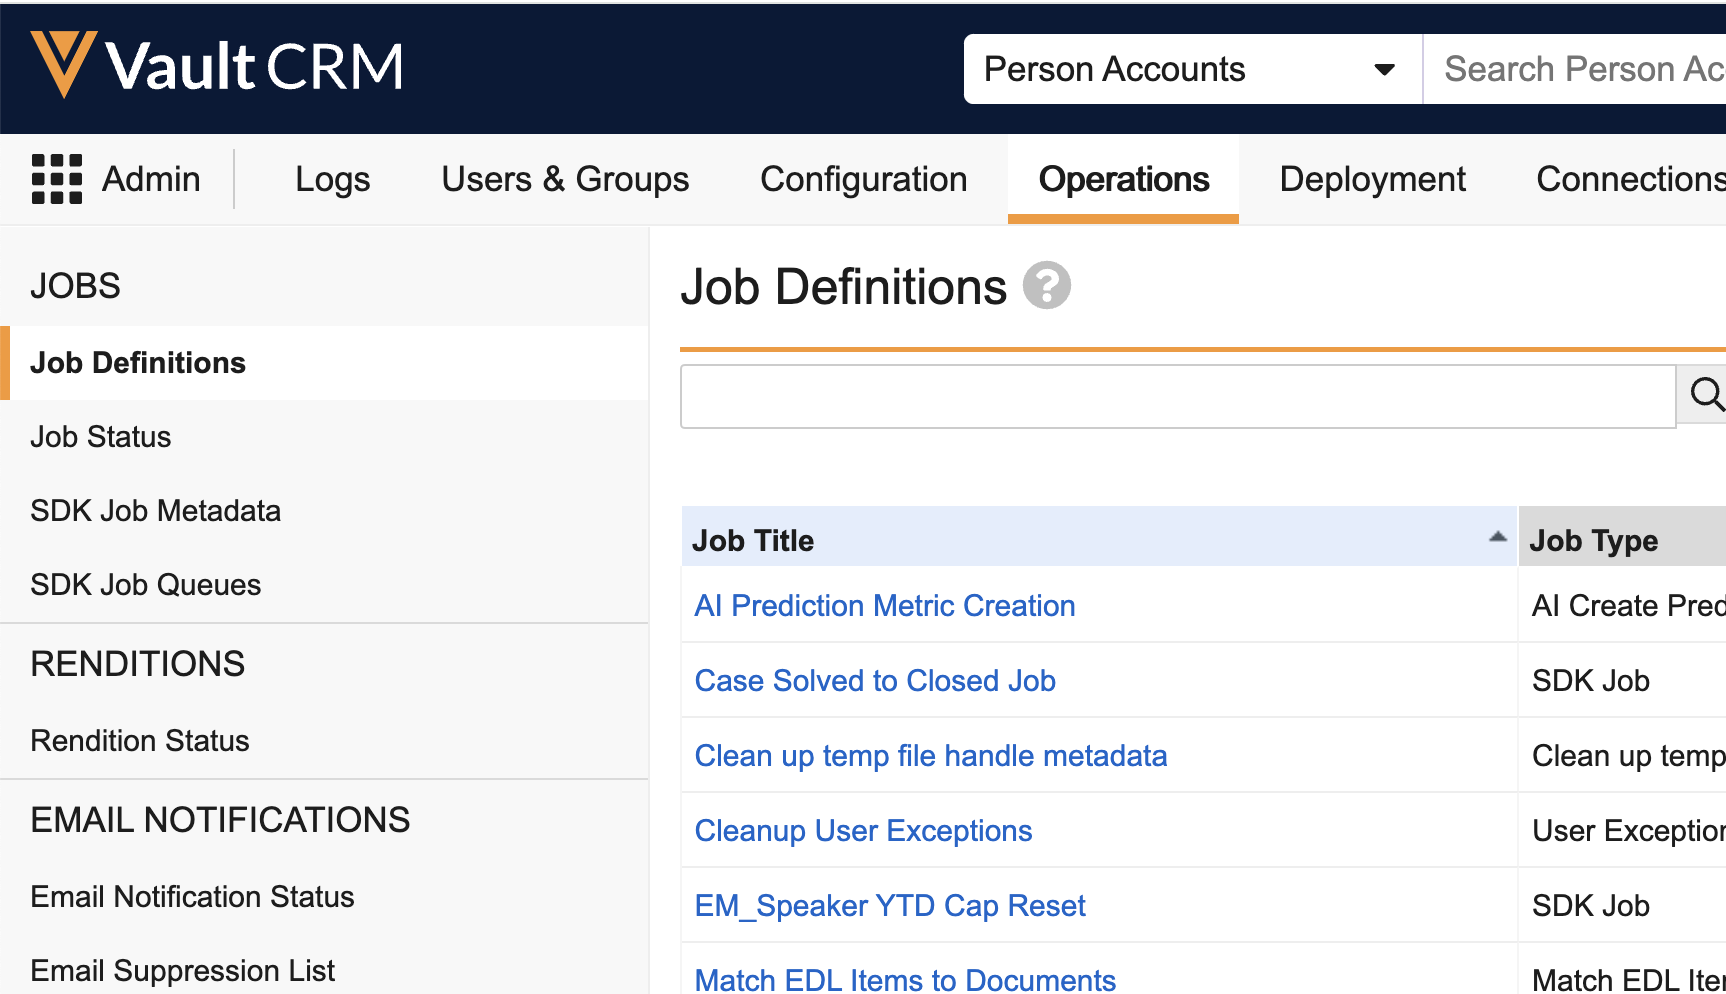
Navigate to Admin > Operations.
-
Select Case Solved to Closed Job.
-
Select Edit.

-
Set the Status to Active.
-
Select Save.
Editing Picklists
The picklist options cannot be edited for the Security and Type picklists. The Security and Type labels can be edited.
The picklist options for the case states (New, Open, Pending, On Hold, Escalated, or Solved) cannot be edited.
Configuring Service Center for
Service Center reps must have the following:
- Service Center license
- Service Center permission set
The Service Center User permission set can be applied to an existing security profile instead of the Service Center security profile if appropriate.
Refer to the Adding Users section below for details on assigning the Security Profile and license to each user.
Service Center reps must also have Read access to the fields associated with the accounts they need to view within Service Center. These permissions are not included in the Service Center permission set because they depend on how Service Center is configured for each customer. For example, if Service Center is configured to display personemail__v for each case, Service Center reps must have Read access to personemail__v.
The most common reason for cases not displaying correctly for a user is the user not having Read permission for the fields included on the case tab.
The Account Search tab displays an error if the user does not have permission on the following account__v fields:
- name__v
- ispersonaccount__v
- last_name_cda__v
Permission Set
Service Center includes a permission set containing all of the permissions required to use Service Center.
If you want to change the permissions, copy the Service Center User permission set and make your changes in the new copy.
The following permissions are included in the Service Center User permission set:
| Object Label (API) | Object Permission | Object Types | Fields | Field Permission |
|---|---|---|---|---|
| Cases (case__v) | CRE |
|
|
Edit |
| Case Comment (case_comment__v) | CRE | case_comment__v |
|
Edit |
| Conversation (case_conversation__v) | CRE |
All Object Types |
All Fields | Edit |
|
Case Note (case_note__v) |
CRE |
case_note__v |
|
Edit |
|
Case Queue (case_queue__v) |
R |
case_queue__v |
All Fields |
Read |
| Case Timeline (case_timeline__v) | R |
All Object Types |
All Fields |
Read |
| Case User Task (case_user_task__v) | CRE | case_user_task__v | All Fields | Read |
| Channel Assignment (channel_assignment__v) | R |
|
All Fields | Read |
| Channel Metrics (channel_metrics__v) | R |
|
All Fields | Read |
| Channel Usage (channel_usage__v) | R | channel_usage__v | All Fields | Read |
|
Collaboration Space Configuration (collaboration_space_configuration__v) |
R |
case__v |
All Fields |
Read |
|
Collaboration Space Resource (collaboration_space_resource__v) |
R |
|
All Fields |
Read |
|
Collaboration Resource Member (collaboration_resource_member__v) |
CRE |
n/a |
All Fields |
Read |
|
Console Application Settings |
R |
service_center__v |
|
Read |
| Dashboard (dashboard__v) | CRED | dashboard__v | All Fields | Edit |
| Domain (domain__v) | R | n/a | All Fields | Read |
| Message Node (message_node__v) | R | n/a | All Fields | Read |
|
Note Comment (note_comment__v) |
CRE |
n/a |
|
Edit |
|
Note Integration (note_integration__v) |
CRE |
onenote__v |
All Fields |
Edit |
|
Veeva Omnichannel (omniconnect_integration__v) |
R |
|
|
Read |
| Outbound Target (outbound_target__v) | CRE | account__v |
All Fields |
Edit |
| Outbound Target Activity (outbound_target_activity__v) | CRED | phone_call__v |
All Fields |
Edit |
| Outbound Target List (outbound_target_list__v) | CRE | sales__v | All Fields | Edit |
| Received Email (received_email__v) | R | service_center__v | All Fields | Read |
If you do not apply the Service Center User Permission Set, grant users Read permission to the following fields for each object defined in this document:
- created_by__vs
- created_date__v
- global_id__sys
- id
- modified_by__v
- link__sys
- name__v
- status__v
Service Center user access to Accounts and Account Types is managed in Vault CRM (through Territories and Permissions).
Security Profile
For ease of configuration, a Service Center User security profile is included with Service Center. The Service Center User security profile contains the Service Center User permission set.
The Service Center User permission set can be applied to an existing security profile instead of to the Service Center security profile if appropriate.
Adding Users
Decide which Service Center reps should use Service Center. Add them to the Vault as described in Creating and Managing Users.
Complete the following steps for each Service Center Rep:
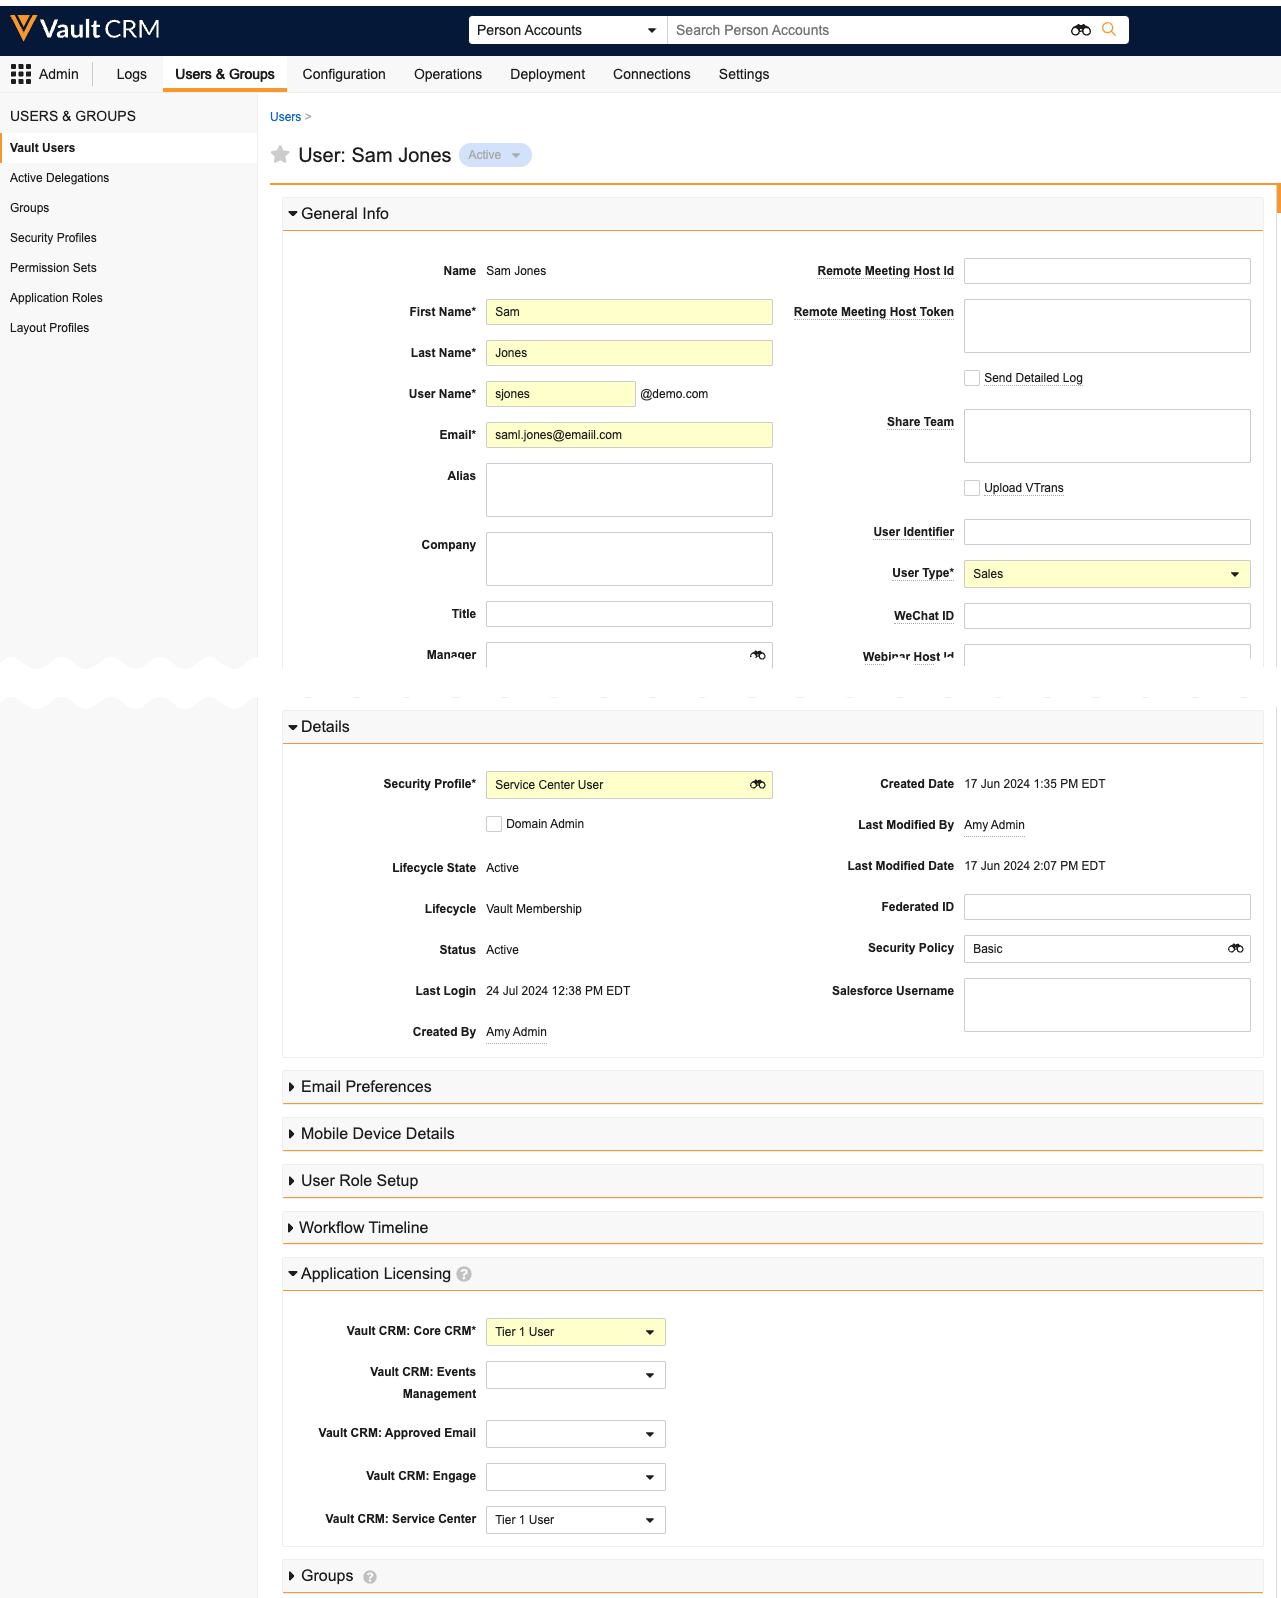
- Navigate to Admin > Users & Groups > Vault Users.
- Select a user.
- Select the Edit icon.
-
Select Sales in the User Type field.
-
Select Service Center User in the Security Profile field.
-
Select the user’s license type in the Vault CRM: Service Center field.
-
Select Save.
Configuring Case Queues for
In Contact Center as a Service (CCaaS) telephony applications, queues are used to route incoming calls to Service Center reps with the appropriate training to handle the call. For example, calls regarding a specific product can be routed to Service Center reps with expertise in that product.
Because Service Center assigns the associated queue to cases created from a call, each telephony queue must be connected to a corresponding Case Queue in Service Center.
One default queue is associated with the Console Application Settings object. If multiple queues are configured in an organization’s CCaaS application, admins must create a corresponding record for each of those queues in Service Center.
Console Application Settings records must have a value for the default queue. If you delete the Default queue record, update Console Application Settings records to reference a different queue record.
Complete the following steps for each additional queue:
-
Navigate to Business Admin > Objects.
-
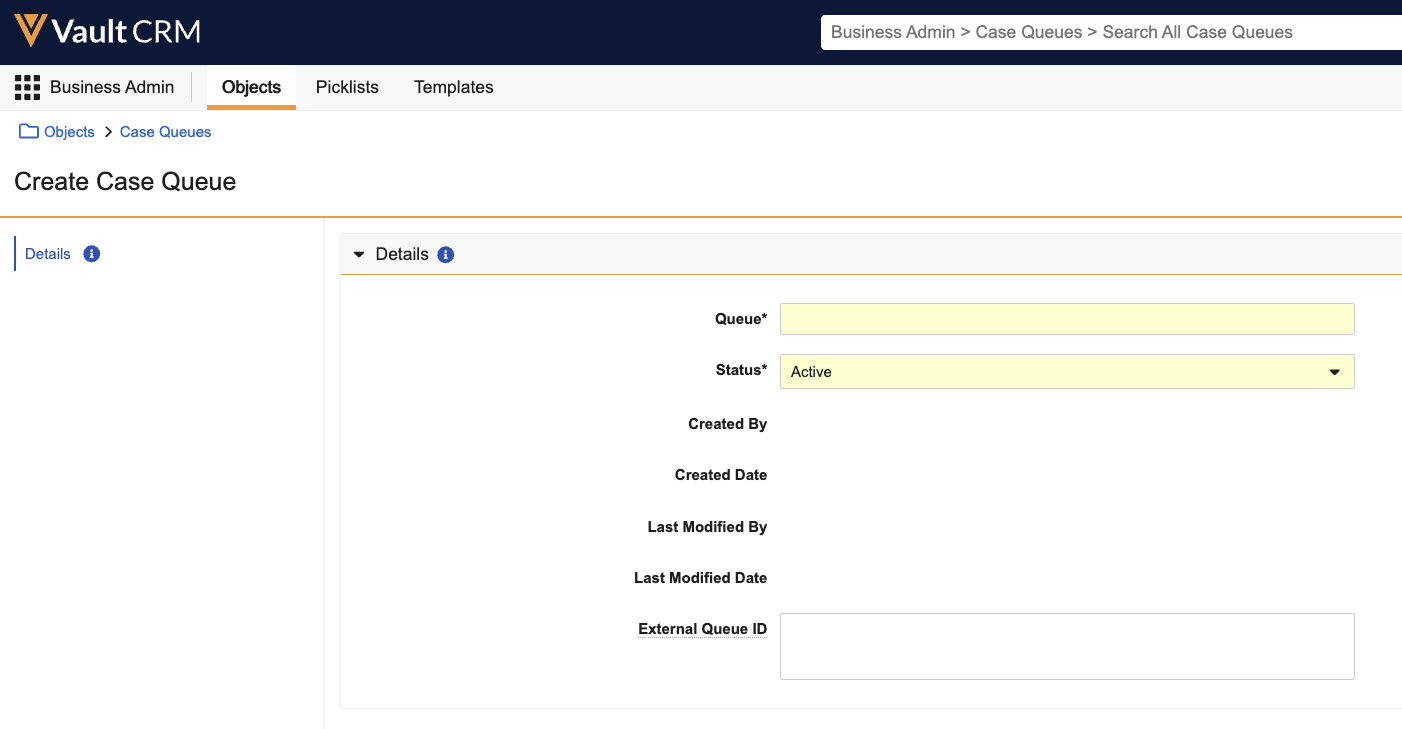
Select the Case Queues object.
-
Select + Create.
-
Enter a name in the Queue field.
-
Change the Status to Inactive if the queue should not currently be available for use (optional). The Status is set to Active by default.
-
Enter the External Queue ID. For example, the External Queue ID for Amazon Connect queues is the Amazon Resource Number found in the Queue configuration on the Amazon Connect platform. Refer to the appropriate telephony provider's documentation for additional details.
The External Queue ID must exactly match the corresponding value in the external application.
-
Select Save.
Configuring Case Layouts for
Admins can configure Case layouts to customize the case information displayed to Service Center reps. These layouts determine the information displayed when users view a full case, for example, when viewing a case or when viewing full case details from the center pane of the Service Center console.
To configure case layouts:
-
Navigate to Admin > Configuration > Objects > case__v.
-
Select the Layouts tab.
-
Select the case_detail_page_layout__c layout.
-
Add, remove, or reorder the appropriate fields.
-
Select Save.
For more information on layouts, see Supporting Layouts in Vault CRM or see Configuring Object Layouts on the Vault platform help site.

