Configuring Accounts
If users are unable to access record detail pages, verify the country__v field on the user's user__sys object is populated. The country__v field is required for all users.
The Accounts module incorporates objects covering account creation, modification, and tracking.
Account Details
- account__v – The initial object for creating and working with an account
- address__v – This object stores all addresses for account profiles. It also stores physicians’ DEA and state license information.
- affiliation__v – This object stores affiliations between person accounts and business accounts visualized in the Sphere of Influence module
- child_account__v - This object stores the hierarchy relations between person accounts and business accounts in a Parent-Child, HCO-HCO, or HCO-HCP manner. These relationships are displayed in the Account Hierarchy.
Account Territory Management
- tsf__v – This object stores territory-specific fields for an account
Account Change Management
- data_change_request__v – This object stores information for the data change request header
- data_change_request_line__v – This object stores information for data change request lines
- dcr_field_type__v – This object indicates DCR-controlled fields and which changes need to be sent to Veeva Network
My Accounts
- account_list__v – This object stores a list of accounts
- account_list_item__v – This object’s records represent individual accounts in lists on the account_list__v object
- view__v - This object stores information about Account Views
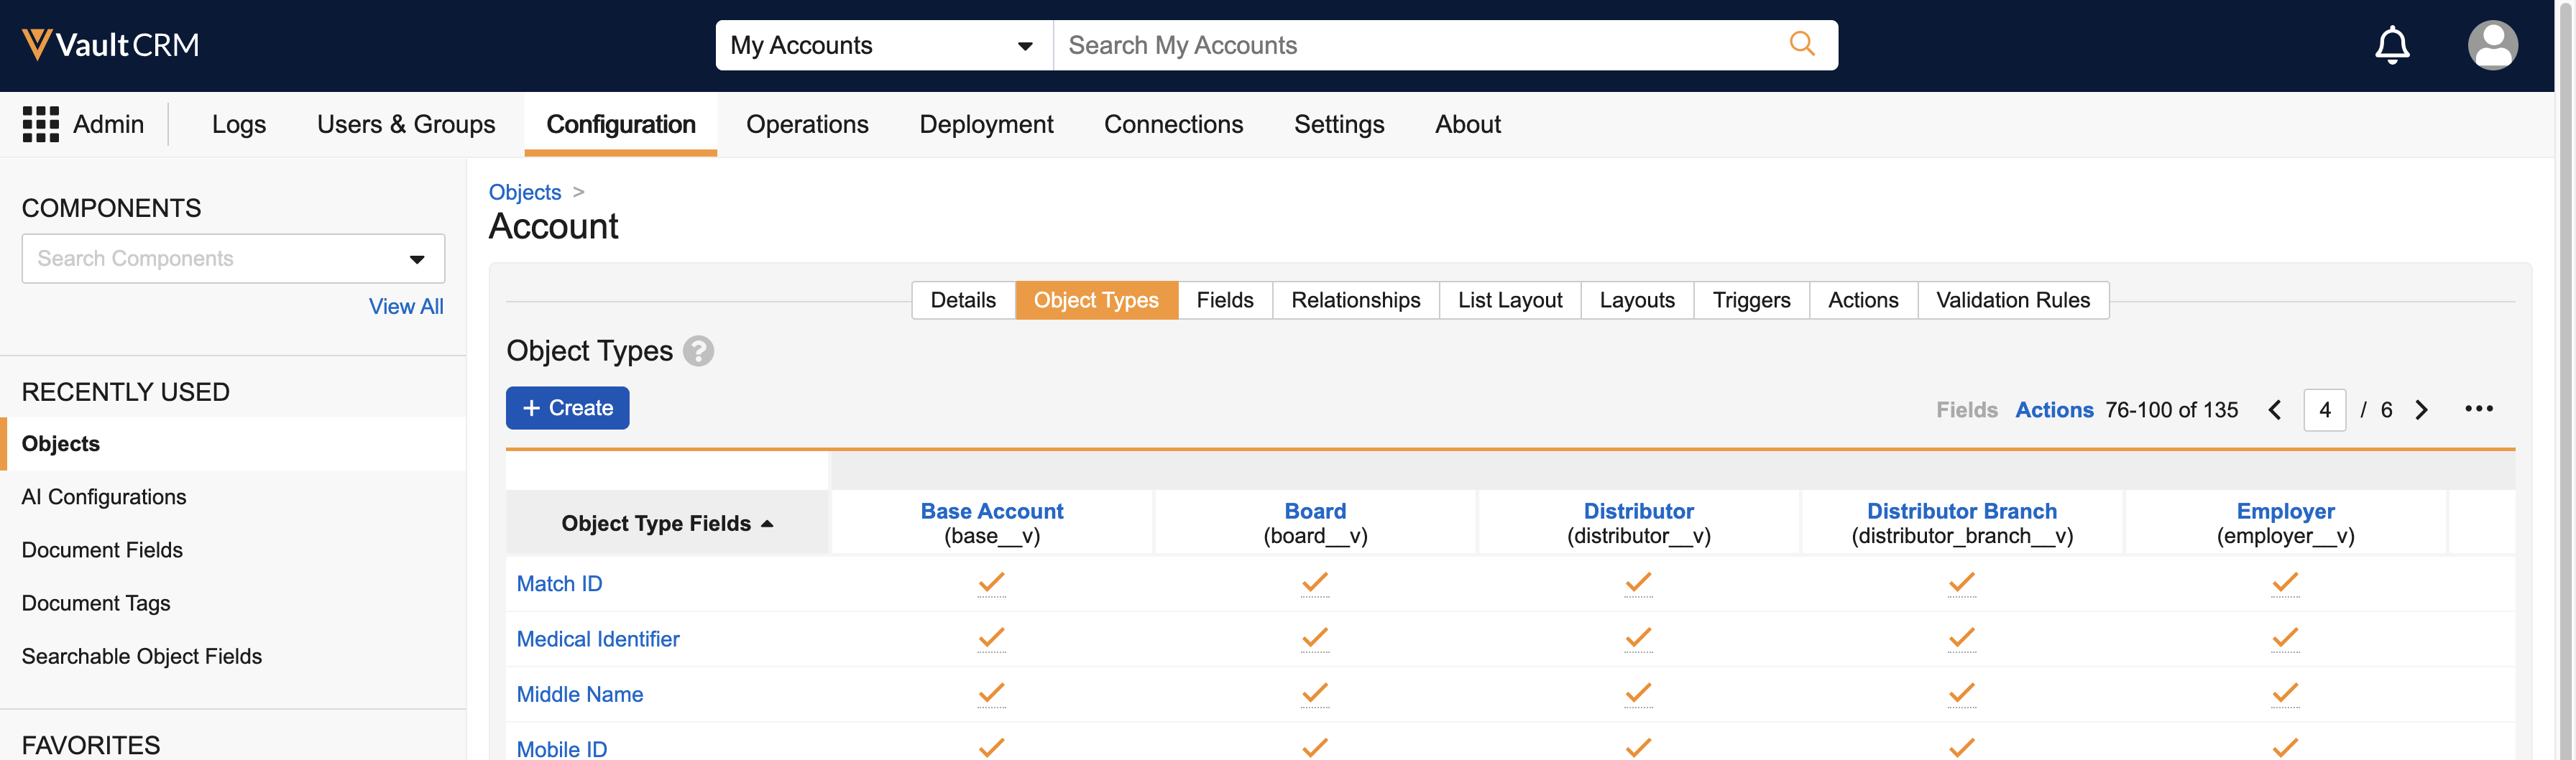
Accounts Object Types
Object types are used on the Accounts object.
The table below contains the standard Veeva object types and their respective icons.
|
Standard Object Types |
iOS Icon |
Browser Icon |
|---|---|---|
|
board__v |
|
|
|
business_professional__v |
|
|
| distributor__v distributor_branch__v |
|
|
|
employer__v |
|
|
|
extended_care__v |
|
|
|
Generic Business |
|
|
| Generic Person |
|
|
|
government_agency__v |
|
|
|
hospital__v |
|
|
|
hospital_department__v |
|
|
|
institution__v |
|
|
|
kol__v |
|
|
|
laboratory__v |
|
|
|
mco_plan__v mco__v |
|
|
|
organization__v |
|
|
|
pharmacy__v |
|
|
|
practice__v |
|
|
|
professional__v |
|
|
|
publication__v |
|
|
|
wholesaler__v |
|
|


Account object types must have unique translated labels. If a Vault contains two or more account object types with the same translated label, they may not all display in the New Account Wizard.
For information on mapping standard account object type icons to custom object types, see Assigning Account Icons to Custom Object Types.
Configuring Accounts for
To configure this feature:
- Verify established territories exist. Displaying My Accounts requires an established Territory Hierarchy with users and accounts assigned to territories.
- Navigate to Admin > Users & Groups > Permission Sets.
- Select the appropriate permission set.
- Navigate to Objects.
- Grant the following permissions:
Object Object Permission Object Types Fields Field Permission account__v
CRED
All object types
account_class__v
account_group__v
account_identifier__v
account_search_business__v
account_search_firstlast__v
account_search_lastfirst__v
alternate_name__v
approved_email_opt_type__v
business_professional_person__v
call_reminder__v
career_status__v
clm_opt_type__v
color__v
country__v
country_code__v
credentials__v
customer_master_status__v
default_inventory_monitoring_type__v
default_order_type__v
do_not_call__v
do_not_create_child_account__v
do_not_sync_sales_data__v
enable_restricted_products__v
exclude_from_zip_to_terr_processing__v
external_id__v
formatted_name__v
furigana__v
gender__v
hospital_type__v
id__v
id2__v
inventory_monitoring_type__v
investigator_cda__v
kol_cda__v
language__v
master_align_id__v
matchid__v
me__v
middle_name_cda__v
national_company_id__v
nhid_cda__v
no_orders__v
npi__v
order_type__v
- ownerid__v
payer_id__v
pdrp_opt_out__v
pdrp_opt_out_date__v
photo__v
practice_at_hospital__v
practice_near_hospital__v
preferred_name__v
restricted_products__v
- salutation__v
sample_default__v
segmentations__v
speaker_cda__v
specialty_1__v
group_specialty_1__v
group_specialty_2__v
specialty_2__v
spend_amount__c
spend_status__v
spend_status_value__v
status_cda__v
suffix_cda__v
target_cda__v
- to_account__v
type__v
vl_link__v
vl_url__v
Read
mobile_id__v
primary_parent__v
territory_test__v
Edit
account_list__v CRED n/a n/a n/a account_list_item__v
CRED
n/a
n/a
n/a
account_overview_layout__v
R
n/a
n/a
n/a
address__v
CRE
All object types
- account__v
- street_address_2_cda__v
- appt_required__v
- billing_cda__v
- brick__v
- business_cda__v
- city_cda__v
- comment__v
- controlled_address__v
- controlling_address__v
- country__v
- created_date__v
- customer_master_status__v
- entity_reference_id__v
- external_id__v
- fax_cda__v
- fax_2__v
- home_cda__v
- inactive__v
- include_in_territory_assignment__v
- latitude_cda__v
- license__v
- license_expiration_date__v
- license_status__v
- license_valid_to_sample__v
- lock__v
- longitude_cda__v
- mailing__v
- map__v
- master_align_id__v
- mobile_id__v
- network_cds_entity_id__v
- network_dea_entity_id__v
- network_distributor_entity_id__v
- network_license_entity_id__v
- network_rxa_eligible__v
- no_address_copy__v
- office_notes__v
- phone_cda__v
- phone_2__v
- network_comp_sample_eligibility__v
- sample_send_status__v
- sample_status__v
- shipping_cda__v
- source__v
- staff_notes__v
- state__v
- zip_4__v
Read
- best_times__v
- primary_cda__v
Edit
address_coordinates__v
CRED
ios__v
- address__v
- geocode_fail__v
- last_geocode_date__v
- latitude__v
- longitude__v
- user_detail__v
Edit
affiliation__v
CRE
n/a
- role__v
- to_account_name__v
- to_account_record_type__v
Read
child_account__v
CRED
n/a
- alternate_name__v
- best_times__v
- child_account__v
- child_account_identifier__v
- child_account_search_lastfirst__v
- child_affiliation_count__v
- child_name__v
- child_record_type__v
- copy_address__v
- customer_master_status__v
- external_id__v
- external_key__v
- hierarchy_type__v
- location_identifier__v
- mobile_id__v
- network_primary__v
- parent_account__v
- parent_account_identifier__v
- parent_affiliation_count__v
- parent_child_formatted_name__v
- parent_child_name__v
- parent_name__v
- parent_record_type__v
- primary__v
Read
preferences__v
RED
n/a
- last_account_type__v
- last_account_view_used__v
- last_view_used__v
Read
product_metrics__v
at least R
n/a
n/a
n/a
territory__v R n/a n/a n/a tsf__v
at least CRE
All object types
Should match the object types for the account__v object
- territory__v
- territory_name__v
Read
- external_id__v
- territory__v
Edit user__sys
R
n/a
application_profile__v
Read
user_territory__v
R
n/a
- territory__v
- user__v
Read
view__v
CRED
n/a
n/a
n/a
vmobile_object_configuration__v
R
n/a
security_profile__v
Read
- Navigate to Pages.
- Grant View access to the following pages:
- My Accounts
- View
- Navigate to Tabs.
- Grant View access to the My Accounts tab.
- Navigate to Business Admin > Objects > Veeva Settings.
- Populate the Person Account Object Types Veeva Setting by selecting the account__v object types corresponding to person accounts. For example, Person Account, Professional, KOL.
Layout
For users managing the account hierarchy, add the Members or Member Of related list to the corresponding Account or PersonAccount layouts.
Veeva Messages
Enter a comma-delimited list of column names in the ACCOUNT_LIST_COLS Veeva Message to display different account, address, or TSF-related information for each account in an account list. Use the following format: Object_API_Name.Field_API_Name.
For example, account__v.name__v,address__v.name__v,address__v.city_cda__v
To add a column to the account list, include the column name in the ACCOUNT_LIST_COLS Veeva Message. Verify users have at least read field permission to all of the fields defined in the ACCOUNT_LIST_COLS Veeva Message.
If the ACCOUNT_LISTS_COLS Veeva Setting does not point to the ACCOUNT_LIST_COLS Veeva Message, either update the Veeva Setting to point to the Veeva Message, or enter columns in the Veeva Setting.
VMOCs
Ensure VMOCs are activated for all objects in the permissions table above (except vmobile_object_configuration__v).
Creating Custom Account Object Types
In addition to the standard object types, admins can create custom object types for accounts to tailor the data model and user experience to specific business needs. Consider the following information when creating custom account object types.
Configuring Product Metrics for Custom Account Object Types
If you create new object types, add them to the applies_to__v picklist on the metric_configuration__v object so users can apply Product Metrics to accounts with the new object type. For more information on updating the applies_to__v picklist, see Using Product Metrics with Detail Groups and Topics.
Configuring Territory Field Layouts for Custom Account Object Types
If you add a custom account type, you should also create a custom TSF object type. For more information, see Defining Territory Field Layouts by Account Type.
Mapping Icons to Custom Account Object Types
To provide a visual identifier for custom account object types, admins can map standard account icons to custom account object types.
To map a standard account icon to a custom account object type, populate the account_record_type_icon_map__v Veeva Setting with a semicolon-delimited string in the following format:
<standard_type_1>:<custom_type_a>,<custom_type_b>;<standard_type_2>:<custom_type_c>,<custom_type_d>
- <standard_type> is the name of one of the standard Veeva object types.
- <custom_type> is the label of the custom object type to map to the standard object type
- To map one standard icon to multiple custom object types, separate the custom object type names with commas. For example, professional:mycustom1,mycustom2;hospital:mycustom3
- Separate icon mapping lists with a semicolon. For example, professional__v:mycustom1,mycustom2;hospital__v:mycustom3
Configuring a Data Source for Custom Object Types
Admins must configure data_source__v field for all custom object types. For more information, see Record Data Sources for Account, Child Account, and Address.
Configuring Custom Object Types for Match ID Stamping
To allow Match ID Stamping in Vault CRM on custom object types:
-
Navigate to Admin > Configuration > Objects > account__v.
-
Select the Object Types tab.
-
Select Edit Object Type Fields.
-
Navigate to the page containing the Match ID field.
-
Select the Match ID checkbox for all custom object types.
-
Select Save.
-
Create and assign a User Role to the Core CRM System User to grant Edit permission to the custom object types. This allows the Match ID value to be updated. The permissions provided in the User Role are additive with the permissions from the Core CRM Integration Security Profile.
The Core CRM System User is assigned to the Core CRM Integration Security Profile, which uses the standard Core CRM Permission Set that Admins cannot modify.
To create and assign a User Role to the Core CRM System User, do the following:
- Ensure a Permission Set exists that grants Edit access to each custom Account object type. To create a new Permission Set:
- Navigate to Admin > Users & Groups > Permission Sets
- Select Create
- Enter a Name for the permission set. For example, Accounts Custom Object Type Permissions.
- Select Save
- Select Objects Tab > Accounts
- Select Edit
- Grant Edit access to all custom object types on the account object
- Select Save
- Create an Application Role:
- Select Admin > Users & Groups > Application Roles
- Select Create
- Enter a Label
- Enter a Name
- Select the appropriate Permission Set
- Select Save
- Add a related object section for the User Role object to the User object detail layout
- Add the appropriate User Role to the Core CRM User:
- Navigate to the Core CRM User detail page
- Find the User Role related object section
- Select the Add button
- Select the Application Role created above
- Select OK

Configuring Custom Sharing Rules for Match ID Stamping
If Custom Sharing Rules are configured on the account object, the Core CRM System User must be provided access to update all Account records for Match ID Stamping.
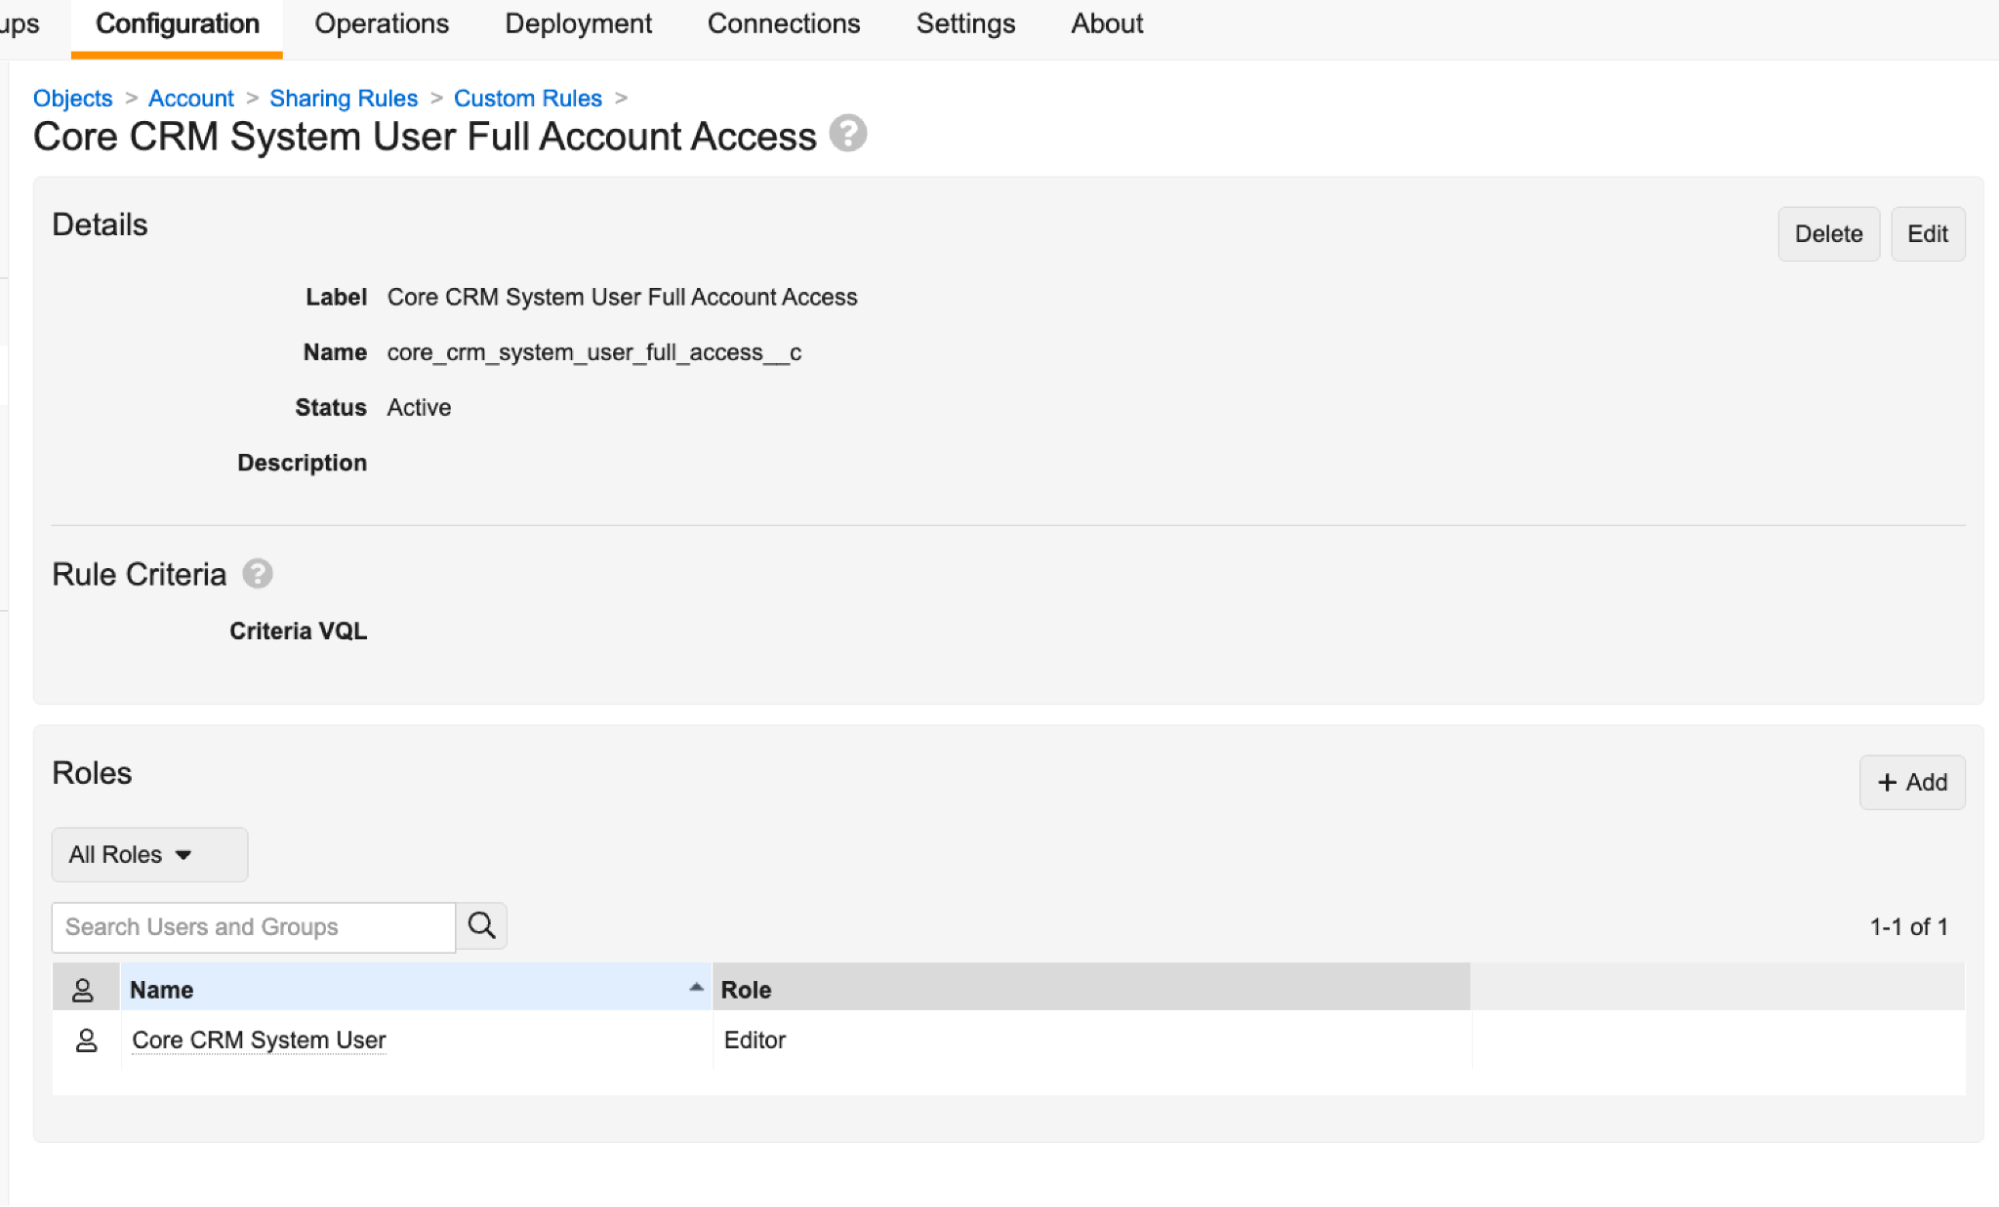
If a Custom Sharing Rule does not exist, Admins must create a Custom Sharing Rule. To create and assign a Custom Sharing Rule:
-
Create a Custom Sharing Rule for the Core CRM User:
- Navigate to Admin > Configuration > Objects > account__v > Sharing Rules tab
- Select Create
- Create the new sharing rule using the information below:
Attribute Value Label Core CRM System User Full Account Access Name
core_crm_system_user_full_access__c
Active
True
Criteria
Role
Editor
Members
User.application-core_crm_int@<insert_customer_vault_domain>.com * Criteria should not have a populated Value
-
Assign the Core System User to the Custom Sharing Rule:
-
System users cannot be manually assigned through the UI. Instead, admins must run MDL using the Vault Postman Collection:
Using the Execute MDL Script Post action execute the following MDL. Be sure to replace the placeholder text with the appropriate vault domain.
CopyRECREATE Sharingrule core_crm_system_user_full_access__c (
label('Core CRM System User Full Account Access'),
active(true),
object('account__v'),
criteria([]),
Sharingrole editor__v (
members('User.application-core_crm_int@<insert_customer_vault_domain>.com')
)
); -
Admins can verify the Core System User is assigned to the correct Editor Role by viewing the Roles section of the Custom Sharing Rule:
-

