Managing Calls in Agenda View
My Schedule’s Agenda View enables users to view and schedule calls and other entries one day at a time.
Who can use this feature?
- End Users — iPad, iPhone, Windows
- Managing Calls in Agenda View
- Users do not require an additional license
Configuring Agenda View for
To configure this feature, ensure Configuring Call Planning is complete.
Managing Calls in Agenda View as
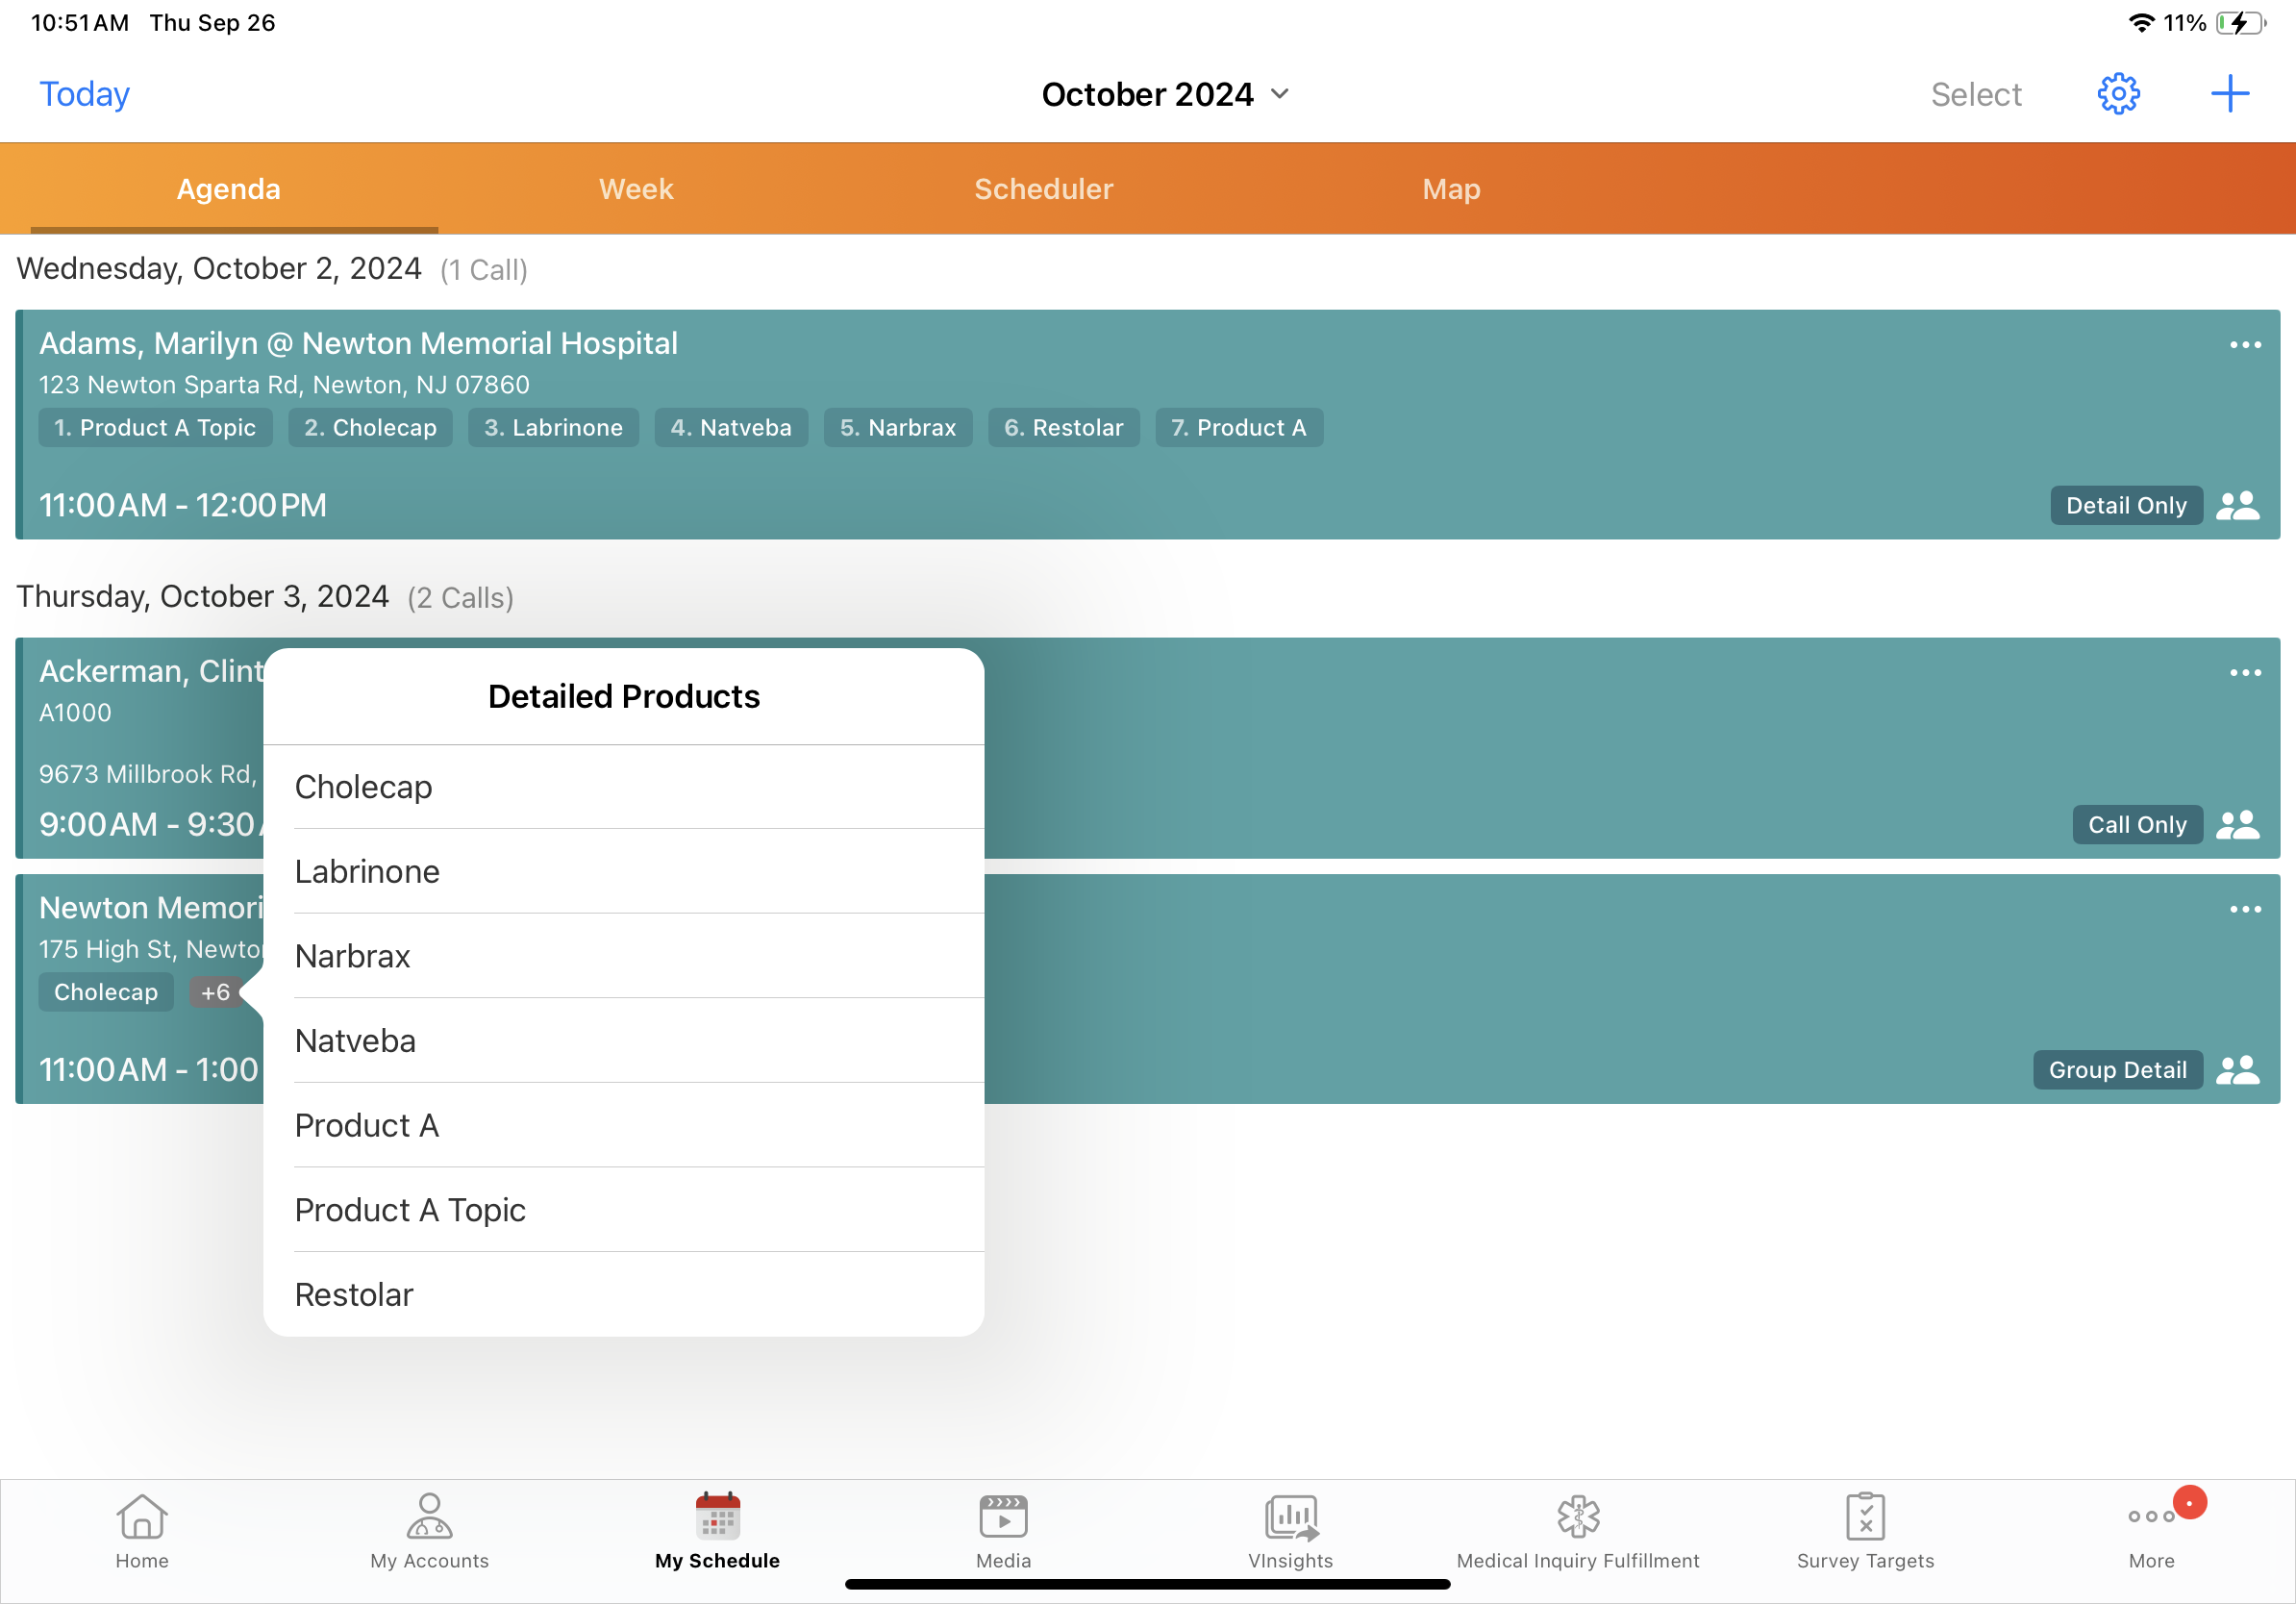
Each call entry type displays pertinent information about the call—for example, call type, detailed products, account identifier, and call address. Users can select from context sensitive actions for each call: viewing, editing, or deleting the call, viewing the account summary, or launching CLM.
To edit or delete calls, users either select the All Actions button, or select and hold the call entry, to display the context menu.
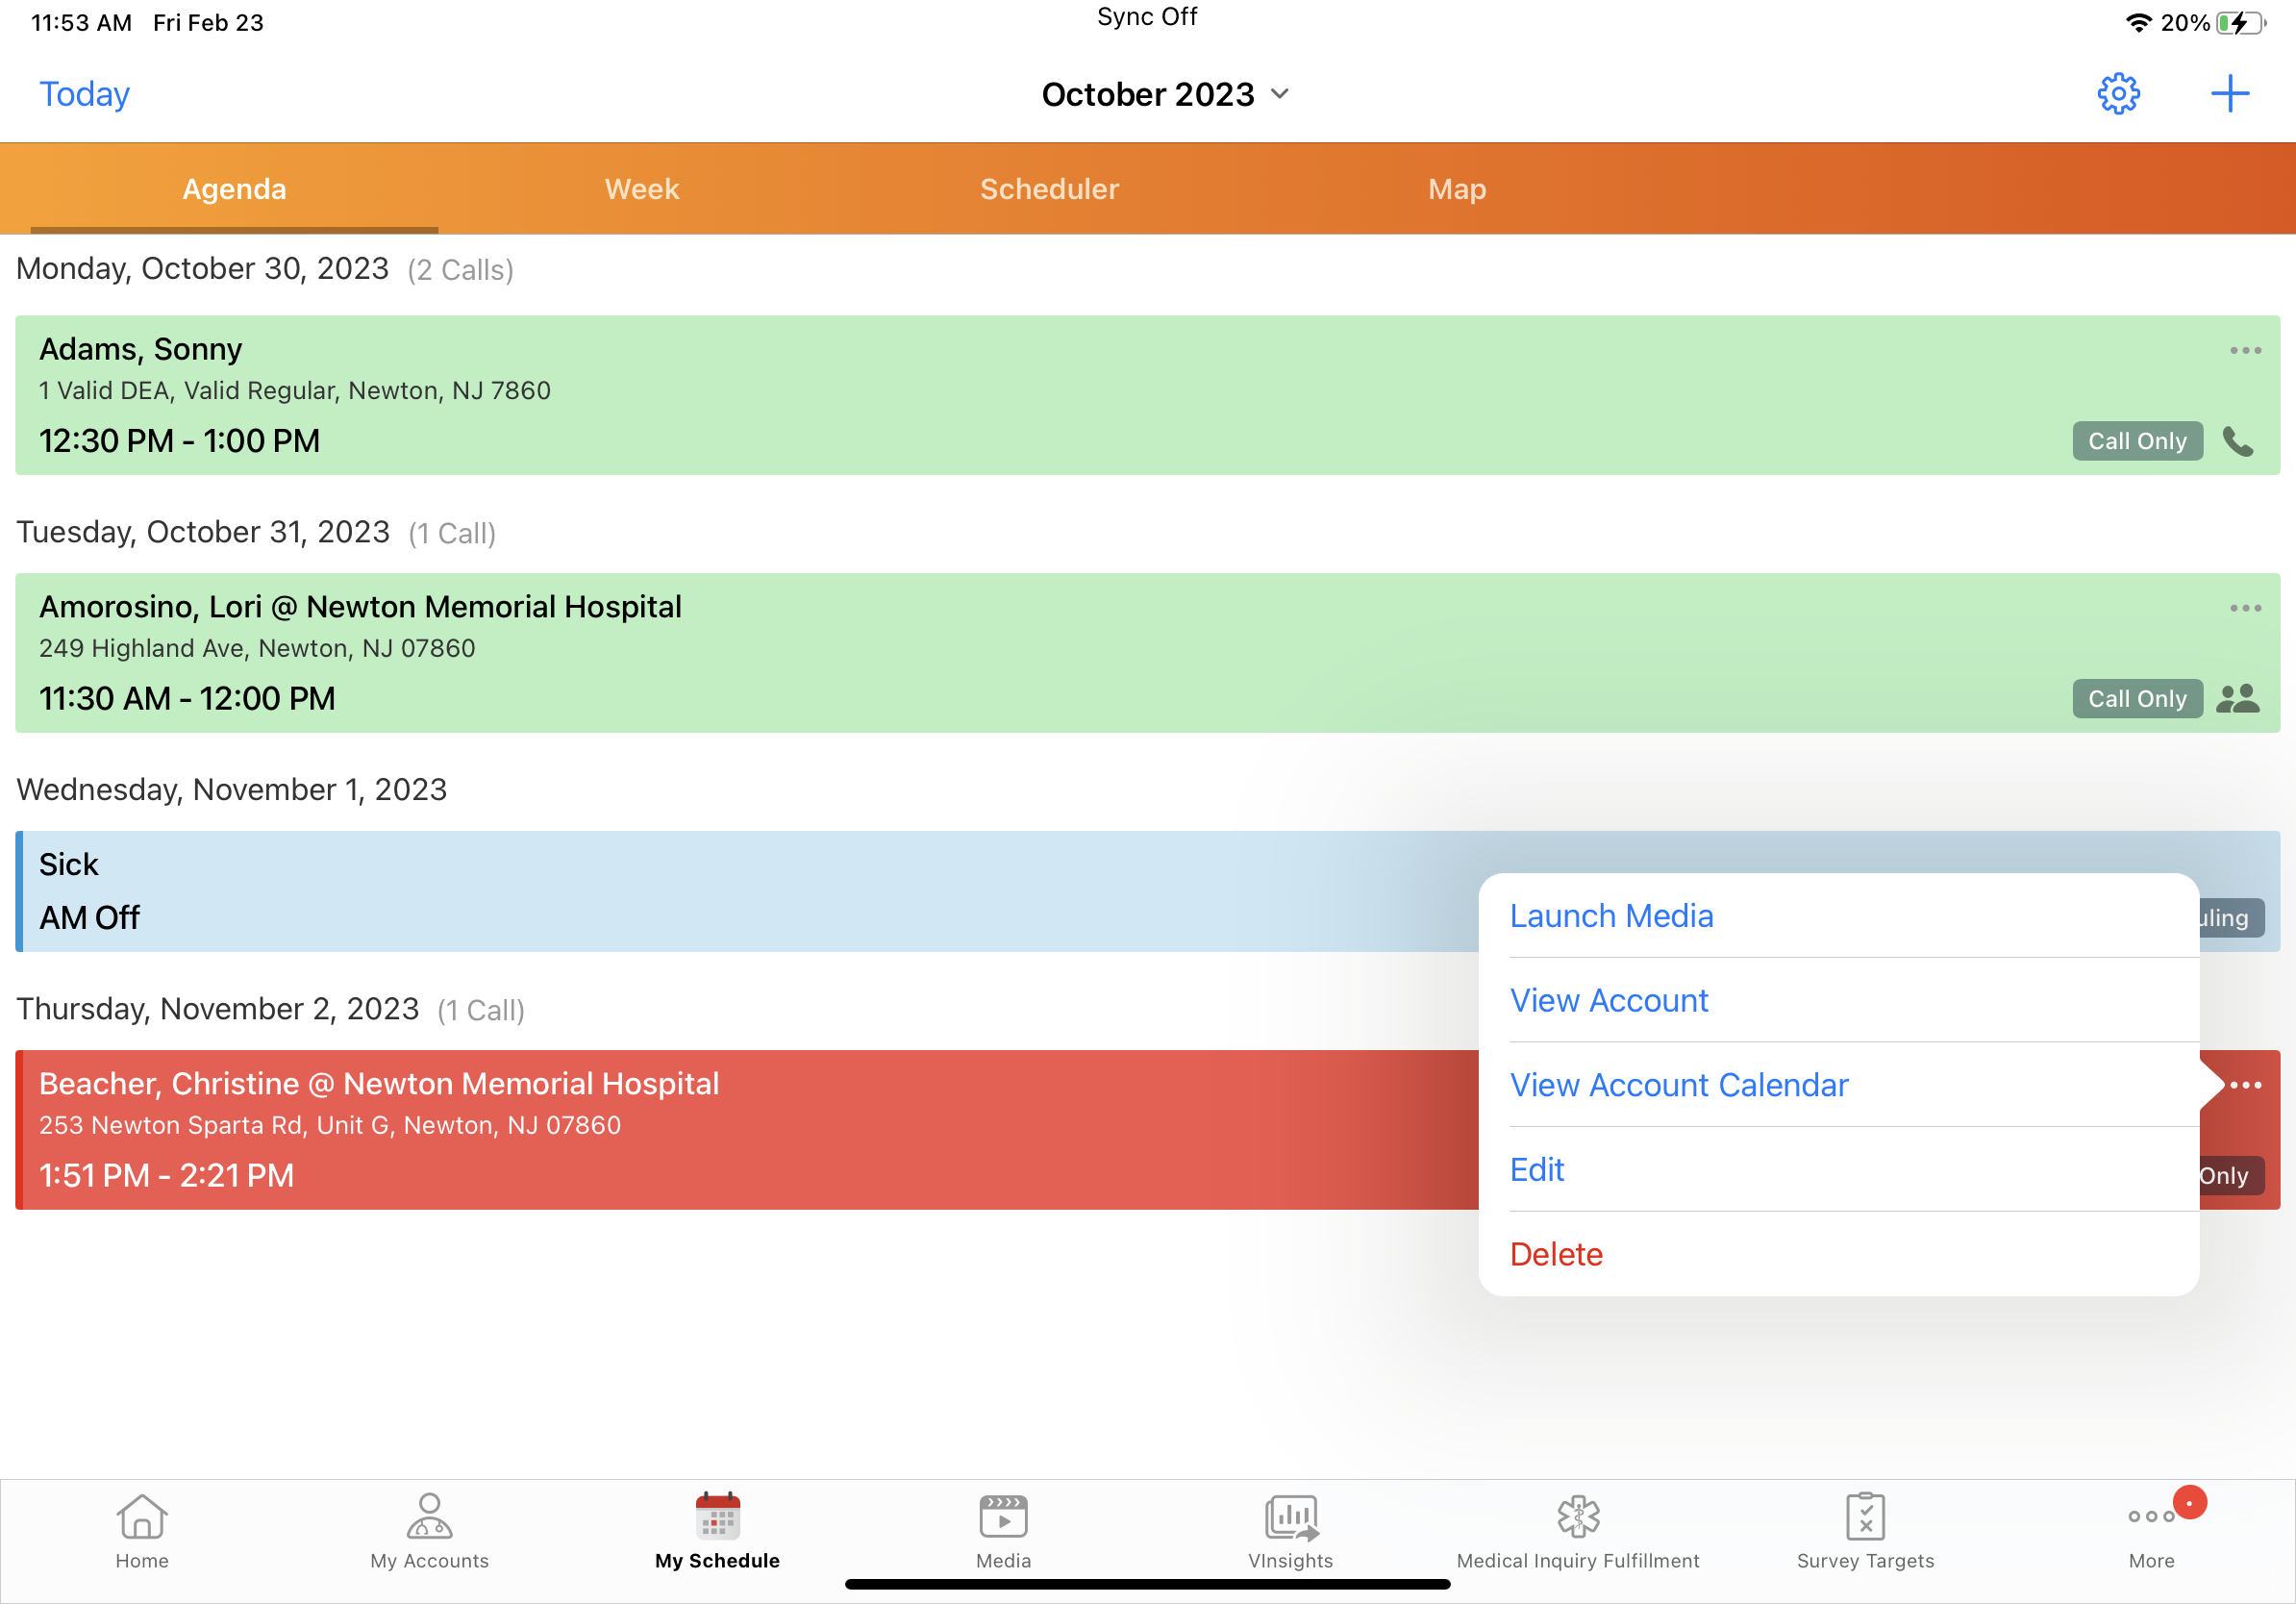
If CLM is enabled, select Launch Media from the All Actions menu to begin a CLM presentation.
If there are several detail products on the call report, a plus icon displays next to the list of detailed products on the call entry. Select the plus icon to view the full list of detailed products.
- For standard group calls, the text Detailing Priority displays at the top of the detailing priority list
- For unique activity group calls, the text Detailed Products displays at the top of the detailing priority list