Managing Expense Headers and Expense Lines
As an event accrues expenses, event organizers can create expense headers and expense lines that attribute the expense to one or more participants. Additionally, based on the type of expense, end users can quickly attribute the expense to a single attendee, speaker, or team member, called a payment expense, or divided equally across multiple participants, called a split expense. This enables end users to create and record different types of expenses, based on business and compliance requirements.
When an event is closed or canceled, actual values replace any estimate and committed values in the em_event_budget__v record, which then updates any related em_budget__v records.
Who can use this feature?
- Business Admin Users - Browser
- Enabling or Disabling the Split Expense Selector
- Defining the Expense Line’s Object Type
- End Users - Browser, iPad
- Creating Expense Headers and Lines
- Users require an Events Management License
Configuring Expense Headers and Expense Lines for
To configure this feature for business admin users:
- Ensure Configuring Events Management is complete.
- Navigate to Admin > Users & Groups > Permission Sets.
- Select the appropriate permission set.
- Select the Objects tab.
-
Grant the following permissions:
Object Object Permission Object Types Fields Field Permission expense_header__v CRED event_expense_header__v
- vcountry__v
- event__v
- incurred_expense__v
- incurred_expense_account__v
- incurred_expense_attendee__v
- incurred_expense_speaker__v
- incurred_expense_team_member__v
- incurred_expense_vendor__v
- incurred_expense_venue__v
- local_currency__sys
- object_type__v
- override_lock__v
- payee__v
- payee_account__v
- payee_attendee__v
- payee_speaker__v
- payee_team_member__v
- payee_vendor__v
- payee_venue__v
- payment_date__v
- payment_due_date__v
- expense_header__status__v
- split_lines__v
- transaction_date__v
- mobile_created_datetime__v
- mobile_last_modified_datetime__v
Edit - actual__v
- committed__v
- external_id__v
- mobile_id__v
- name__v
Read expense_line__v CRED event_expense_line__v
- actual__v
- committed__v
- description__v
- event_budget__v
- expense_estimate__v
- expense_type__v
- expense_type_code__v
- expense_type_name__v
- external_id__v
- mobile_id__v
- override_lock__v
- parent_expense_type_code__v
- parent_expense_type_name__v
- mobile_created_datetime__v
- mobile_last_modified_datetime__v
Edit - event__v
- expense_header__v
- local_currency__sys
- name_v
Read expense_attribution__v CRED event_expense_attribution__v - actual__v
- expense_line__v
- incurred_expense__v
- incurred_expense_account__v
- incurred_expense_attendee__v
- incurred_expense_speaker__v
- incurred_expense_team_member__v
- incurred_expense_vendor__v
- incurred_expense_venue__v
- incurred_expense_type__v
- mobile_created_datetime__v
- mobile_last_modified_datetime__v
- mobile_id__v
Edit - expense_header__v
- expense_type_name__v
- name__v
- number_of_people__v
- local_currency__sys
- payment_date__v
- split_amount_per_person__v
Read em_event_layout__v CRED event_layout__v expense_related_list_fields__v
Edit
To configure this feature for end users:
- Ensure Configuring Events Management is complete.
- Navigate to Admin > Users & Groups > Permission Sets.
- Select the appropriate permission set.
- Select the Objects tab.
-
Grant the following permissions:
Object Object Permission Object Types Fields Field Permission expense_header__v CRED event_expense_header__v
- country__v
- event__v
- incurred_expense__v
- incurred_expense_account__v
- incurred_expense_attendee__v
- incurred_expense_speaker__v
- incurred_expense_team_member__v
- incurred_expense_vendor__v
- incurred_expense_venue__v
- object_type__v
- payee__v
- payee_account__v
- payee_attendee__v
- payee_speaker__v
- payee_team_member__v
- payee_vendor__v
- payee_venue__v
- payment_date__v
- payment_due_date__v
- split_lines__v
- expense_header__status__v
- transaction_date__v
- mobile_created_datetime__v
- mobile_last_modified_datetime__v
Edit - actual__v
- committed__v
- local_currency__sys
Read expense_line__v CRED event_expense_line__v
- actual__v
- committed__v
- description__v
- event_budget__v
- expense_estimate__v
- expense_header__v
- expense_type__v
- expense_type_code__v
- expense_type_name__v
- object_type__v
- parent_expense_type_code__v
- parent_expense_type_name__v
- mobile_created_datetime__v
- mobile_last_modified_datetime__v
Edit - event__v
- expense_header__v
- local_currency__sys
- name__v
- number_of_people__v
- split_amount_per_person__v
Read expense_attribution__v CRED event_expense_attribution__v - expense_line__v
- incurred_expense__v
- incurred_expense_account__v
- incurred_expense_attendee__v
- incurred_expense_speaker__v
- incurred_expense_team_member__v
- incurred_expense_vendor__v
- incurred_expense_venue__v
- incurred_expense_type__v
- mobile_created_datetime__v
- mobile_last_modified_datetime__v
- mobile_id__v
Edit - actual__v
- expense_header__v
- expense_type_name__v
- local_currency__sys
- name__v
- payment_date__v
Read em_event_layout__v R event_layout__v expense_related_list_fields__v
Read
- Navigate to Admin > Configuration > Objects > expense_header__v > Layouts.
- Place the split_lines__v field on the appropriate layouts.
Defining Expense Header Related List Columns
Business admin users can define which expense_header__v and expense_line__v fields display as columns in the Expense Header’s Related List view from an event:
-
Create a message__v record with the following properties:
- Message Name = EXPENSE_HEADER_FIELDS
- Category = EXPENSE_FIELDS
- Type = label__v
- Language = en_US
-
Text – Enter a semicolon separated list of expense_header__v and expense_line__v fields to define as columns on the Expense Header related list. Use the following format:
Object_API_Name.Field_API_Name1;Object_API_Name.Field_API_Name2;
For example, expense_header__v.transaction_date__v;expense_line__v.actual__v;expense_line__v.committed__v;
Do not include the name__v field in the list as this column is automatically included.
- Navigate to the appropriate em_event_layout__v records.
- Populate the expense_related_list_fields__v field with EXPENSE_HEADER_FIELDS;;EXPENSE_FIELDS.
Defining the Expense Line Fields
Business admin users can define expense_line__v fields to display in the New Expense Header and Edit Expense Header modals of payment and split expenses, enabling end users to quickly populate the appropriate fields of a new expense line.
Define the expense_line__v fields to display by adding or rearranging fields on the appropriate expense_line__v layout.
Any standard or custom field can be added, though the following fields and field types are not supported:
- Any Time type field
- The following standard fields:
- number_of_people__v
- concur_response_timestamp__v
- concur_system_id__v
- event__v
- expense_estimate__v
- expense_header__v
- expense_type_code__v
- expense_type_name__v
- external_id__v
- mobile_id__v
- name__v
- override_lock__v
- parent_expense_type_code__v
- parent_expense_type_name__v
- id
- global_id__sys
- legacy_crm_id__v
- split_amount_per_person__v
Users must have Edit permission to a field for it to be considered available. If a field is not supported or if the user does not have sufficient permission, the field does not display. Formula fields display with only read permission.
Defining an Expense Line's Object Type
Admins can define the object type of expense_line__v records created alongside expense_header__v records.
Grant users access to an expense_line__v object type with the same developer name as the selected expense_header__v object type to automatically use that expense_line__v object type.
If matching object types do not exist, the default expense_line__v object type is used instead.
Enabling or Disabling the Split Expense Selector as
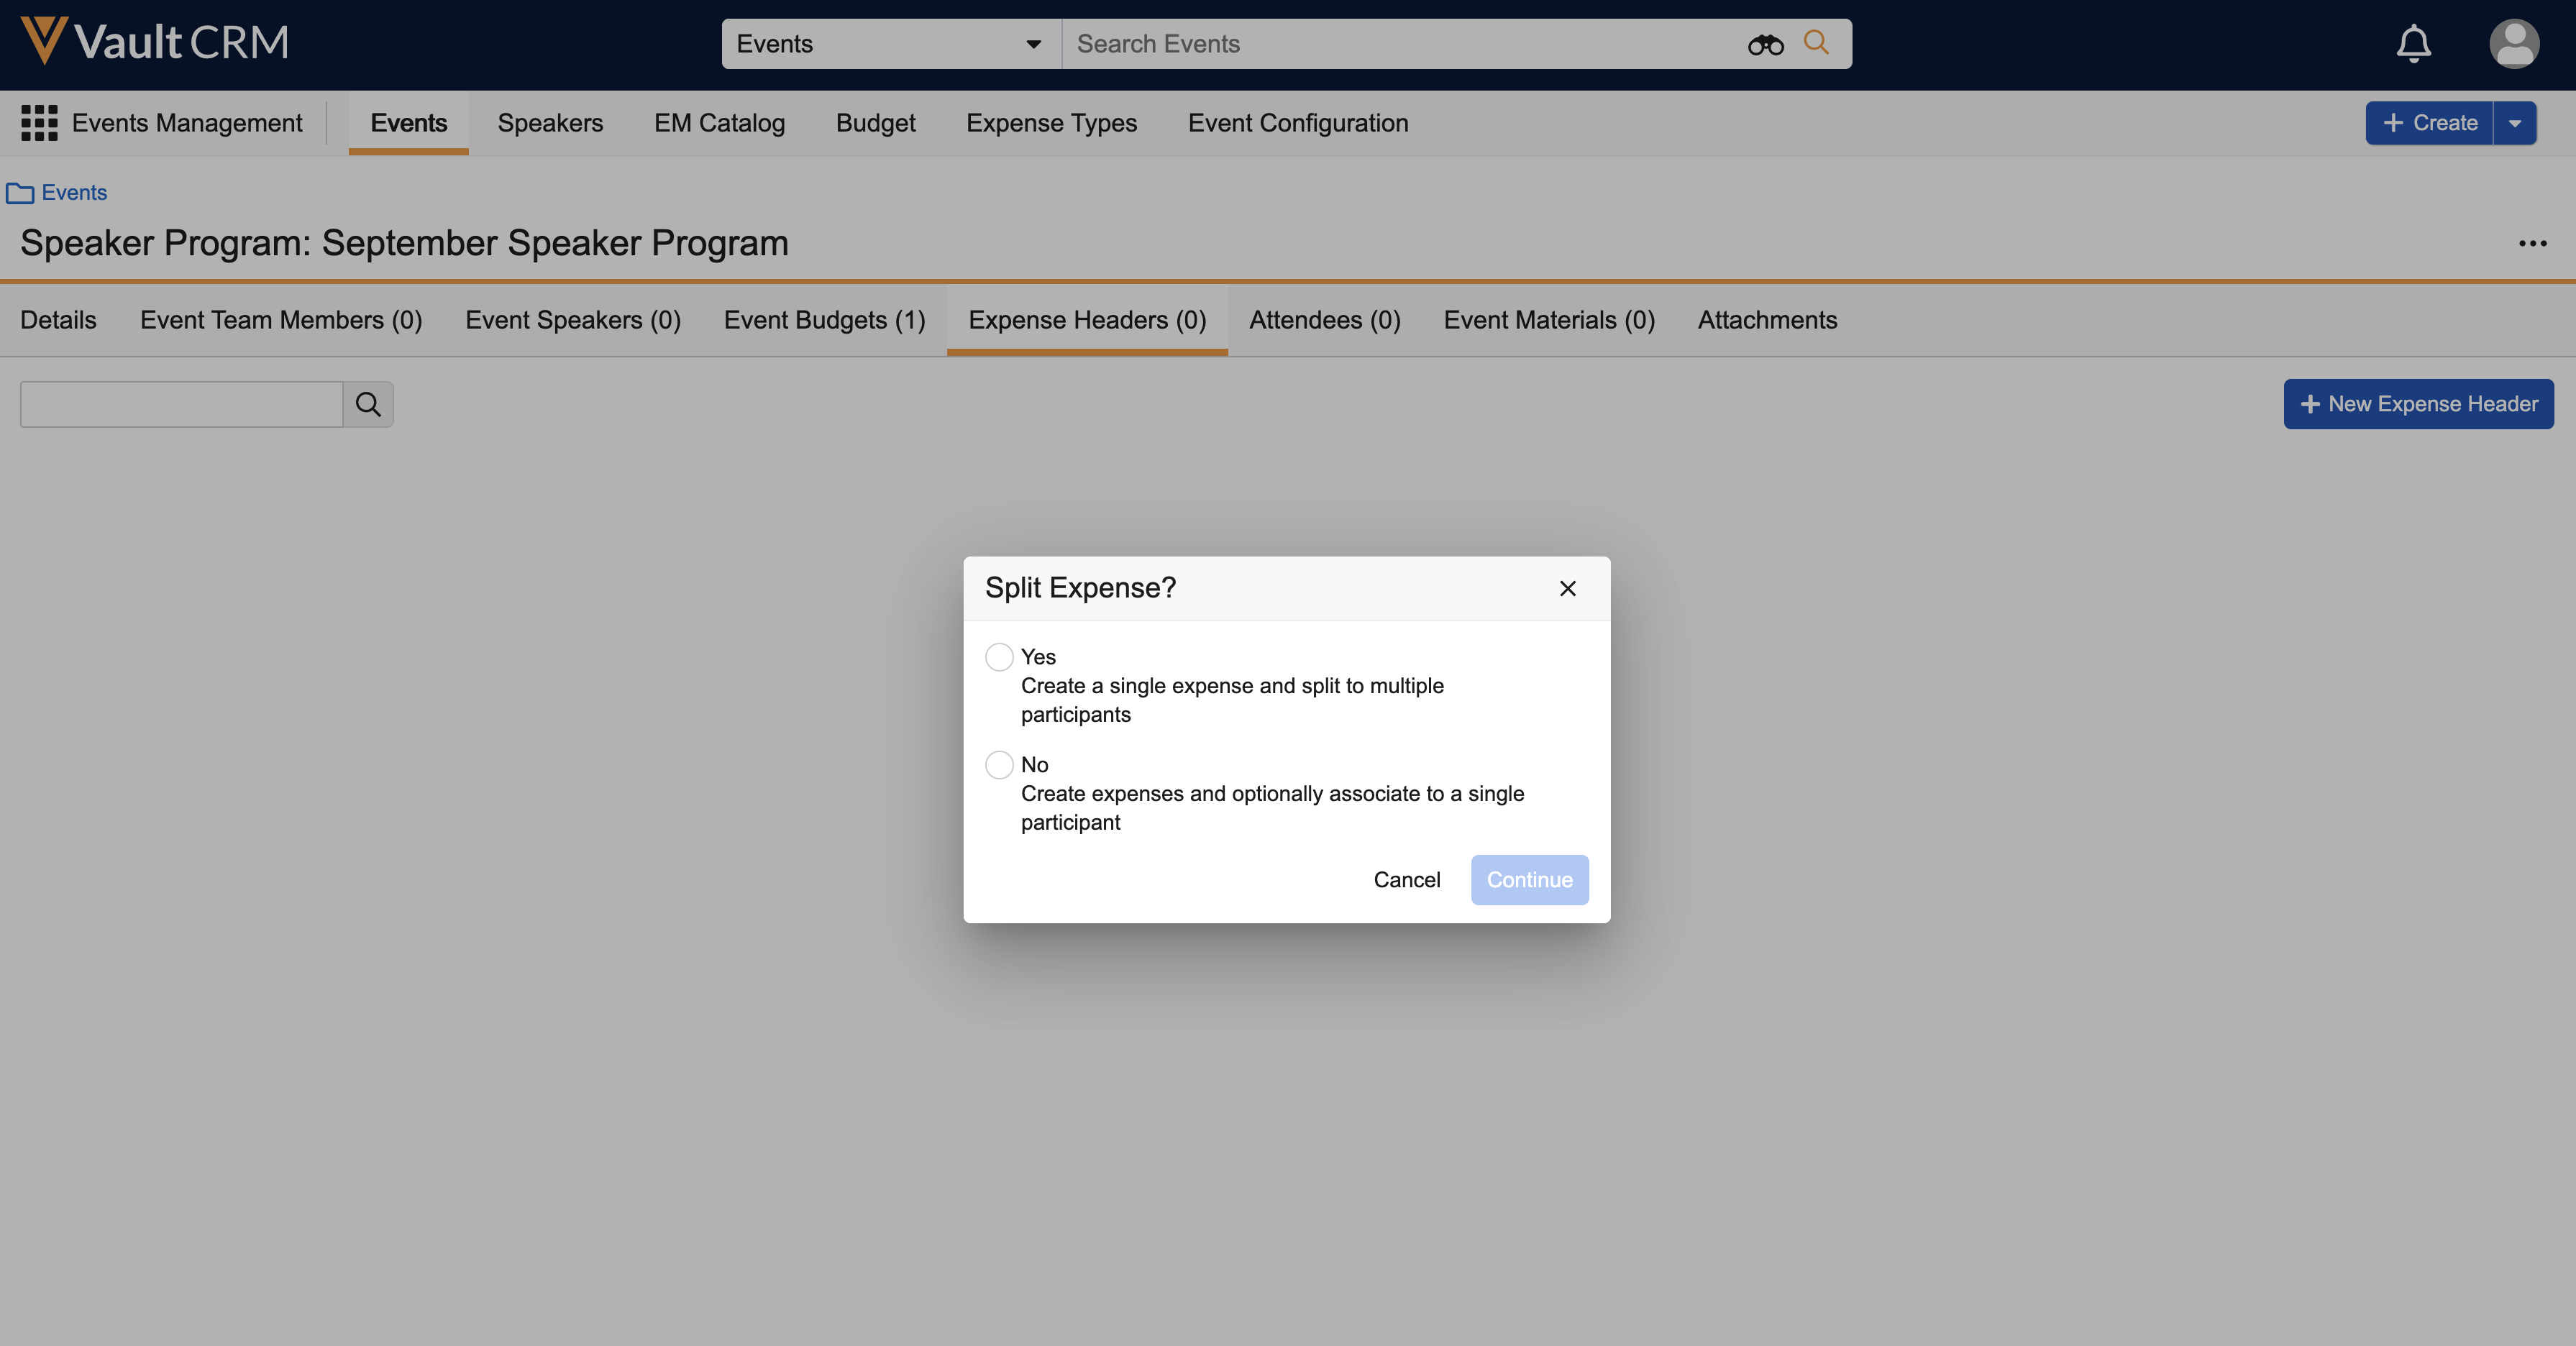
By default, end users can select whether an expense is a payment expense or a split expense when they create a new expense header via a designated modal during the record creation process. Depending on customer needs, end users may need to be prevented from selecting one of these expense types.
Therefore, admins can control what types of expenses are available to end users by controlling access to values of the split_lines__v picklist:
To define if an expense should display this selector:
- Navigate to Admin > Configuration > Objects > expense_header__v.
-
Edit access to the values of the split_lines__v picklist:
- yes__v – Enables using split expenses for this object type
- no__v – Enables using non-split expenses for this object type
If both values are enabled for the object type, the Split Expense modal displays whenever a new expense_header__v record is created, enabling end users to choose whether the expense is for a split expense or not.

If only one value is enabled for the object type, the Split Expense modal is skipped when creating a new expense_header__v record and the available value is automatically used.
- Create em_event_layout__v records for both the expense_header__v and expense_line__v objects linking the object types to the appropriate layouts. See Defining Event Layouts for more information.
Defining the Expense Line’s Object Type as
Business admin users can define the object type of expense_line__v records created alongside expense_header__v records.
Grant users access to an expense_line__v object type with the same developer name as the selected expense_header__v object type to automatically use that expense_line__v object type.
If matching object type do not exist, the default expense_line__v object type is used instead.
Creating Expense Headers and Lines as
To create an expense header and its associated expense lines in the browser:
- Navigate to the Expense Headers related list of the appropriate event.
- Select Create.
- Select the object type if multiple object types are available.
- Select Next.
-
Select a value on the Split Expense selection modal. If there is only one value of the split_lines__v picklist available, this selector is skipped.

- Select Next.
Creating Payment Expenses
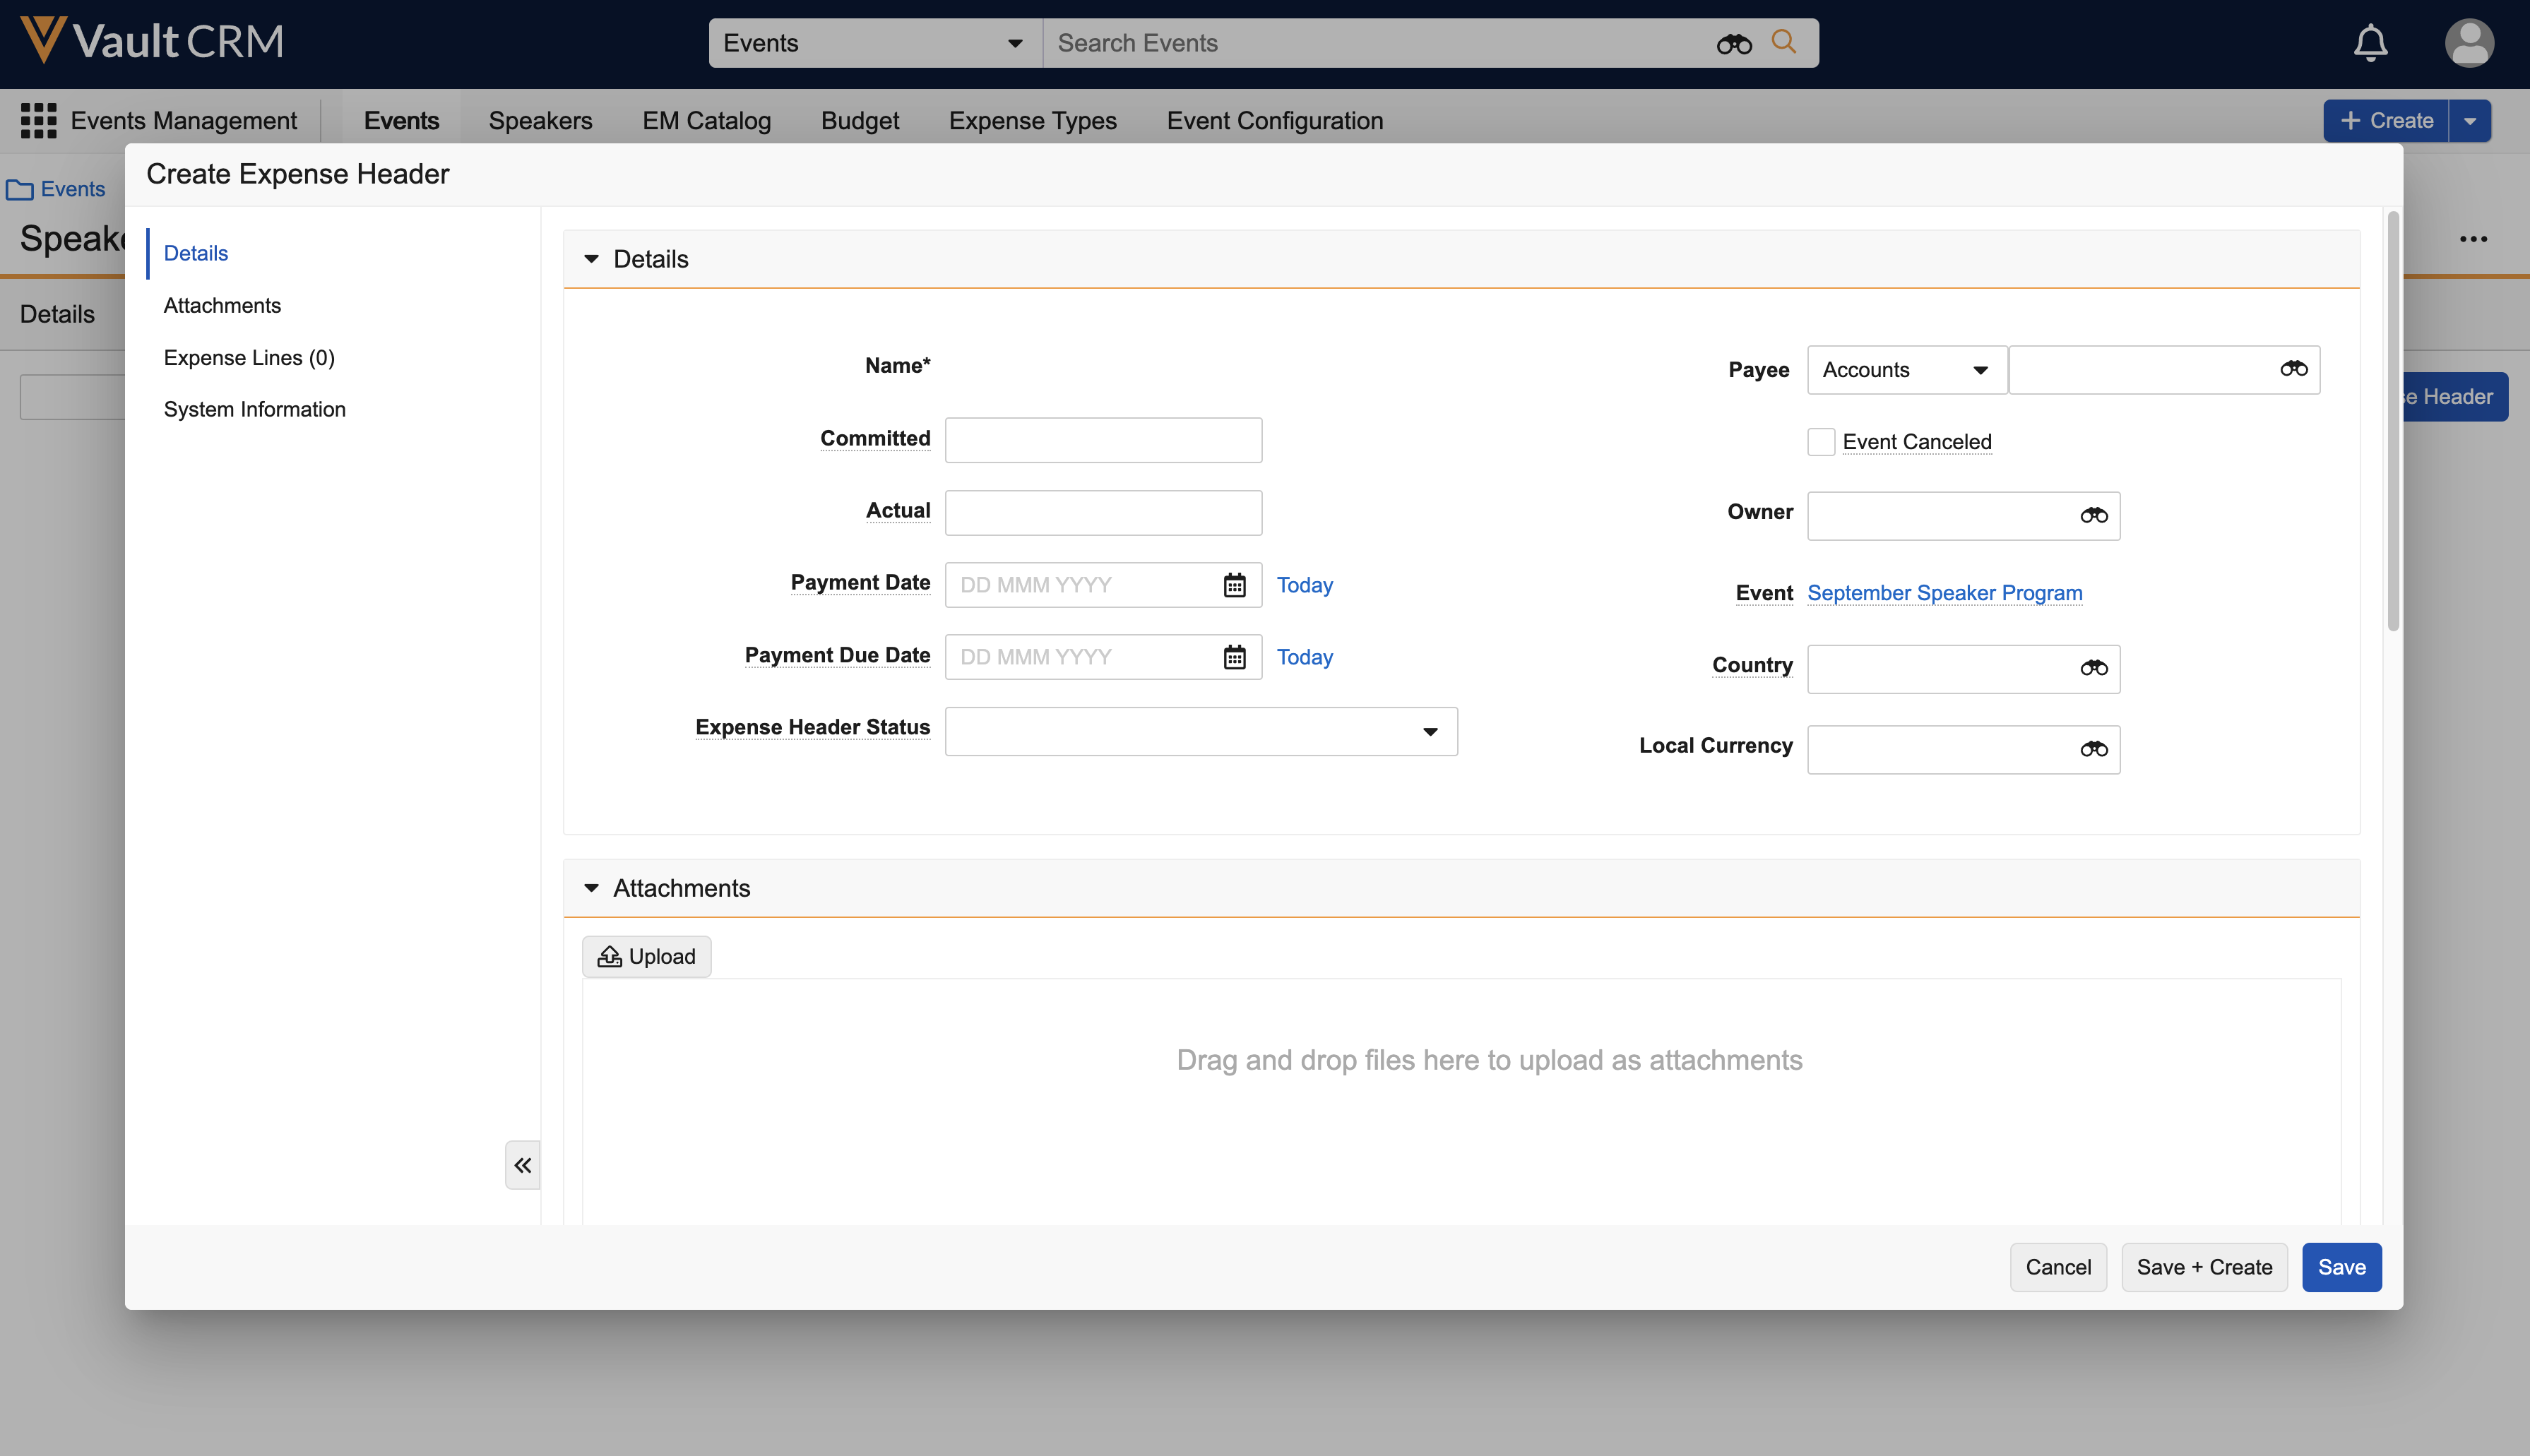
After selecting a payment expense, the New Expense Header modal displays for end users to populate expense header and expense line details:
-
Populate all appropriate expense_header__v fields.

The available values of the payee__v and incurred_expense__v field are dependent on end users having Edit Field Permission to the various payee and incurred expense fields on the expense_header__v object.
-
Select the New Expense Line button in the Expense Lines section.
-
Populate all appropriate expense_line__v fields based on the configured layout.
Formula fields display as read only and are calculated after saving the expense.
- Select the New Expense Line button again to continue adding expense lines to the header, if applicable.
- Select either Save or Save + New.
Creating Split Expenses
After selecting a split expense, the New Expense Header modal displays for end users to populate expense header, expense line, and participant details:
- Populate all appropriate expense_header__v fields.
- Select the Add Expenses button in the Expenses section.
-
Populate the following fields for the new expense:
- Expense Type
- Actual
- Participants – Select the Add Participants button to search for and select individual attendees, event speakers, or event team members. Alternatively, select the drop down menu next to the button to display the following options:
- Meal Opt-In – Select this option to add all attendees and speakers on the event who opted into a meal for the event
- Groups from previous split expenses – These options only display if other split expenses exist on the event. These options allow end users to quickly select the same group of participants as other split expenses.
- Select Add Expenses again to another expense and repeat the process, if applicable.
- Select either Save or Save + Create.
To create an expense header and its associated expense lines on the iPad:
-
Navigate to the Expense Headers section of the appropriate event.

- Select + above the card in the Expense Headers section.
- Select the object type if multiple object types are available.
-
Select a value on the Split Expense selection modal. If there is only one value of the split_lines__v picklist available, this selector is skipped.

Split expenses are currently only supported on the Browser platform.
Creating Payment Expenses
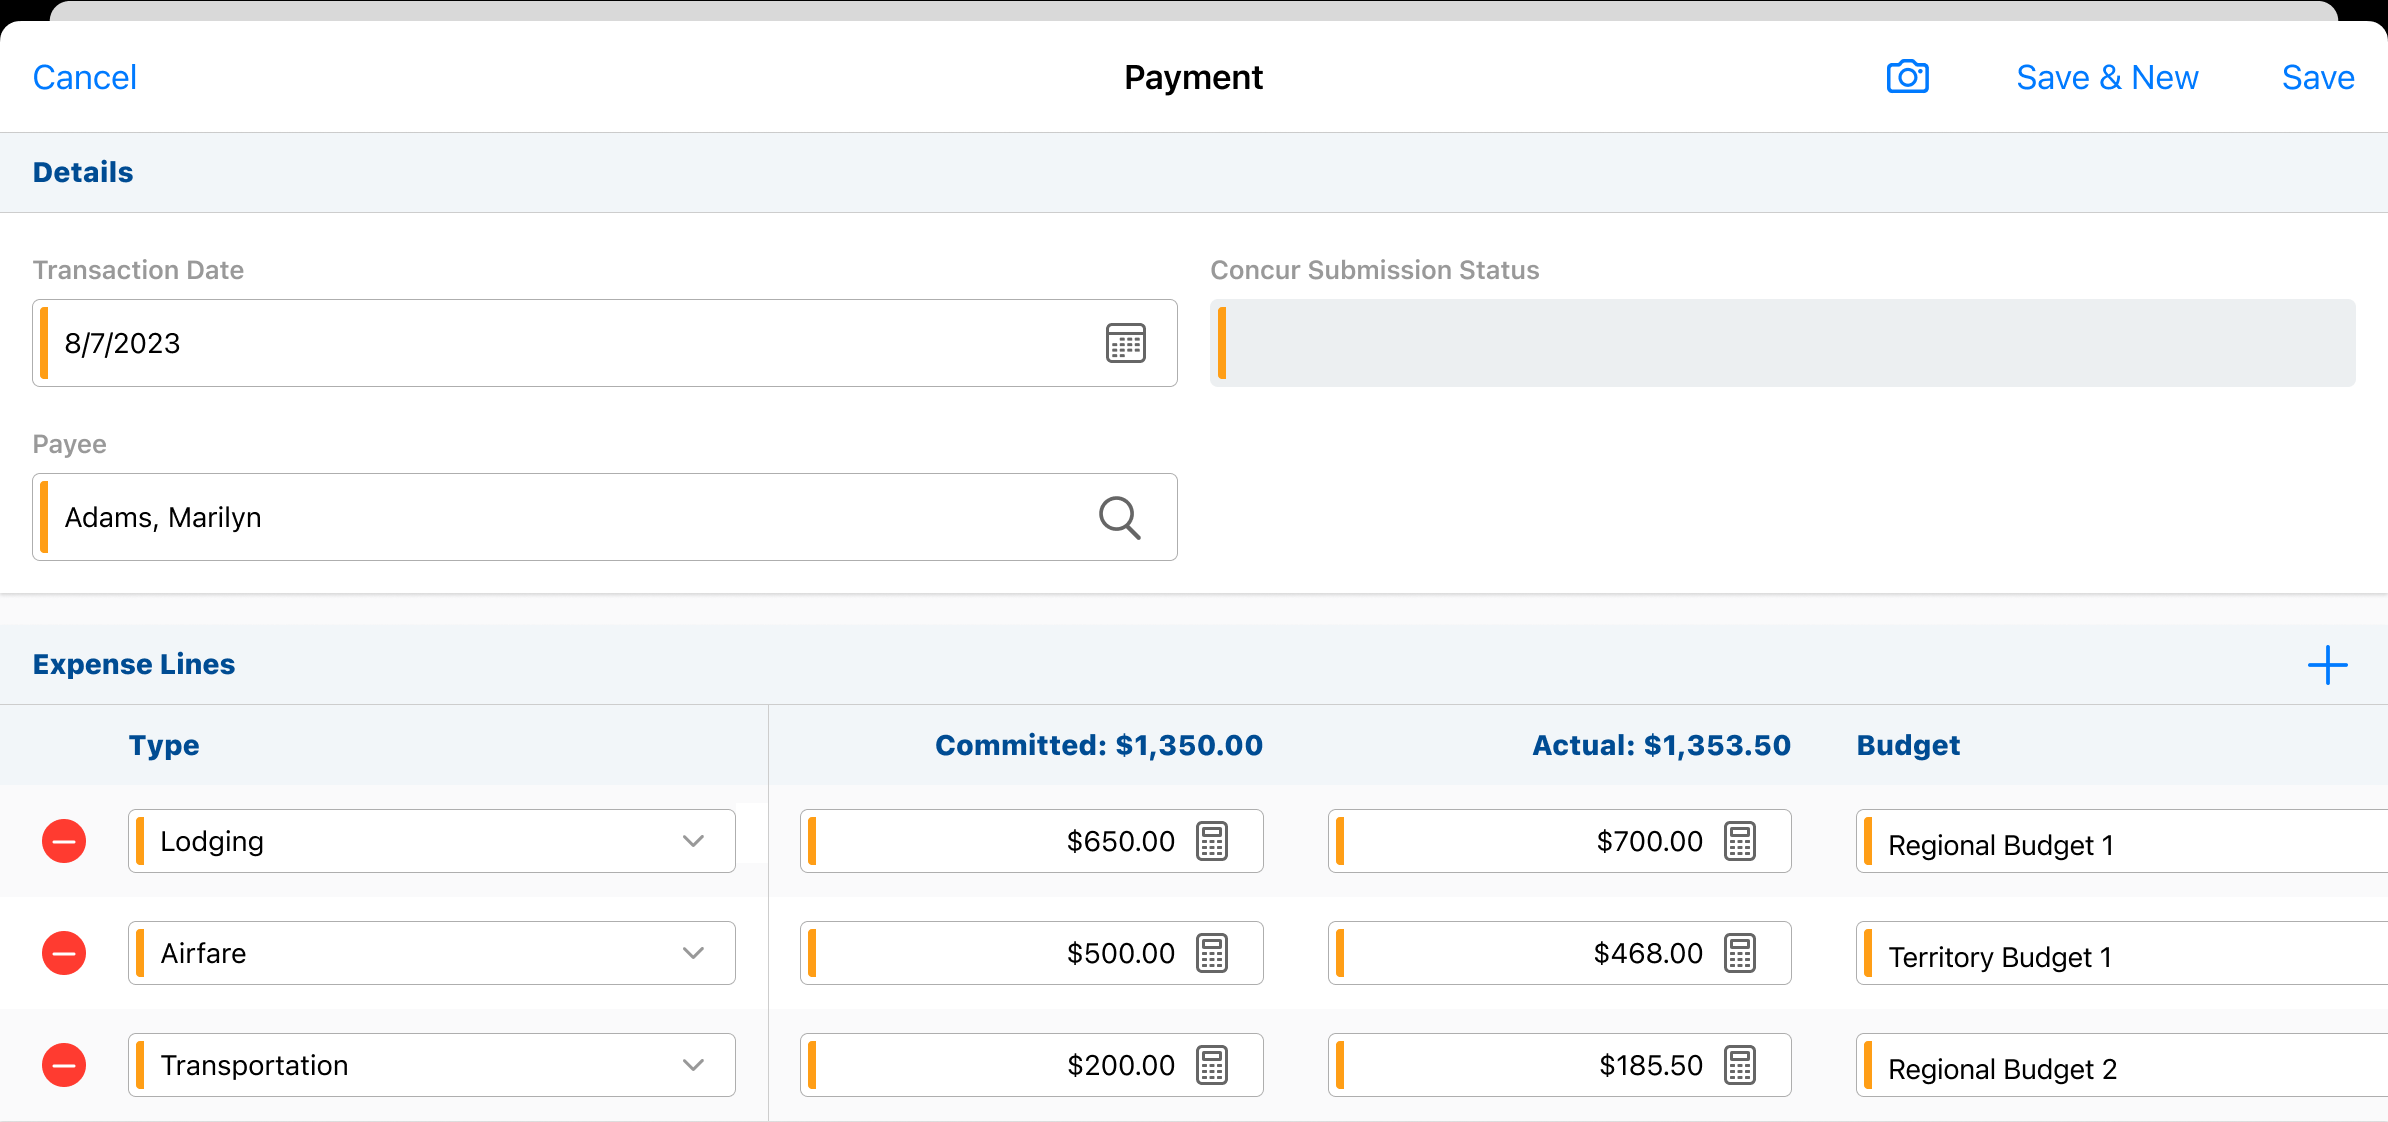
After selecting a payment expense, the New Expense Header modal displays for end users to populate expense header and expense line details:
-
Populate all appropriate expense_header__v fields.

-
Select the + button in the Expense Lines section.
-
Populate all appropriate expense_line__v fields based on the configured layout.
Formula fields display as read only and are calculated after saving the expense.
- Select the + button again to continue adding expense lines to the header, if applicable.
- Select either Save or Save & New.
Creating Split Expenses
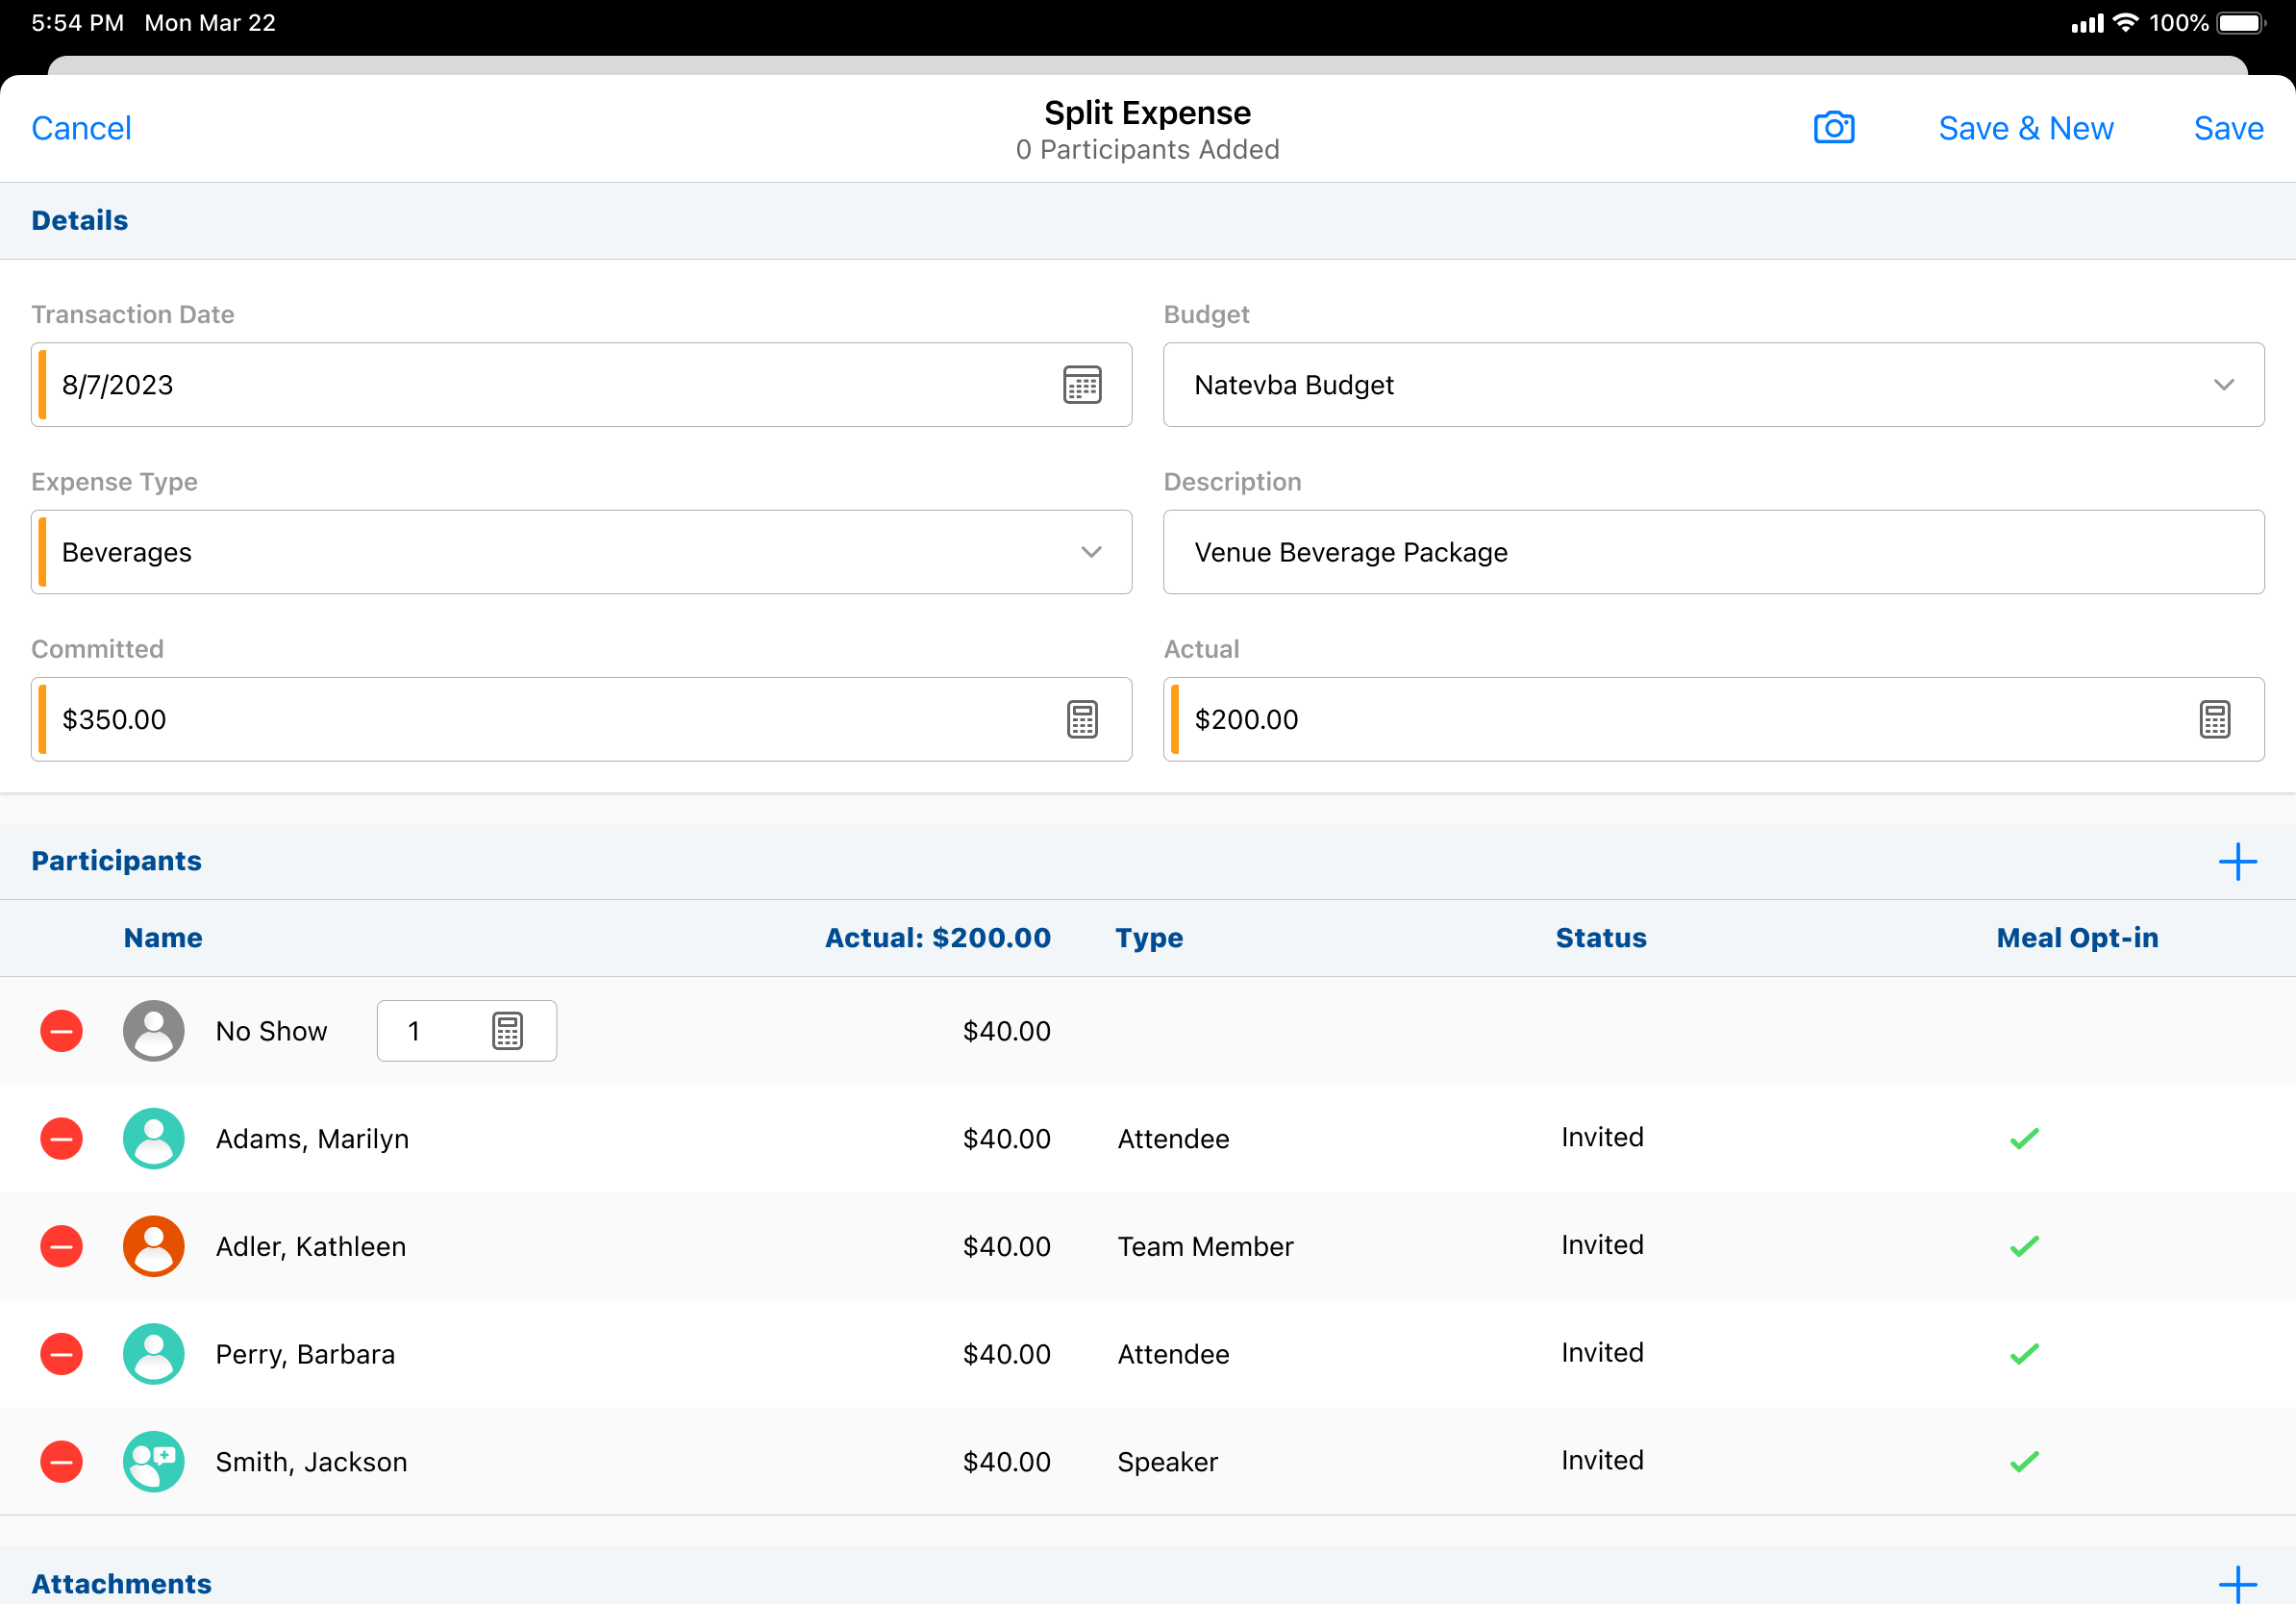
After selecting a split expense, the New Expense Header modal displays for end users to populate expense header, expense line, and participant details:
- Populate all appropriate expense_header__v fields, including the Actual field with the expense amount.
-
Select the + button in the Participants section. The following options display:
- Meal Opt-In – Select this option to add all attendees and speakers on the event who opted into a meal for the event
- Groups from previous split expenses – These options only display if other split expenses exist on the event. These options allow end users to quickly select the same group of participants as other split expenses.
- Select Participants – Select this option to search for and select individual attendees, event speakers, or event team members
The Actual value for each added participant is calculated by dividing the expense line’s Actual cost by the number of added participants.

For example, if the expense line’s Actual cost is $250 and ten participants are added, each participant has an Actual cost of $25.
- Select either Save or Save & New.

