Defining Custom Event Statuses and Lifecycle States
Business admin users can create custom event statuses that suit their specific business needs. When end users use Event Actions to change their event's status, the event's lifecycle state also updates. Every potential event status must have a corresponding lifecycle state with a matching API name, meaning that business admin users must also create these custom lifecycle states for each custom status they create.
Who can use this feature?
- Business Admin Users - Browser
- Creating Custom Event Statuses
- Creating Custom Event Lifecycle States
- Users require an Events Management License
Configuring Lifecycle States for
To configure this feature for business admin users, ensure Configuring Events Management is complete.
Creating Custom Event Statuses as
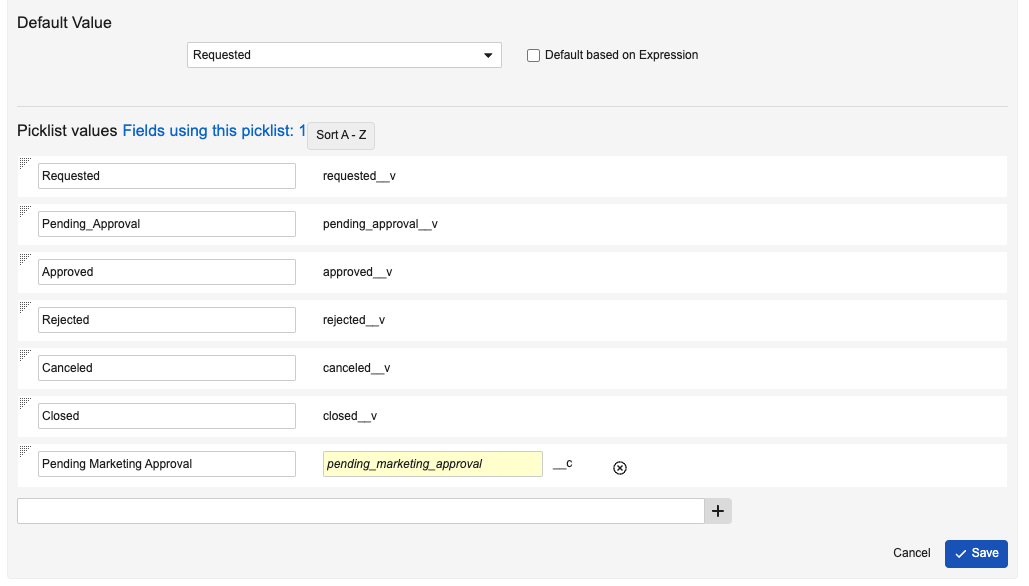
To create a custom event status:
- Navigate to Admin > Configuration > Objects > em_event__v > Fields > em_event_status__v.
- Select Edit.
- Enter the appropriate labels for the new status values.
-
Select Enter or the + button.

-
Adjust the new picklist value's automatically populated API name, if necessary.
The API names of new picklist values must be entered exactly when creating the corresponding lifecycle state.
- Select Save.
- Grant the appropriate object types access to the new picklist value.
Creating Custom Event Lifecycle States as
Every custom value on the em_event_status__v picklist must have a corresponding event lifecycle state, as users are prevented from executing Event Actions that change an event's status to one without a matching lifecycle state.
To create matching event lifecycle states:
-
Navigate to Admin > Configuration > Object Lifecycles > em_event_lifecycle__v.
- Select the Create button in the States section.
-
Populate the following fields:
- State Label – Enter the appropriate label
- State Name – Enter the exact API name of the corresponding status, excluding the __c suffix
- Status = Active
- Workflow Cancel Status = No State Change

- Select Save.
- Navigate to Admin > Configuration > Objects > em_event_history__v > Fields.
-
Create picklist values for each custom status on the following picklists:
- event_starting_status__v
- event_ending_status__v
These new picklist values must have identical API names as the custom lifecycle state.
- Ensure all created custom picklist values on both fields are made available to the event_history__v object type.

