Managing Patient Documents
Patient documents consolidate files related to a patient, enabling care teams to provide support across patient journeys and cases. The files can include intake forms, letters of medical necessity, and income and residency verification. Users can use the Patient Documents subtab to upload and manage these files in a centralized view.
Who can use this feature?
- End Users – Browser
- Adding Patient Documents
- Viewing Patient Documents
- Editing Patient Document Information
- Removing Patient Documents
- Admin Users – Browser
- Adding Patient Documents
- Users require a Patient CRM License
Configuring Patient Documents for
 All Users
To configure this feature:
To configure this feature, ensure Configuring Patient CRM is complete.
Adding Patient Documents as
All Users
There are three ways in which end users can add a patient document:
- Uploading a document to the Patient Documents subtab
- Adding an inbound fax document as a patient document
- Adding a case document for the patient
When a patient document is added, a Document record of the Patient Document (patient_document__v) document type is created. The name of the document defaults to the name of the original source file, and the account on the document defaults to the associated patient.
Uploading to the Patient Documents Subtab
There are two ways in which a user can upload patient documents through the Patient Documents subtab. Users can upload a maximum of ten documents at a time.
To upload documents with drag and drop:
- Drag one or more files from your computer to the Patient Documents subtab.
- Release the files when the “Drop files here to upload” message displays. The Uploading Files modal shows the upload progress.
To upload documents with the Upload Documents action:
- Select Upload Documents in the upper right corner of the subtab. The file dialog opens.
- Select one or more files to upload.
- Select Open. The Uploading Files modal displays the upload progress.
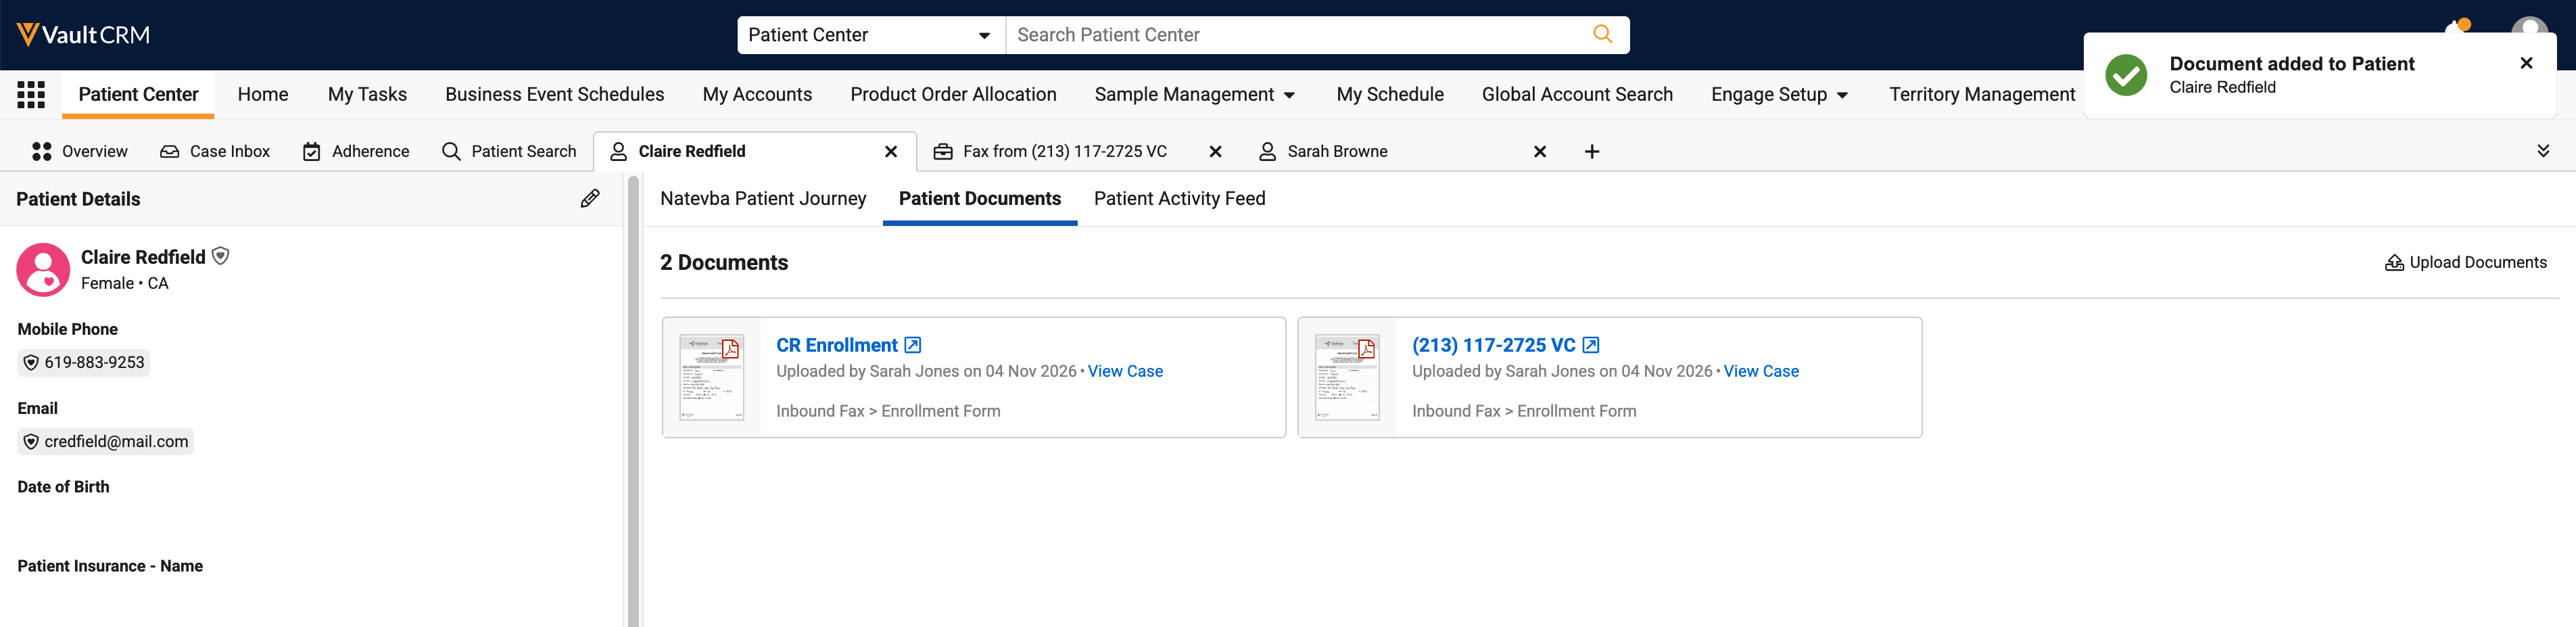
During the upload process, users can navigate to another browser tab but cannot navigate to another area in the application. When all of the selected documents are finished uploading, a success toast message displays and the documents are listed in the Patient Documents subtab.
If an upload error occurs, the Upload Error modal opens instead and lists the reasons why the documents failed to be added.
Adding from Inbound Fax
Inbound fax documents can be added as patient documents.
To add a patient document from the Case Inbox:
- Select Process Fax. The Patient Search screen opens.
- Search for the patient whom the inbound fax document applies to.
- Select + Add to Patient on the desired patient. The Add to Patient modal opens.
- Enter a name for the patient document in the Document Name field.
-
Select a category for the patient document in the Subtype field.
If the Enrollment Form option is selected, as it is by default, then users can select the + Begin Intake button to close the Add to Patient modal and start the patient intake process instead. Document classifications are not supported for patient documents.
- Select Continue. The Add to Patient modal closes and the Patient Documents subtab opens.
When the inbound fax document is successfully added as a patient document, it is displayed in the Patient Documents subtab. If the inbound fax document is used to start the patient intake process, it is also displayed in the Patient Documents subtab after the patient intake process is completed.
Adding a Case Document
Case documents, or documents specific to a case, may also be patient documents if the case is directly related to a patient. For example, if a document is uploaded to a case and the case is on a patient journey step for a given patient, then the document is displayed in both the Documents subtab of the patient journey step as well as the Patient Documents subtab for the patient.
Admin Users
In addition to adding patient documents through the Patient CRM user interface (UI), admin users can also add patient documents in two other ways:
- With the Vault API. See the Create Single Document and Create Multiple Documents pages in the Vault Developer Portal.
- With file staging. See the File Staging page in the Vault Developer Portal.
Viewing Patient Documents as
All Users
Users can view and manage a patient’s documents in the Patient Documents subtab. Users can only view the patient documents they have access to.
The Patient Documents subtab displays up to 100 documents, but the total number is shown in the subtab header. The documents are sorted based on each document’s creation date such that the most recently uploaded or added document is displayed at the top. If two or more documents have the same creation date, then they are sorted based on their document IDs.
To view a specific patient document, users can select the document name on the document card. This opens the patient document in the Document Viewer in a new browser tab. For more information, see the Using the Document Viewer page in the Vault Platform help site.
If a patient document is linked to a case (for example, if the patient document was used to start a patient intake process), users can also select the available View Case link on the document card. This opens the associated case in a new tab within the Patient CRM application.
Editing Patient Document Information as
All Users
Users can rename and reclassify a patient document in the Patient Documents subtab.
To edit the patient document subtype only, update the selection in the Classify Document dropdown on the document card.
To edit both the patient document name and subtype:
- Hover over the document card.
-
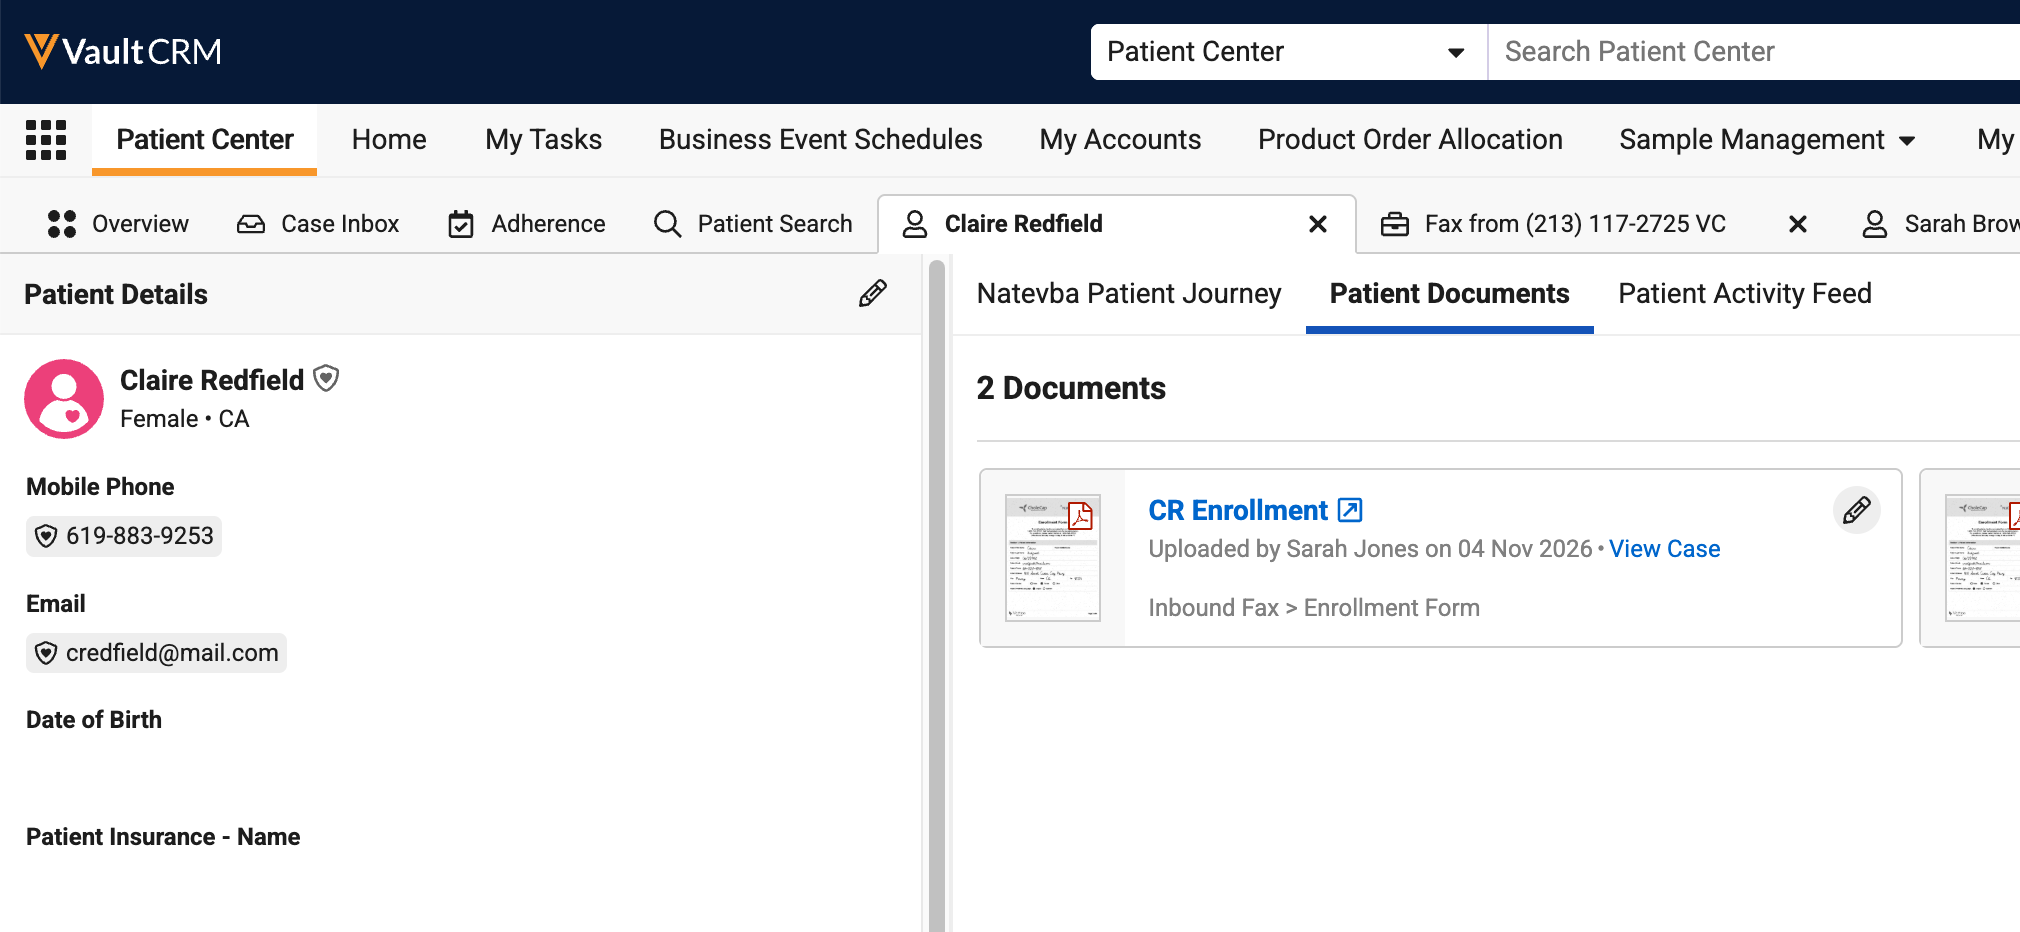
Select the pencil icon to open the document card in edit mode.
-
Update the text in the Document Name field to rename the patient document.
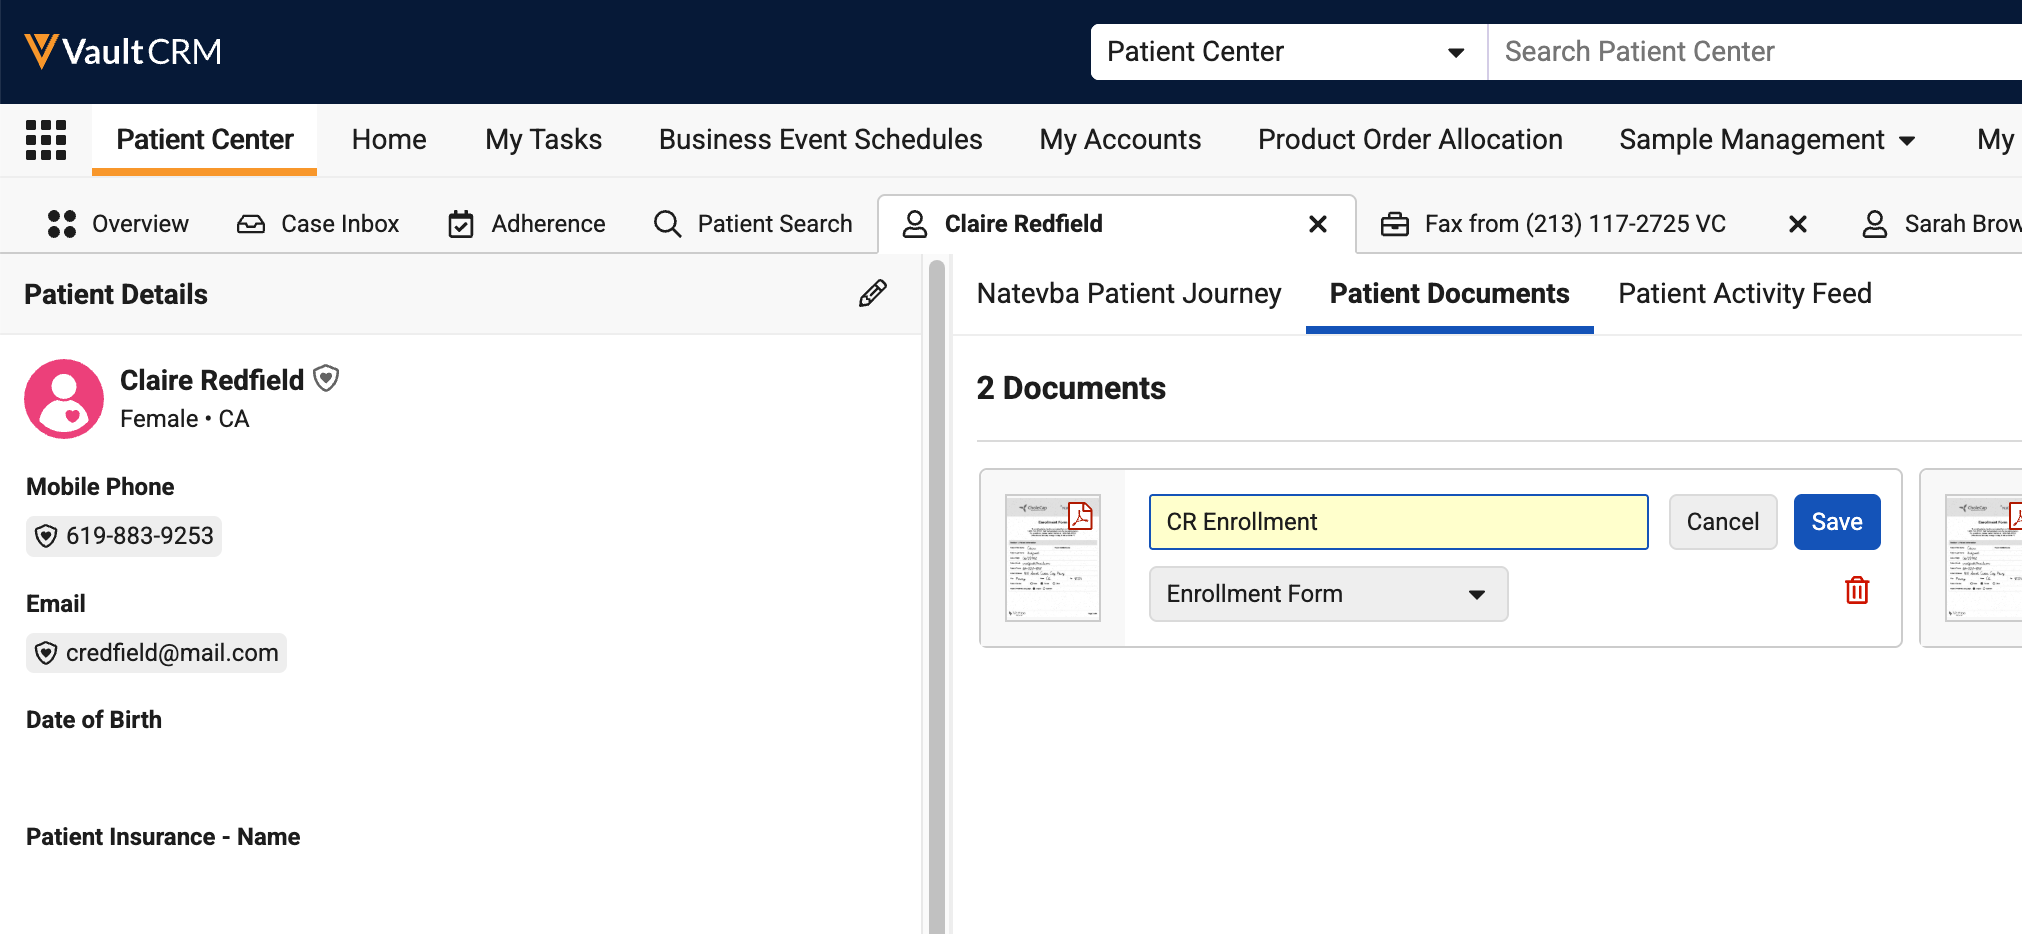
- Update the selection in the Classify Document dropdown to reclassify the patient document.
- Select Save.
If a user tries to navigate away from the application or refresh the browser, a modal opens to warn the user about potentially unsaved changes.
Removing Patient Documents as
All Users
Users can remove a document from a patient in the Patient Documents subtab.
To remove a patient document:
- Hover over the document card.
- Select the pencil icon to open the document card in edit mode.
- Select the trash can icon. The Remove Document from Patient? modal opens.
- Select Remove.
When the patient document is removed, the document no longer displays in the Patient Documents subtab. However, users can still access and view the document in the Vault Library. Users can also access the document on any cases that the patient document was associated with.