Using Patient Intake Forms
Once potential patients and their medical team fill out and submit the appropriate patient intake form, end users can process the form via a standardized enrollment process to open the case associated with the patient journey. This information is captured directly within the Patient Center tab's case inbox, reducing intake time and improving the accuracy of patient data.
Who can use this feature?
- End Users – Browser
- Viewing Patient Intake Forms in the Case Inbox
- Intaking Patients
- Users require a Patient CRM License
Configuring Patient Intake Forms for
To configure this feature:
- Ensure Configuring Patient CRM is complete.
- Navigate to Business Admin > Objects > channel_assignment__v and select + Create.
- Select Fax for the object type, then select Continue.
- Enter the appropriate Name.
- Select Save.
Viewing Patient Intake Forms in the Case Inbox as
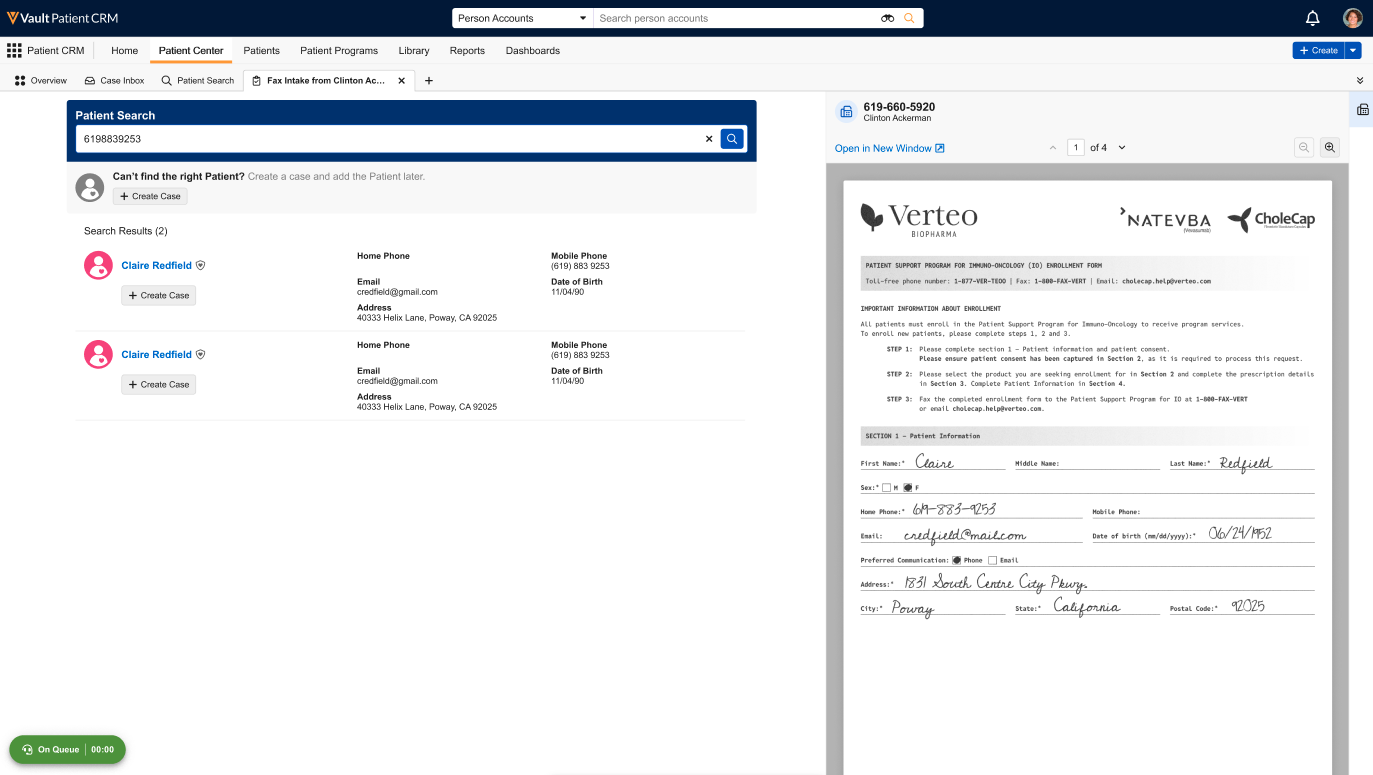
Users can access a dedicated inbox to see all incoming patient intake forms that require processing.
To view the Patient Intake case inbox:
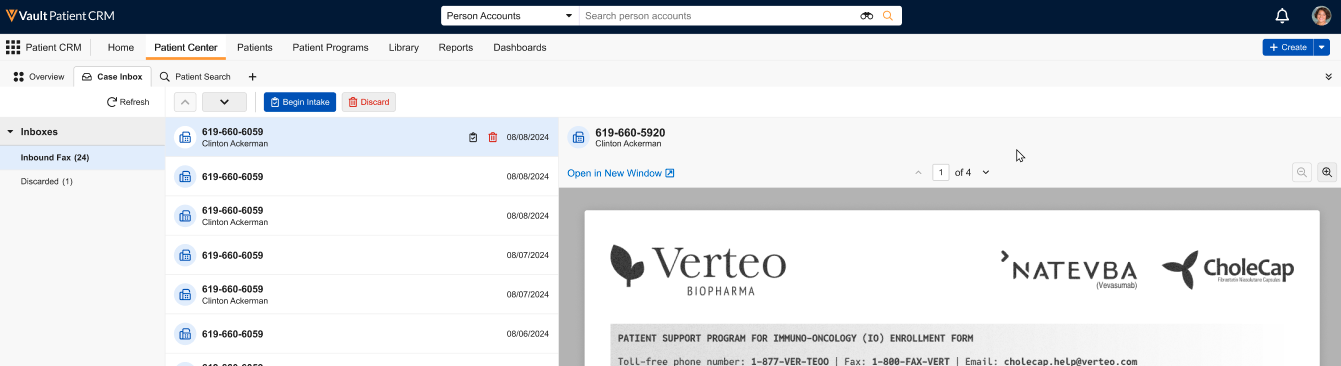
- Navigate to the Case Inbox sub-tab in the Patient Center tab.
-
Select the appropriate inbox from the list. The number of unassigned records displays next to the inbox name.
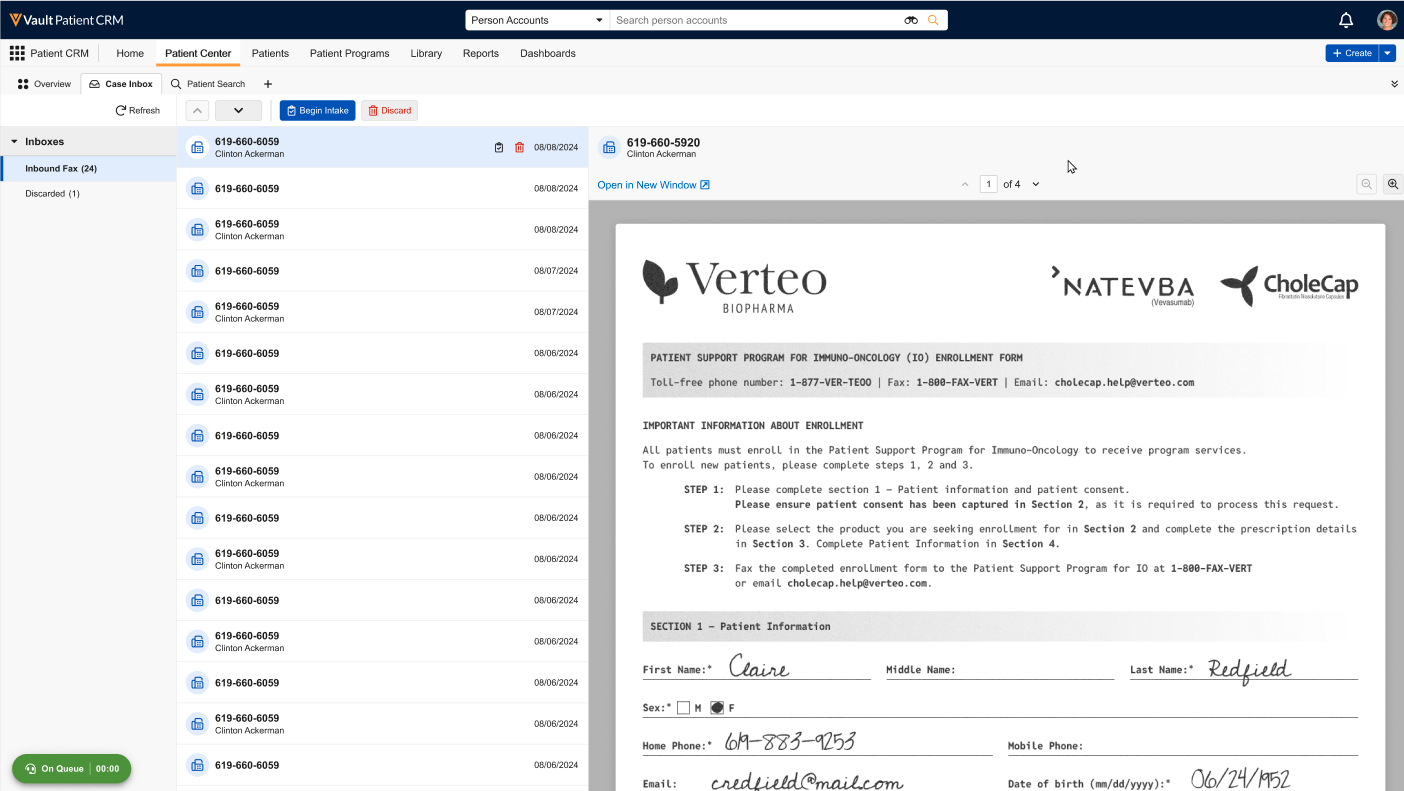
- Select a record from the list to view an embedded rendition of the patient intake form, including controls for zooming and pagination.
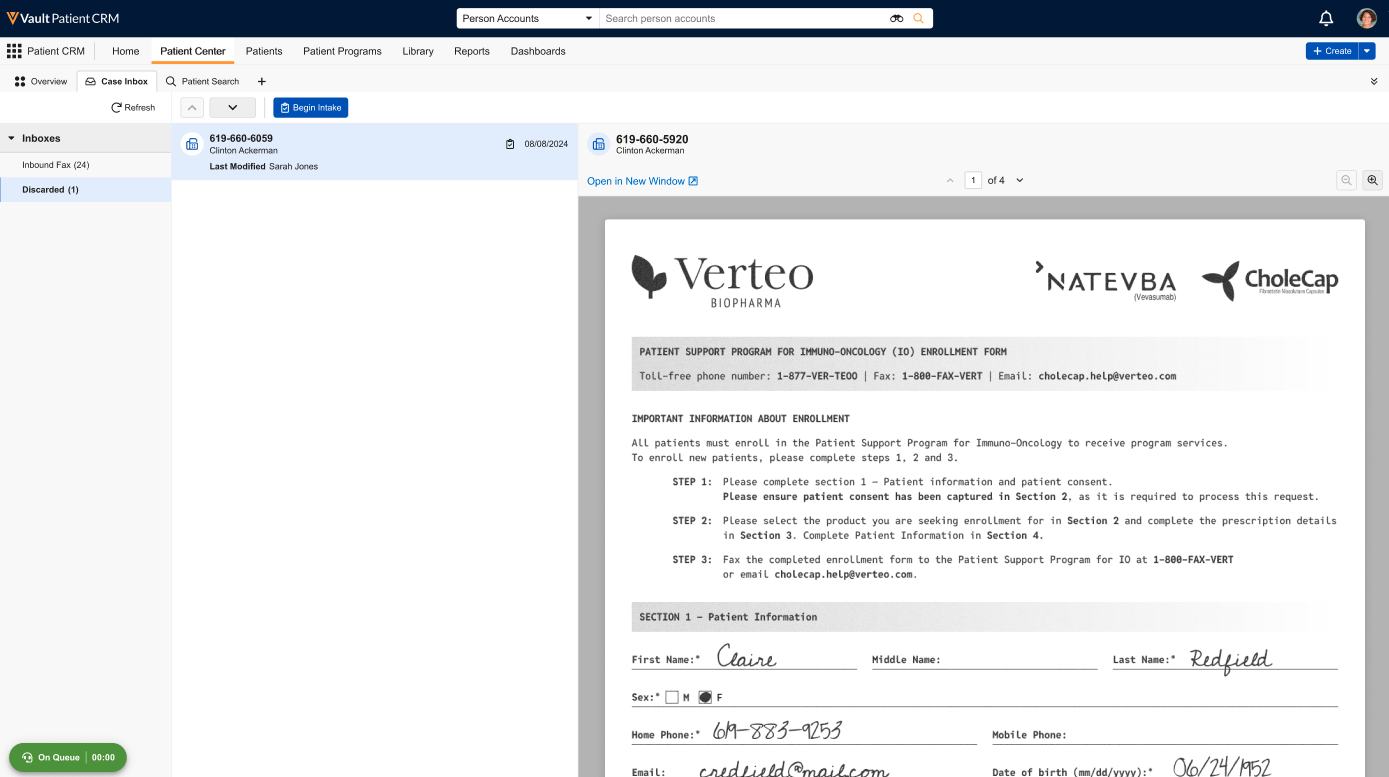
Discarding an Intake Form
If a patient intake form is a duplicate, incomplete, or otherwise invalid, users can discard it from their case inbox:
-
Select the form to remove to display the Discard button.
- Select Discard.
Discarded items display in the Discarded inbox, enabling end users to review discarded form details, and even initiate the intake process if the form was discarded by mistake.
Intaking Patients as
End users can access configured Patient Intake inboxes within the Patient Center tab to process new patient enrollment forms.
To intake a patient:
-
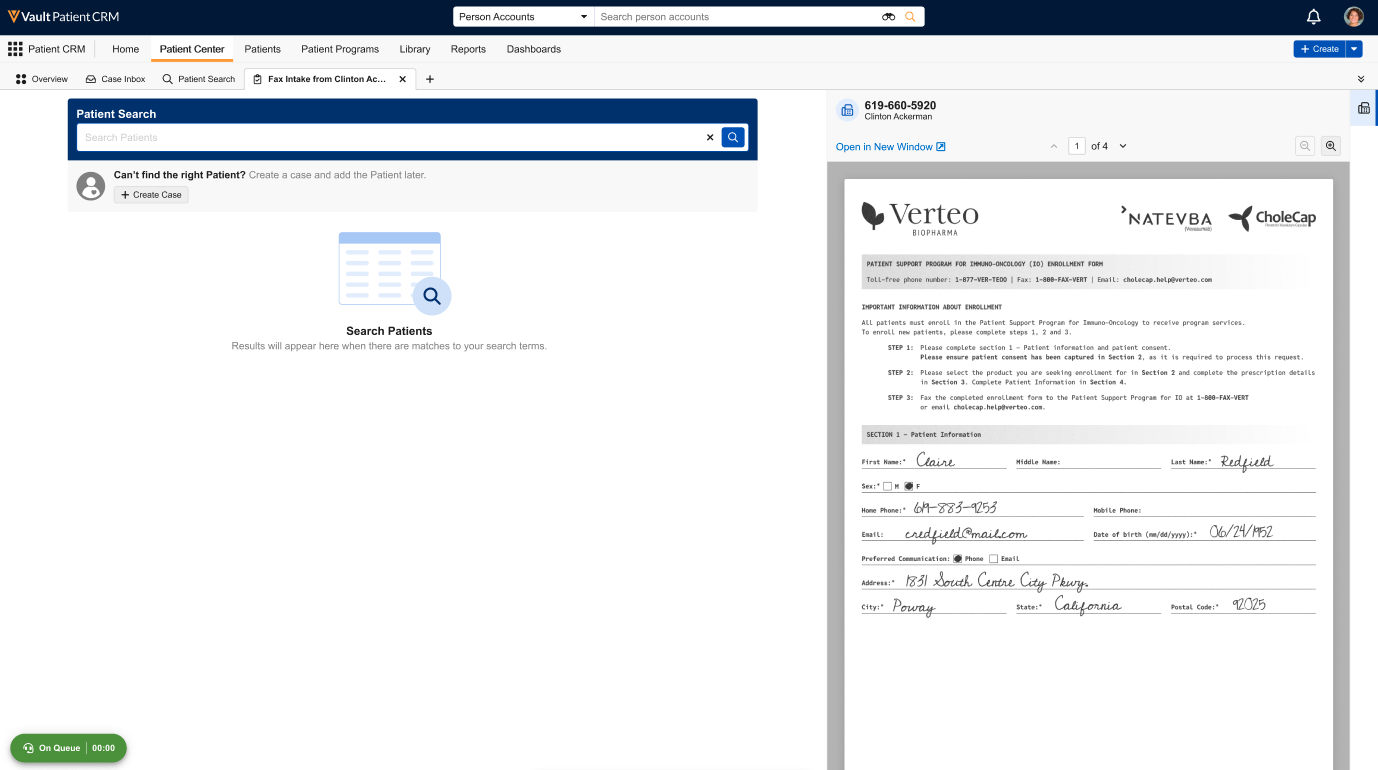
Select the appropriate record from the inbox list.
-
Select Begin Intake. A new sub-tab displays within the Patient Center tab representing the new case.
-
Search for the appropriate patient.
-
Select + Create Case for the appropriate patient.
If a patient cannot be found, select + Create Case beneath the search bar instead. See Creating Patients as Part of Patient Intake for more information.
-
Use the Patient Journey field to select the appropriate Patient Journey.
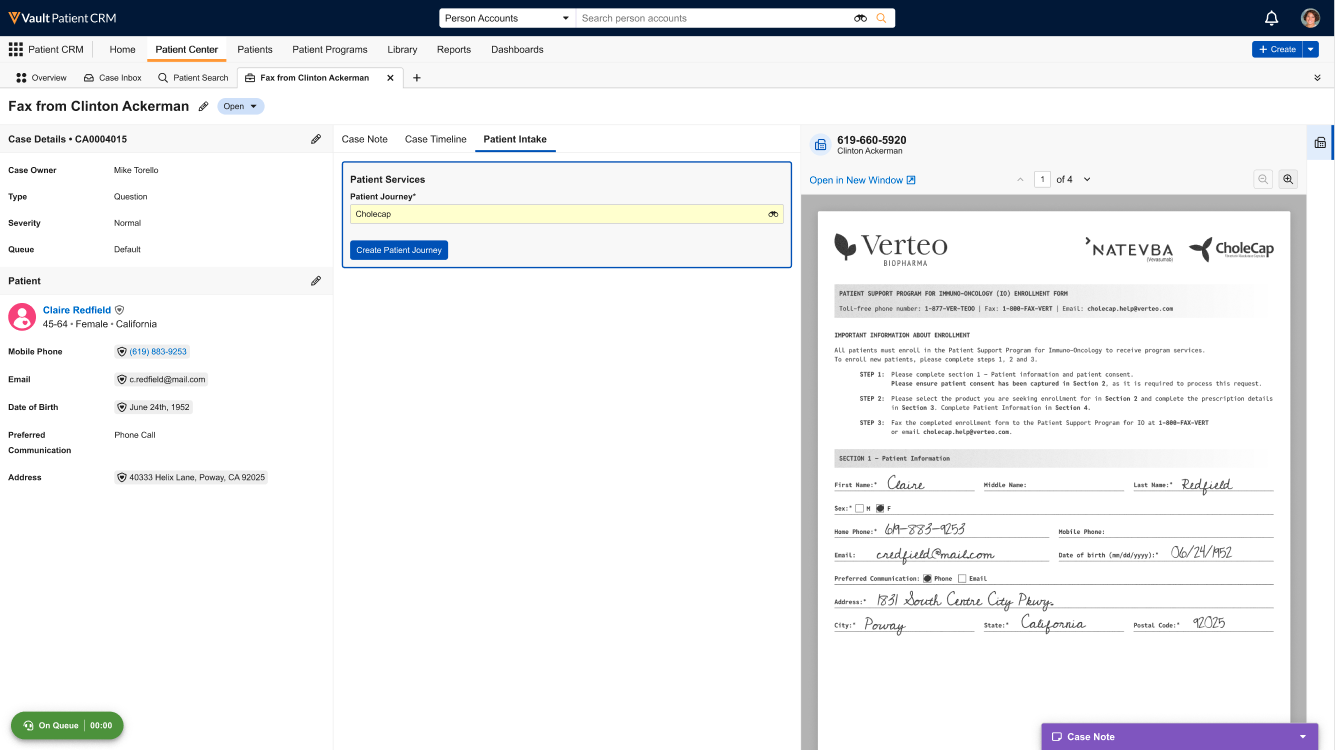
- Select Create Patient Journey.
-
Enter all appropriate information in the following sections, based on which sections are marked as available for the selected Patient Journey:
- Communication Consent
- Patient Prescription
- Patient Insurance
- Patient Journey Details
- Providers/Facilities
- HIPAA Authorization – See Managing Patient HIPAA and Program Authorizations for more information
- Program Authorization – See Managing Patient HIPAA and Program Authorizations for more information
- Select Complete Intake & View Patient Journey once all sections are complete.
When end users complete patient intake, the patient_prescription__v and patient_insurance__v records are automatically created based on the input information and associated with the corresponding patient_attribute__v record.
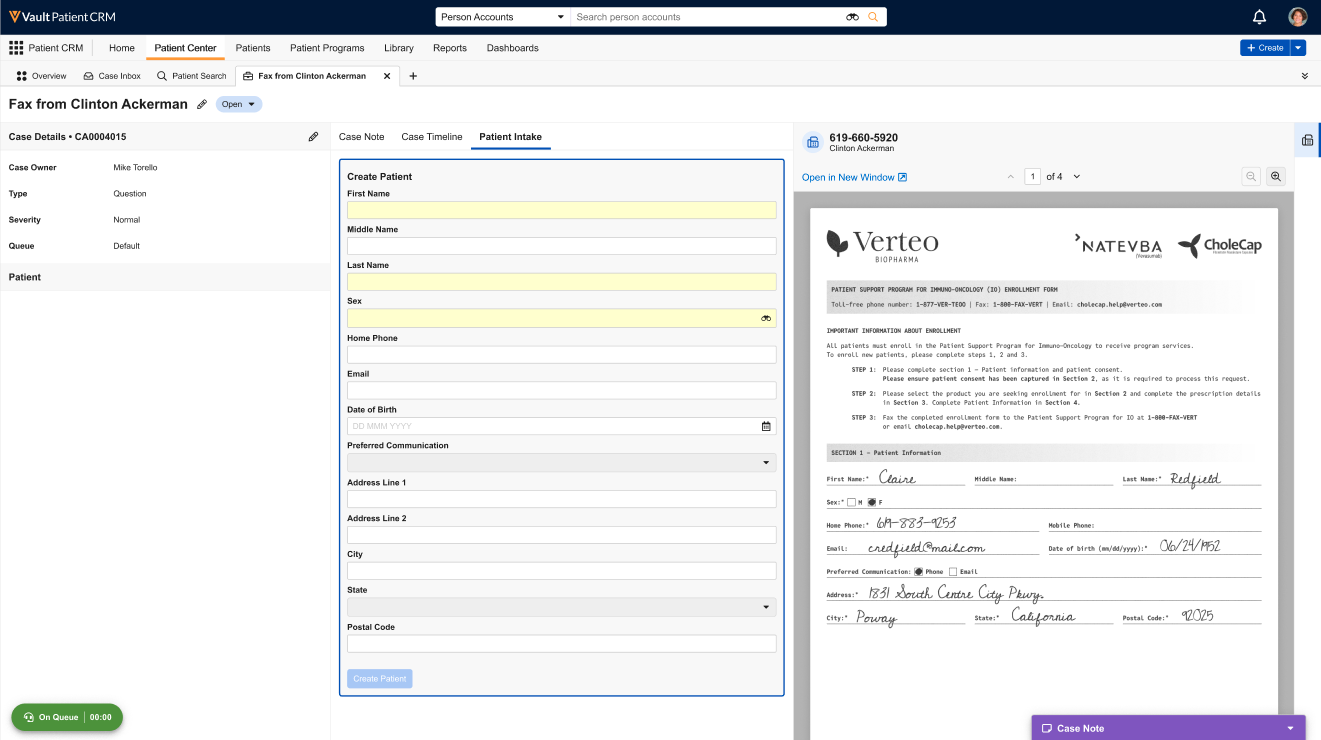
Creating Patients as Part of Patient Intake
If an existing patient could not be found during the patient intake process, end users can input patient details to create a new patient.
-
Navigate to the Patient Search page when intaking a new patient.
-
Select + Create Case.
-
Enter all appropriate information in the Patient Information section.
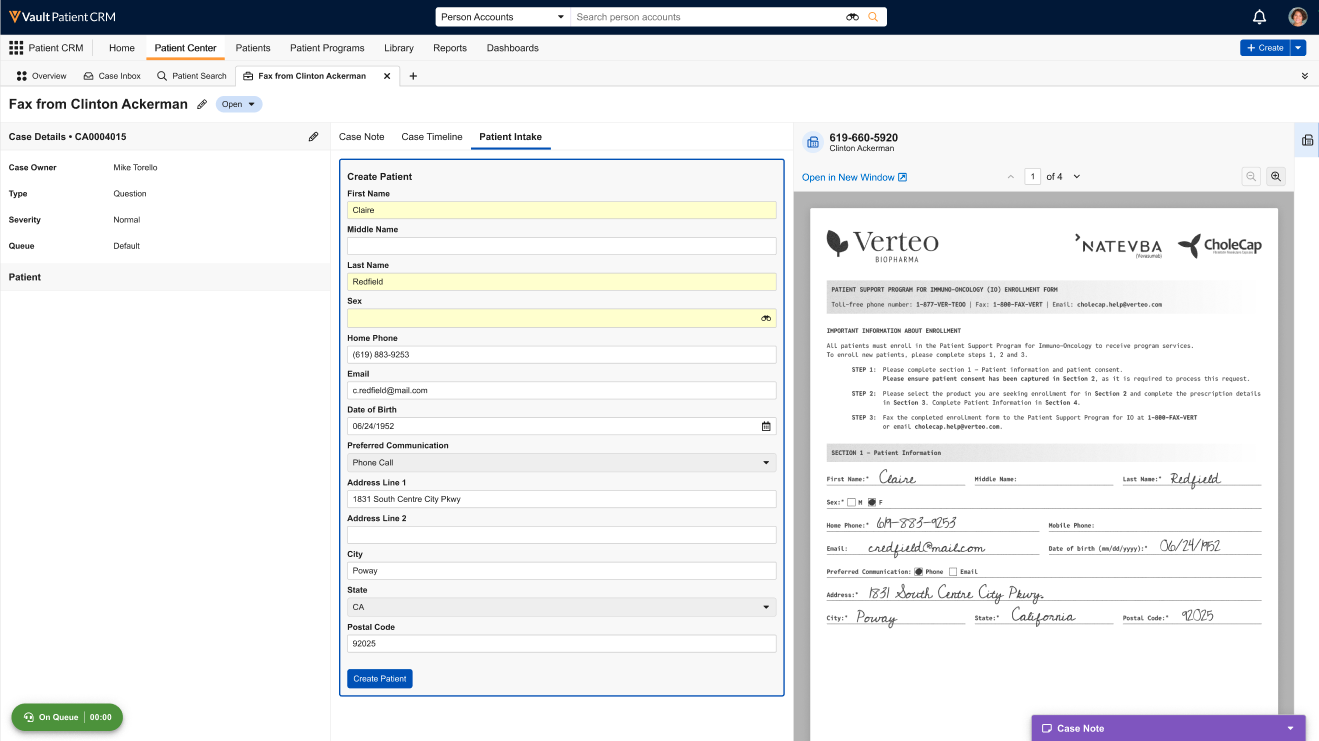
- Select Create Patient to proceed with intaking the patient via the same process as with an existing patient.

