Navigating Territory Designer
After Territory Designer is installed and the necessary files are loaded, the user can begin to design and manipulate alignment scenarios. Here you will find instructions for basic operations, including working with databases, securing data, and customizing the workspace.
Opening a Database
To open a database:
- Navigate to File > Open Database.
-
Select the appropriate database file.
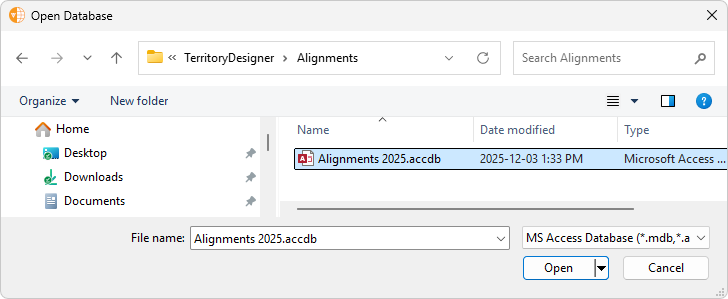
- Select Open.
Opening an Alignment Scenario
A single database can contain multiple alignment scenarios. After opening a database, a list of available alignment scenarios displays. Select the appropriate alignment scenario, then select one of the following actions:
- Open – Open an alignment that can be modified and saved. Select this option to begin an alignment session
- Cancel – Returns to the previous window
- Show Notes – Displays a field to add or review notes for each alignment
- Show Hidden Alignment Scenarios – Displays hidden alignments

Additionally, right-clicking on an alignment enables users to hide or unhide or rename the alignment.

Managing Alignment Scenarios
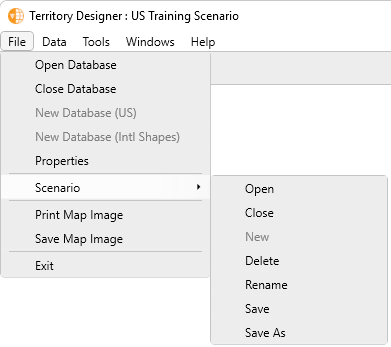
To manage an alignment scenario, navigate to File > Scenario. Users can perform the following actions:
- Open a different scenario – Prompts to open a different scenario from the current database. Closes the current scenario and prompts to save changes.
- Close the current scenario – Closes the current scenario. The database remains open to allow creation of a new scenario through File> Scenario> New or Data> Import.
- New scenario – Starts the process of creating a new Alignment
- Delete a scenario – A deleted scenario is not recoverable
- Rename the current scenario
- Save the current scenario
- Save the current scenario as a copy – Prompts for a name of the new Alignment copy. The new copy remains open. The original is retained from its last save.
Viewing Alignment Scenario Properties
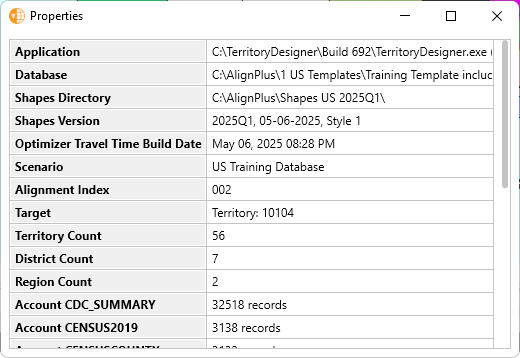
To view the properties of the current alignment scenario, navigate to File > Properties. The Properties dialog box displays the following key information:
- Application name and location
- The name and location of the currently open database
- The version and location of the shapes directory
- Optimizer travel time build date
- Scenario currently open
- Target territory (if defined)
- Counts for each alignment level
- Record counts for each added account file
- User access type
Customizing the Workspace
Territory Designer offers several ways to arrange the alignment tool windows. Users can select these preferences from the Windows menu.

- Docked Windows – Joins the alignment windows areas into a single, tiled screen for simultaneous viewing. This view provides access to all information at once, but may limit the visible content within each tool due to space constraints.
- Undocked Windows – Each window is independent and can be moved freely around the available desktop. Individual windows can be closed. To reopen a closed window, select its name from the Window menu. This option is useful when using multiple monitors.
When windows are undocked, each window must be individually selected to display. Windows can be selected from the Windows menu or from the toolbar buttons ( ).
).
The following windows are a group of integrated panels used to balance territories, analyze attributes, align geography or accounts, and maintain option settings.
- Scenario Tree – Enables the user to build and focus the field force's hierarchical structure by adding or deleting territories and selecting the focus
- Territory Summary – Displays detailed information and attributes for the levels selected as the focus in the Scenario Tree
- Map – Provides a visual representation of the alignment. It displays geographic areas or accounts colored according to their assigned territory. The user can overlay additional layers like roads, labels, attributes, and account locations.
- Alignment Worksheet – Displays information about territories, accounts, and ZIP codes in the selected area of the map, enabling users to preview changes before they are committed
- Options – Displays the Options menu, which contains various tabs for customizing map and alignment preferences

