Enabling Call Booking Support
To enable end users to focus fully on call execution, some organizations authorize designated users (booking coordinators ) to handle call scheduling and planning. Call Booking Support enables booking coordinators to assign planned calls to other users, for centralized call planning.
Who can use this feature?
- Booking Coordinators — Browser
- Assigning Calls with Call Booking Support
- Users do not require an additional license
Configuring Call Booking Support for
To configure this feature:
- Ensure Configuring Call Planning is complete.
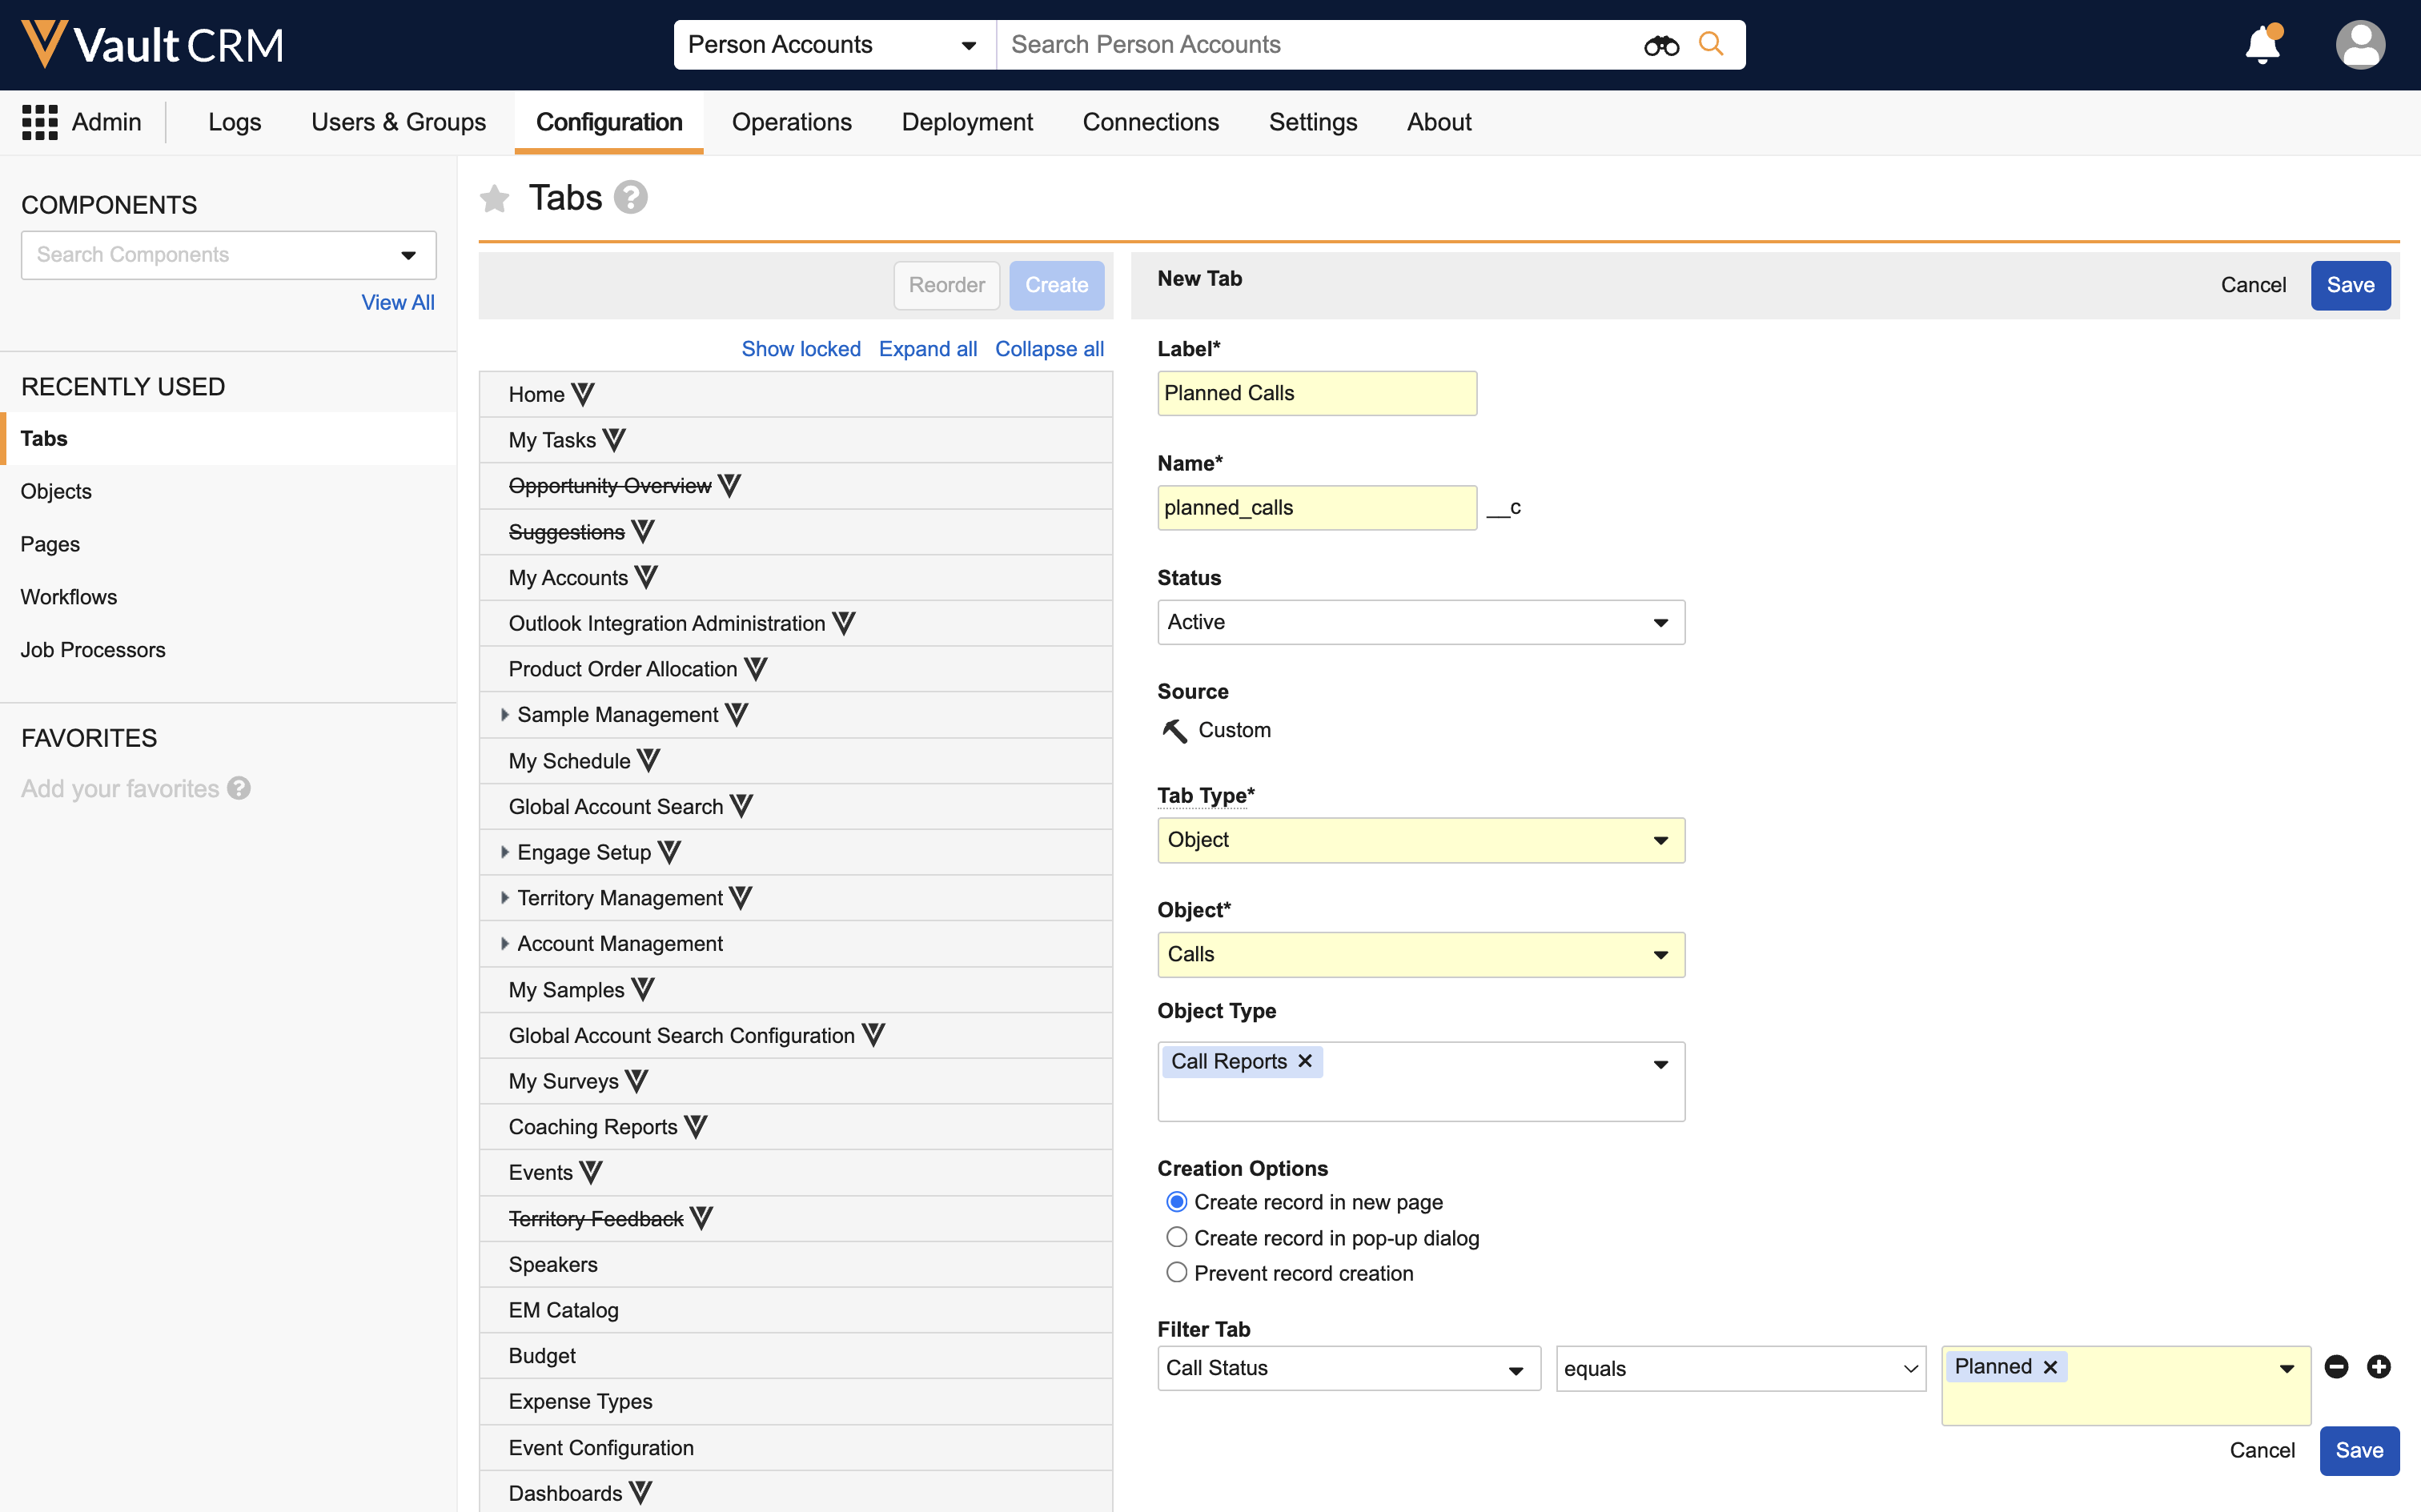
- Navigate to Admin > Configuration > Tabs.
- Create a Planned Calls tab for the call2__v object. Filter records by the call2_status__v field, to only include calls in planned status.
- Navigate to Admin > Users & Groups > Permission Sets.
- Select the appropriate permission set.
- Select the Objects tab.
- Grant booking coordinators Edit field permission to the following fields on the call2__v object:
- assigner__v
- assignment_datetime__v
- ownerid__v
- call2_status__v
Do not grant end users any level of field permission to the assigner__v and assignment_datetime__v fields.
- Select the Tabs tab.
- Grant booking coordinators access to the Planned Calls tab.
- Create a separate booking agent layout on the call2__v object and assign it to booking coordinators:
- Navigate to Admin > Configuration > Objects > call2__v > Layouts
- Create a layout for booking coordinators and ensure the call2_status__v field is placed on the layout. This enables booking coordinators to modify the call booking and save details while the call is in Planned status, then transfer the call to the appropriate user.
- Navigate to Admin > Users & Groups > Layout Profiles
- Create a layout profile for booking coordinators, or select an existing profile
- Select the Layouts tab for the appropriate layout profile
- Add the newly created call2__v object layout to the booking agent layout profile
For more information on layout profiles, see Configuring Layout Profiles on the Vault platform help site.
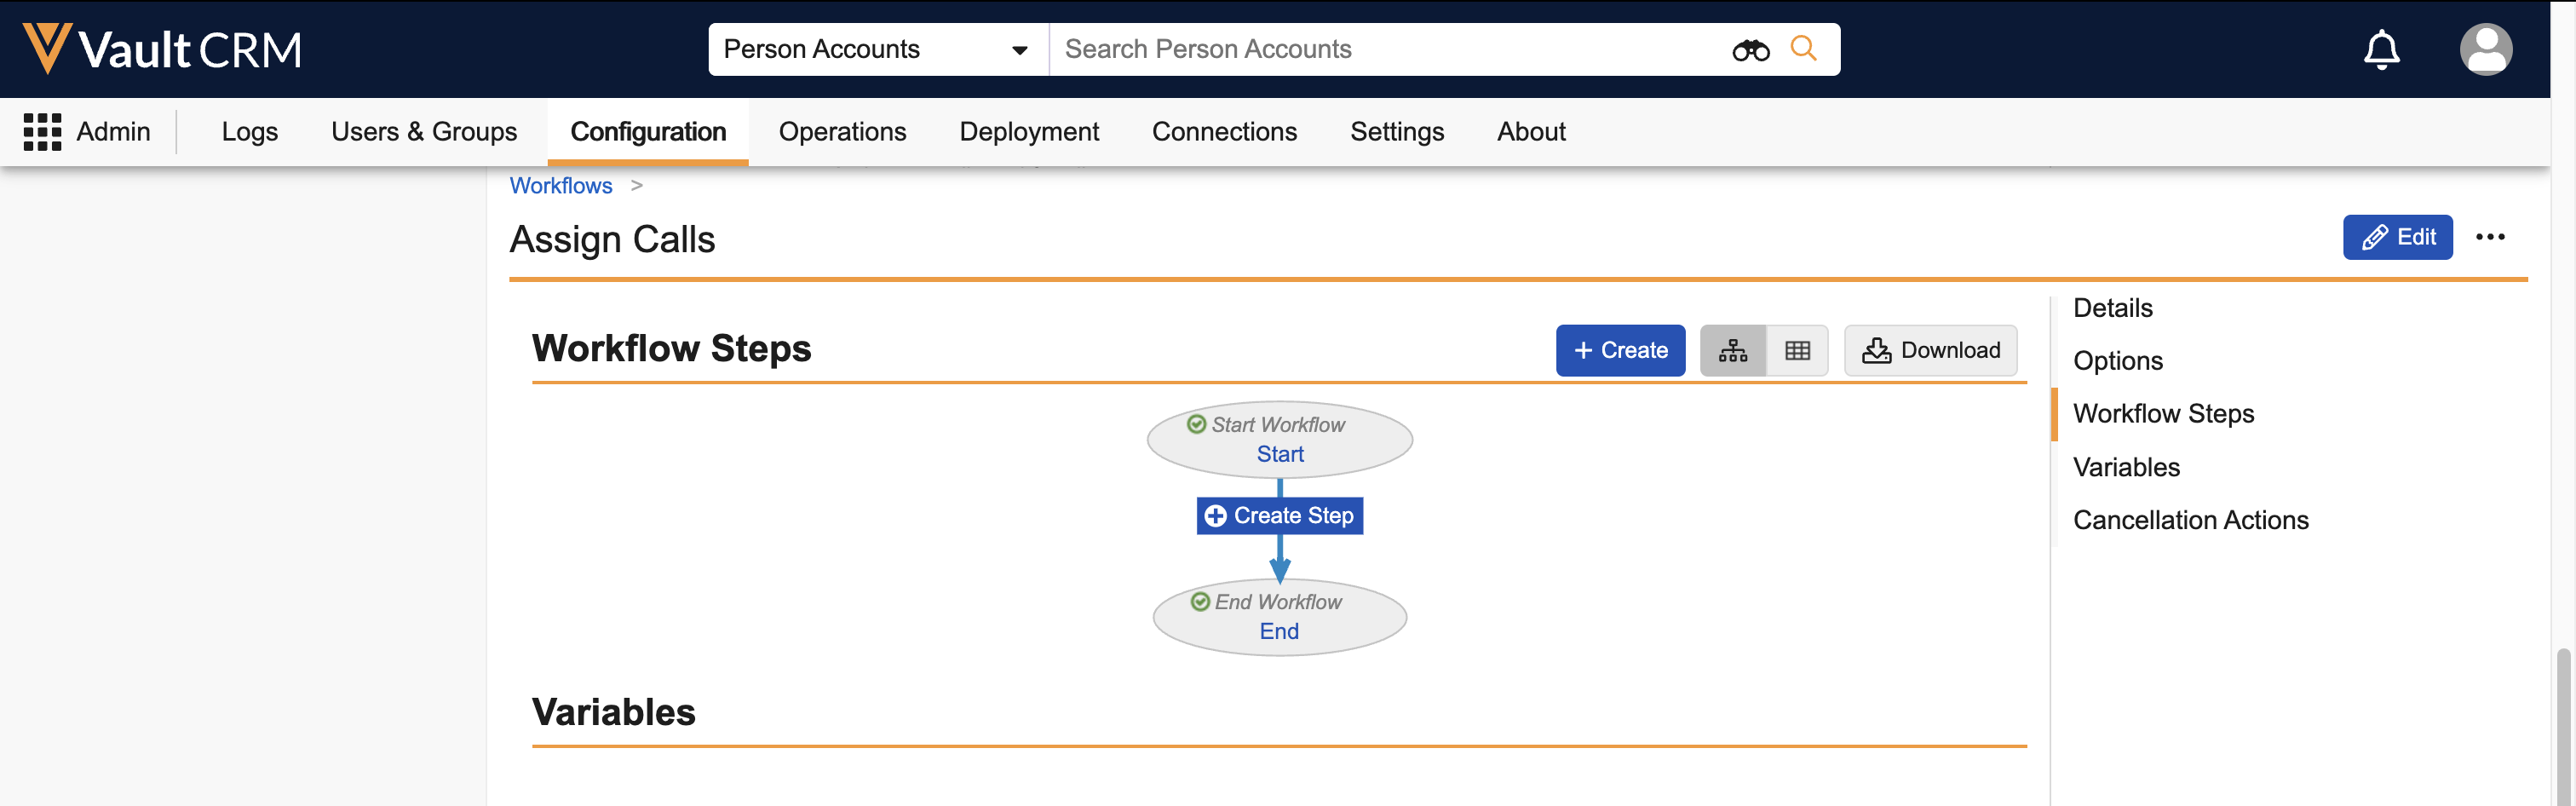
Configuring the Assign Calls Workflow
Ensure there is an Assign Calls workflow associated to the Call lifecycle.
If not, create the workflow and associate it to the Call lifecycle:
- Create an assign_calls__c workflow:
- Navigate to Admin > Configuration > Workflows
- Select Create
- Select the Object Workflow type
- Select Continue
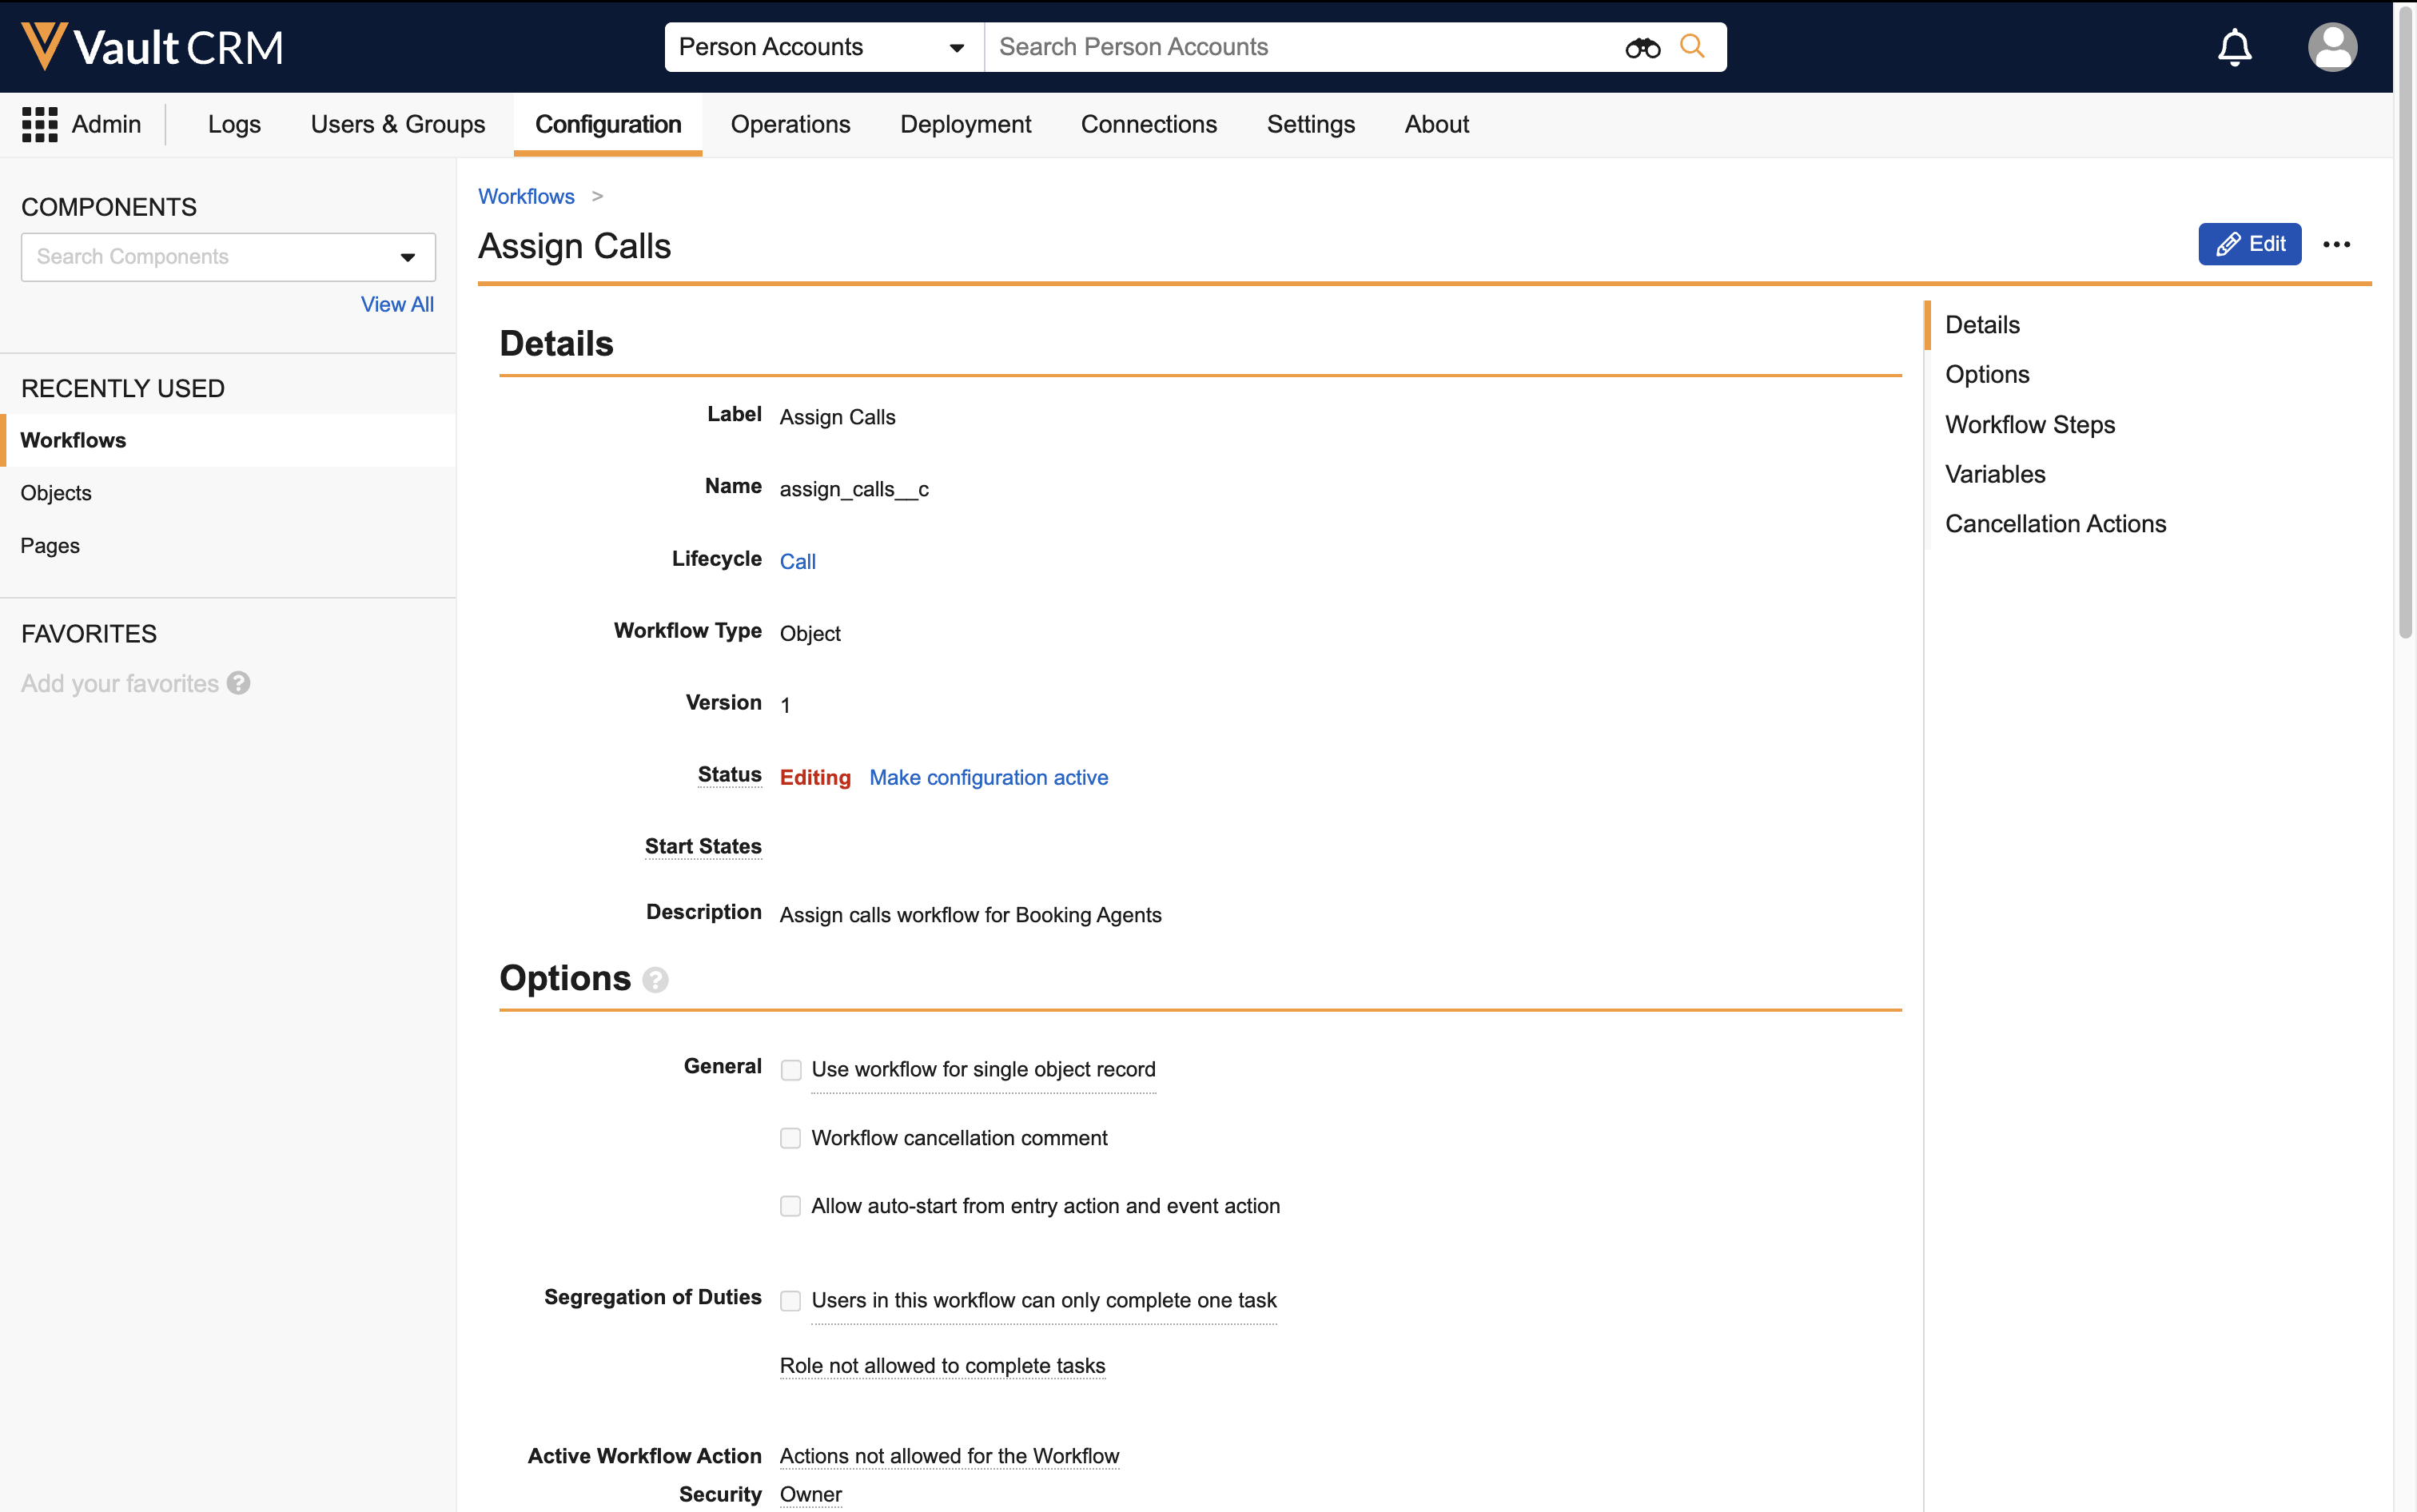
- Enter the following values:
- Label - Assign Calls
- Name - assign_calls__c
- Lifecycle - Call
- Select Save
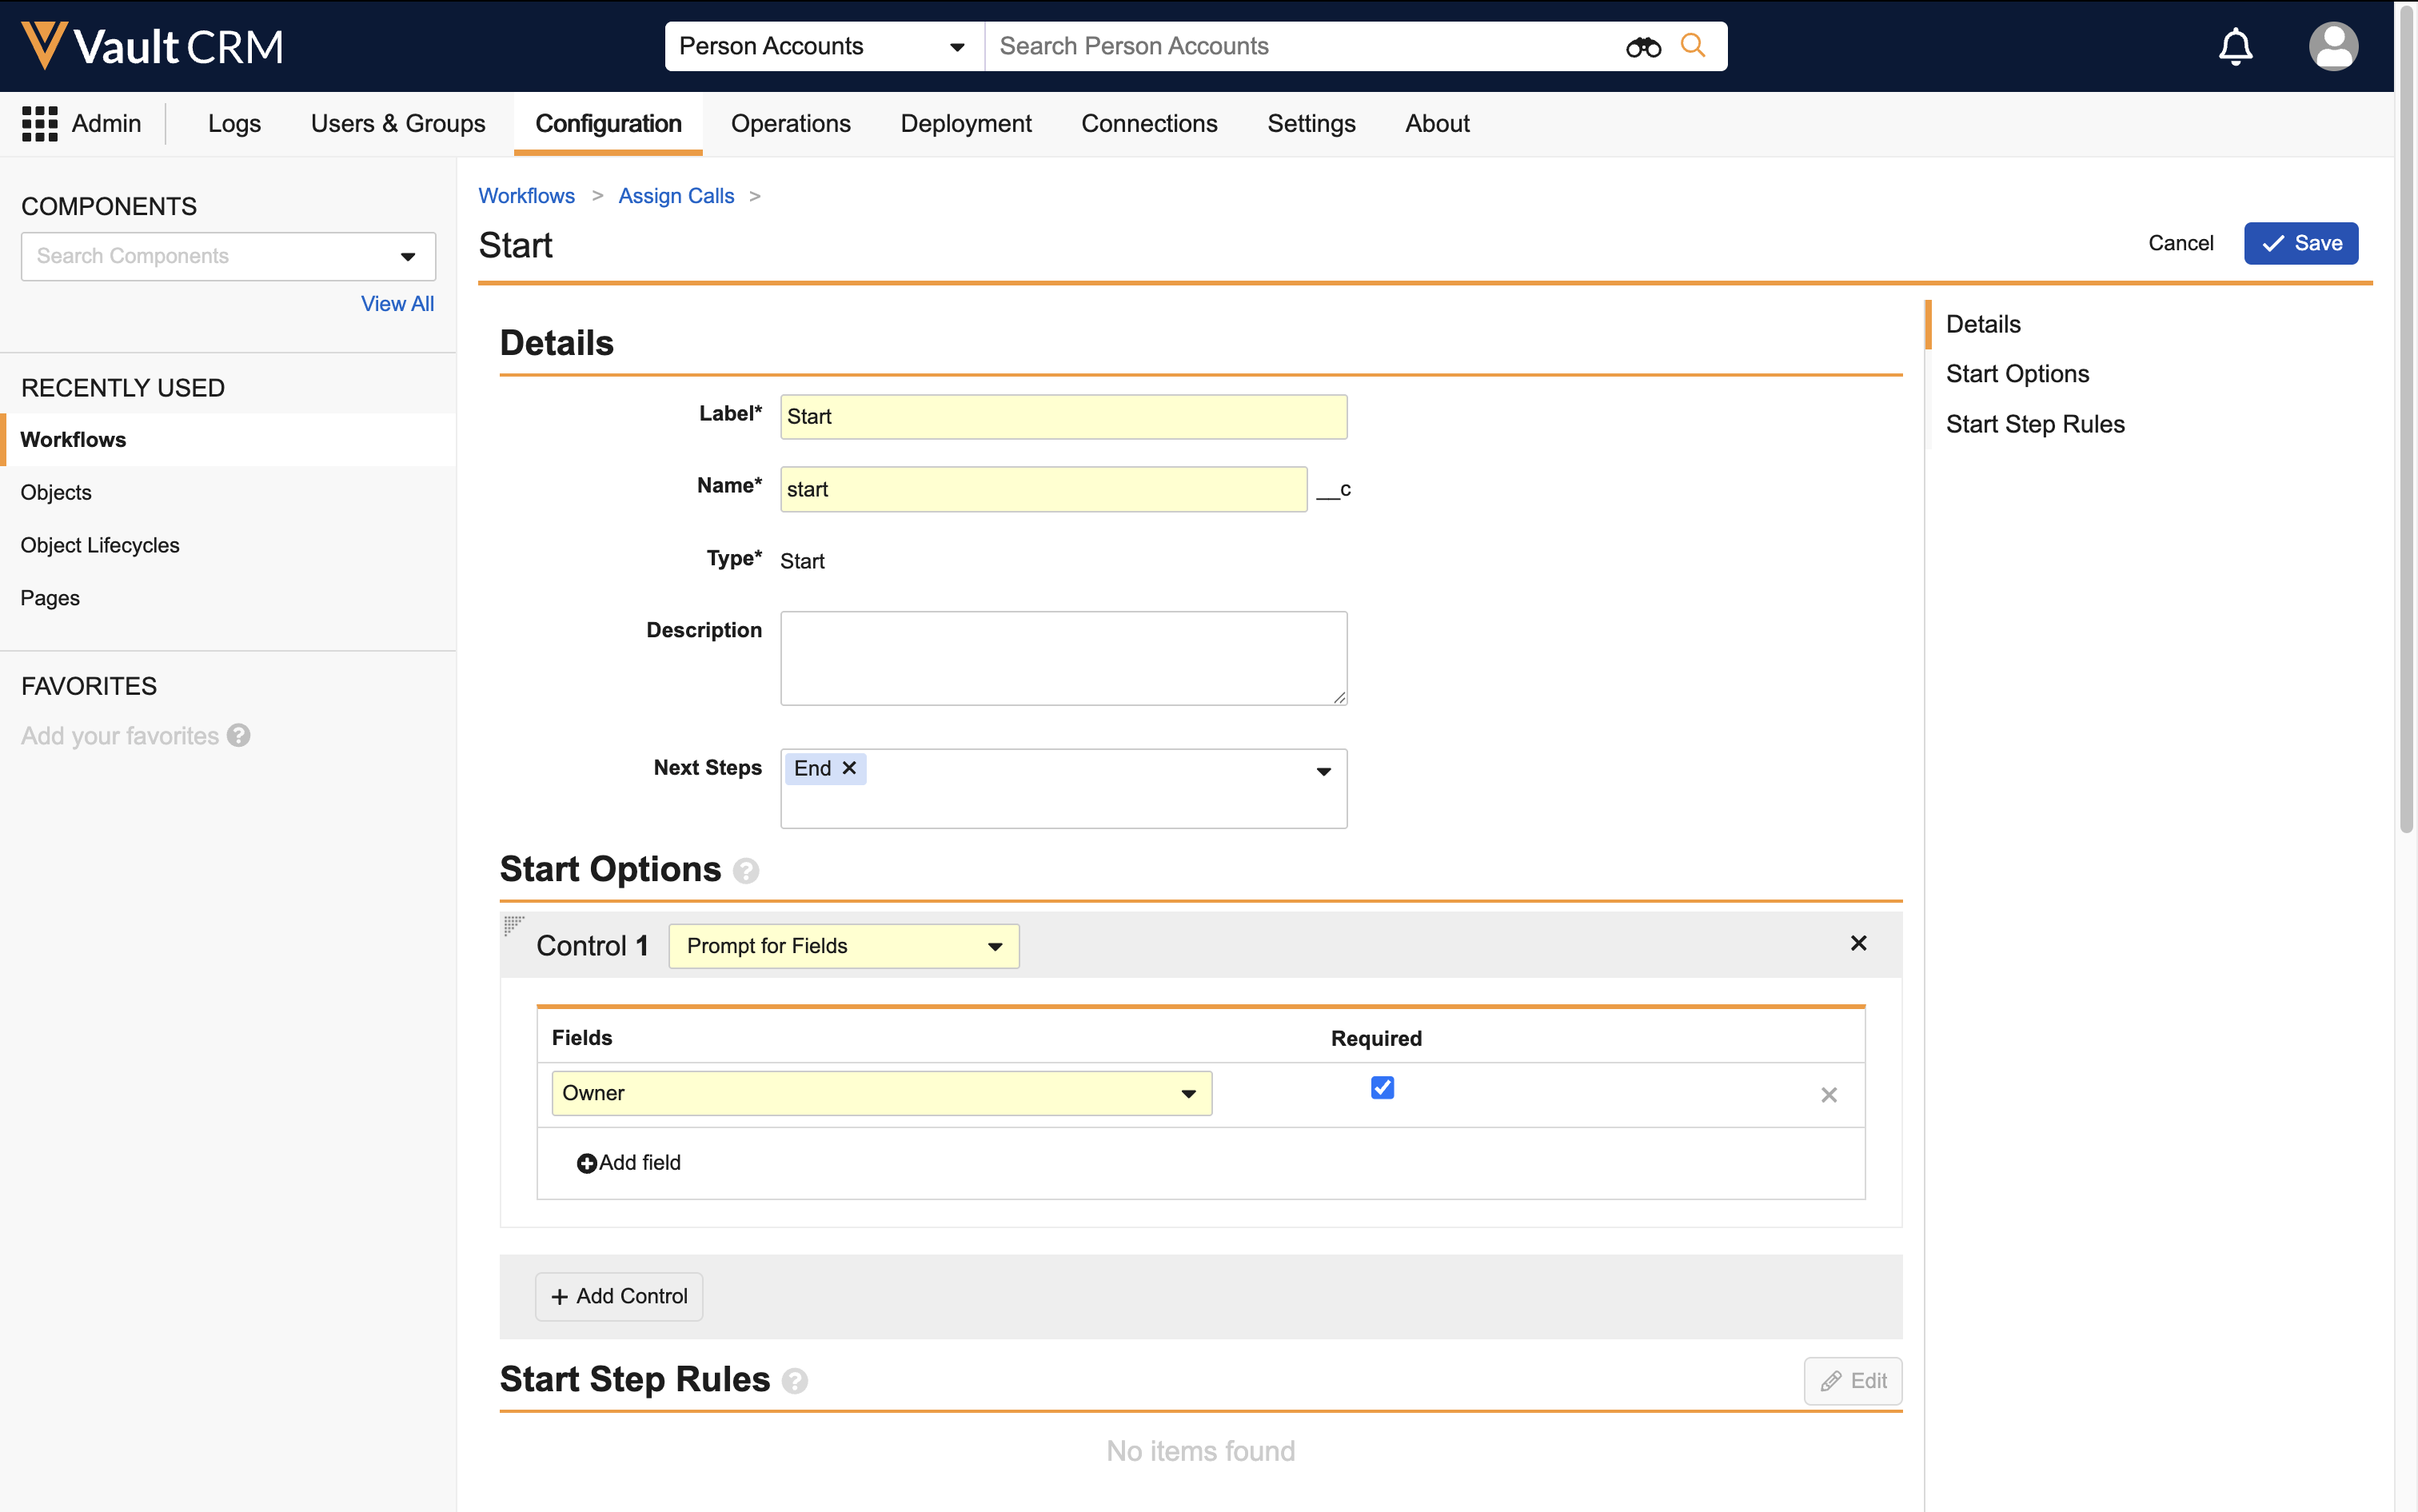
- Add a Start control:
- Select the Start node for the workflow, under Workflow Steps
- Select the Edit button
- Select Add Control, under the Start Options section
- Enter the following values:
- Control picklist - Select Prompt for Fields
- Field - ownerid__v
- Required - Select the Required checkbox
- Select Save.
- Return to the workflow.
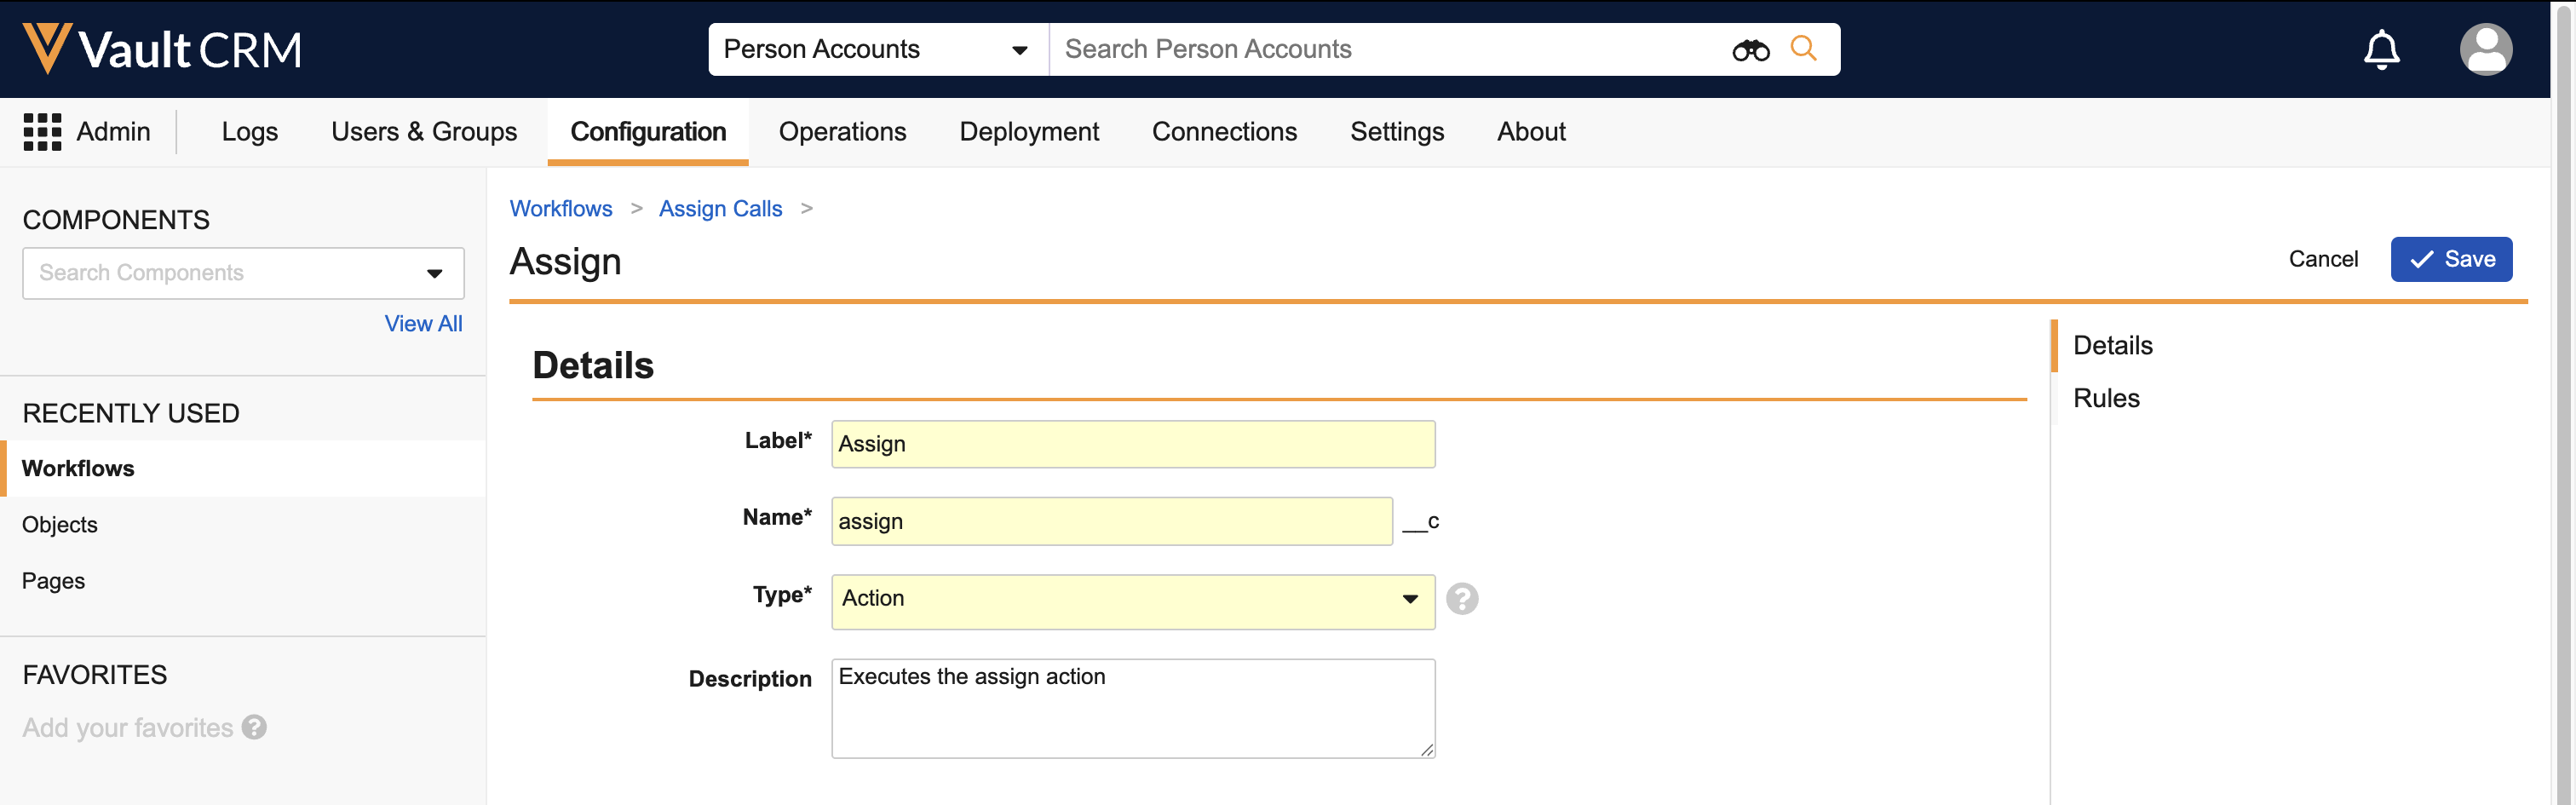
- Select Create Step from the Workflow Steps section.
- Enter the following values:
- Label - Assign
- Name - assign__c
- Type - Action
- Description - Executes the assign action
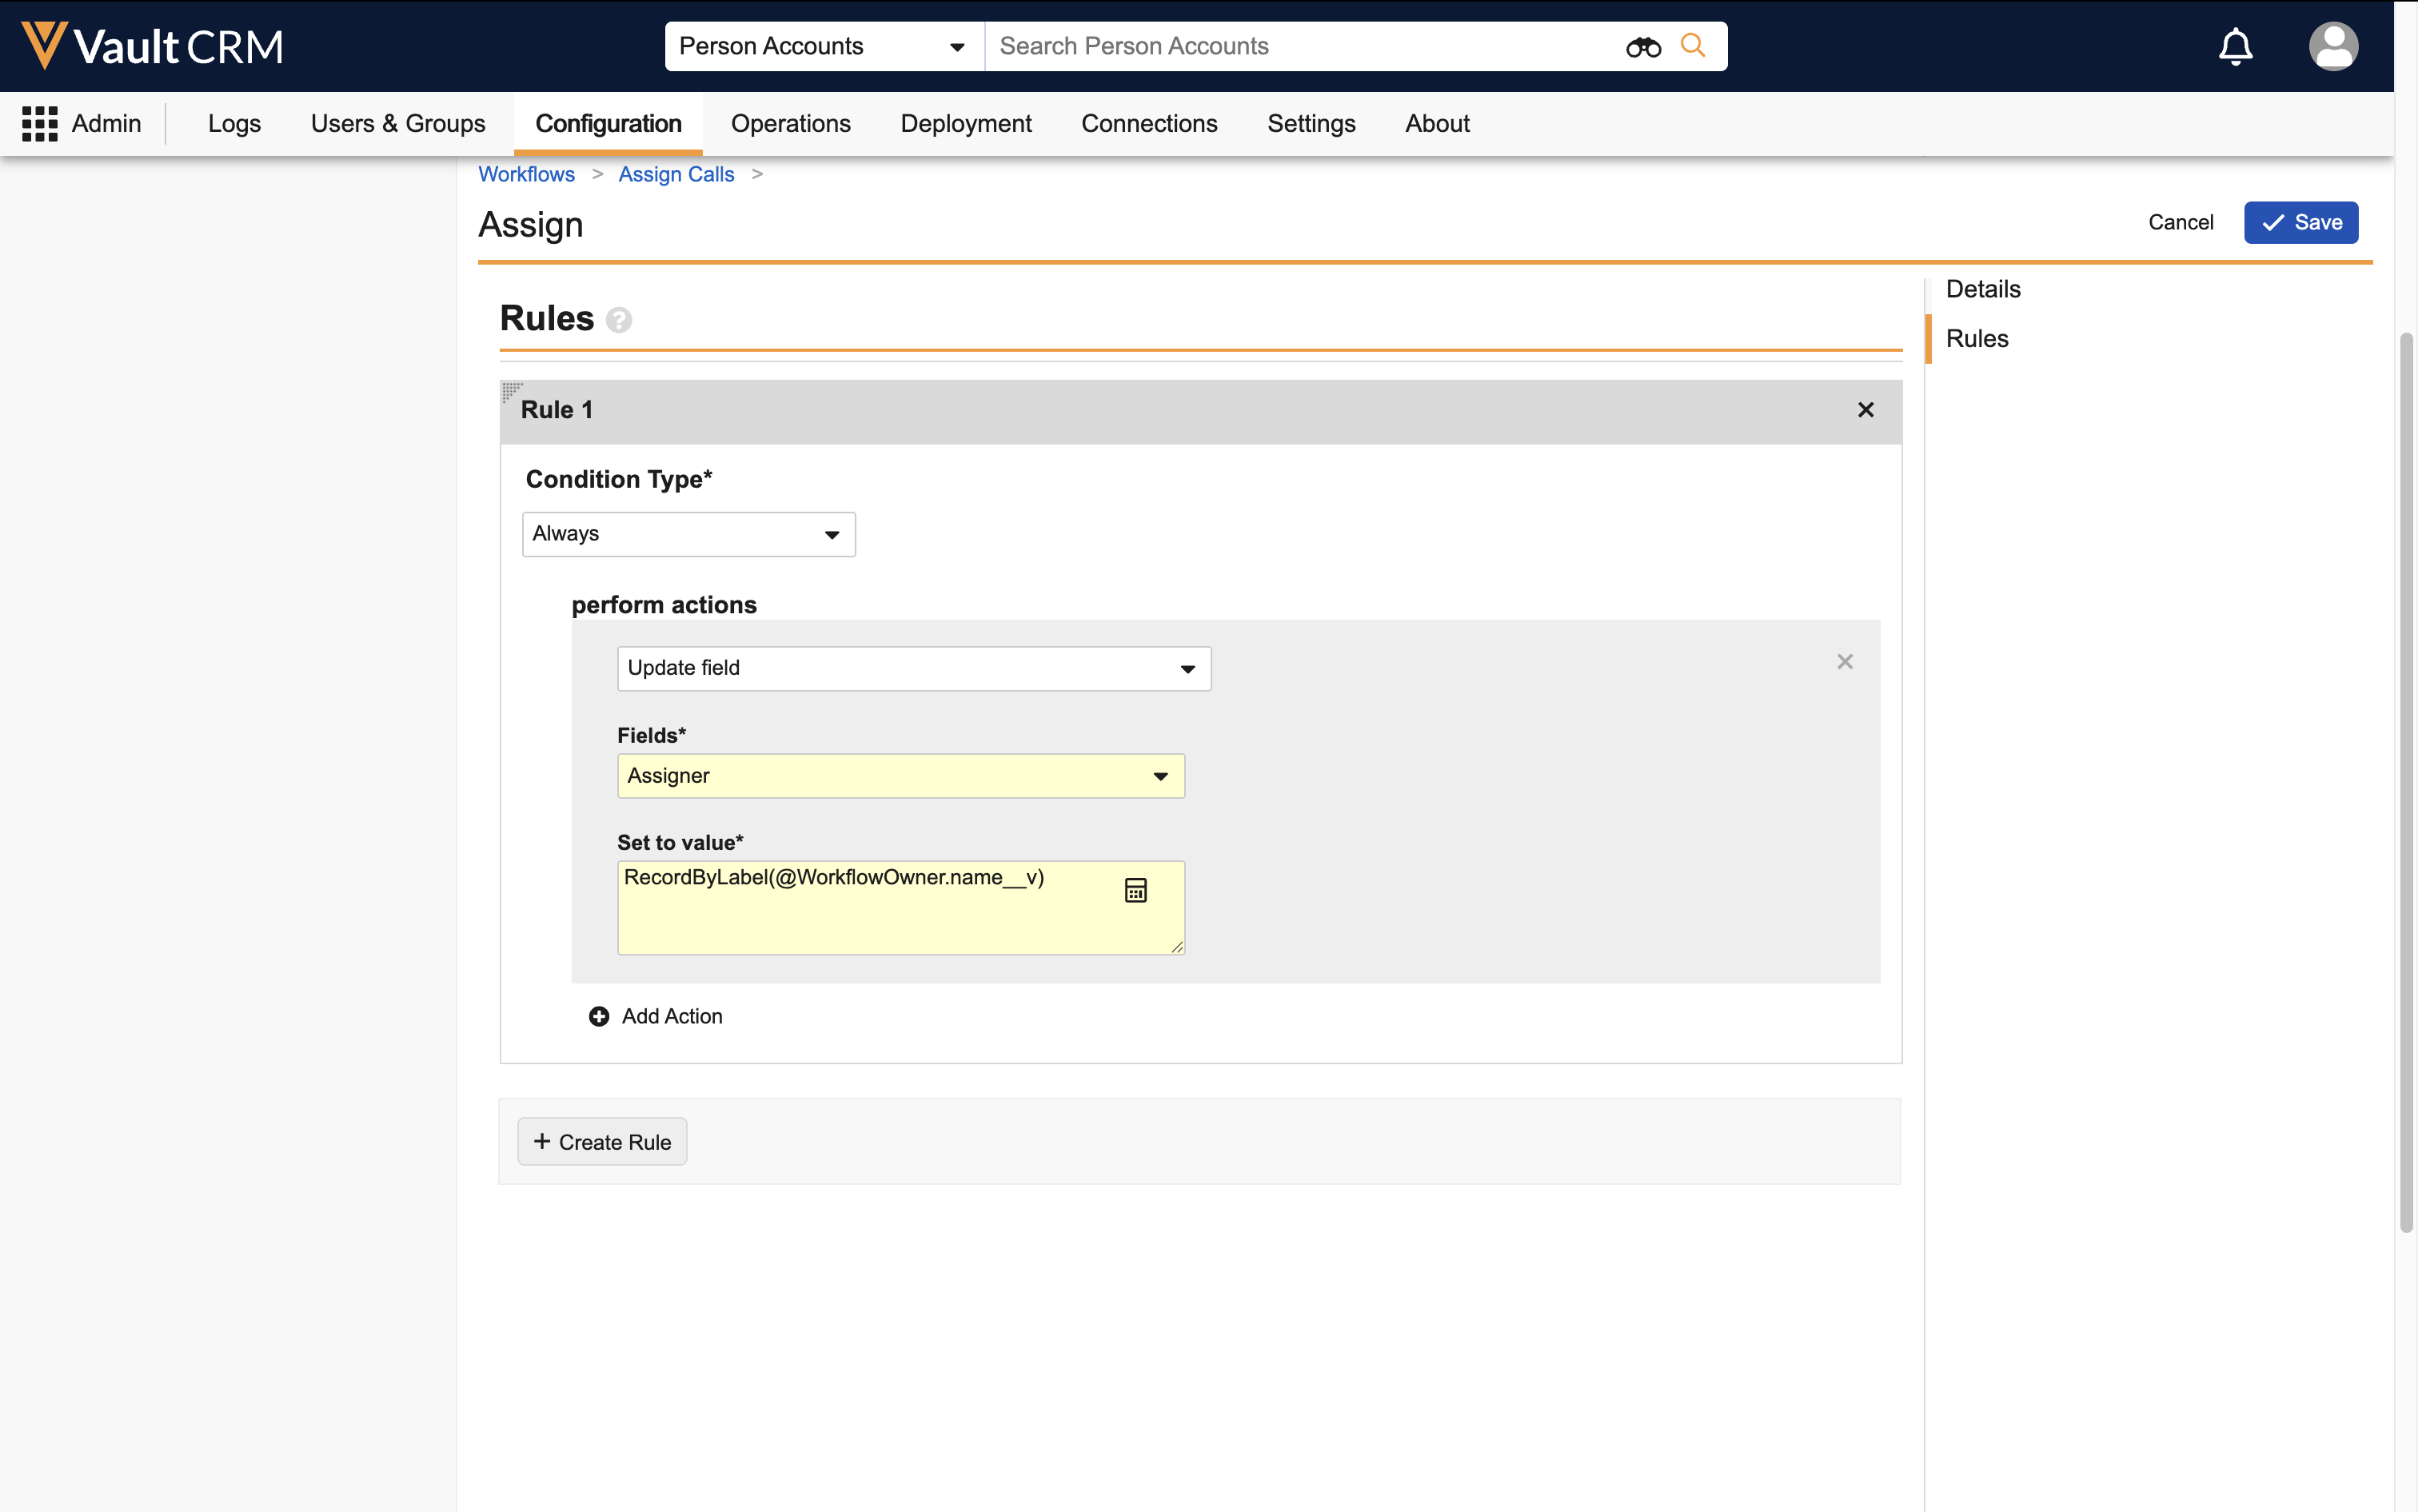
- Select the Create Rule button.
- Enter the following values for the first rule:
- Condition Type - Always
- Perform Action - Update field
- Field - assigner__v
- Set to value - RecordByLabel(@WorkflowOwner.name__v)
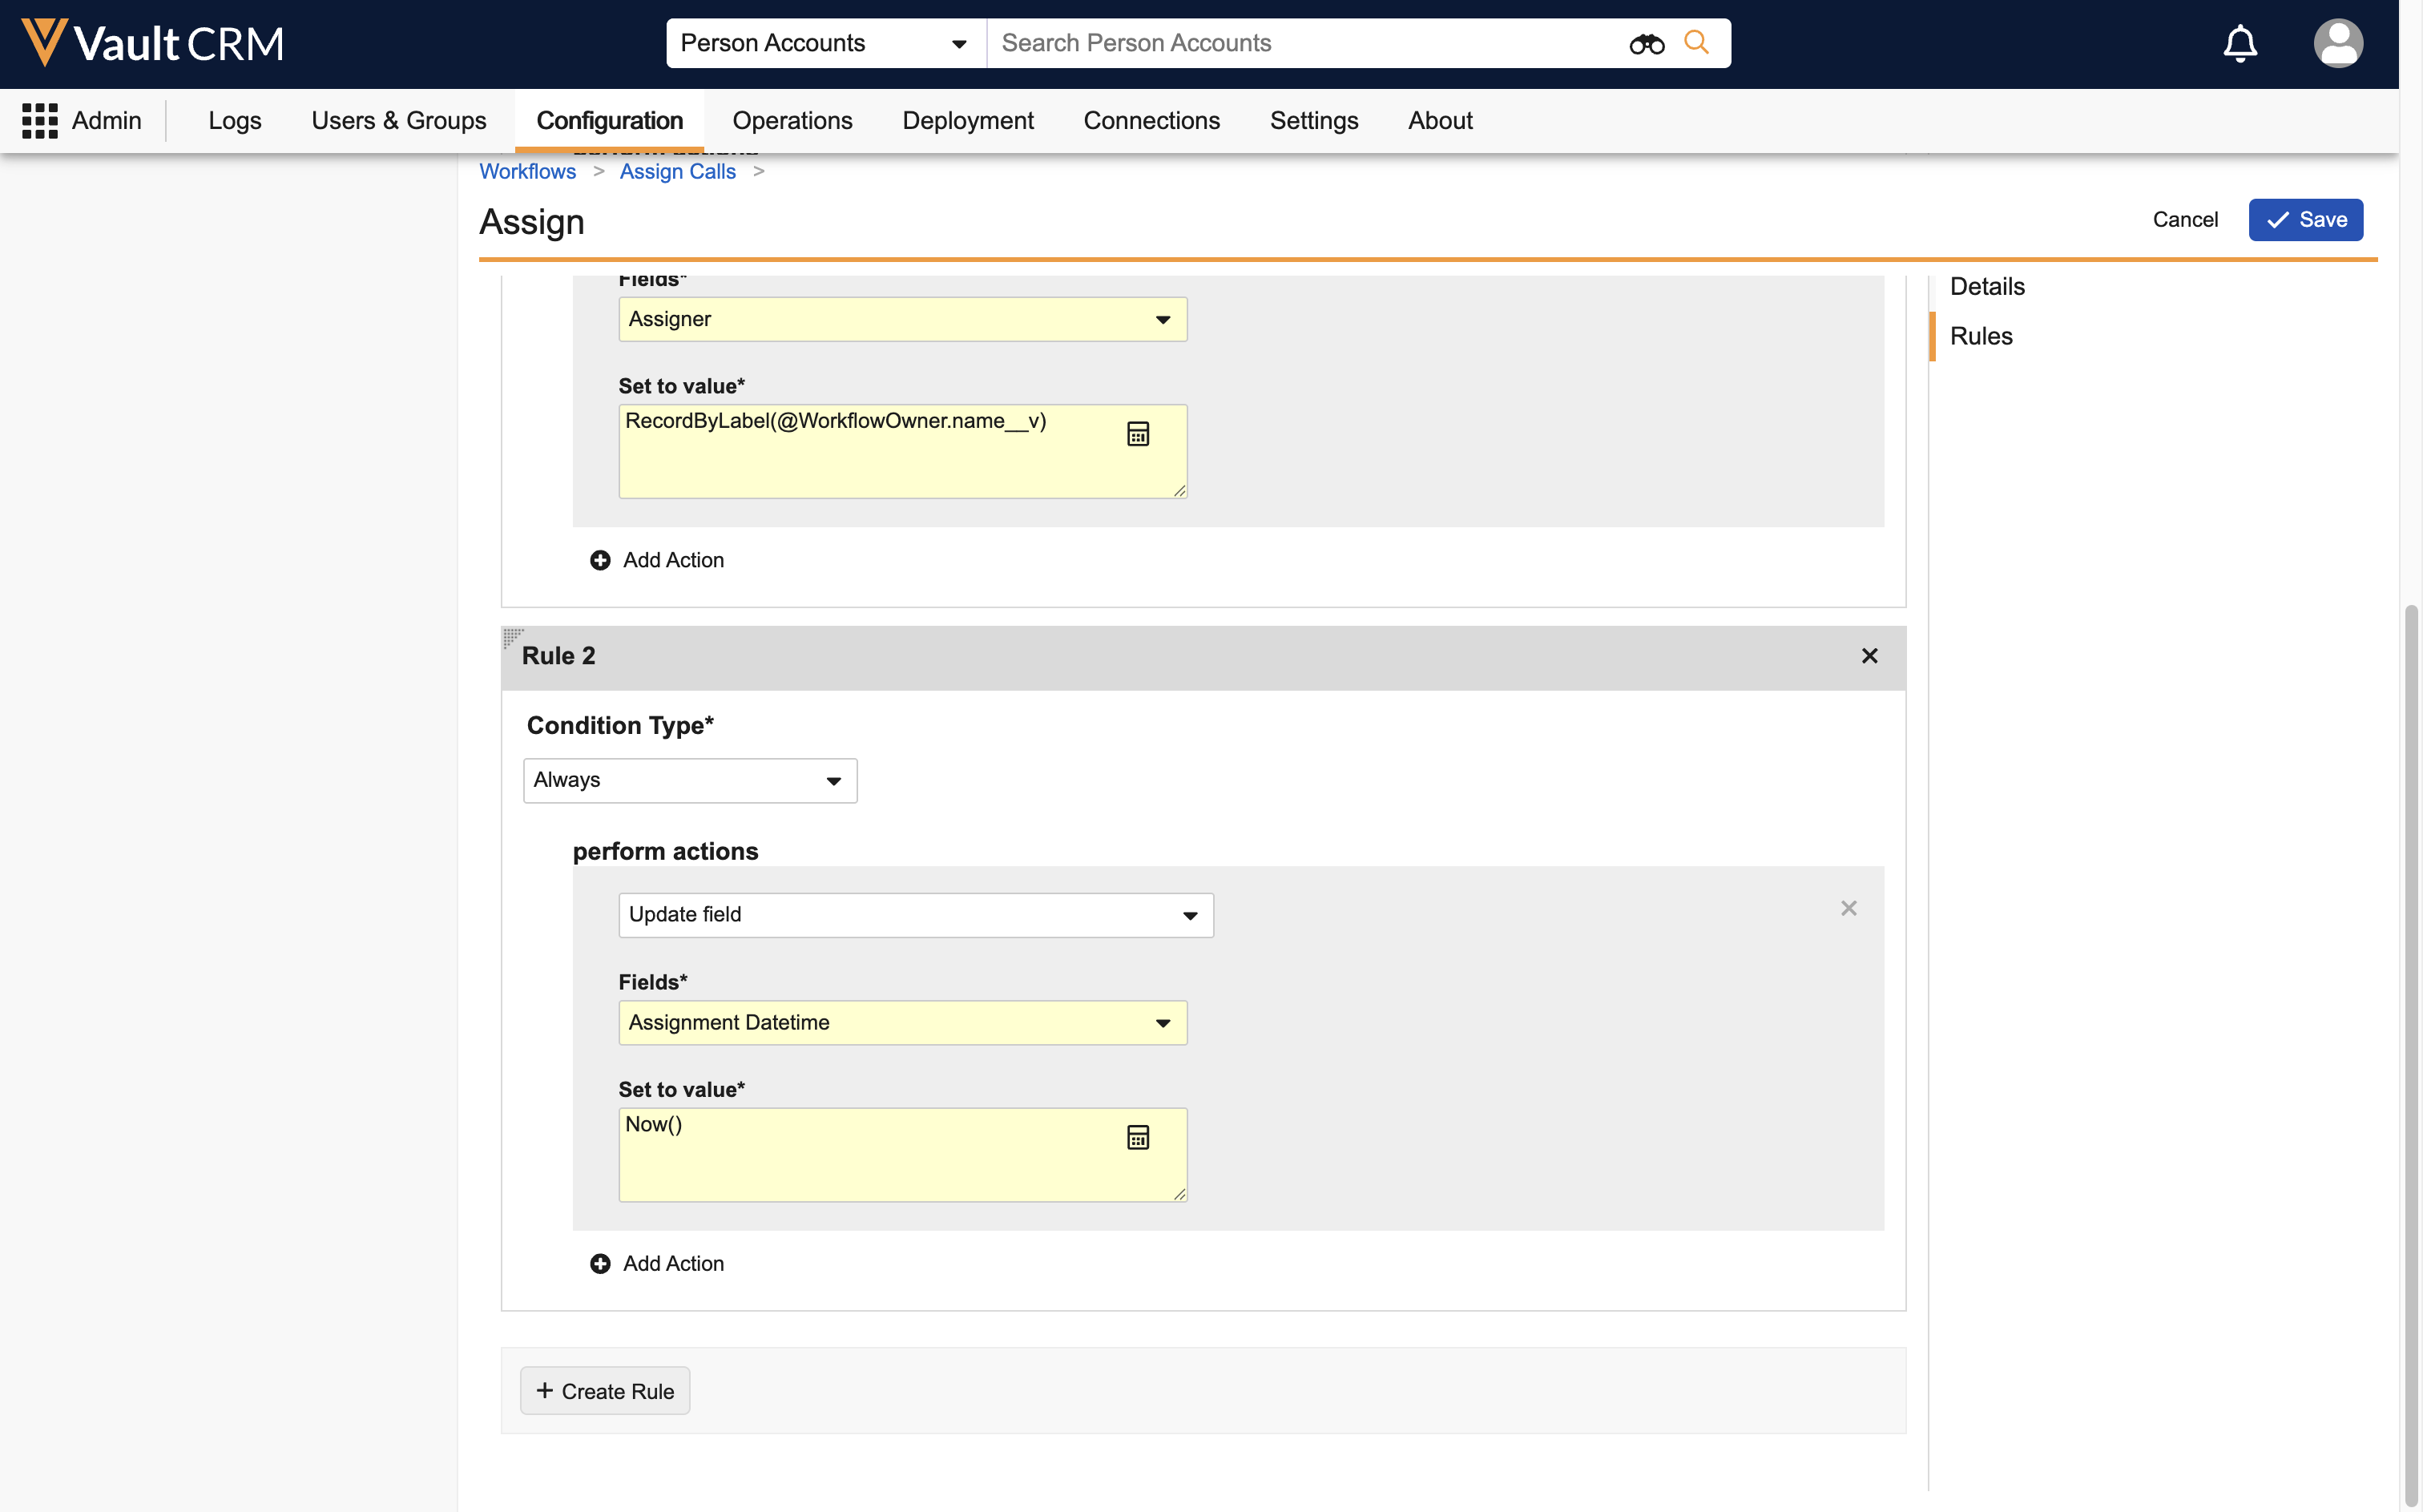
- Select the Create Rule button to create a second rule.
- Enter the following values for the second rule:
- Condition Type - Always
- Perform Action - Update field
- Field - assignment_datetime__v
- Set to value - Now()
- Select Save.
- Return to the workflow.
- Ensure the End Type is set to End workflow.
- Select Make the configuration active.
Ensure the Use workflow for single object record checkbox is not selected.
Next, associate the workflow to the Call lifecycle:
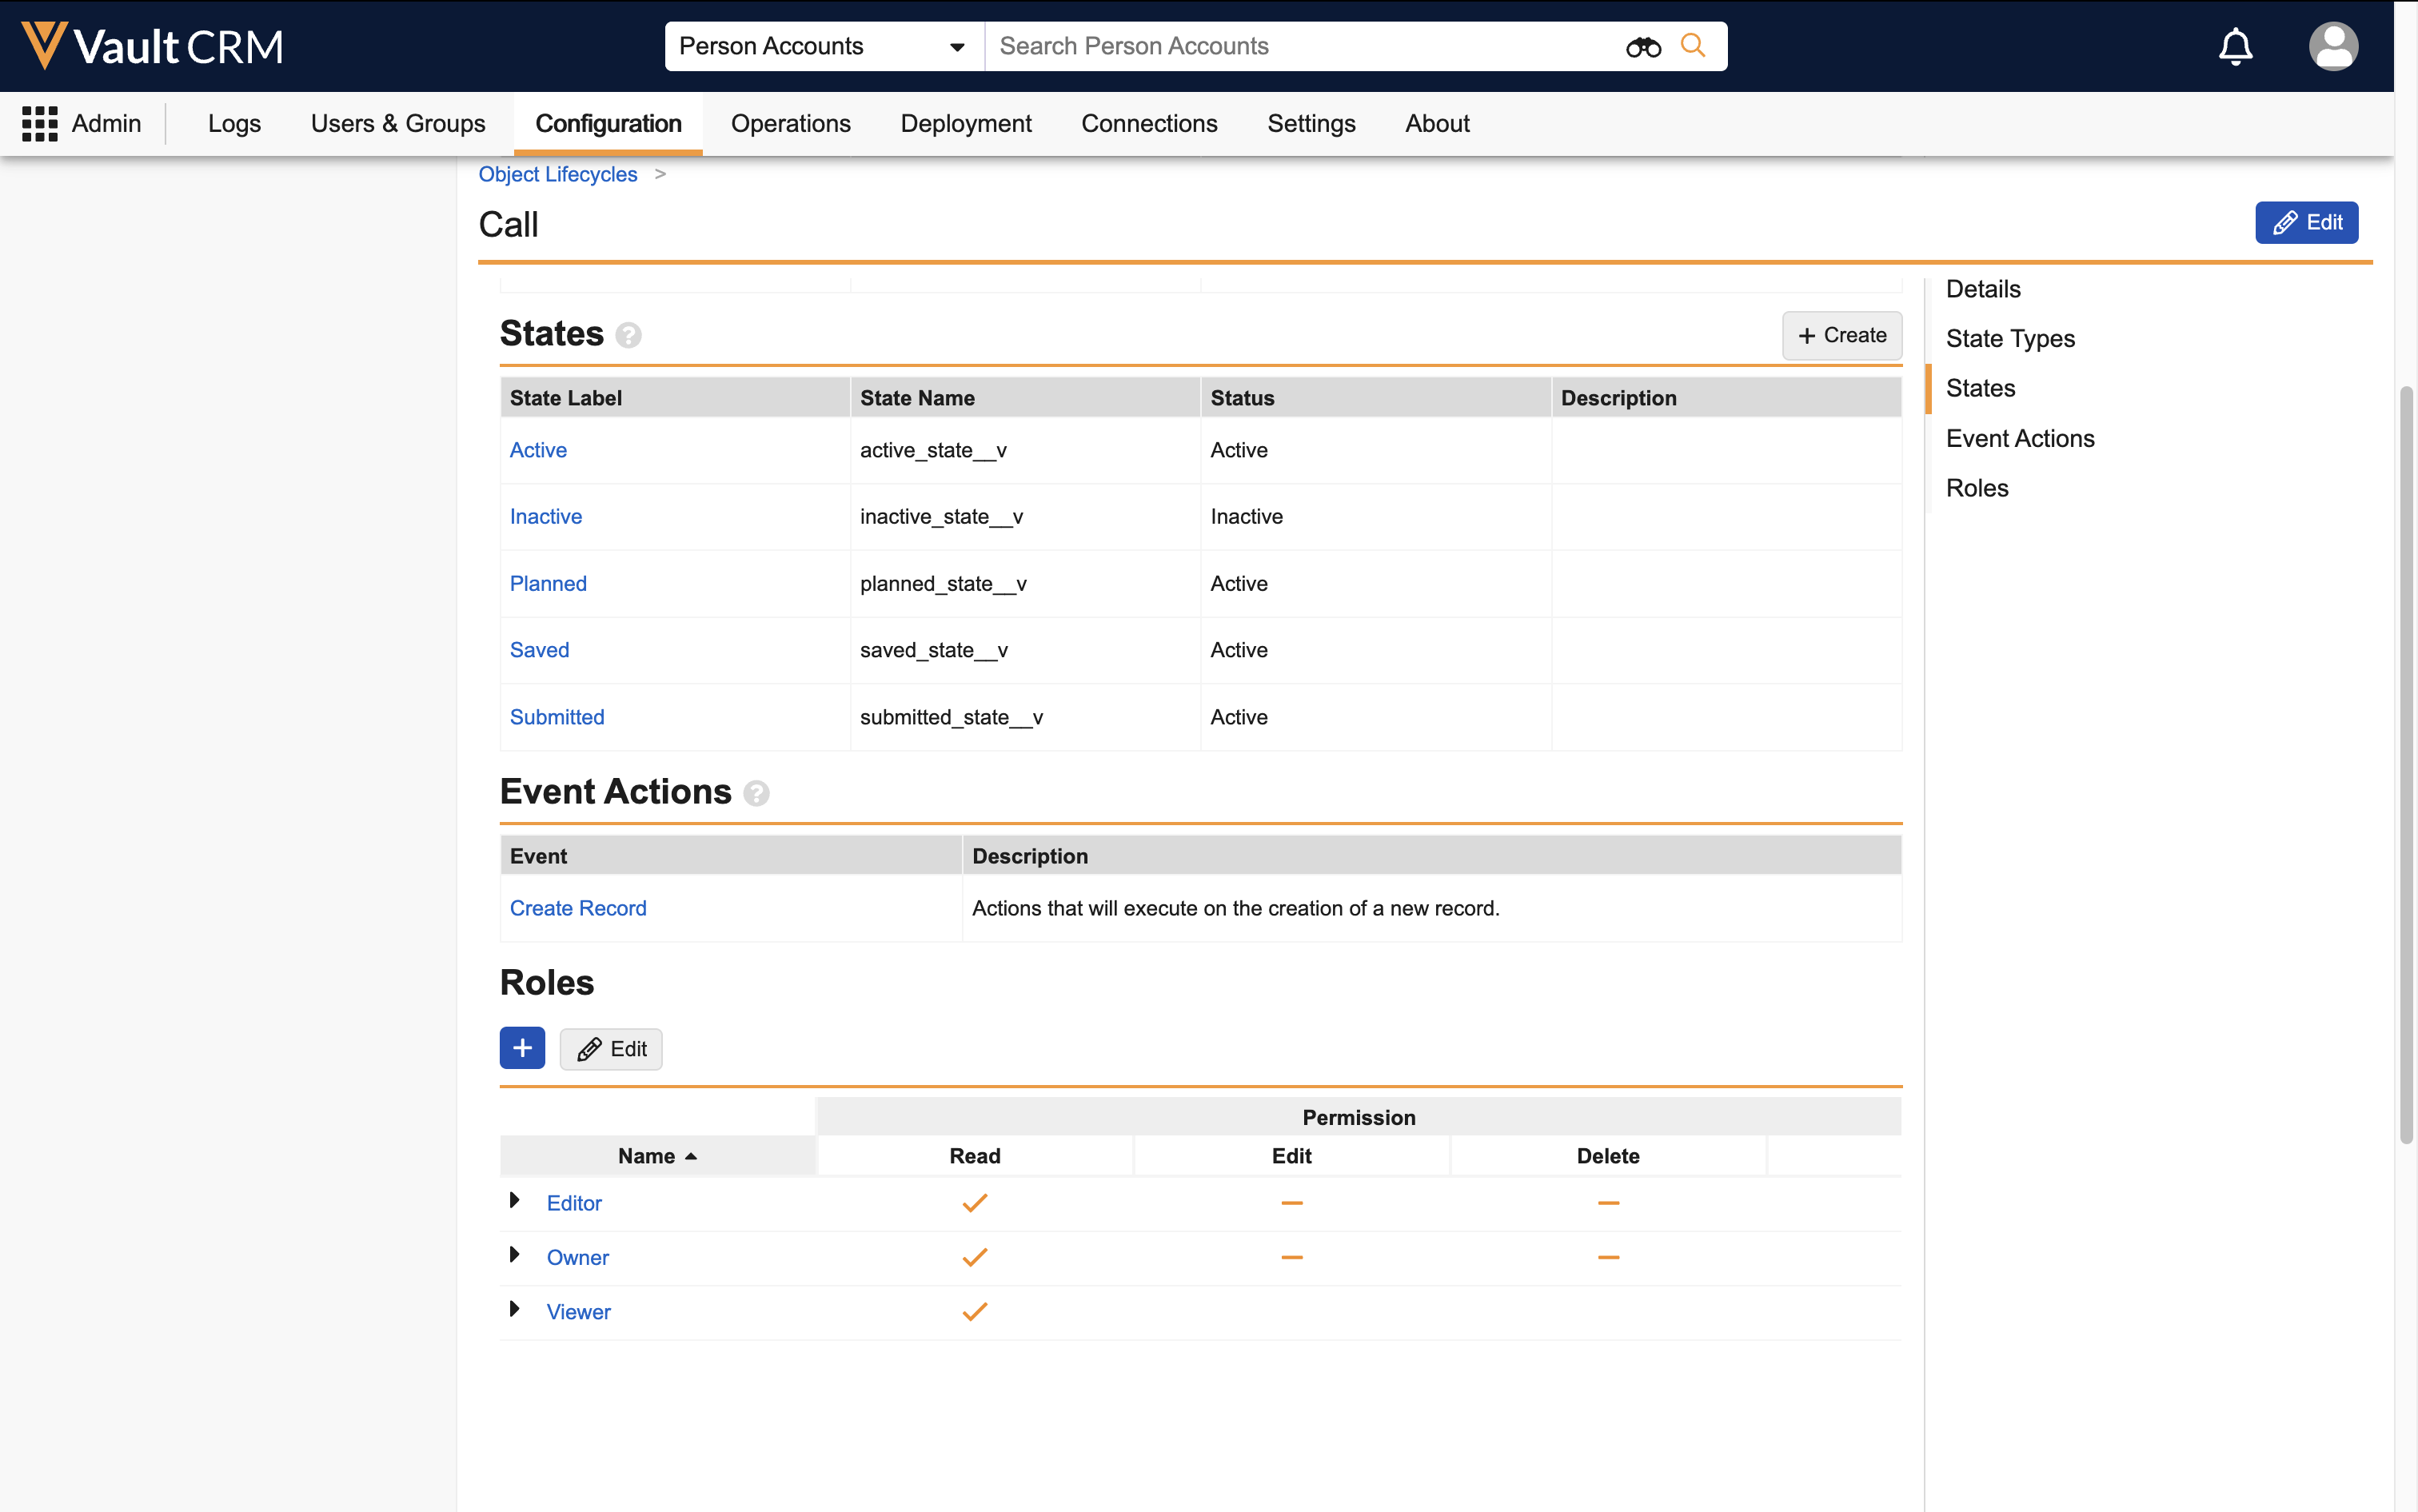
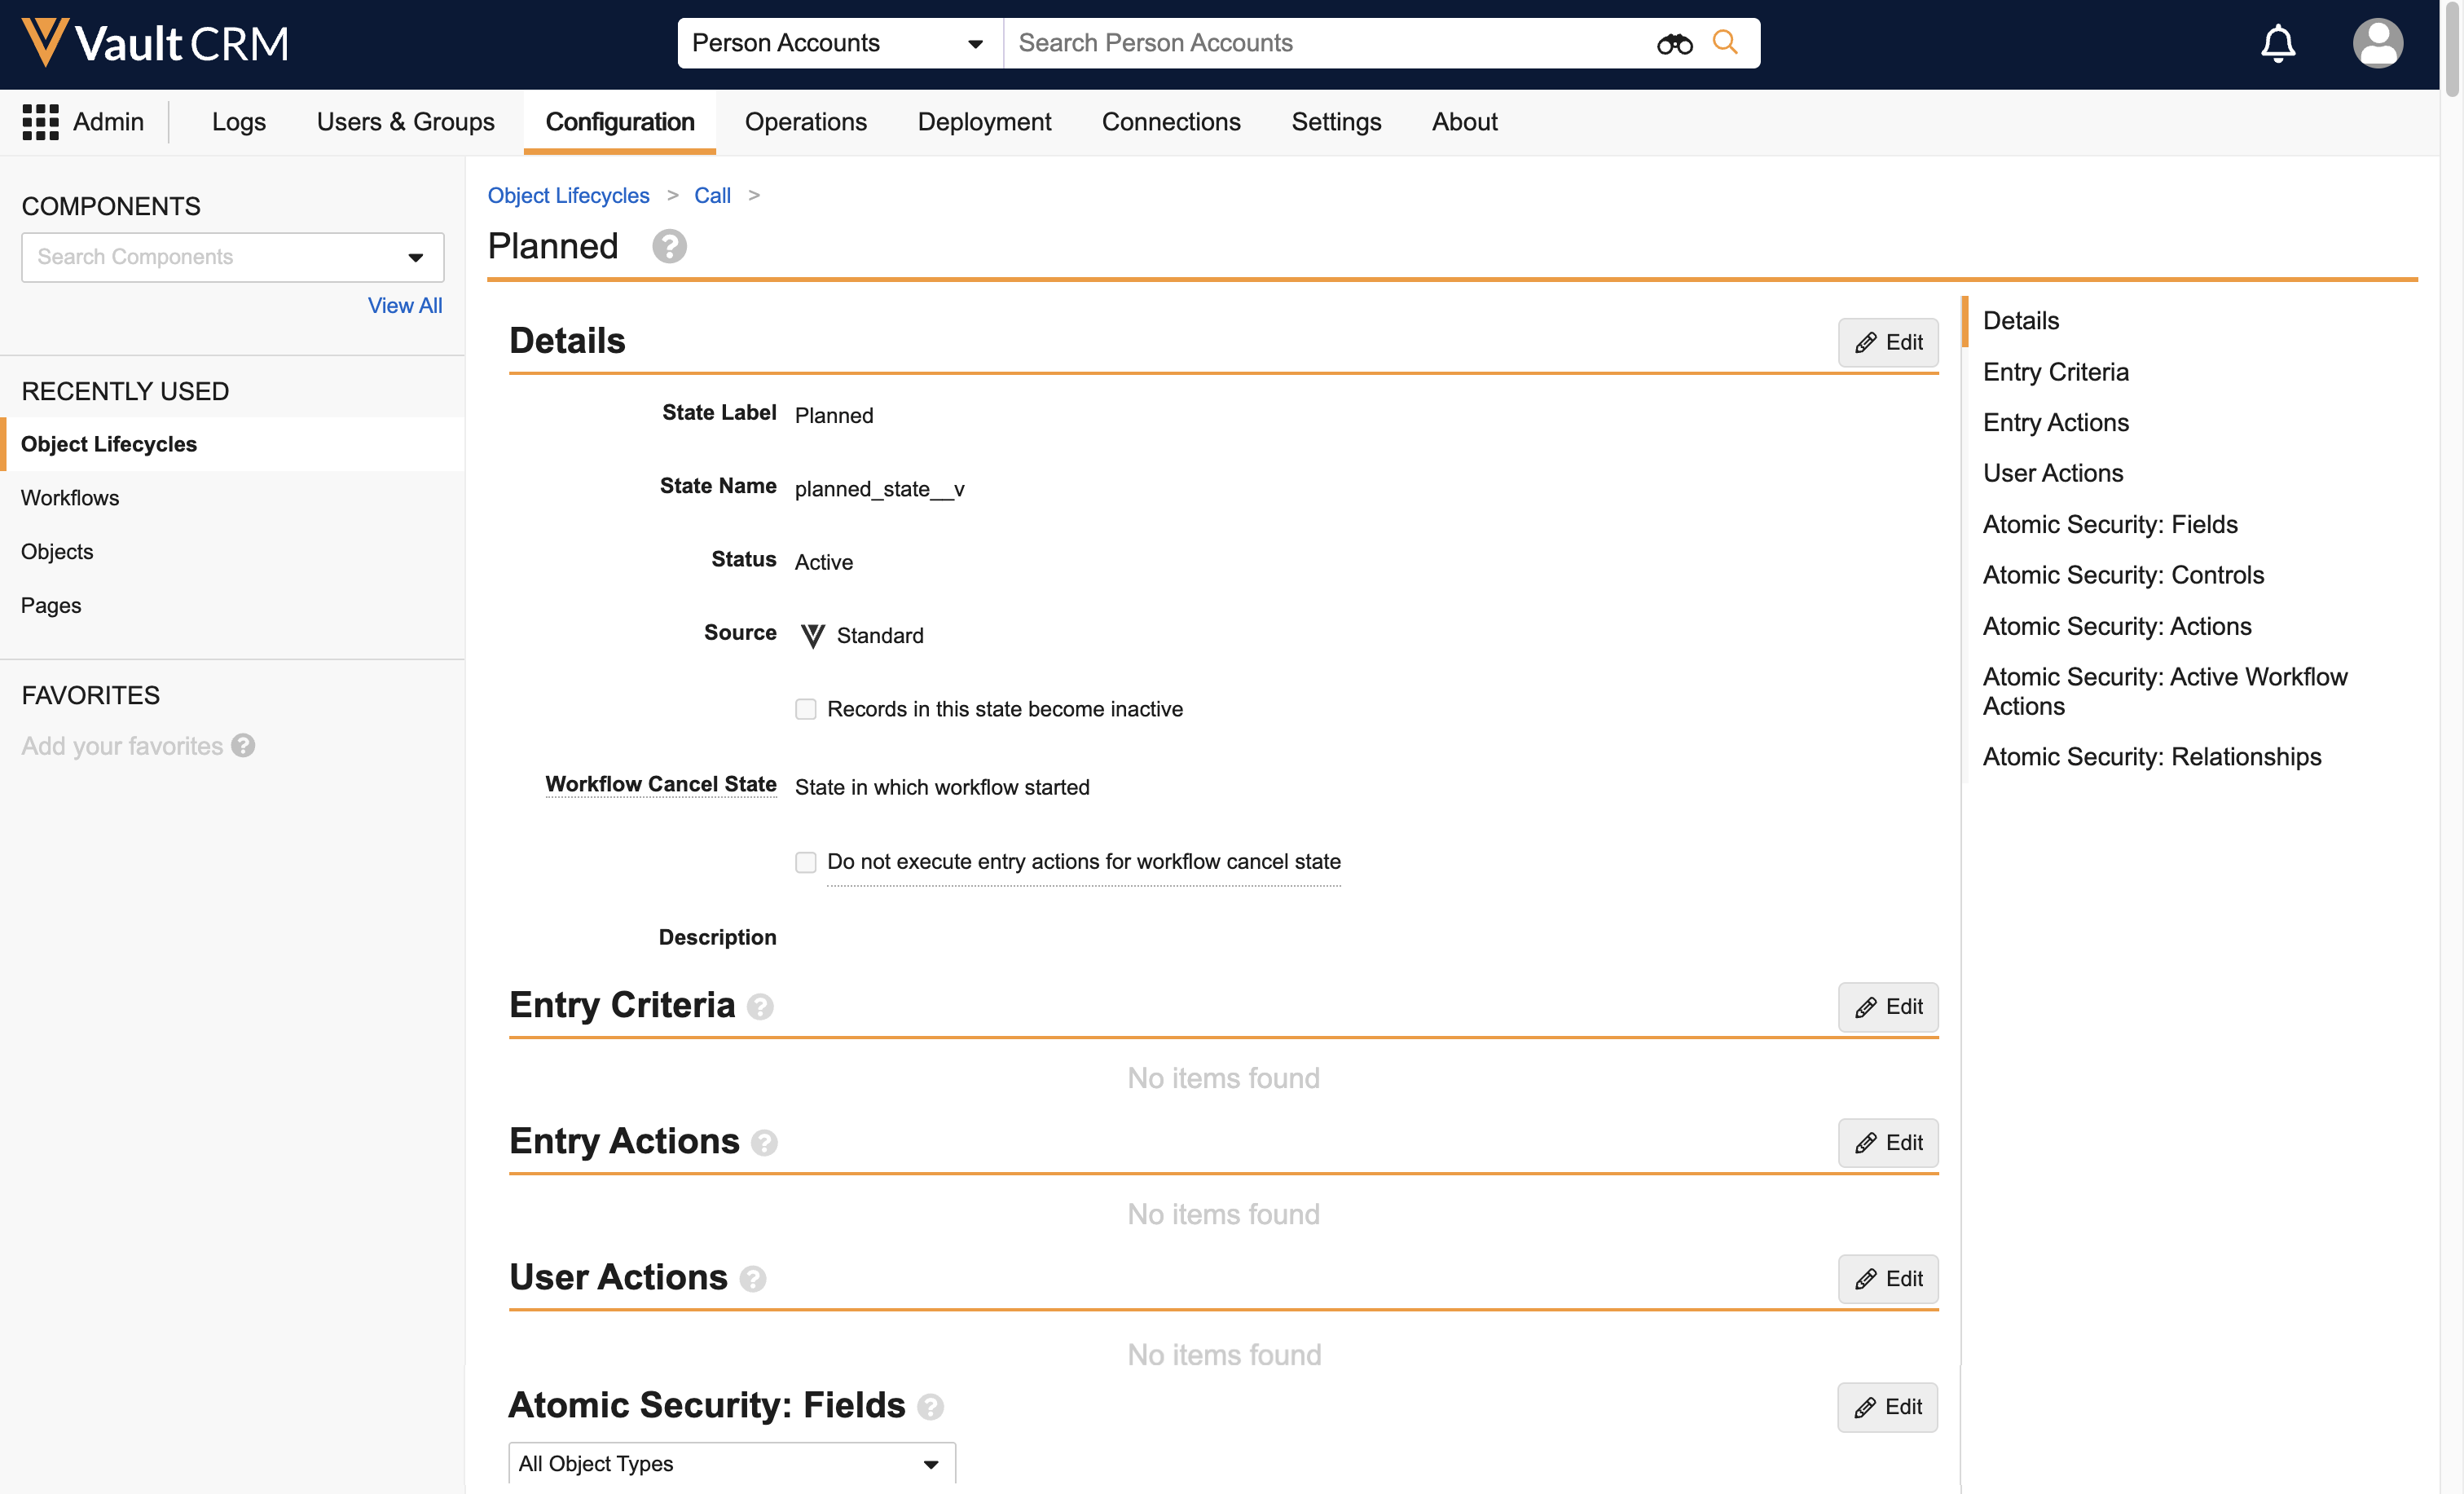
- Navigate to Admin > Configuration > Object Lifecycles.
- Select the call_lifecycle__v lifecycle.
- Select the planned_state__v state.
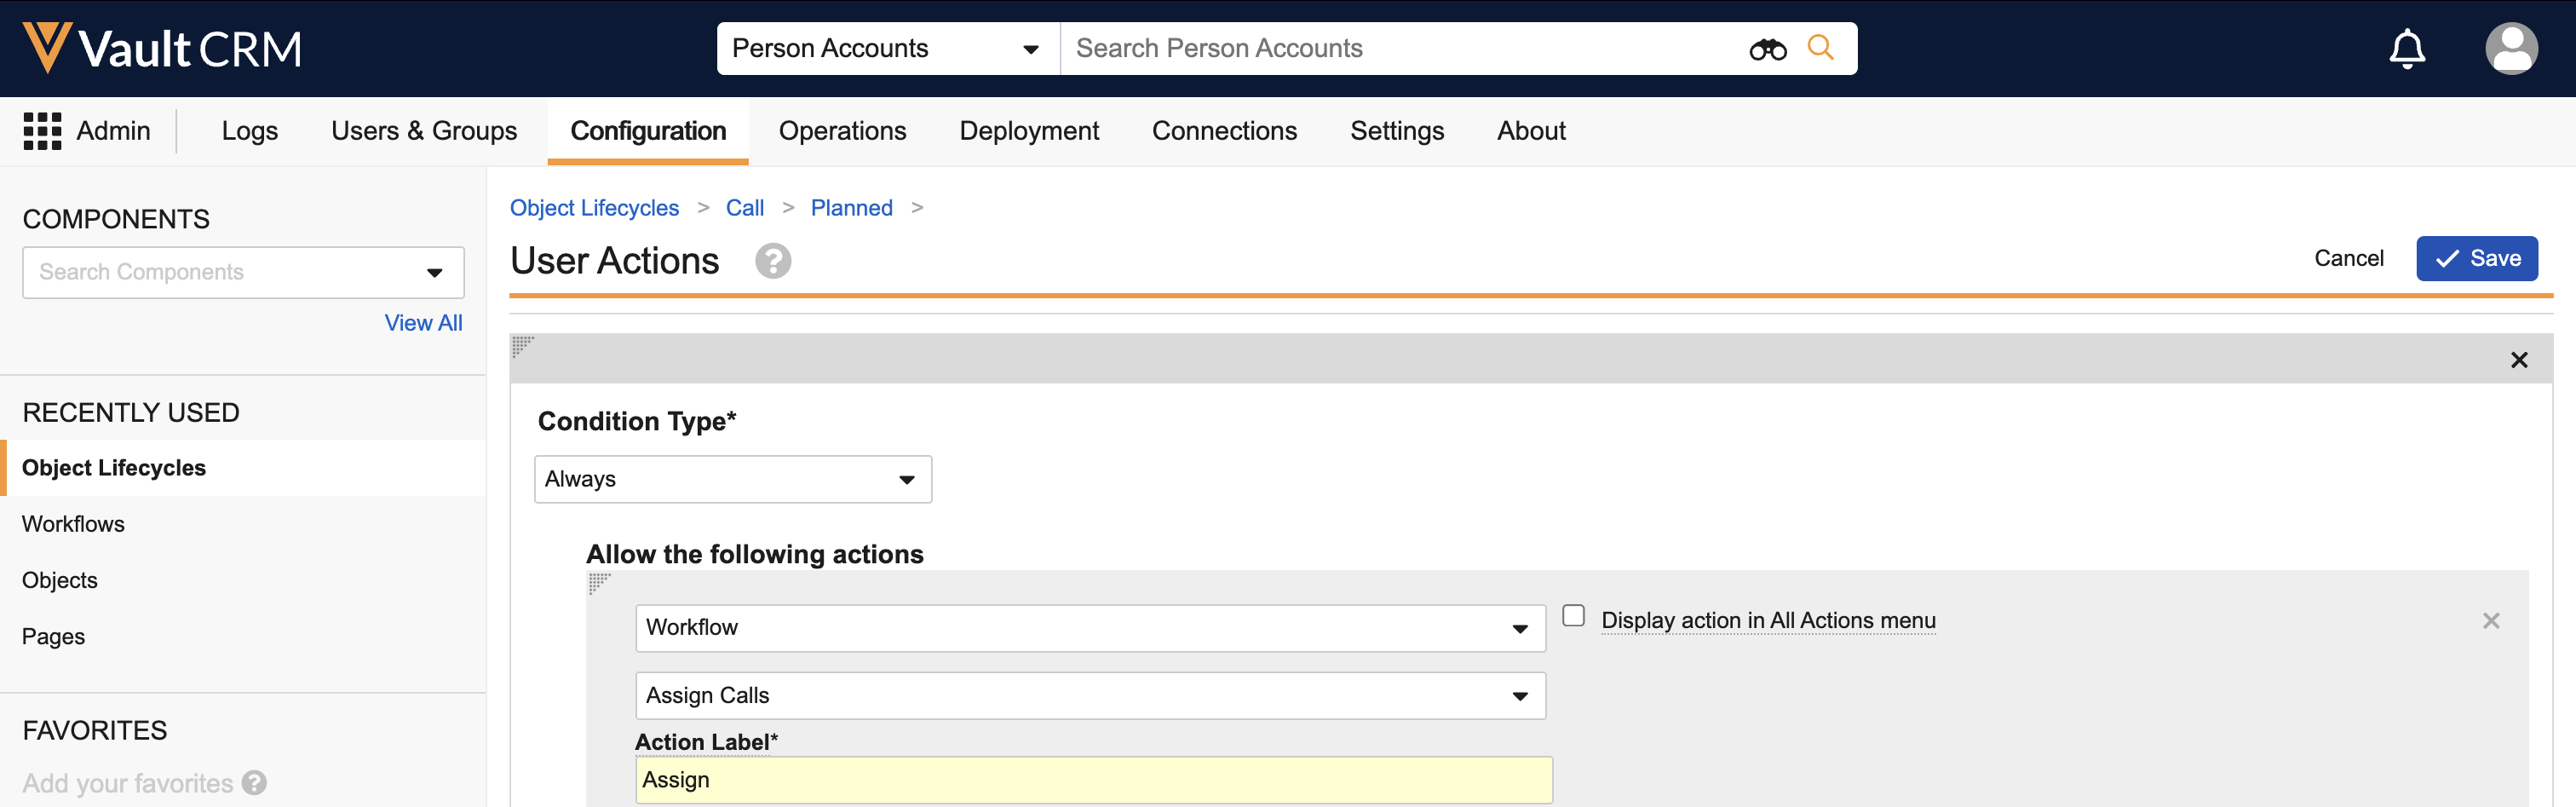
- Select the Edit button for the User Actions section.
- Select Create Rule.
- Enter the following values:
- Condition Type - Always
- Allow the following actions - Workflow
- Workflow - assign_call__c
- Action Label - Assign
- Select Save.
- Navigate to Admin > Users & Groups > Permission Sets.
- Select the appropriate permission set
- Select the Applications tab
- Select Edit
- Select the All Workflow check box in the Workflow section
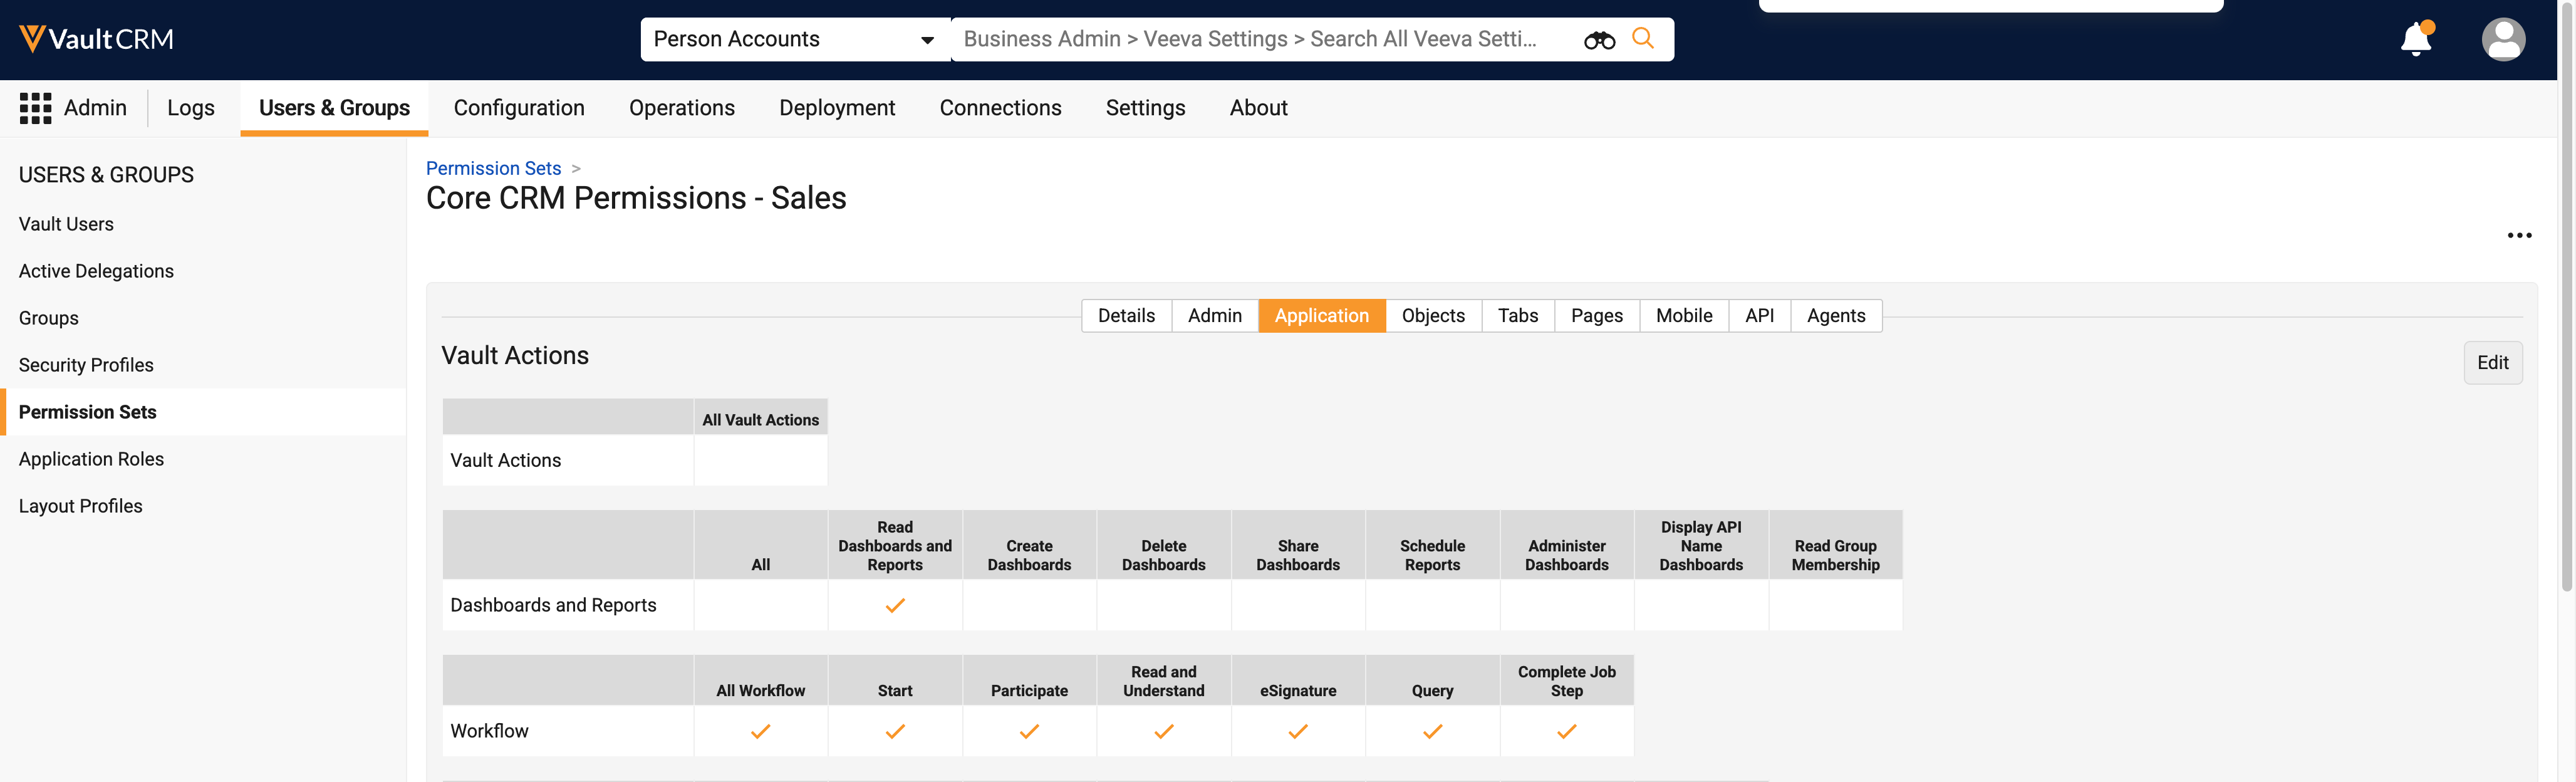
- Select Save
By default, users are granted Execute permission for the action. Optionally, to control visibility to the action by role, add Role Overrides using atomic security. For more on atomic security, see Configuring Atomic Security on the Vault platform help site.
Optional Configuration
Optionally, create a user object reference field to streamline call assignment for booking coordinators :
- Navigate to Admin > Configuration > Objects > call2__v > Fields.
- Create a custom object reference field on the call2__v object for the user__sys object, to enable booking coordinators to indicate the future owner of the call (optional).
- Navigate to Admin > Users & Groups > Permission Sets.
- Select the appropriate permission set.
- Select the Objects tab.
- Grant booking coordinators Edit permission to the newly created field.
- Navigate to Admin > Configuration > Objects > call2__v > Layouts.
- Place the object reference field on the call2__v layout for booking coordinators .
To configure this feature:
- Ensure Configuring Call Planning is complete.
-
Navigate to Admin > Users & Groups > Permission Sets.
-
Select the appropriate permission set.
-
Select the Objects tab.
-
Ensure end users have Read field permission for the call2_status__v field on the call2__v object.
-
Navigate to Admin > Configuration > Objects > call2__v > Layouts.
-
Ensure the call2_status__v field is on the call2__v layout assigned to end users.
Assigning Calls with Call Booking Support as
Booking coordinators can schedule calls for end users via any of the call scheduling methods available in Vault CRM. To plan around existing appointments, use Viewing Shared Calendars to view end users' calendars. Once calls are scheduled, booking coordinators assign calls to the appropriate end users.
Assigning unique activity group calls is not supported.
-
Navigate to the Planned Calls tab.
-
Select the All Actions menu for a planned call report.
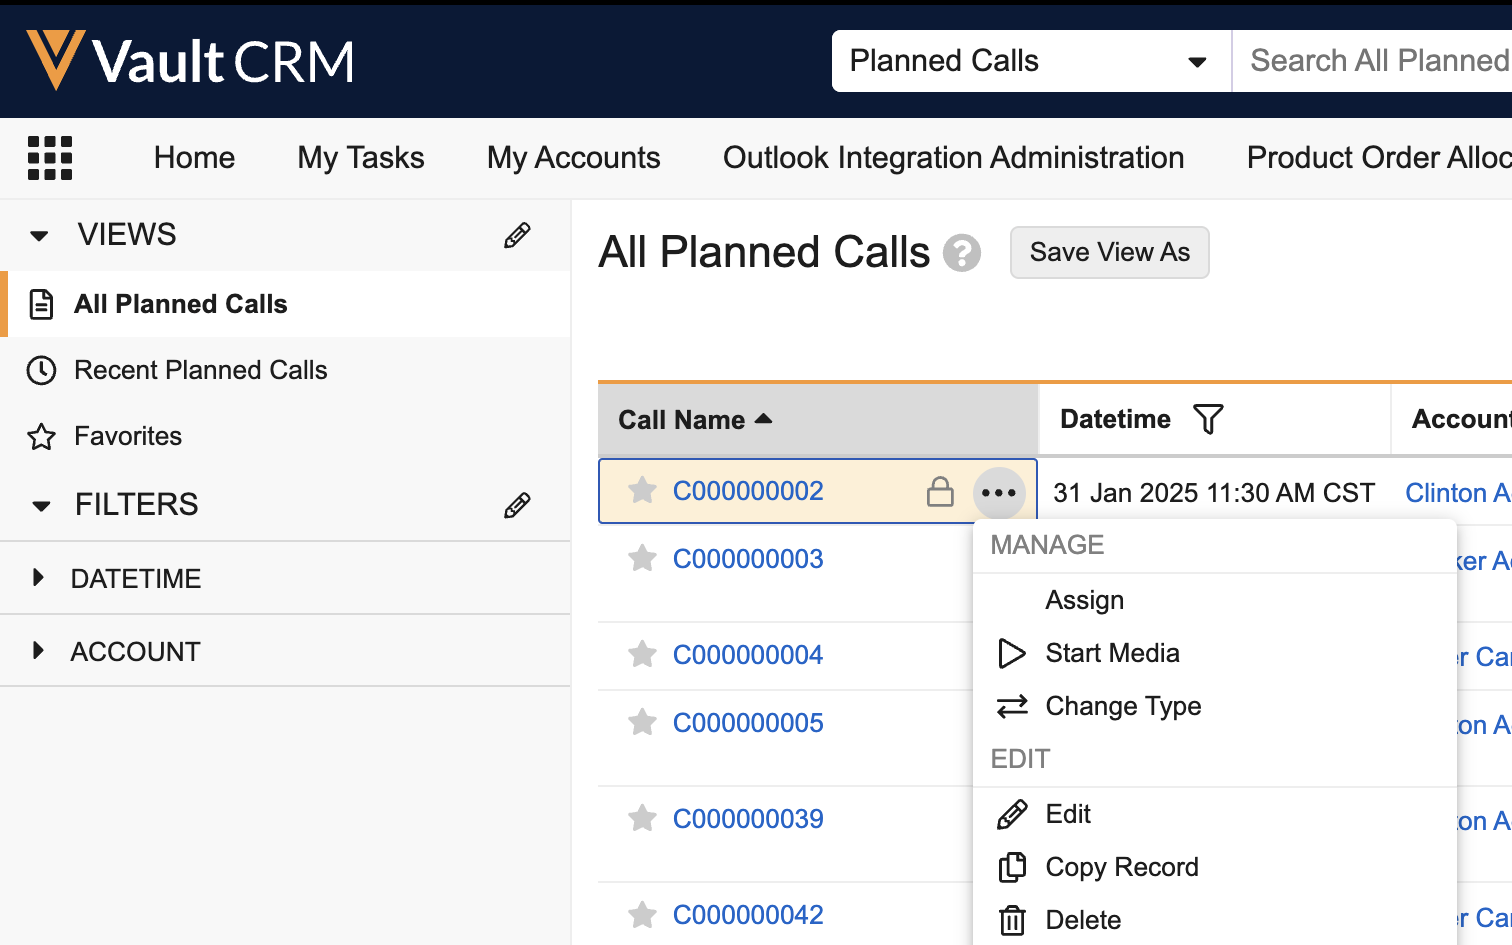
Only calls in Planned status can be assigned. Calls in Saved or Submitted status cannot be assigned.
- Select Assign.
- Search for and select the appropriate assignee from the Owner field.
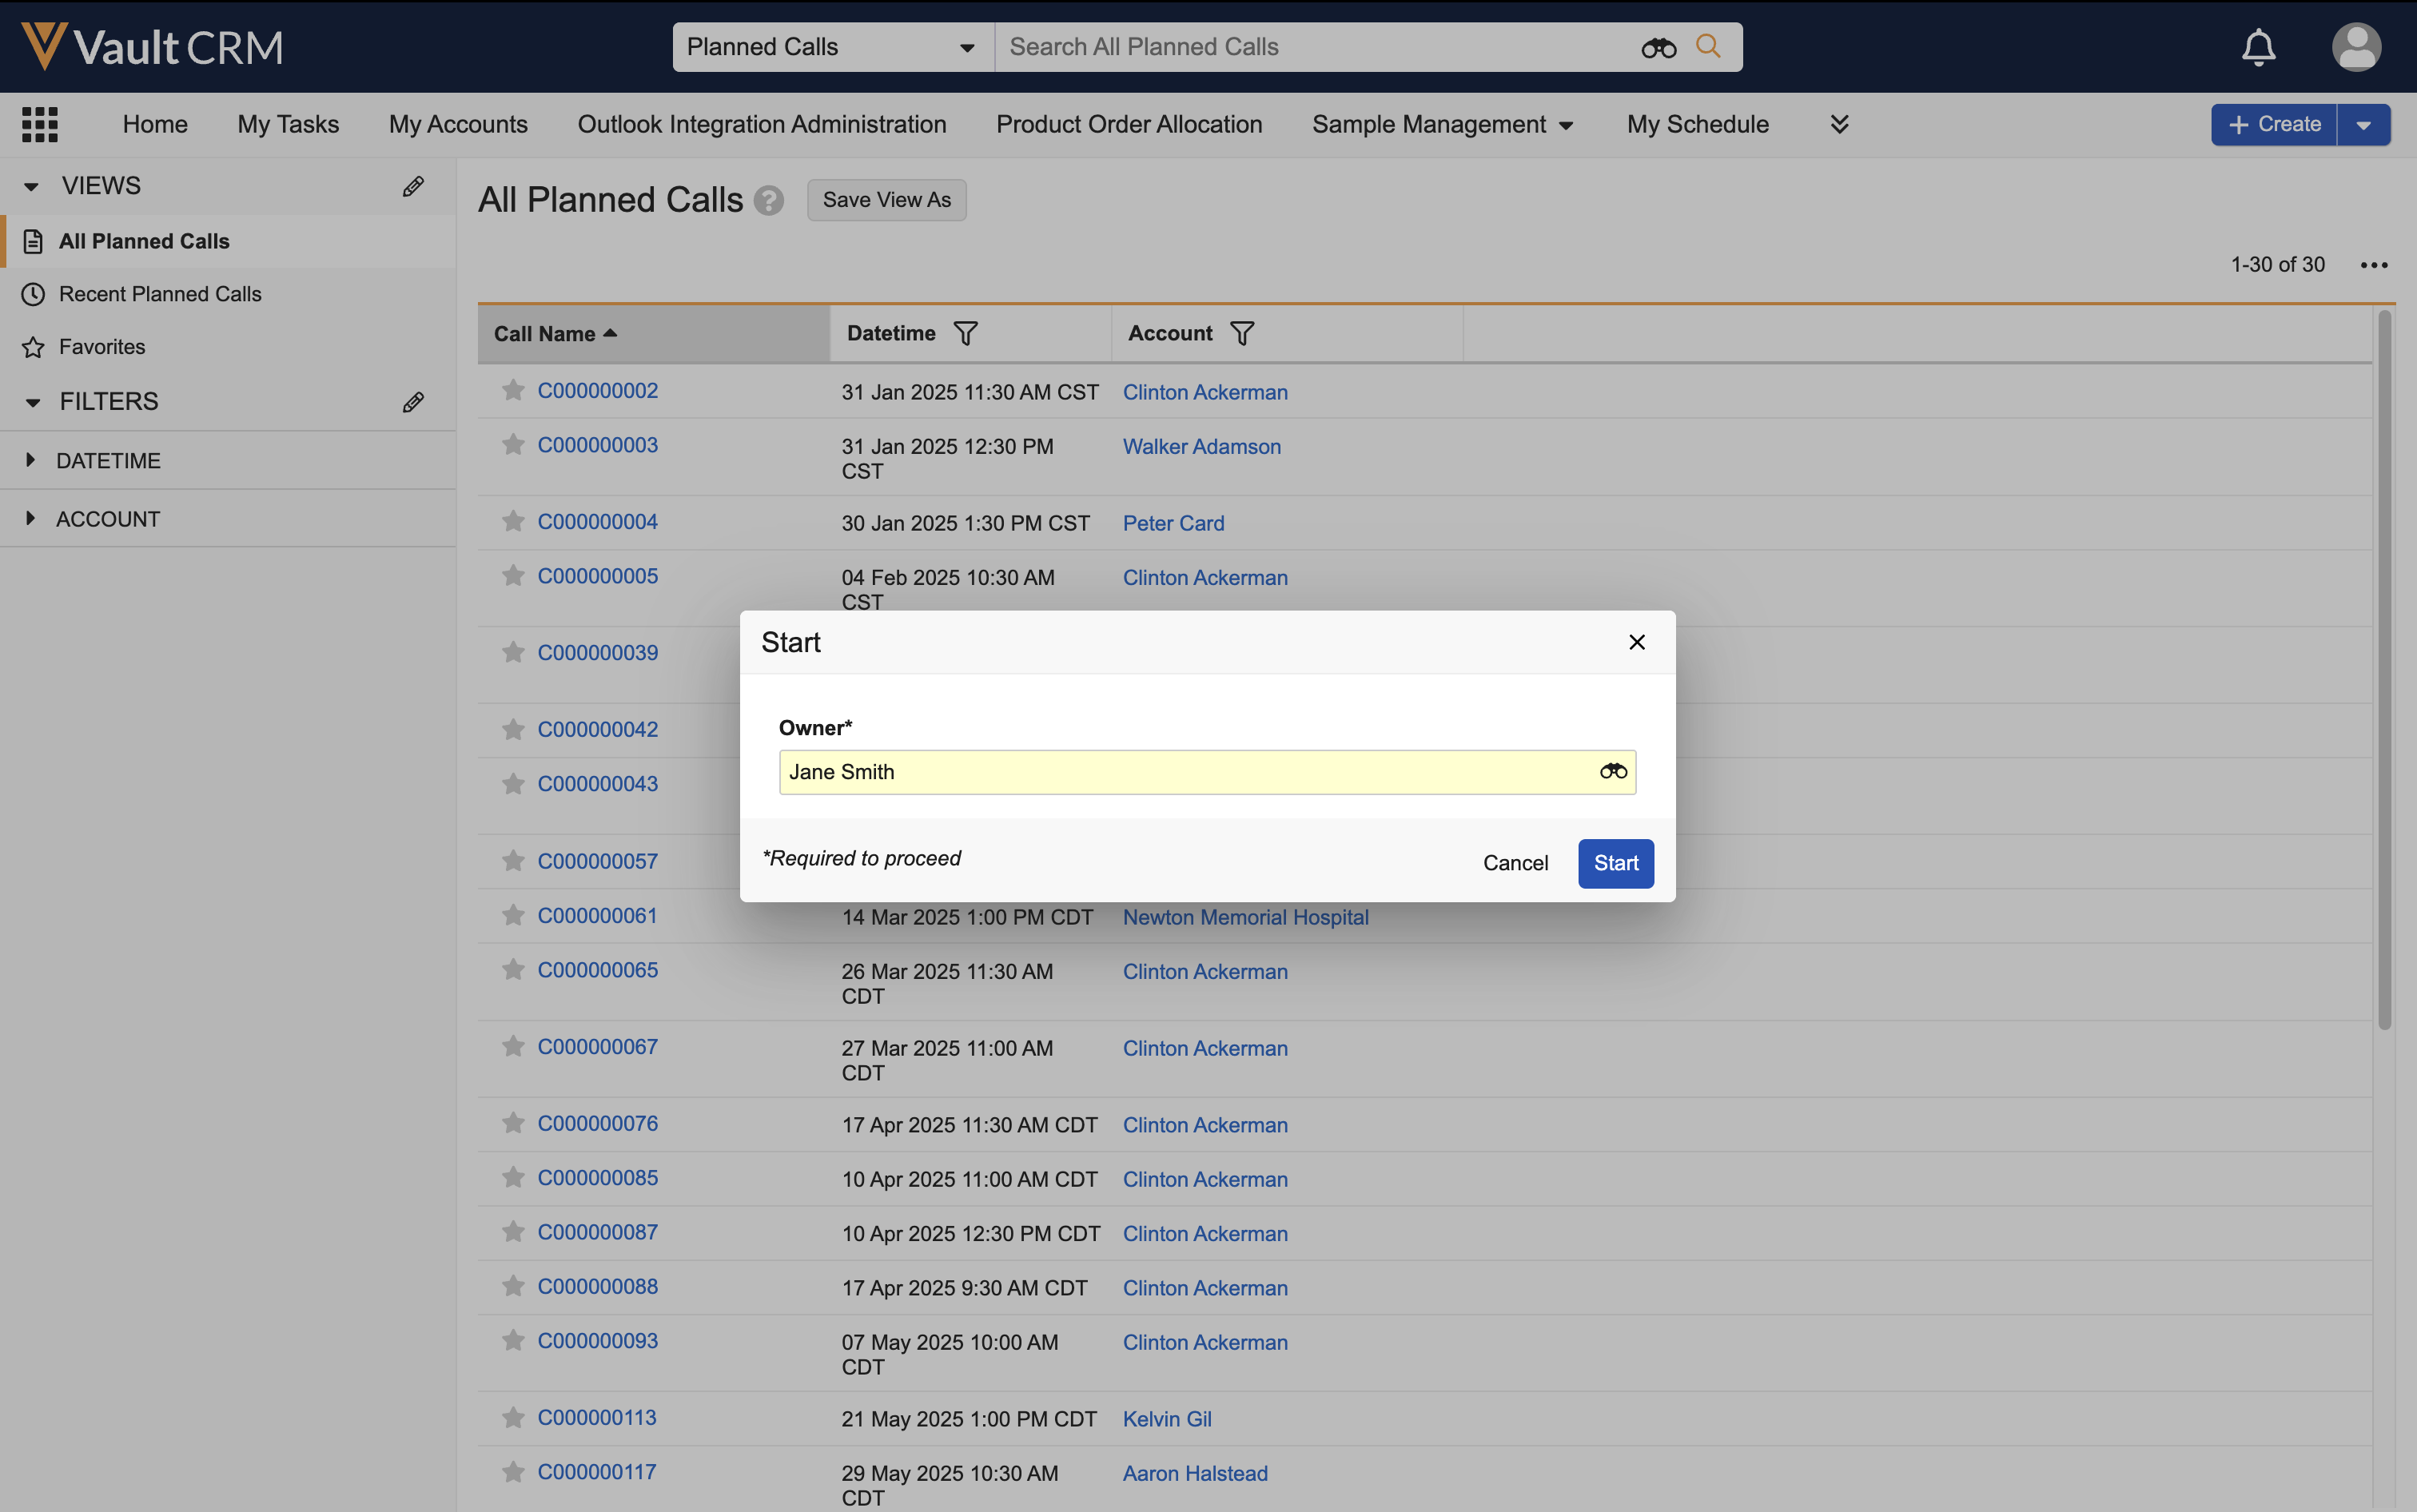
- Select Start to make the selected user the call owner.
To assign a selection of planned calls to the same user:
- Select the All Actions menu for the Planned Calls tab.
To easily view calls for a single user, create a Planned Calls tab view filtered by user.
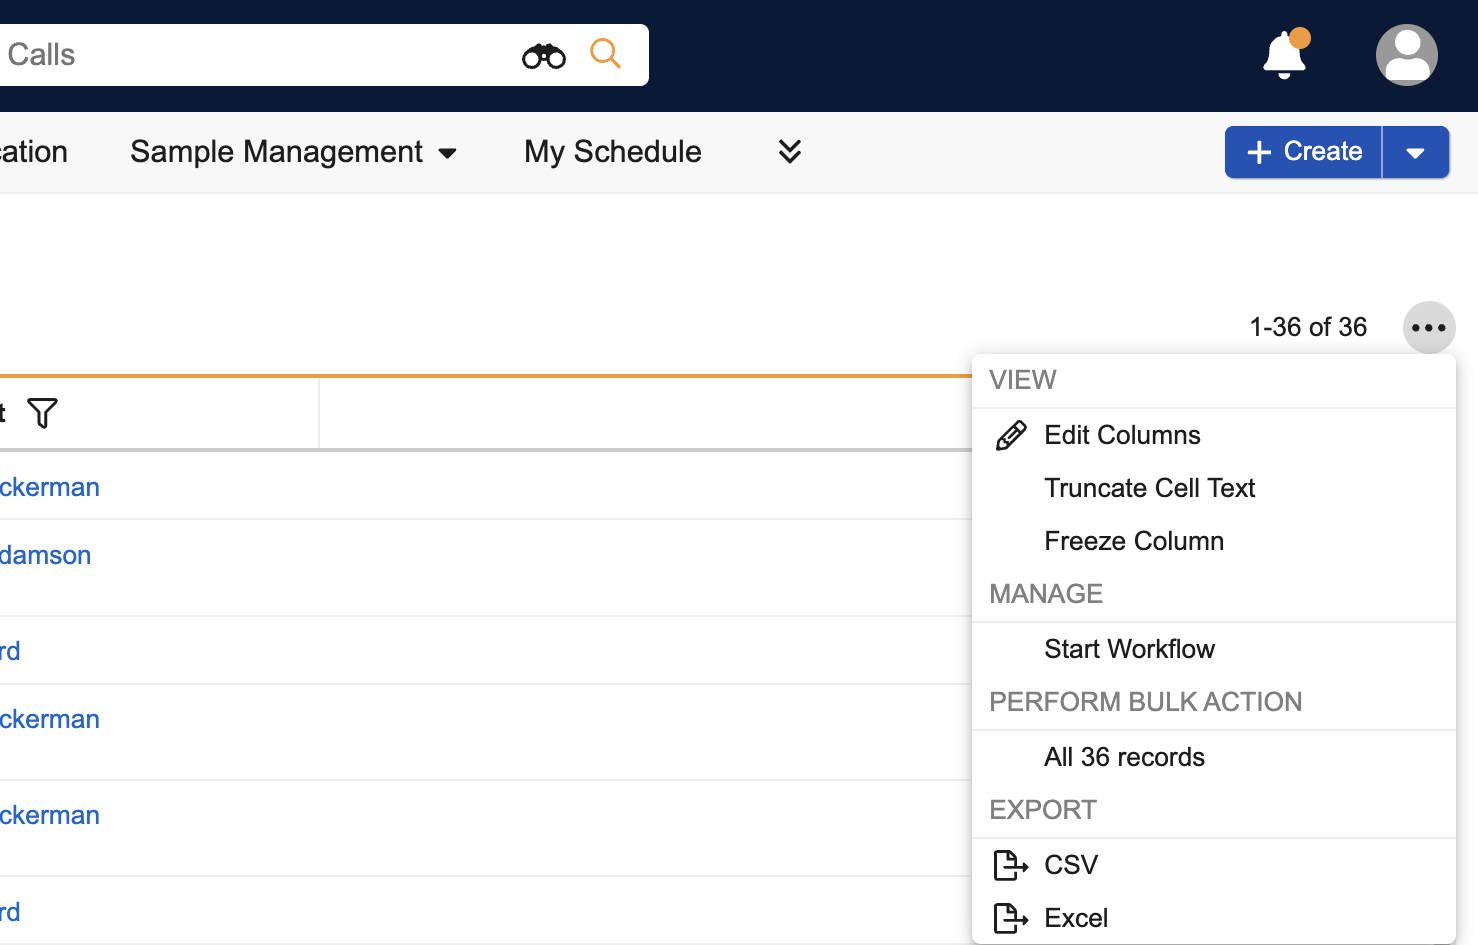
- Select Start Workflow.
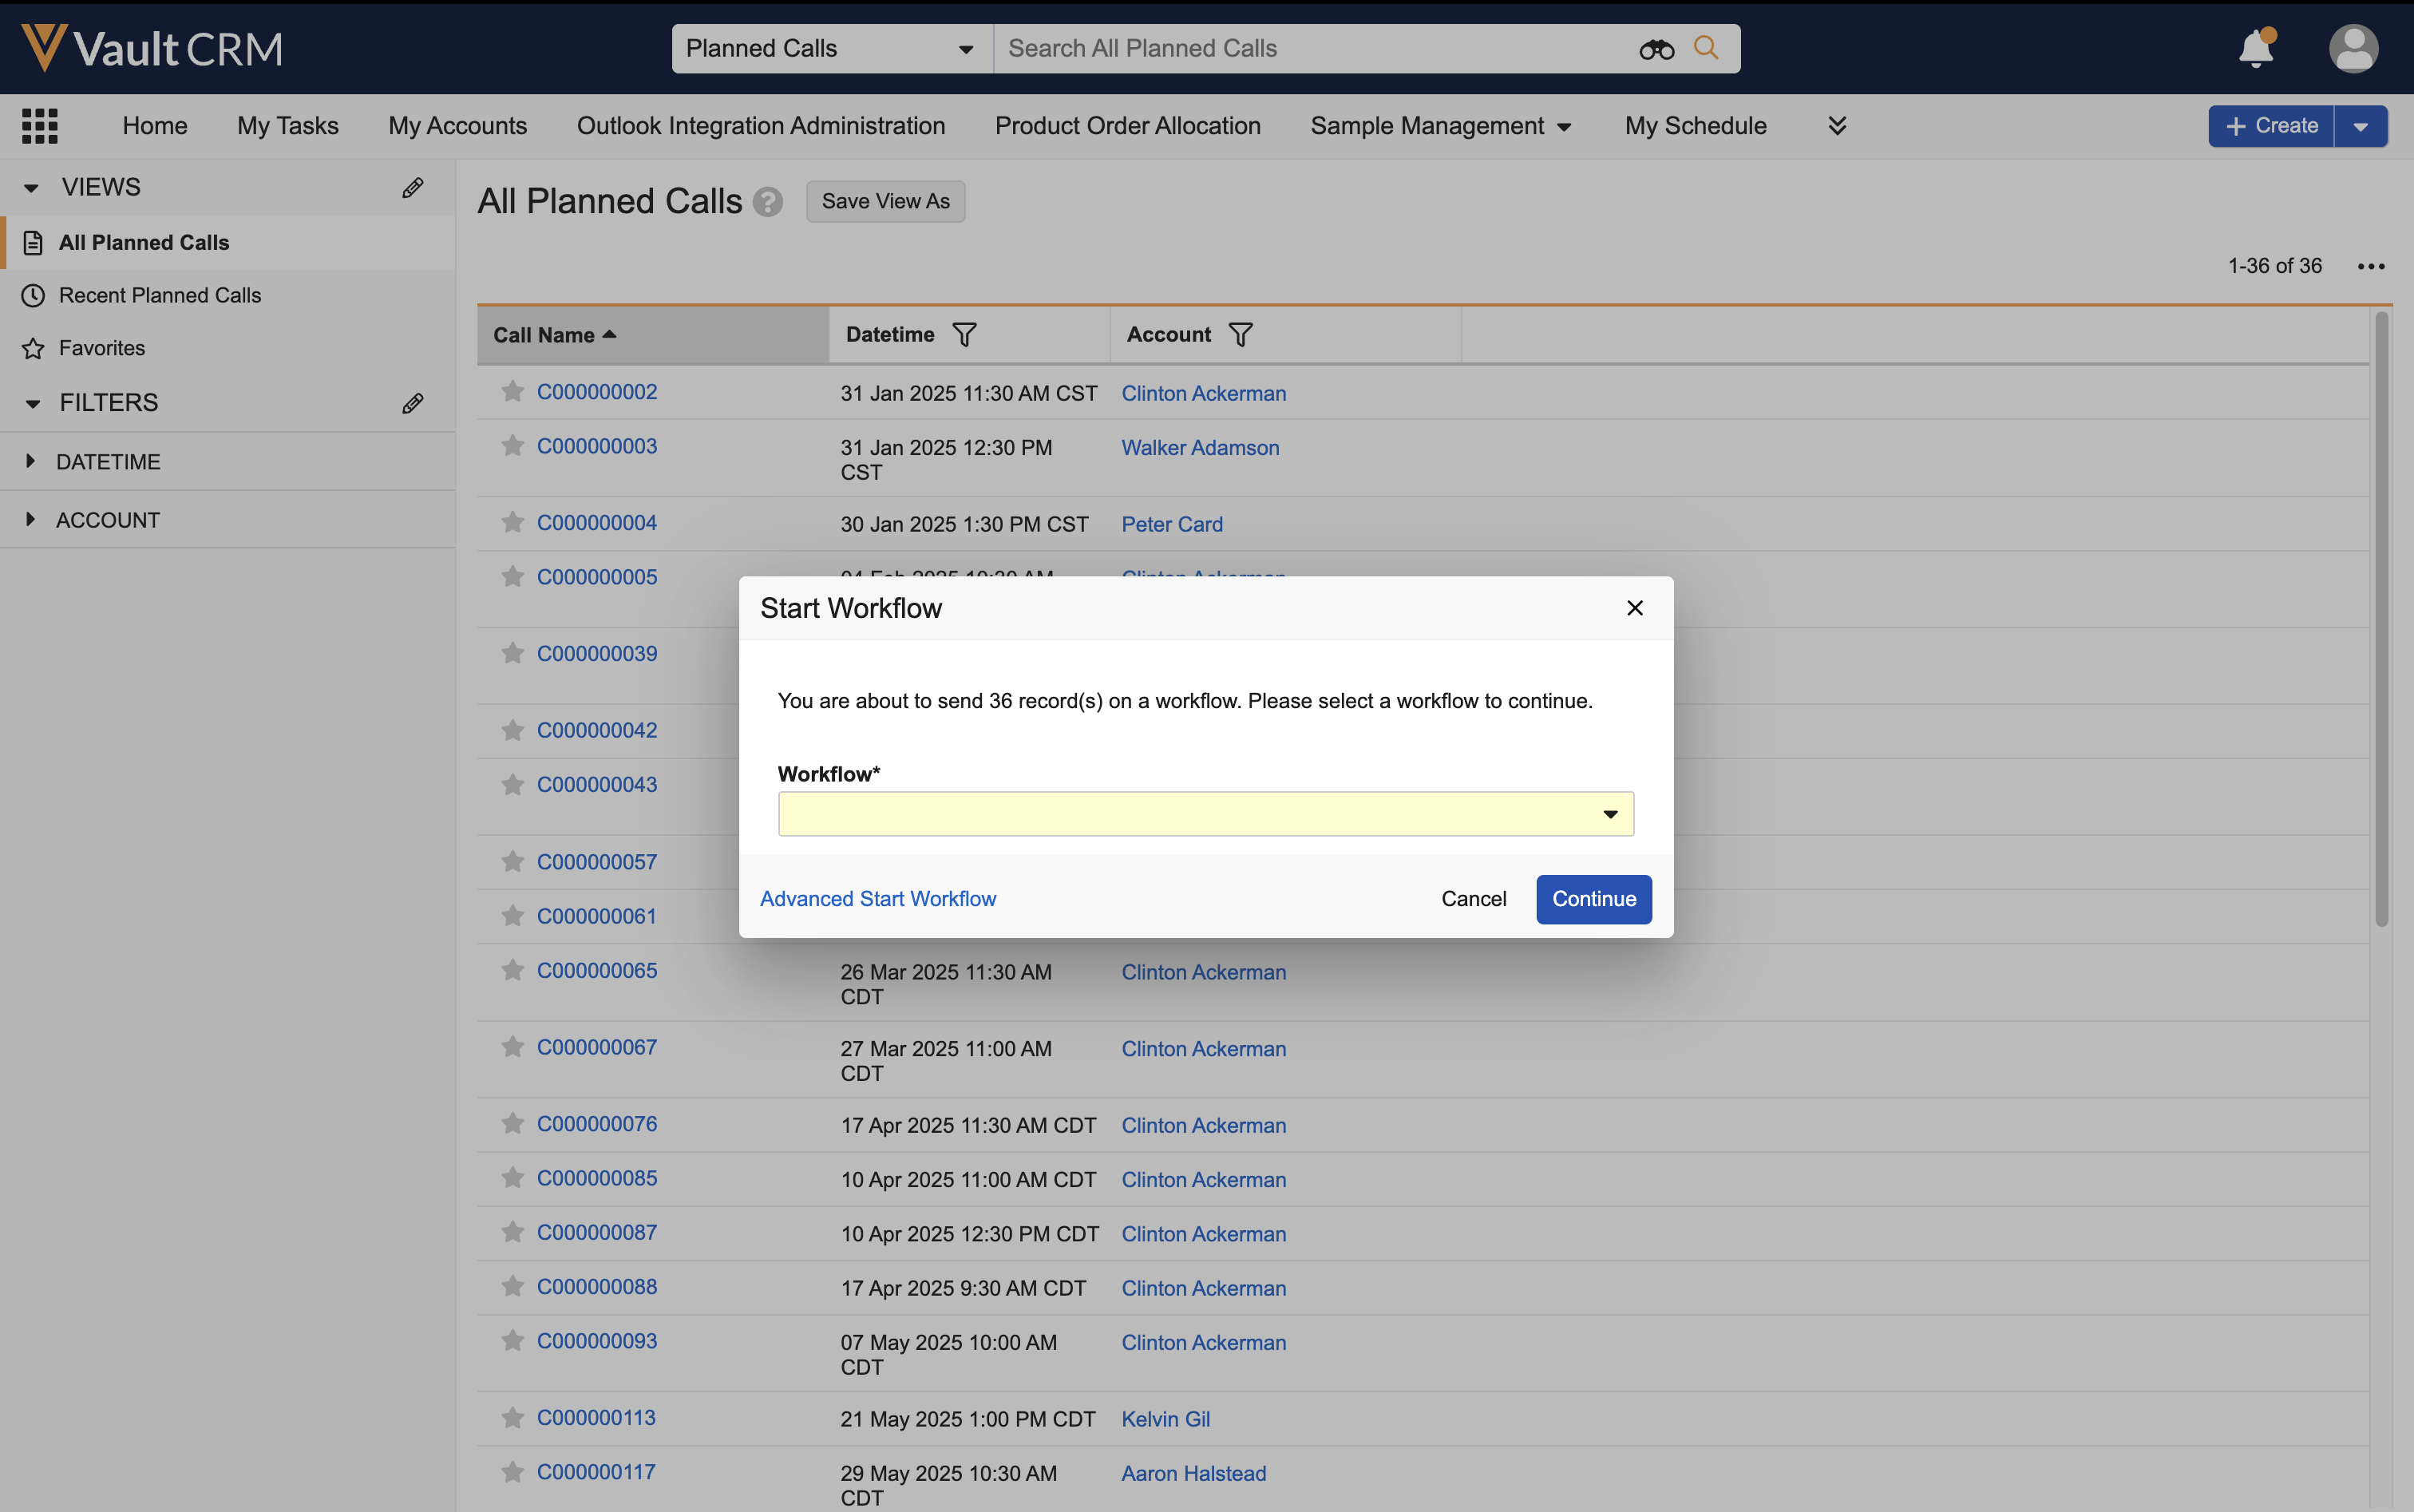
- Select the Advanced Start Workflow link from the Start Workflow modal.
- Select the appropriate records to include.
If there are child calls associated with a parent call, be sure to select the parent call and all related child calls.
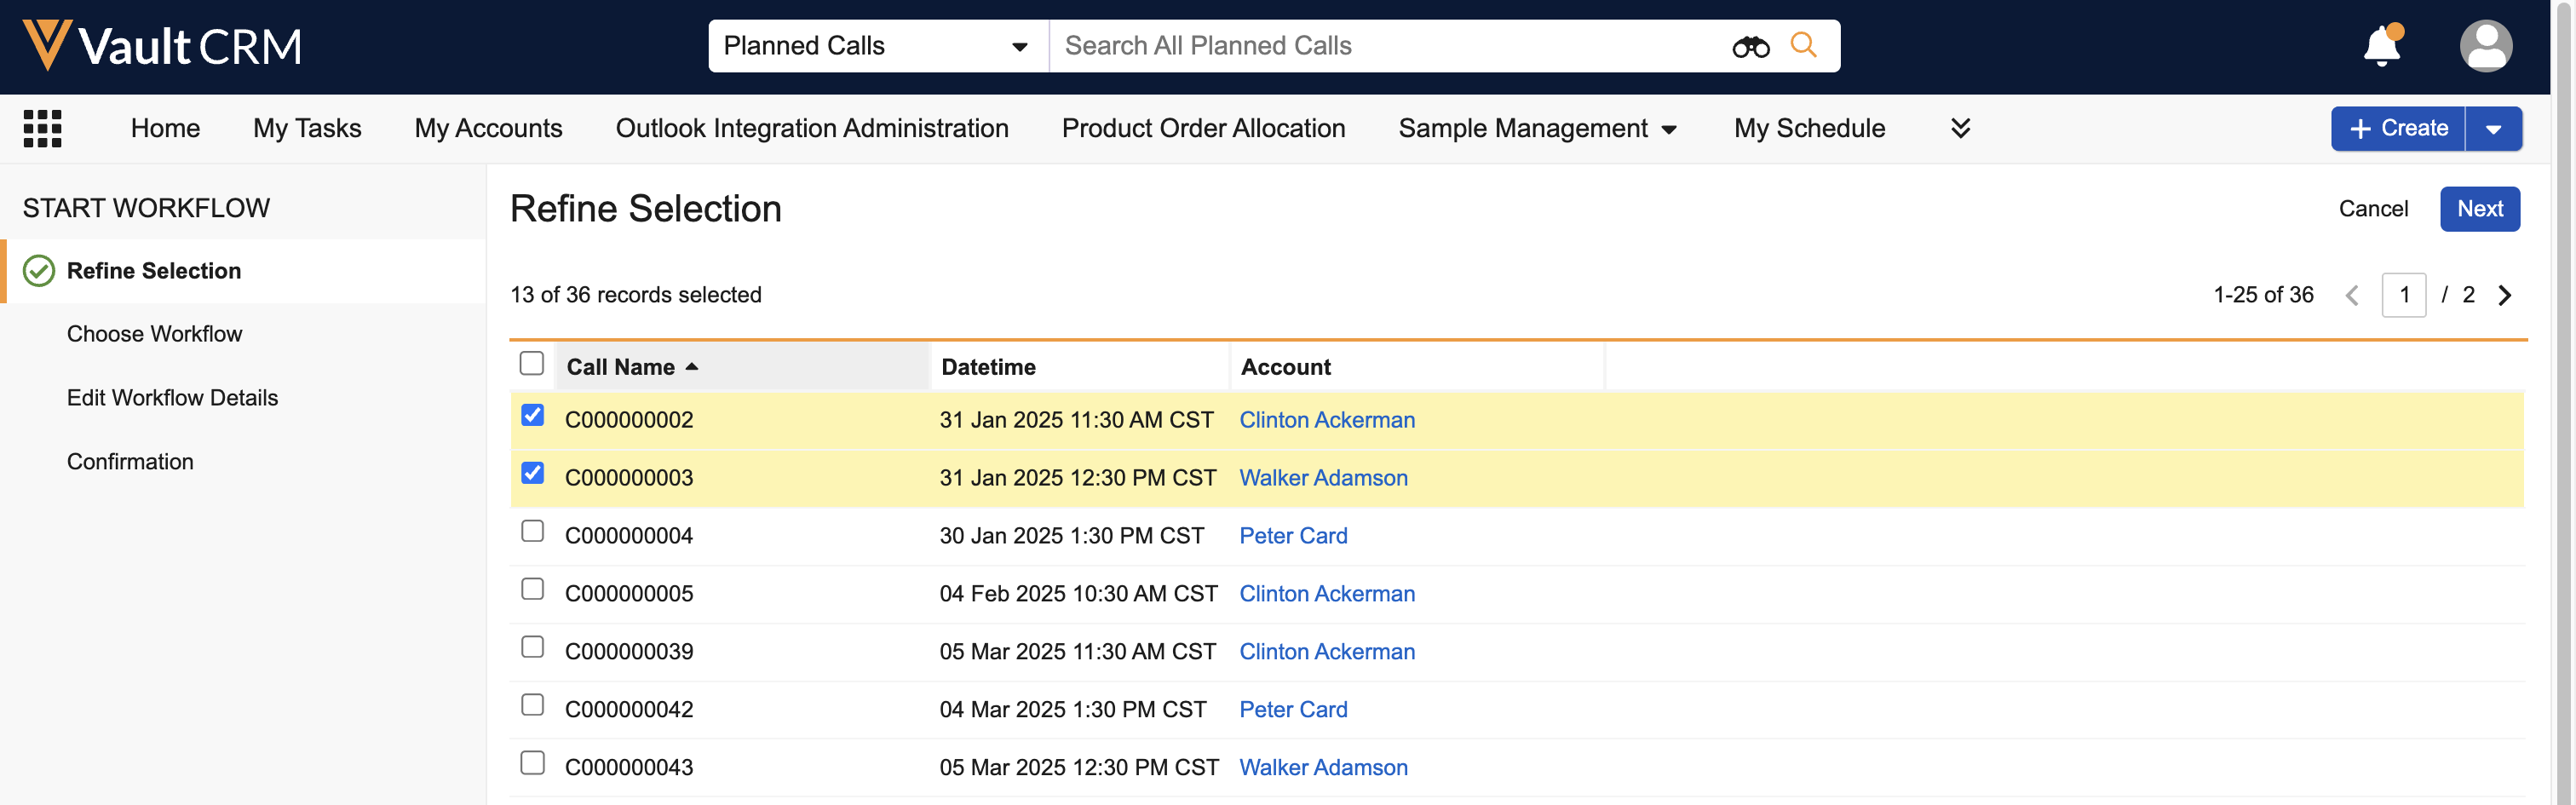
- Select Next.
- Select the Assign Calls workflow.
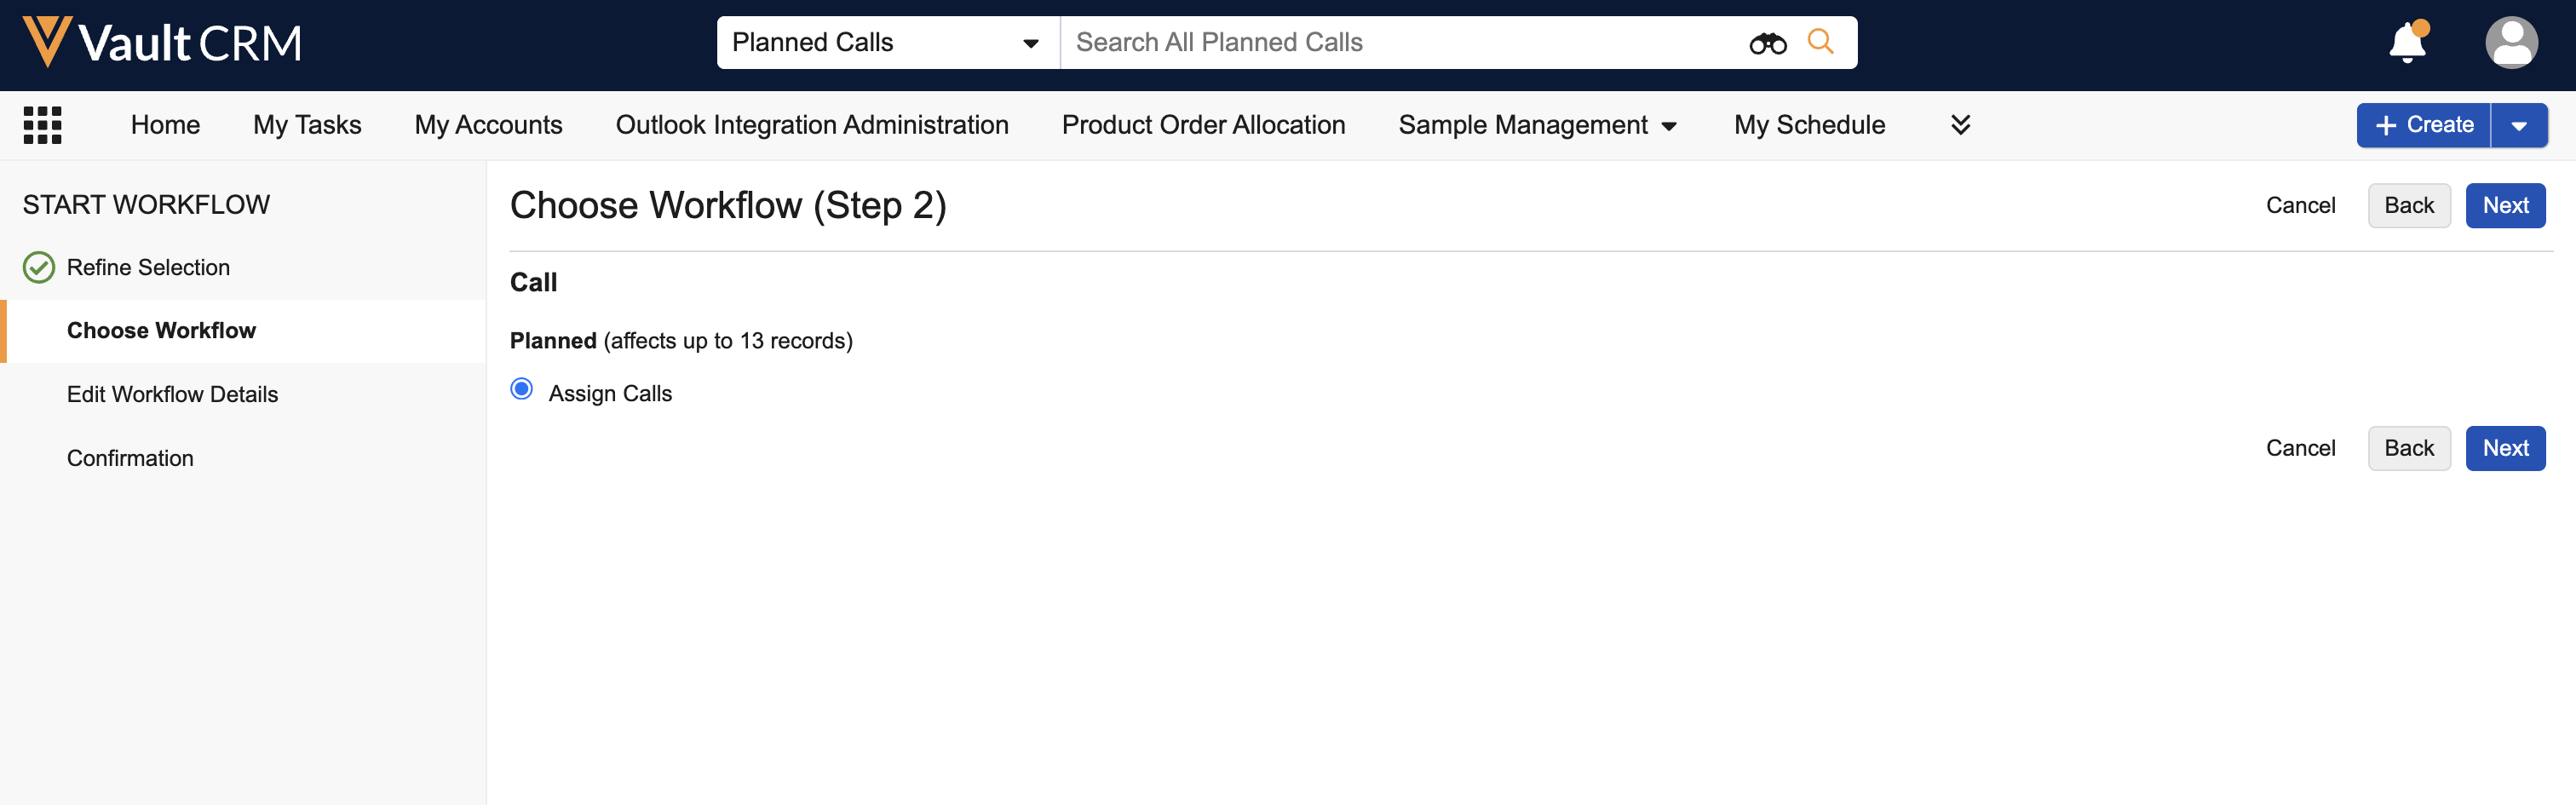
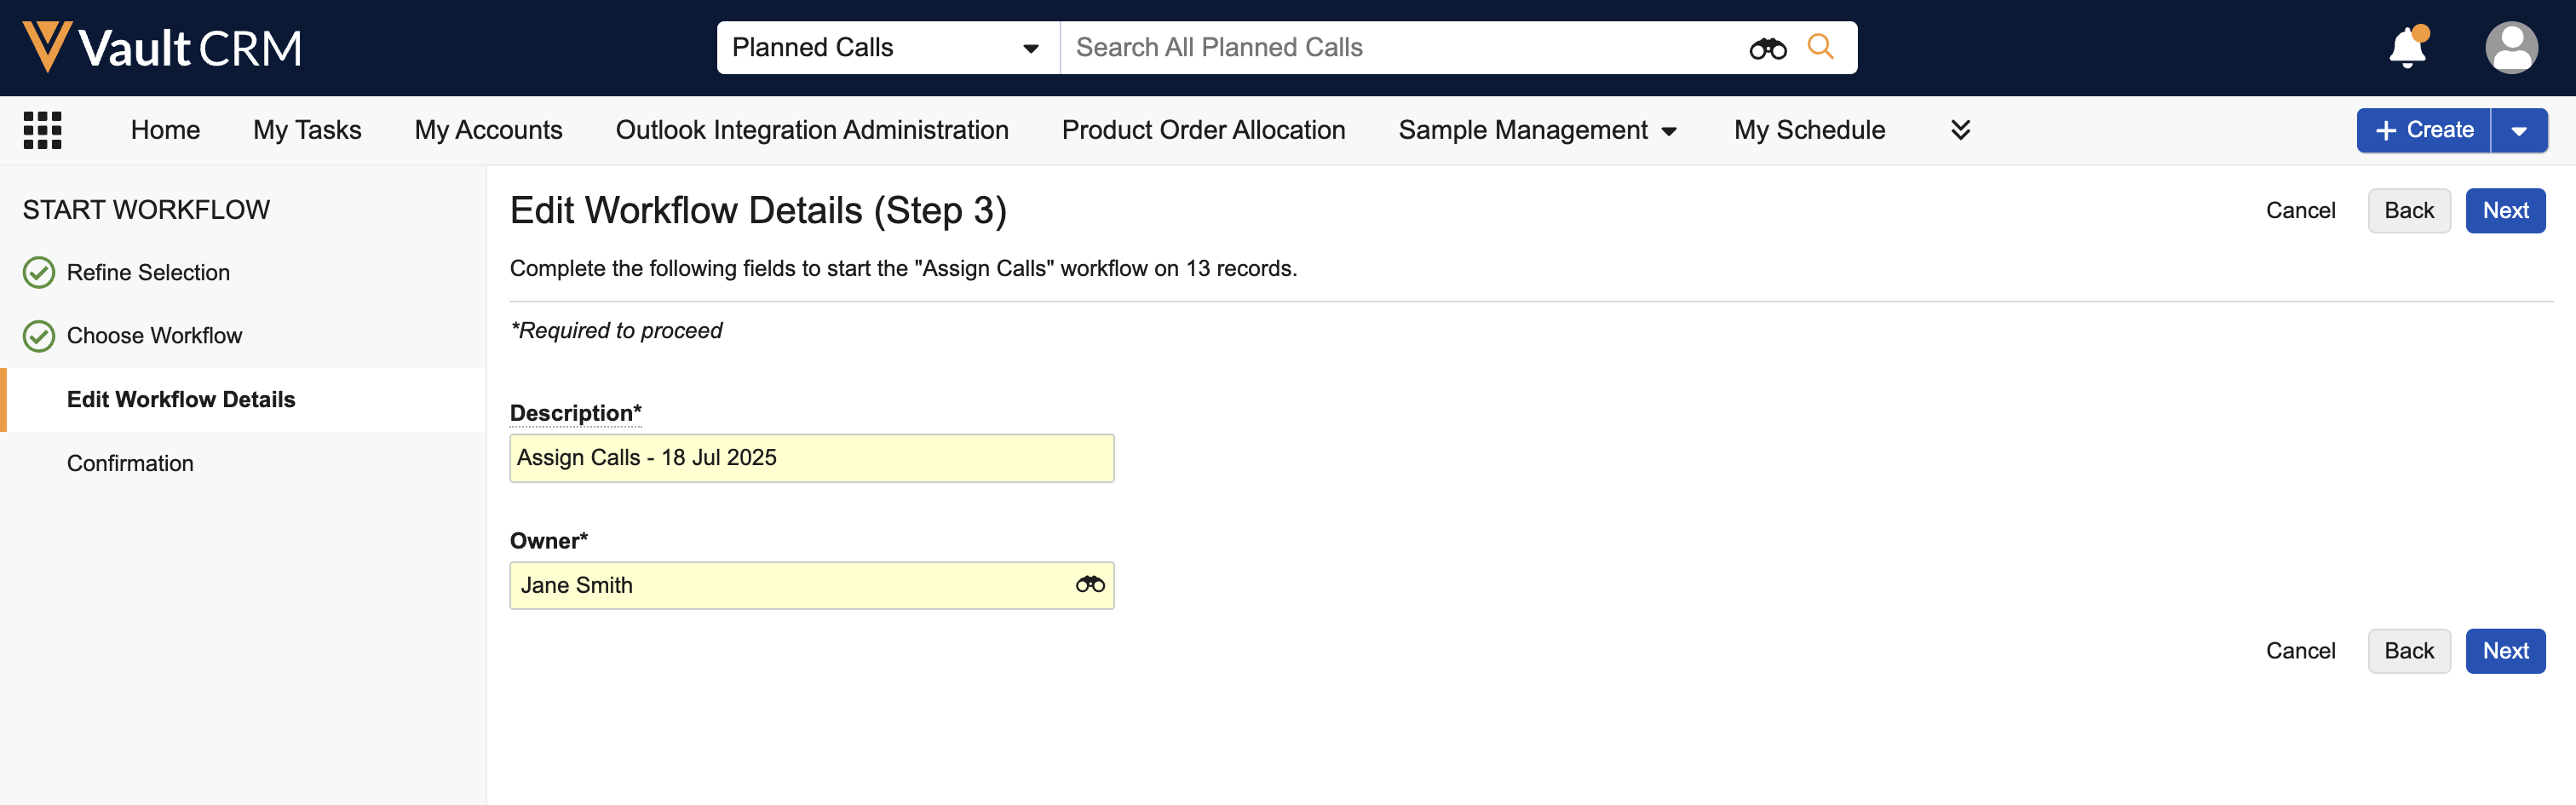
- Select Next.
- Search for and select the appropriate assignee from the Owner field.
- Select Next.
- Select Finish to assign the selected calls.

Once assigned, call ownership is transferred to the selected user. Transferred calls display on the new owner’s calendar in My Schedule, where they can view, edit, and delete calls as usual.
The following fields on the call2__v record are updated when a call is assigned to a new user:
- ownerid__v - Selected owner
- assigner__v - User who initiated the workflow
- assignment_datetime__v - Date and time ownership was transferred
After the call is assigned, the booking agent cannot delete it. Calls can only be deleted by the call owner, if the call owner has Delete permission for the call2__v object.

