Creating Campaigns in Campaign Manager
Marketing users can create campaigns that can then be used to define target lists and channel actions. Campaigns must have a defined target list before the can be activated or scheduled for activation.
Who can use this feature?
- Marketing Users - Browser
- Creating a Single Action Campaign
- Planning and Executing Single Action Campaigns
- Users require a Campaign Manager license
Configuring Creating Campaigns for
To configure this feature, ensure Configuring Campaign Manager is complete.
Creating a Campaign as
To create a campaign:
-
Navigate to Campaign Manager > Home.
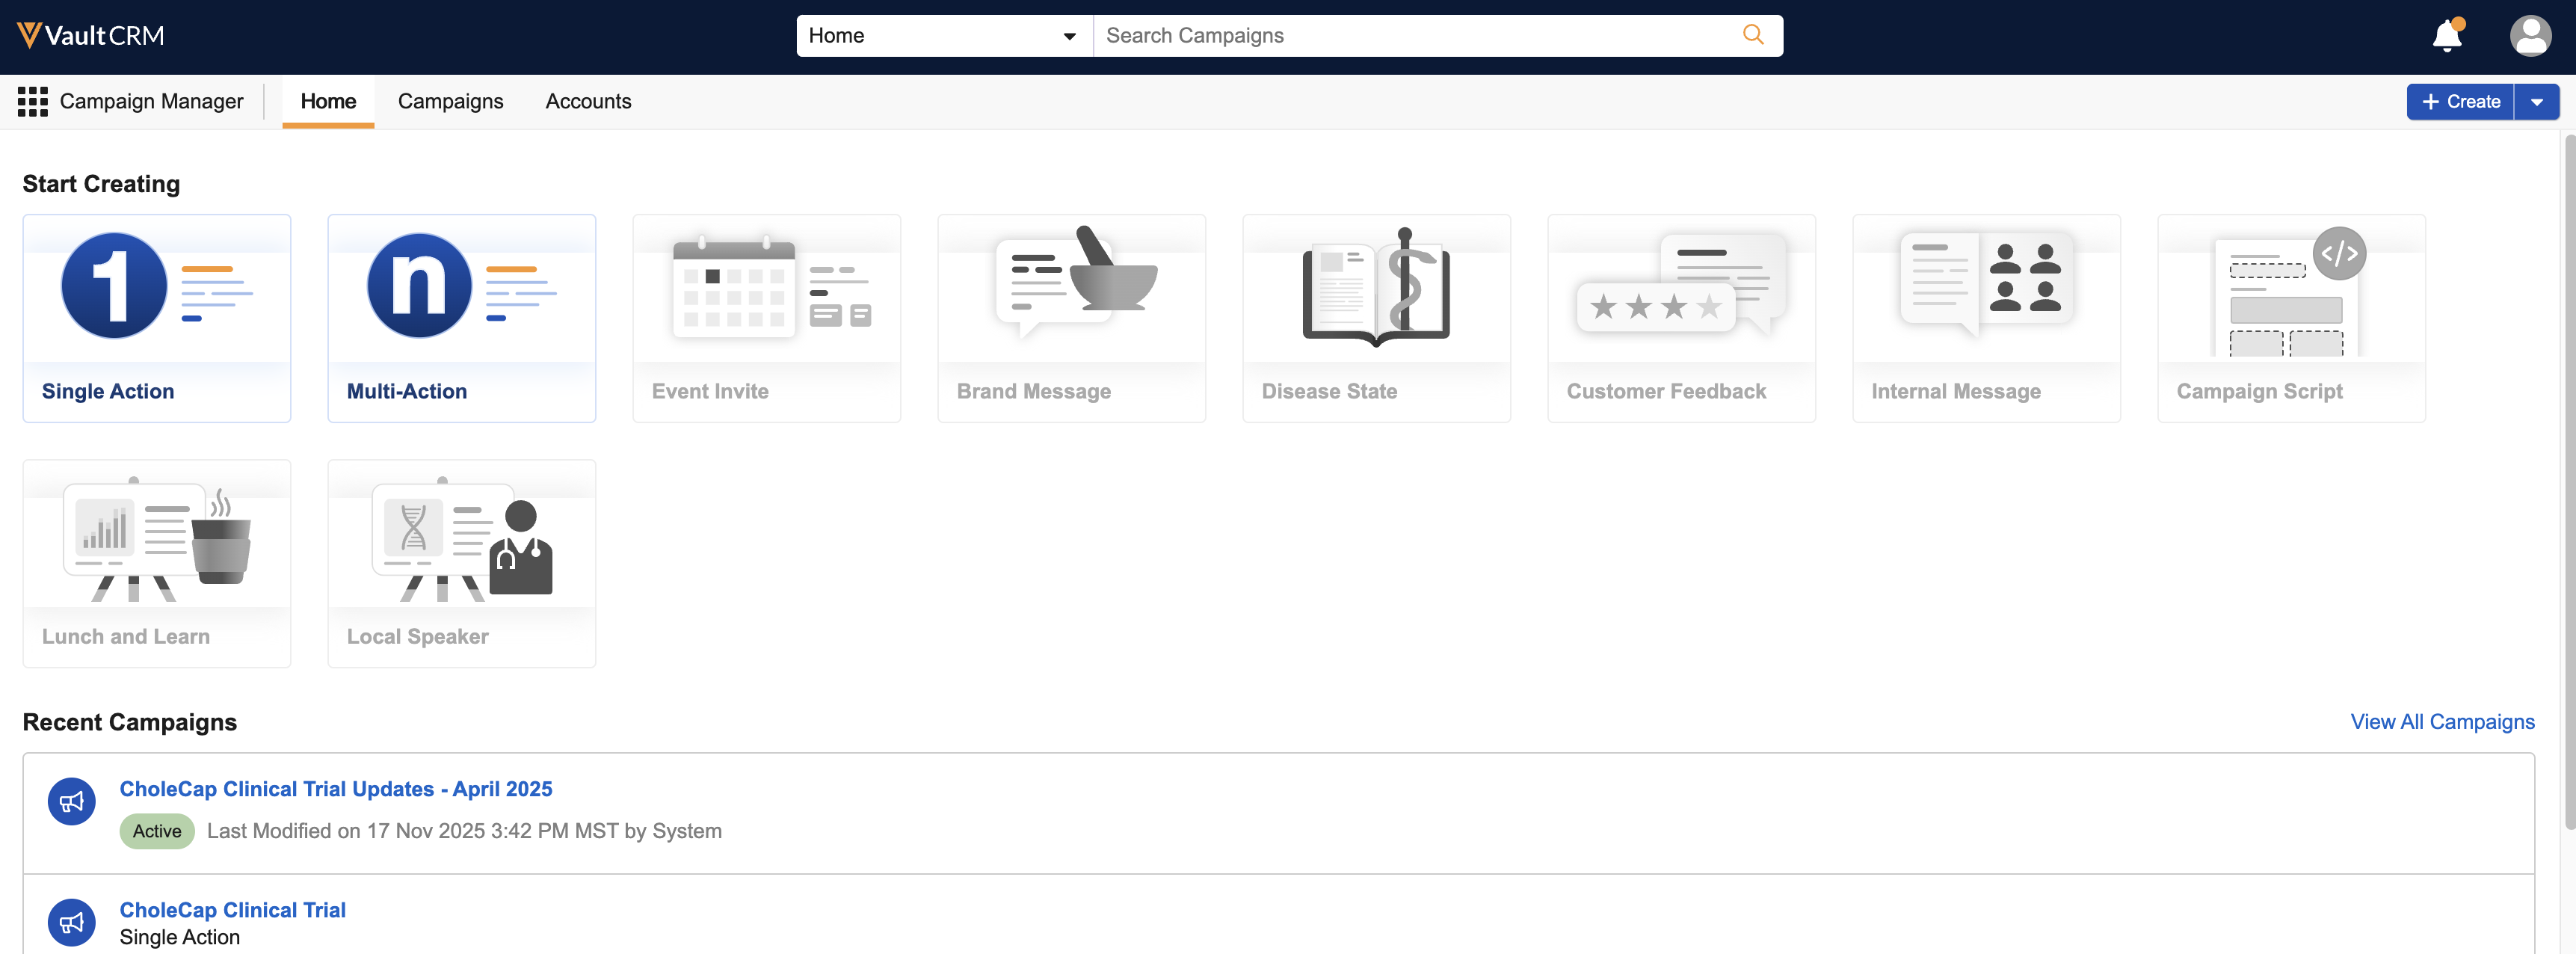
- Select the Create Campaign tile.
-
Select the appropriate template. The following templates are available:
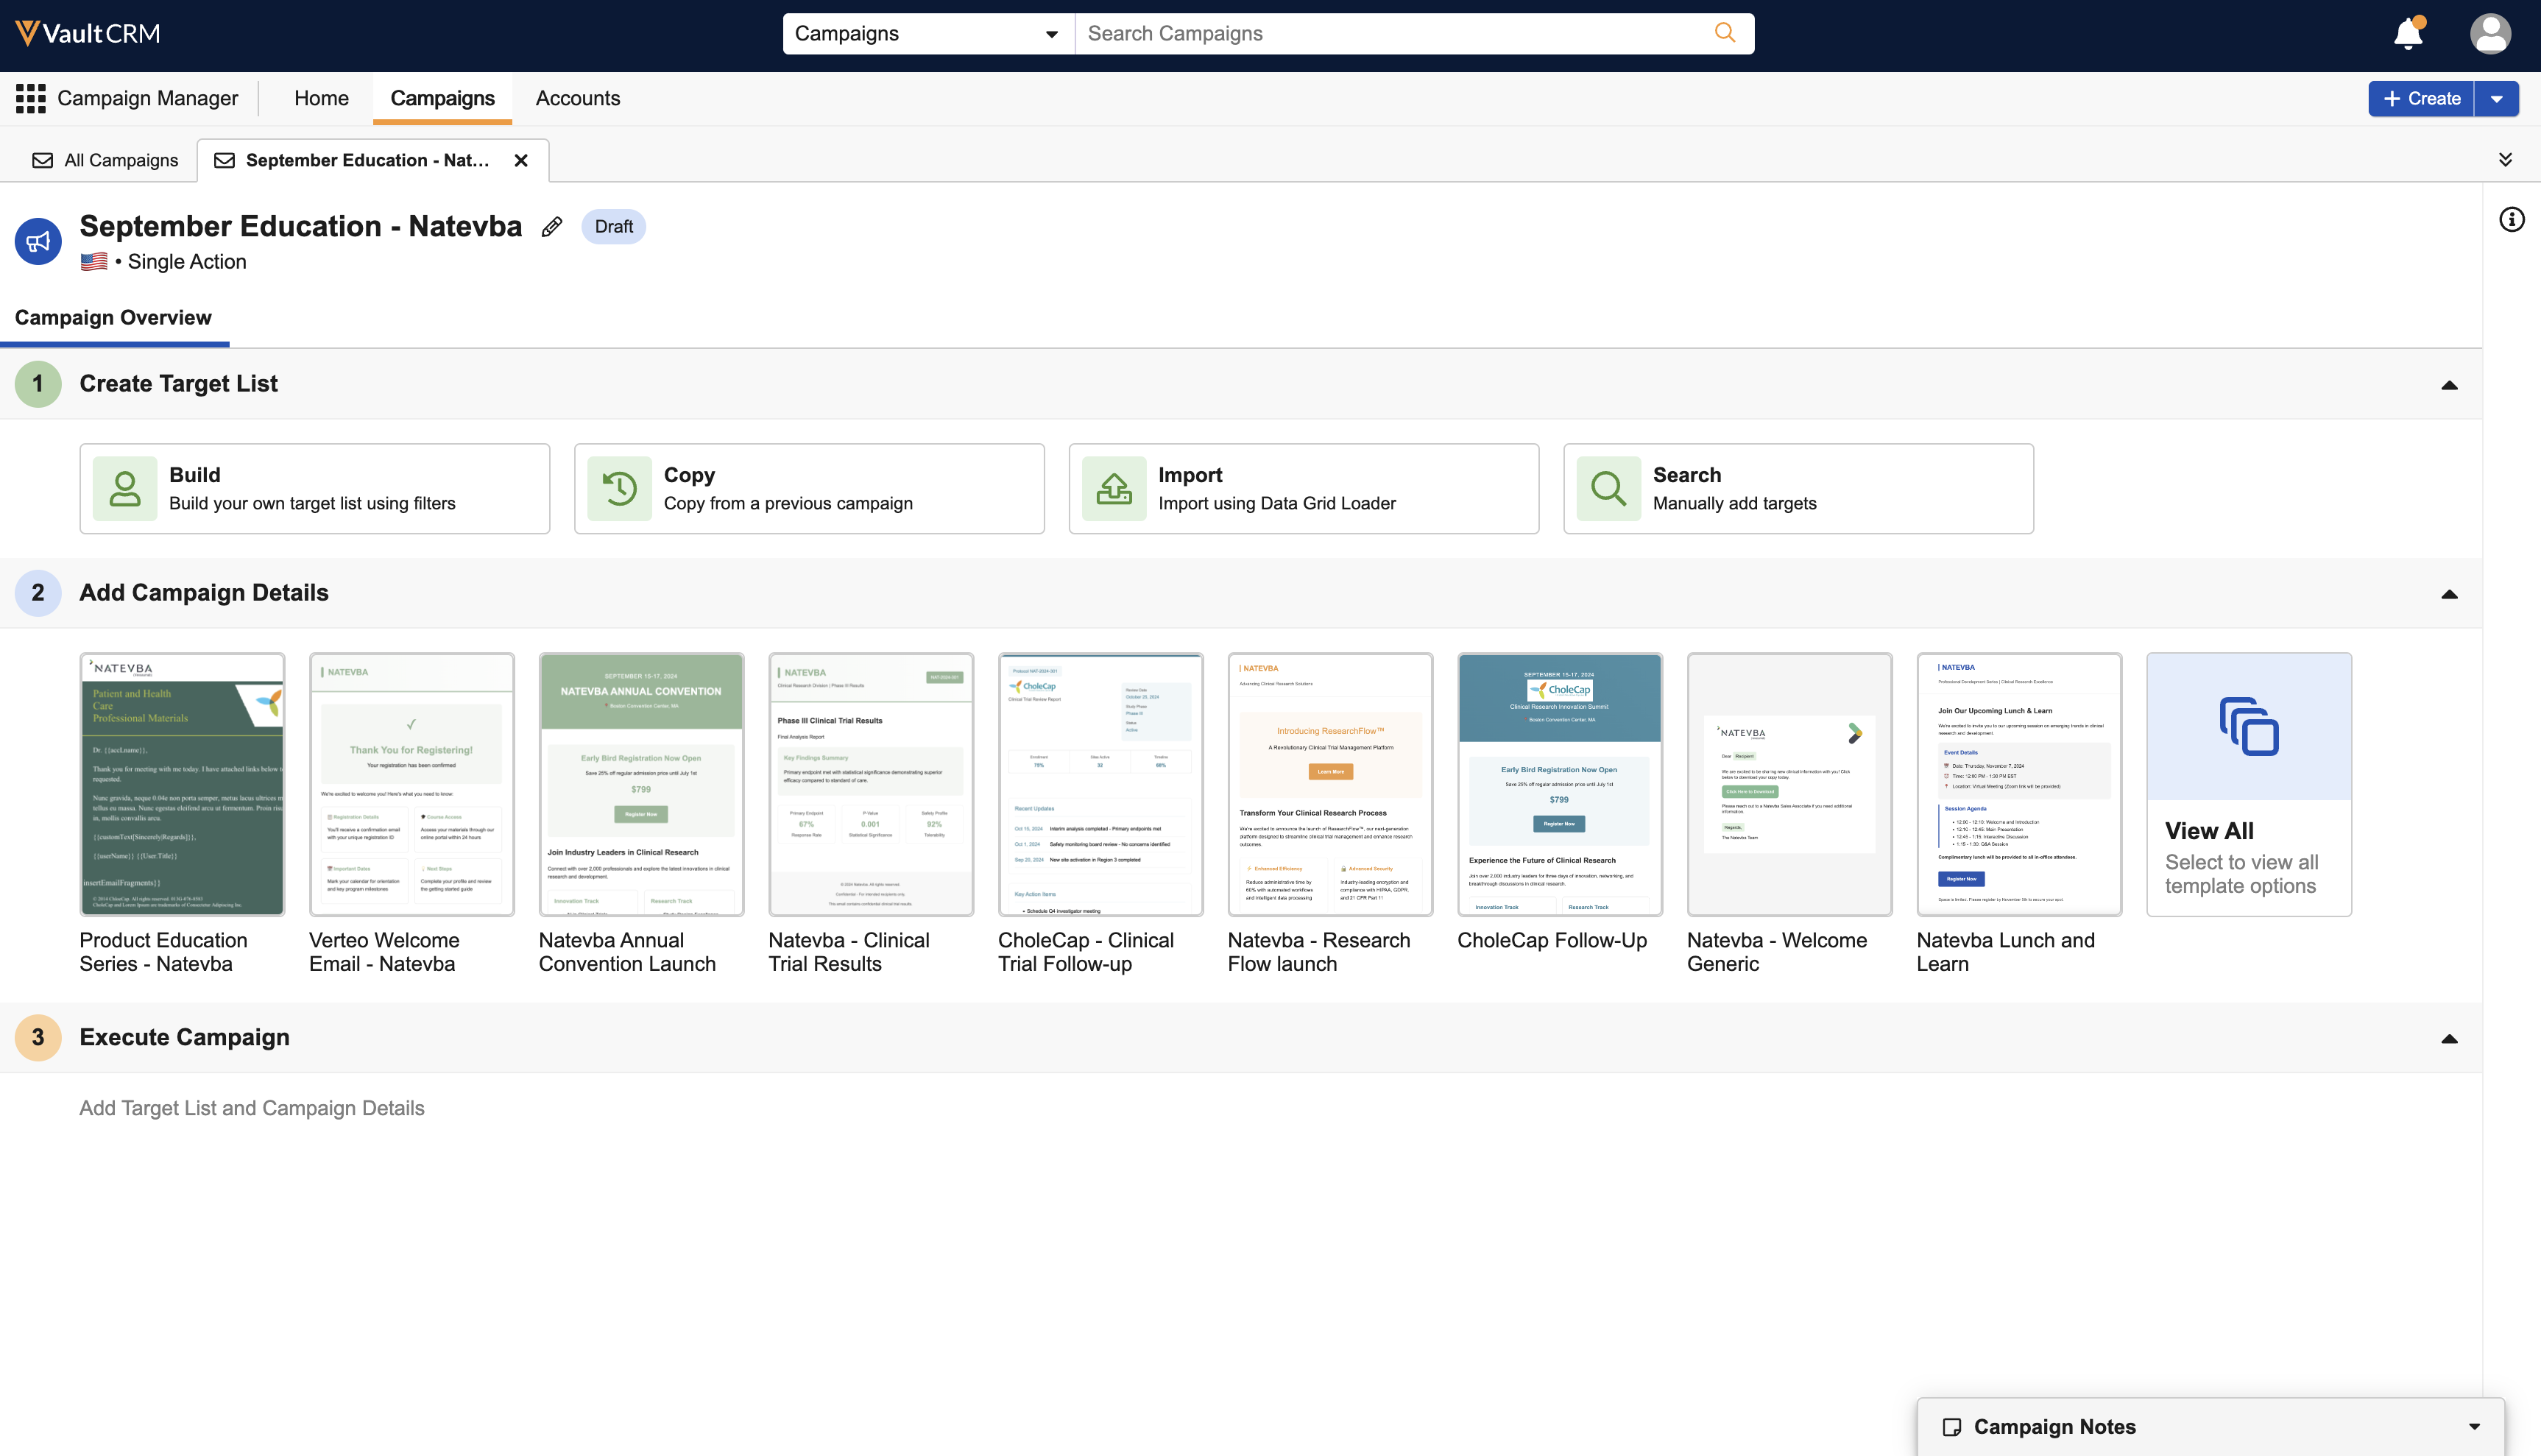
- Enter a Campaign Name. A maximum of 80 characters is supported.
- Ensure Campaign is selected in the Select Type section.
-
Select Create. The new campaign is created with the following fields automatically populated:
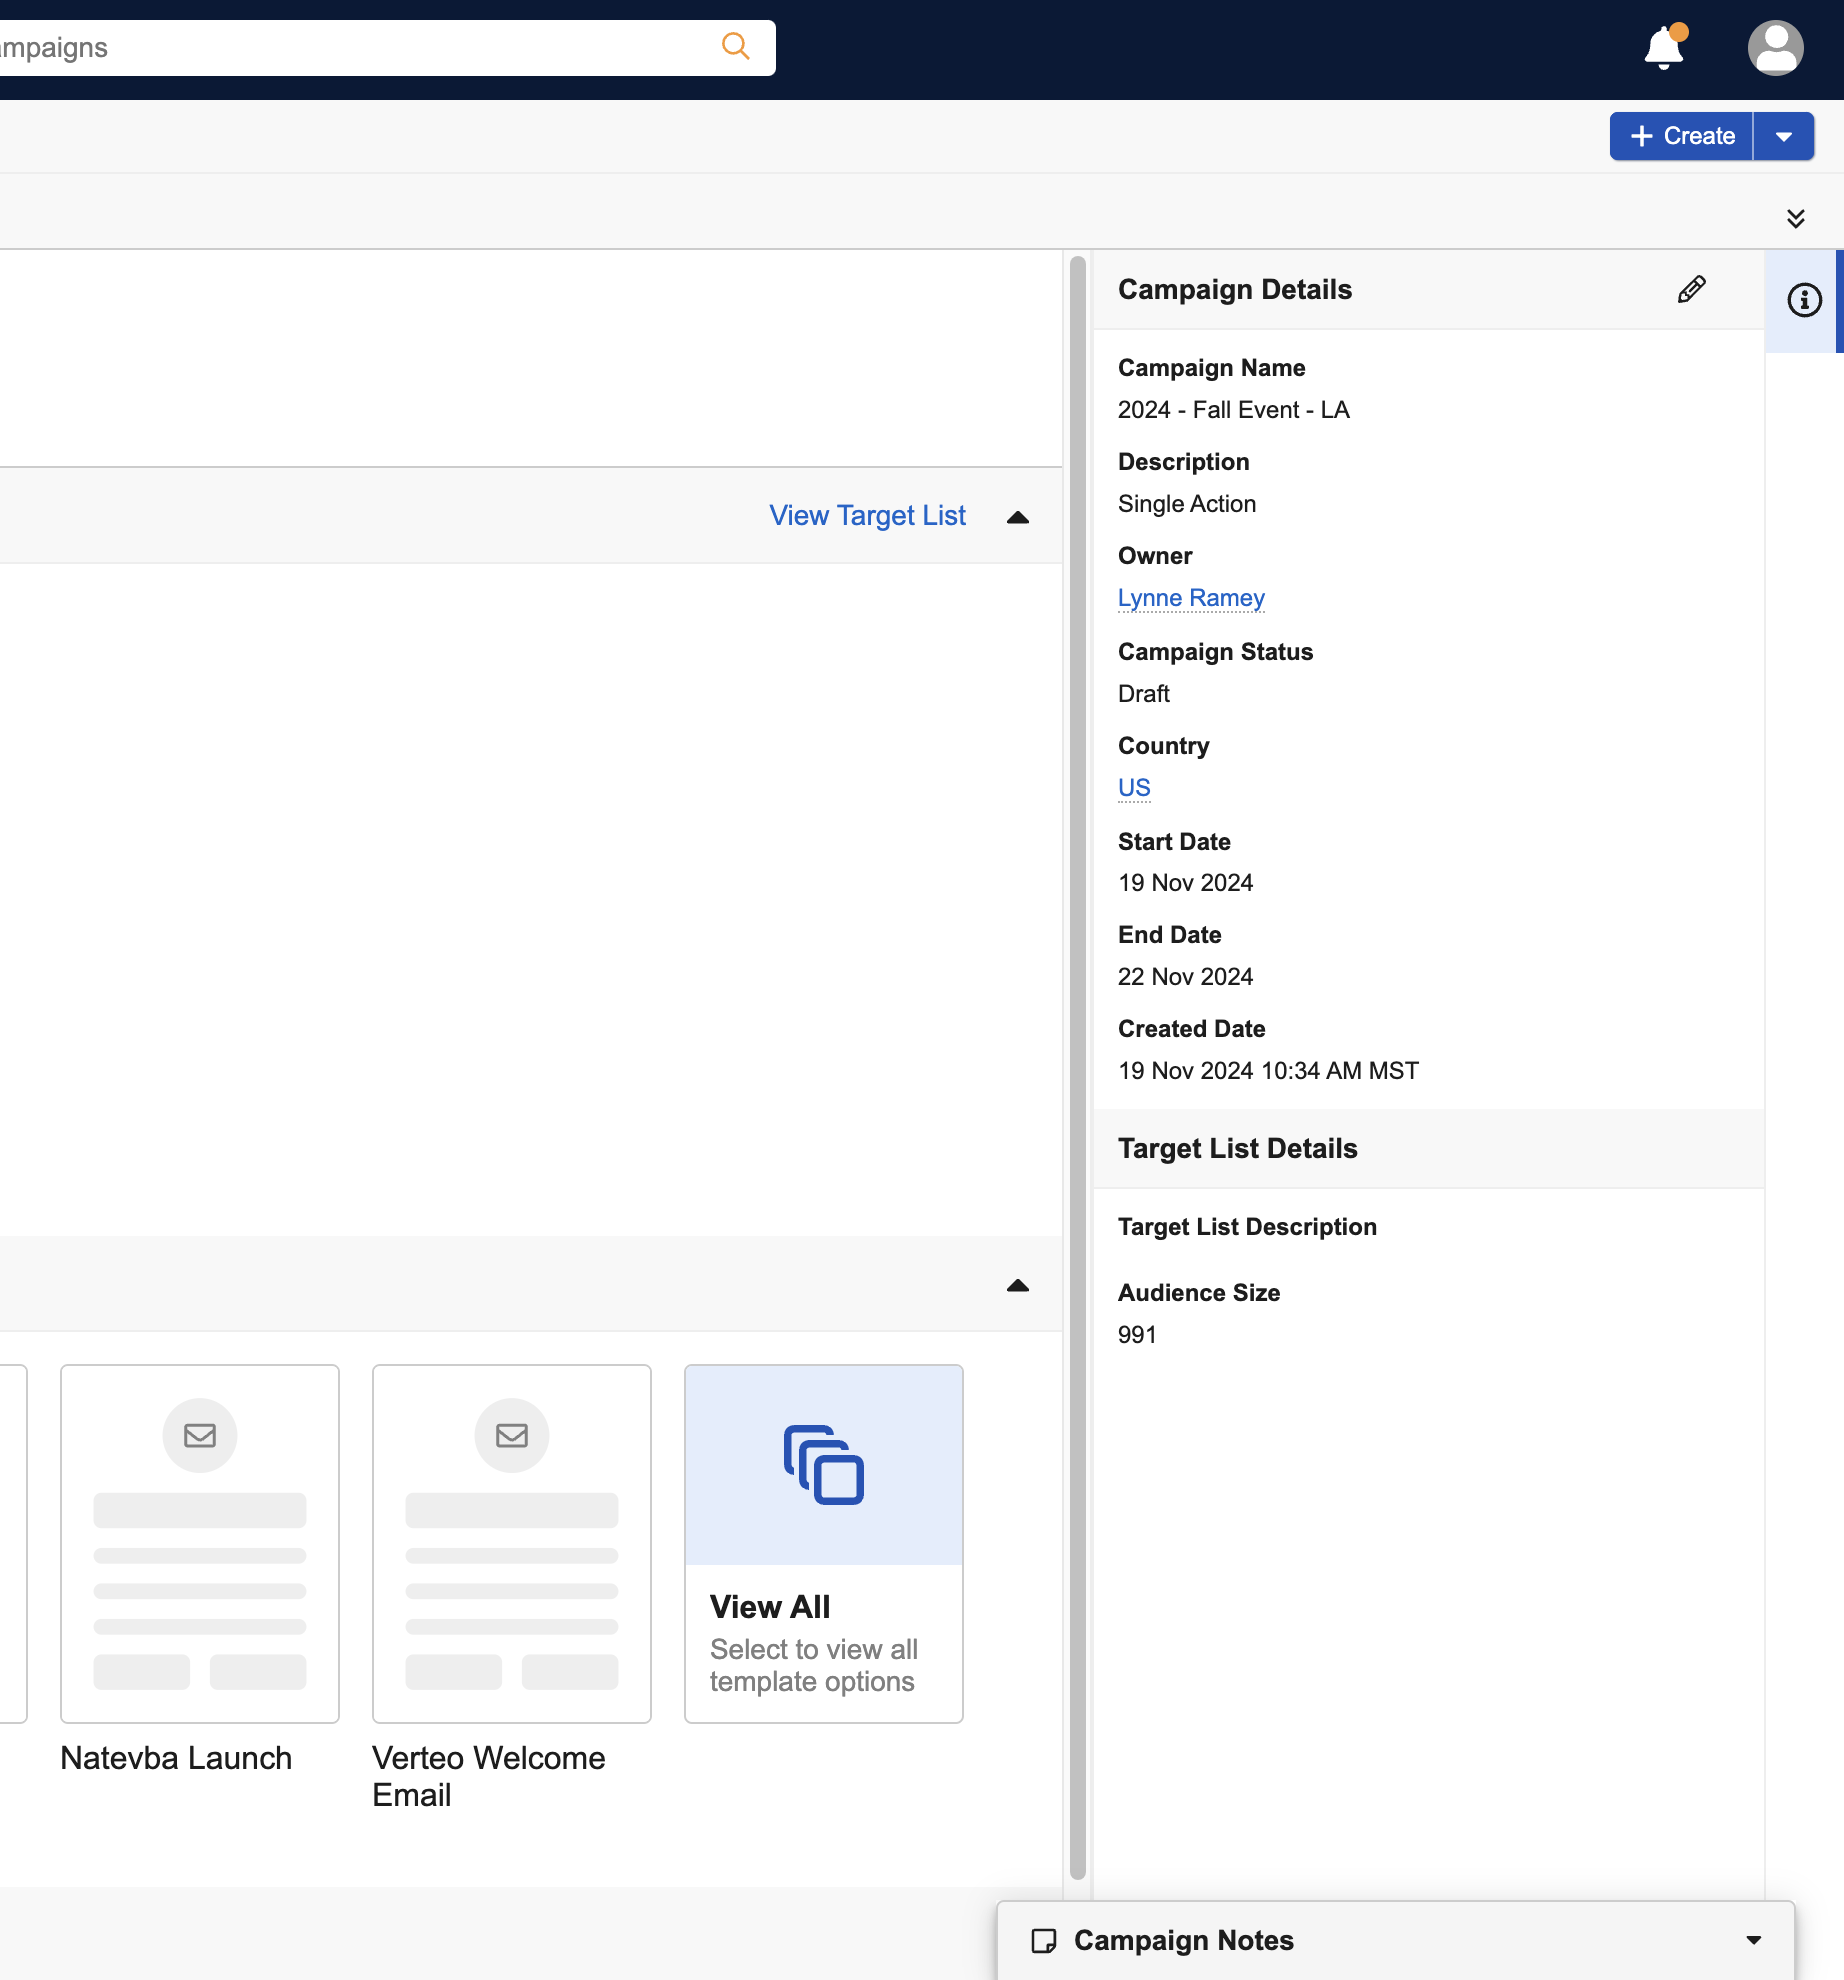
- owner__v – Populates with the user who created the campaign
- vcountry__v – Populates with the vcountry__v field of the user who created the campaign. If this field is not populated, the country is selected based on the user's country.
- campaign_time_zone__v – Populates with the timezone of the user who created the campaign
The new campaign displays in the Campaigns tab in a console view, providing marketing users with the following information:
-
An Overview tab. Marketing users can use this tab to set up the campaign.
You can copy the URL for a campaign and share it with other Campaign Manager users who have access to the campaign. Selecting the URL displays the campaign in a new tab within the Campaign Console, along with the previously open campaigns.
- An edit icon in the campaign header. Select this icon to edit the campaign’s name, country, timezone, or description.
- A pill icon indicating the status of the campaign
Editing Campaign Details
To view or edit campaign details:
-
Select the information icon in the upper right corner to display campaign details.
-
Select the Edit icon to edit the campaign details as needed.
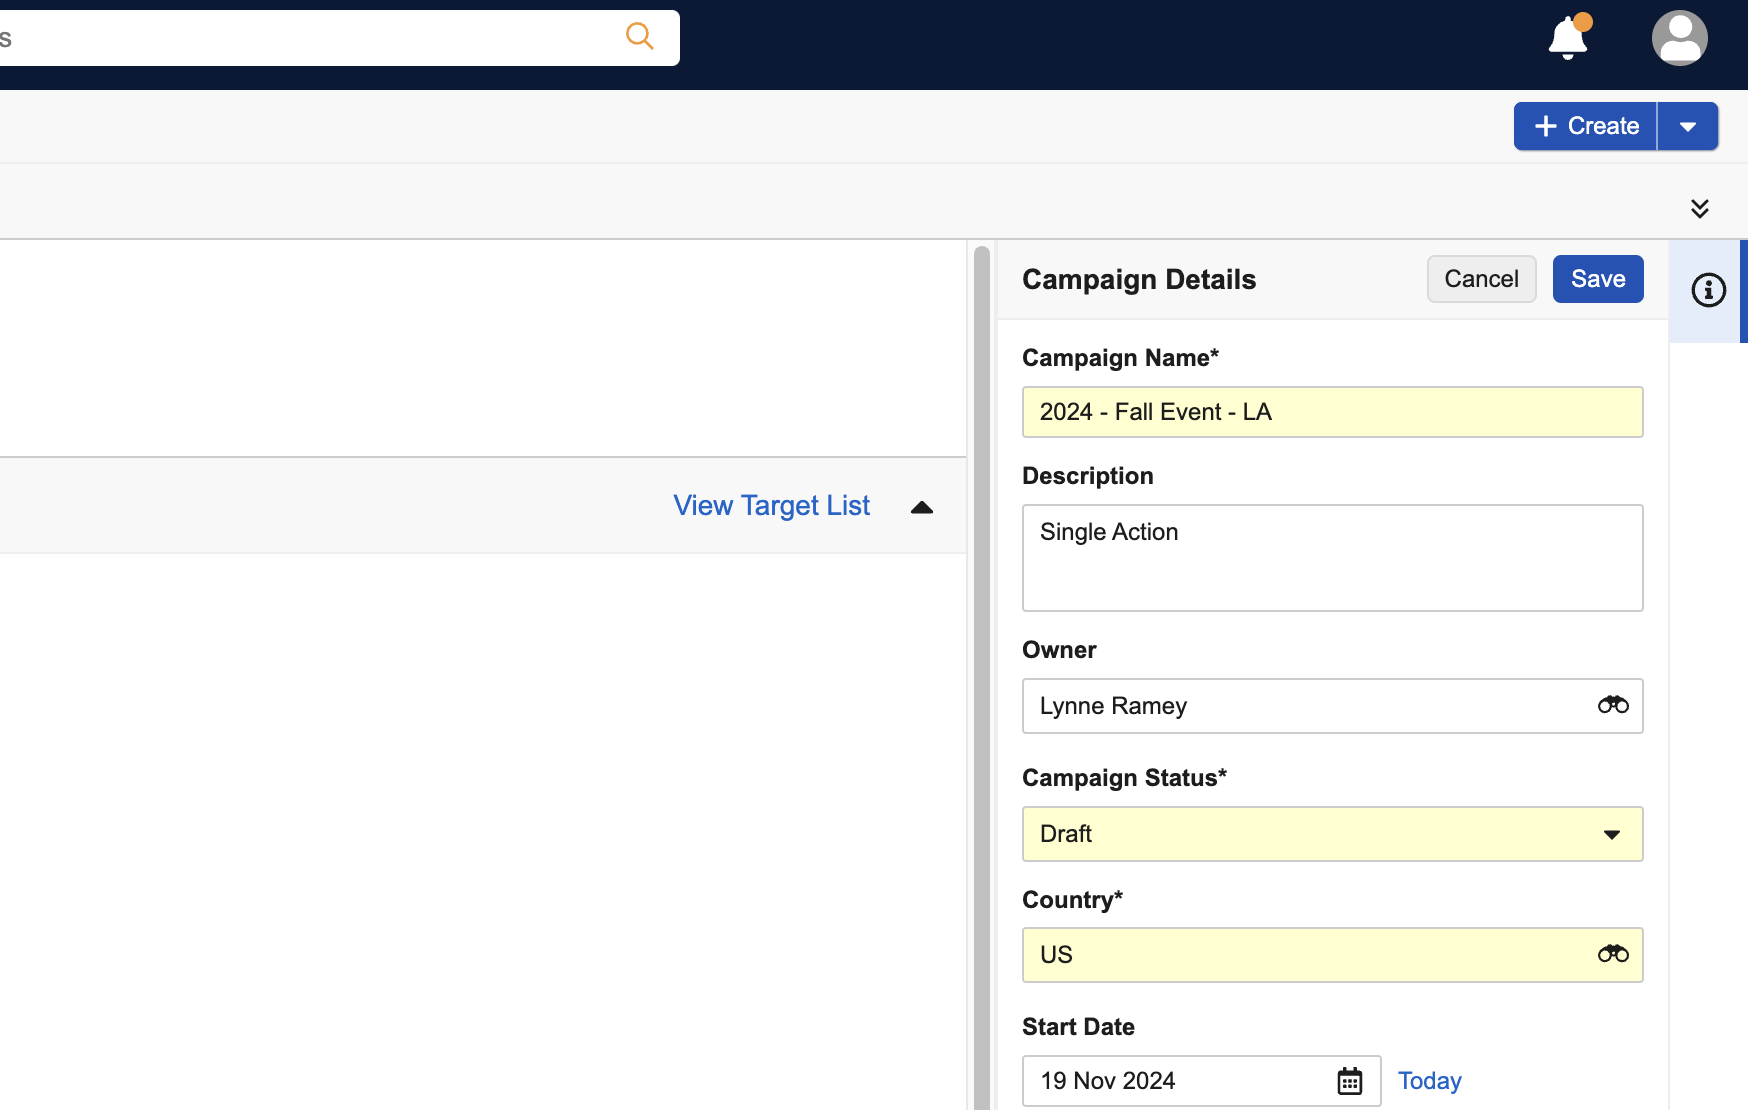
- Select Save.
A warning displays if users attempt to navigate away from or close a campaign tab without saving edits to the campaign details.
Entering Campaign Notes as
A Campaign Notes modal displays in the lower right corner of each campaign details tab for users to enter additional information about the campaign. Campaign Notes are visible to any user with access to view the campaign.
To enter campaign notes, expand the Campaign Notes window in the bottom right corner of the screen.
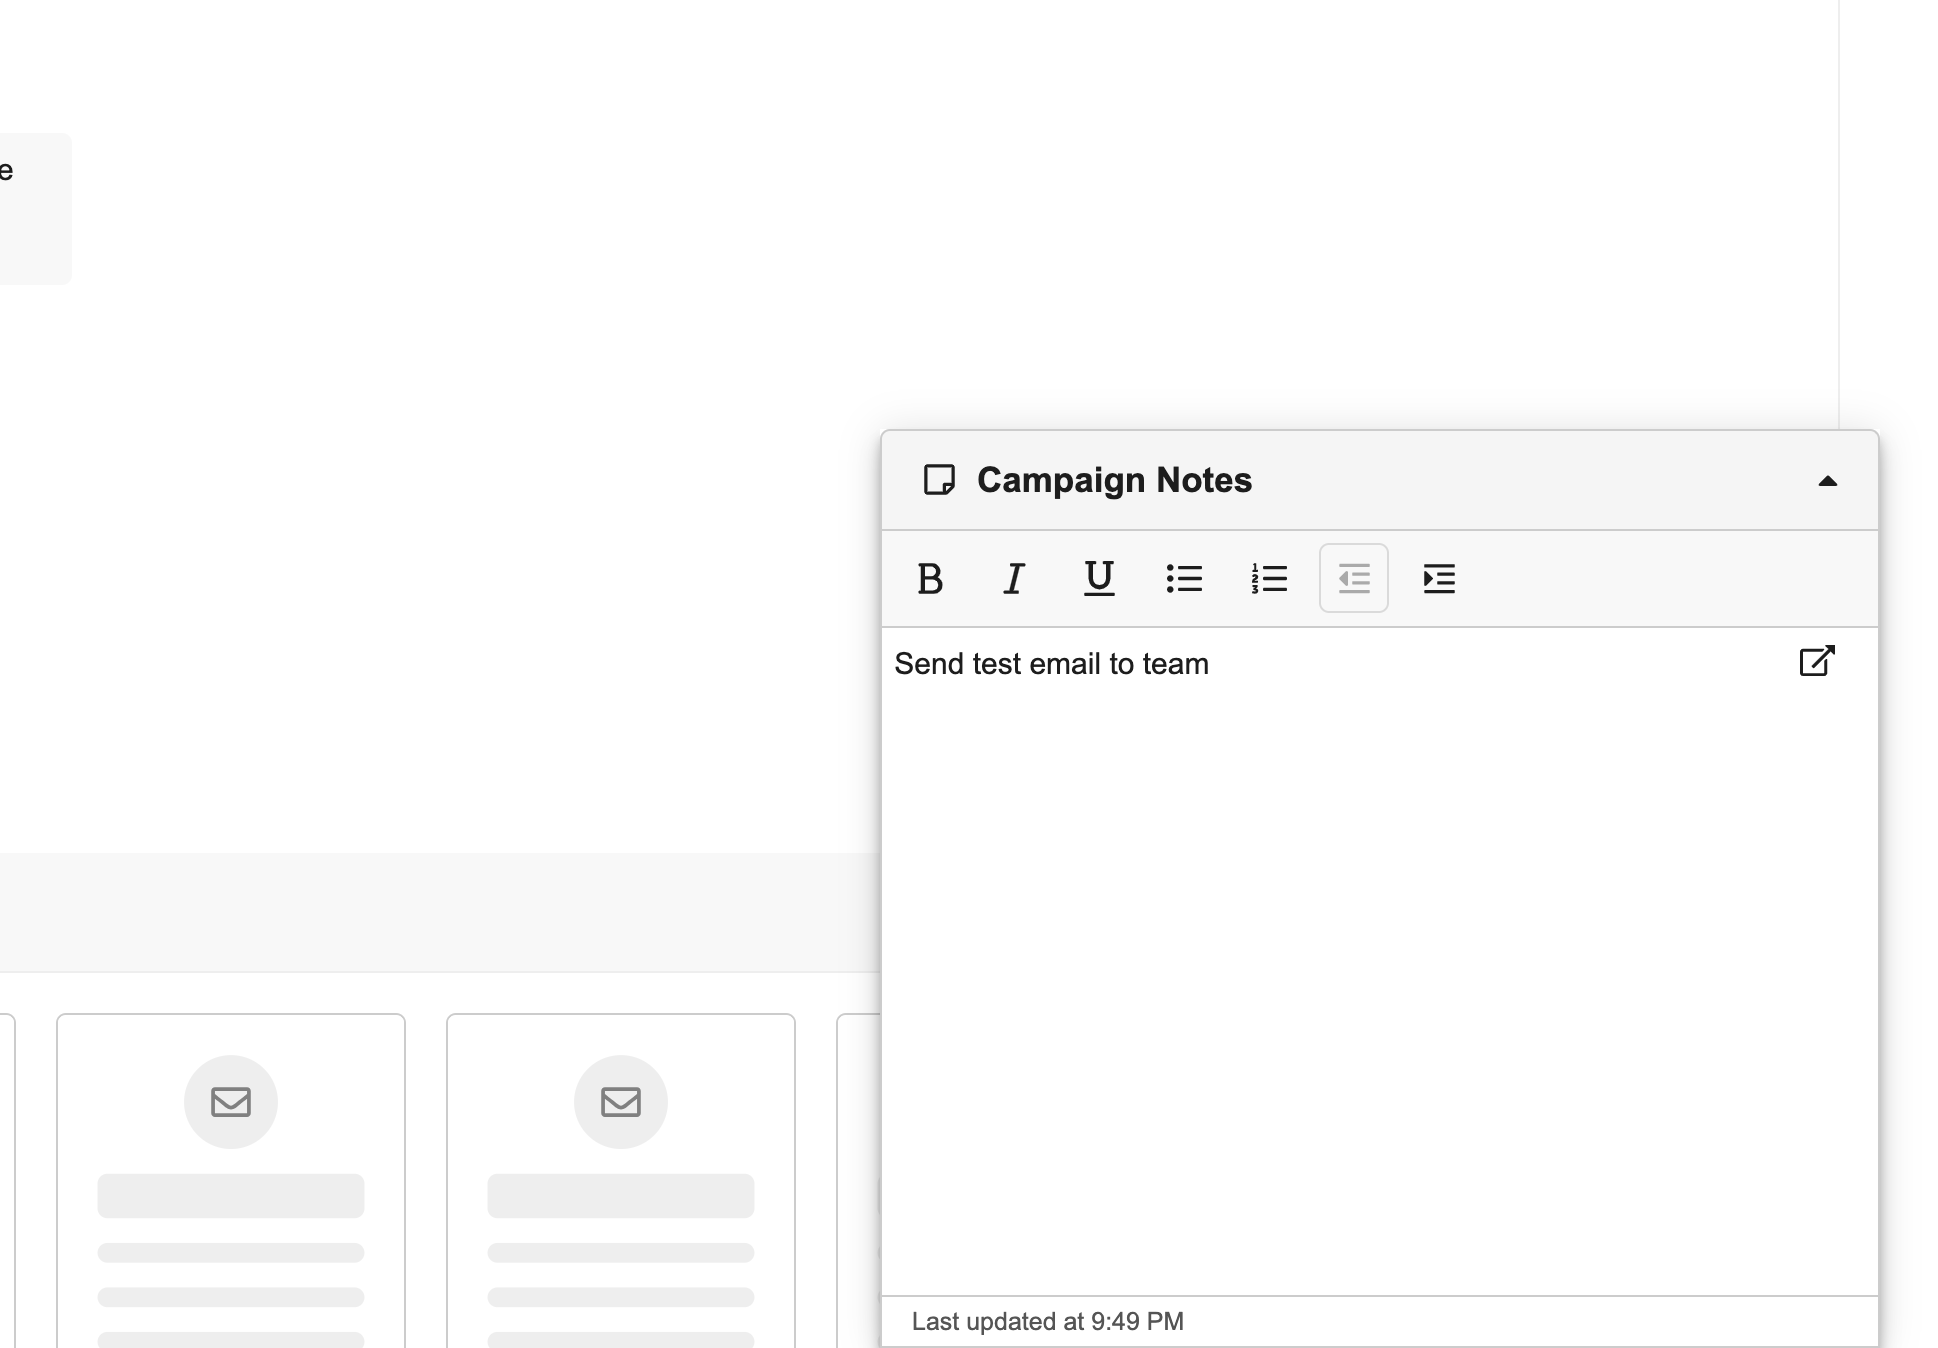
Enter line breaks and text formatting as needed.
The Save button is disabled until changes are made to the text field.
Select the modal header to collapse or expand the modal as needed. To view an extra-large version of the modal, select the expand icon in the text field.
Edit, delete, or enter additional text as needed.
Planning and Executing Campaigns as
Once the campaign is created, marketing users must configure the campaign based on the selected template:
Campaigns must have a defined target list before the can be activated or scheduled for activation.

