Email Tab
The Email tab provides a centralized location where users can easily access Approved Email functionality. The Email tab is accessed from the Vault CRM menu and includes folders for Draft, Scheduled, and Sent emails.
A user can begin composing an Approved Email, then save the email as a draft and navigate to the recipient’s account. After verifying the information from the account, the user can access the saved draft, finish editing her response, and send the finalized email to the recipient. When the user navigates to the Sent folder, she sees the sent email along with other emails she has sent.
Who can use this feature?
- End Users — iPad, iPhone
- Viewing Emails
- Editing Drafts or Scheduled Emails
- Discarding Drafts or Scheduled Emails
- Displaying Errors for Unavailable Content
- Users require an Approved Email license
Configuring the Email Tab for
To configure the Email Tab and default Sent folder for end users:
- Ensure Configuring Approved Email is complete.
- Verify users have CRE access to the sent_email__v object.
- Add Email to the Text field on the TAB_NAV_DISPLAY Veeva Message if the Veeva Message is populated to customize the display and order of tabs on the navigation bar.
By default, the email folders display emails sent within the last 90 days. Admins can adjust this range by changing the WHERE clause of the sent_email__v VMOC, but this may result in longer sync times.
To enable Drafts and display the folder for end users, populate the enable_drafts_folder Approved Email Custom Setting with a value of 1.
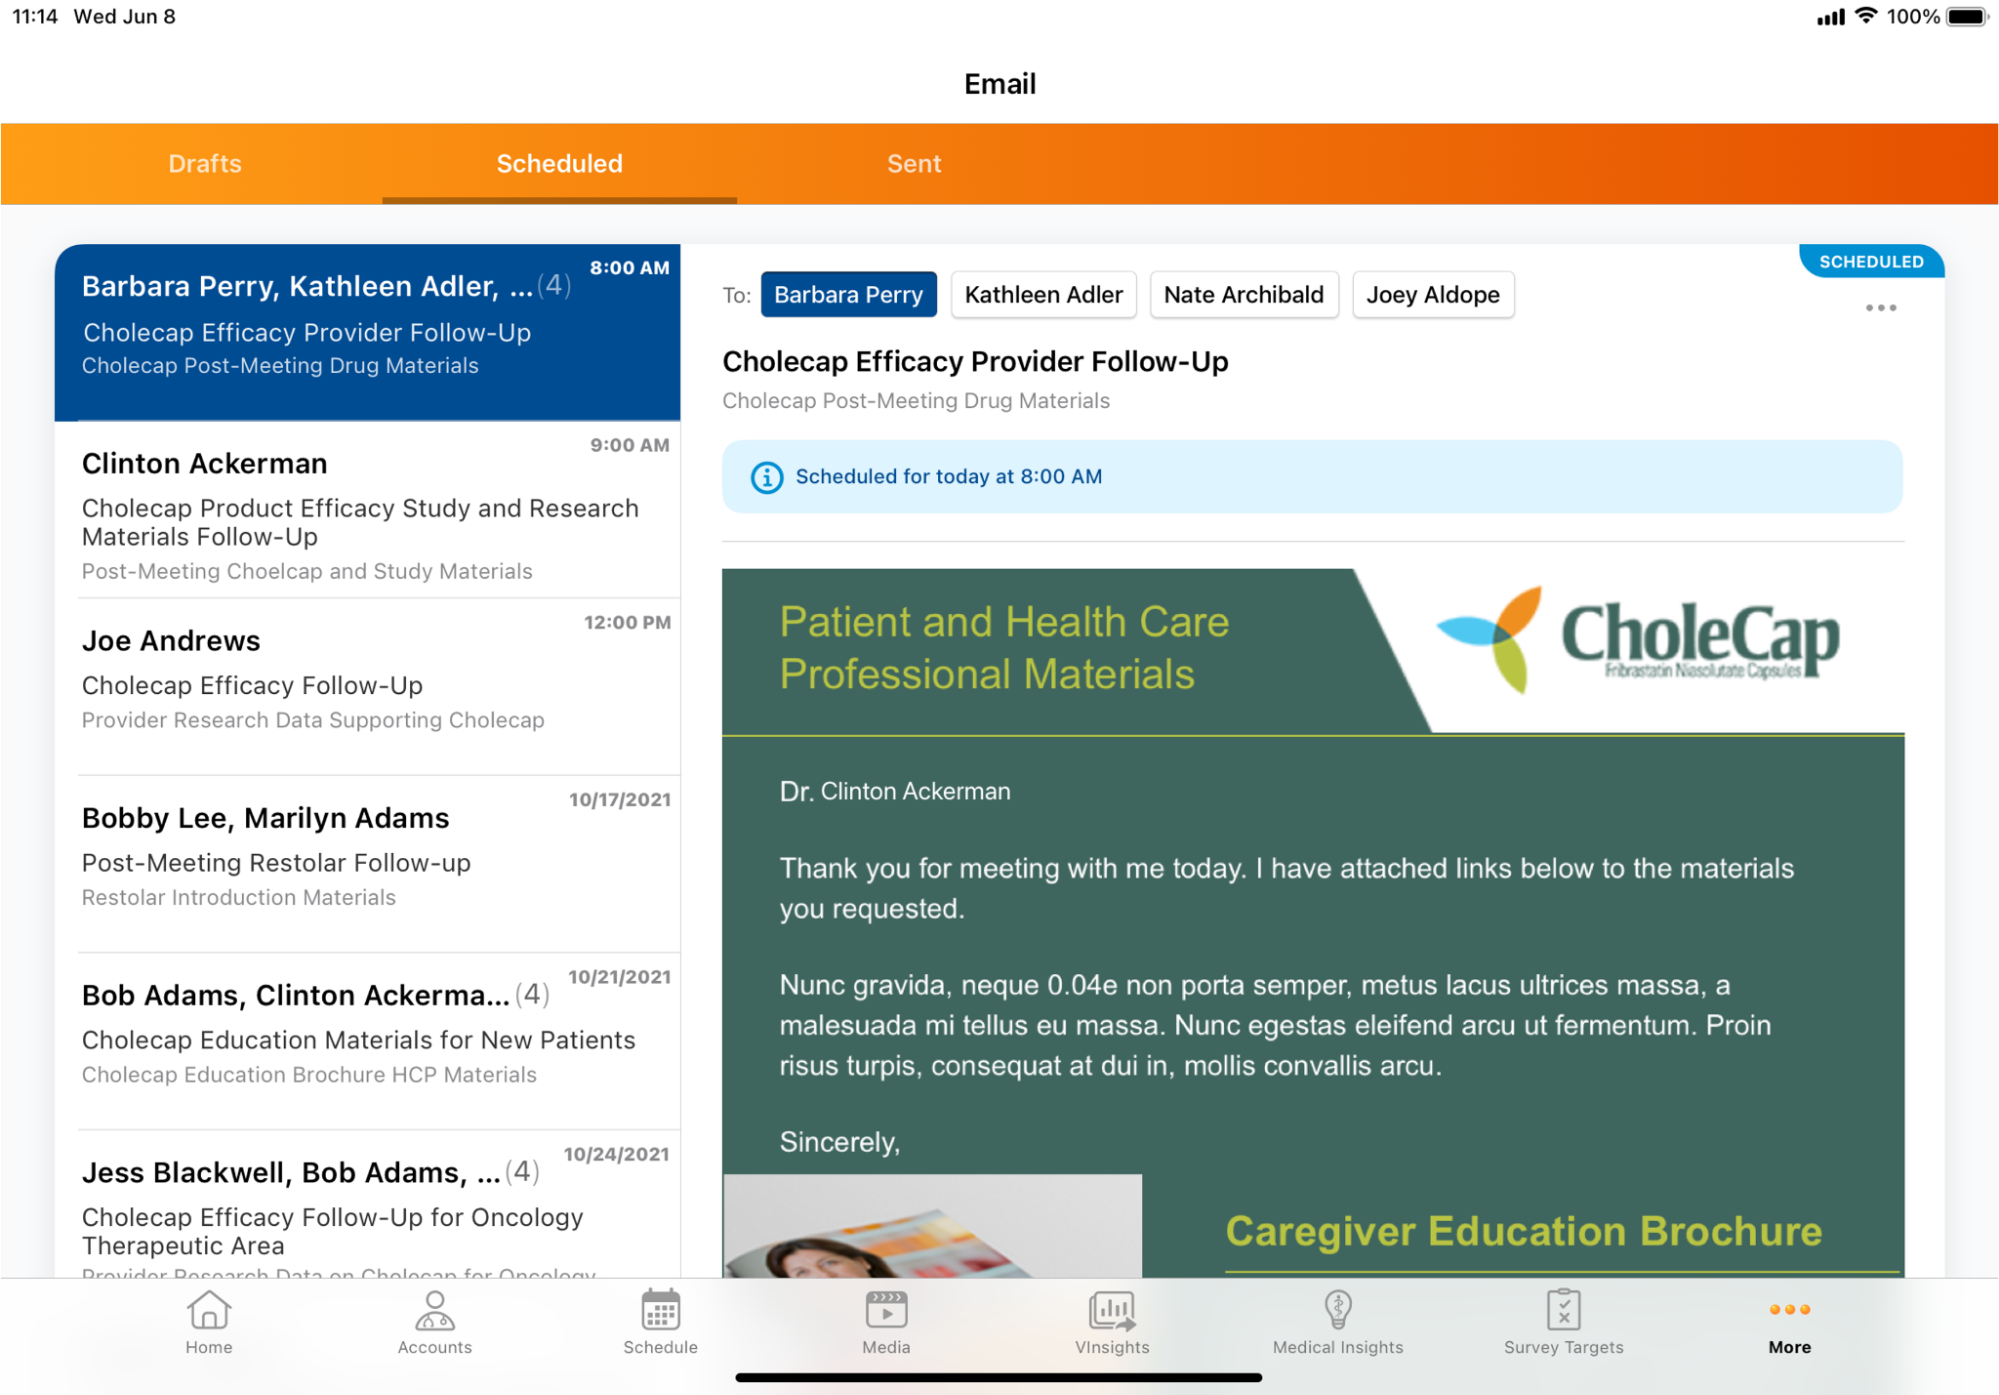
To enable the Scheduled folder and functionality for end users, verify users have Edit field permission to the scheduled_send_datetime__v field on the sent_email__v object.
Using the Email Tab as
All Approved Emails display in the Email tab, except emails for:
- Consent capture receipts
- Consent confirmation
Viewing Emails
The Email tab displays loading indicators in the List and Preview panes to show that data is still loading. The amount of time the indicator displays depends on how much email data you have.

To view an email, select the row for the email in the side panel. The selected email displays in the Preview window.
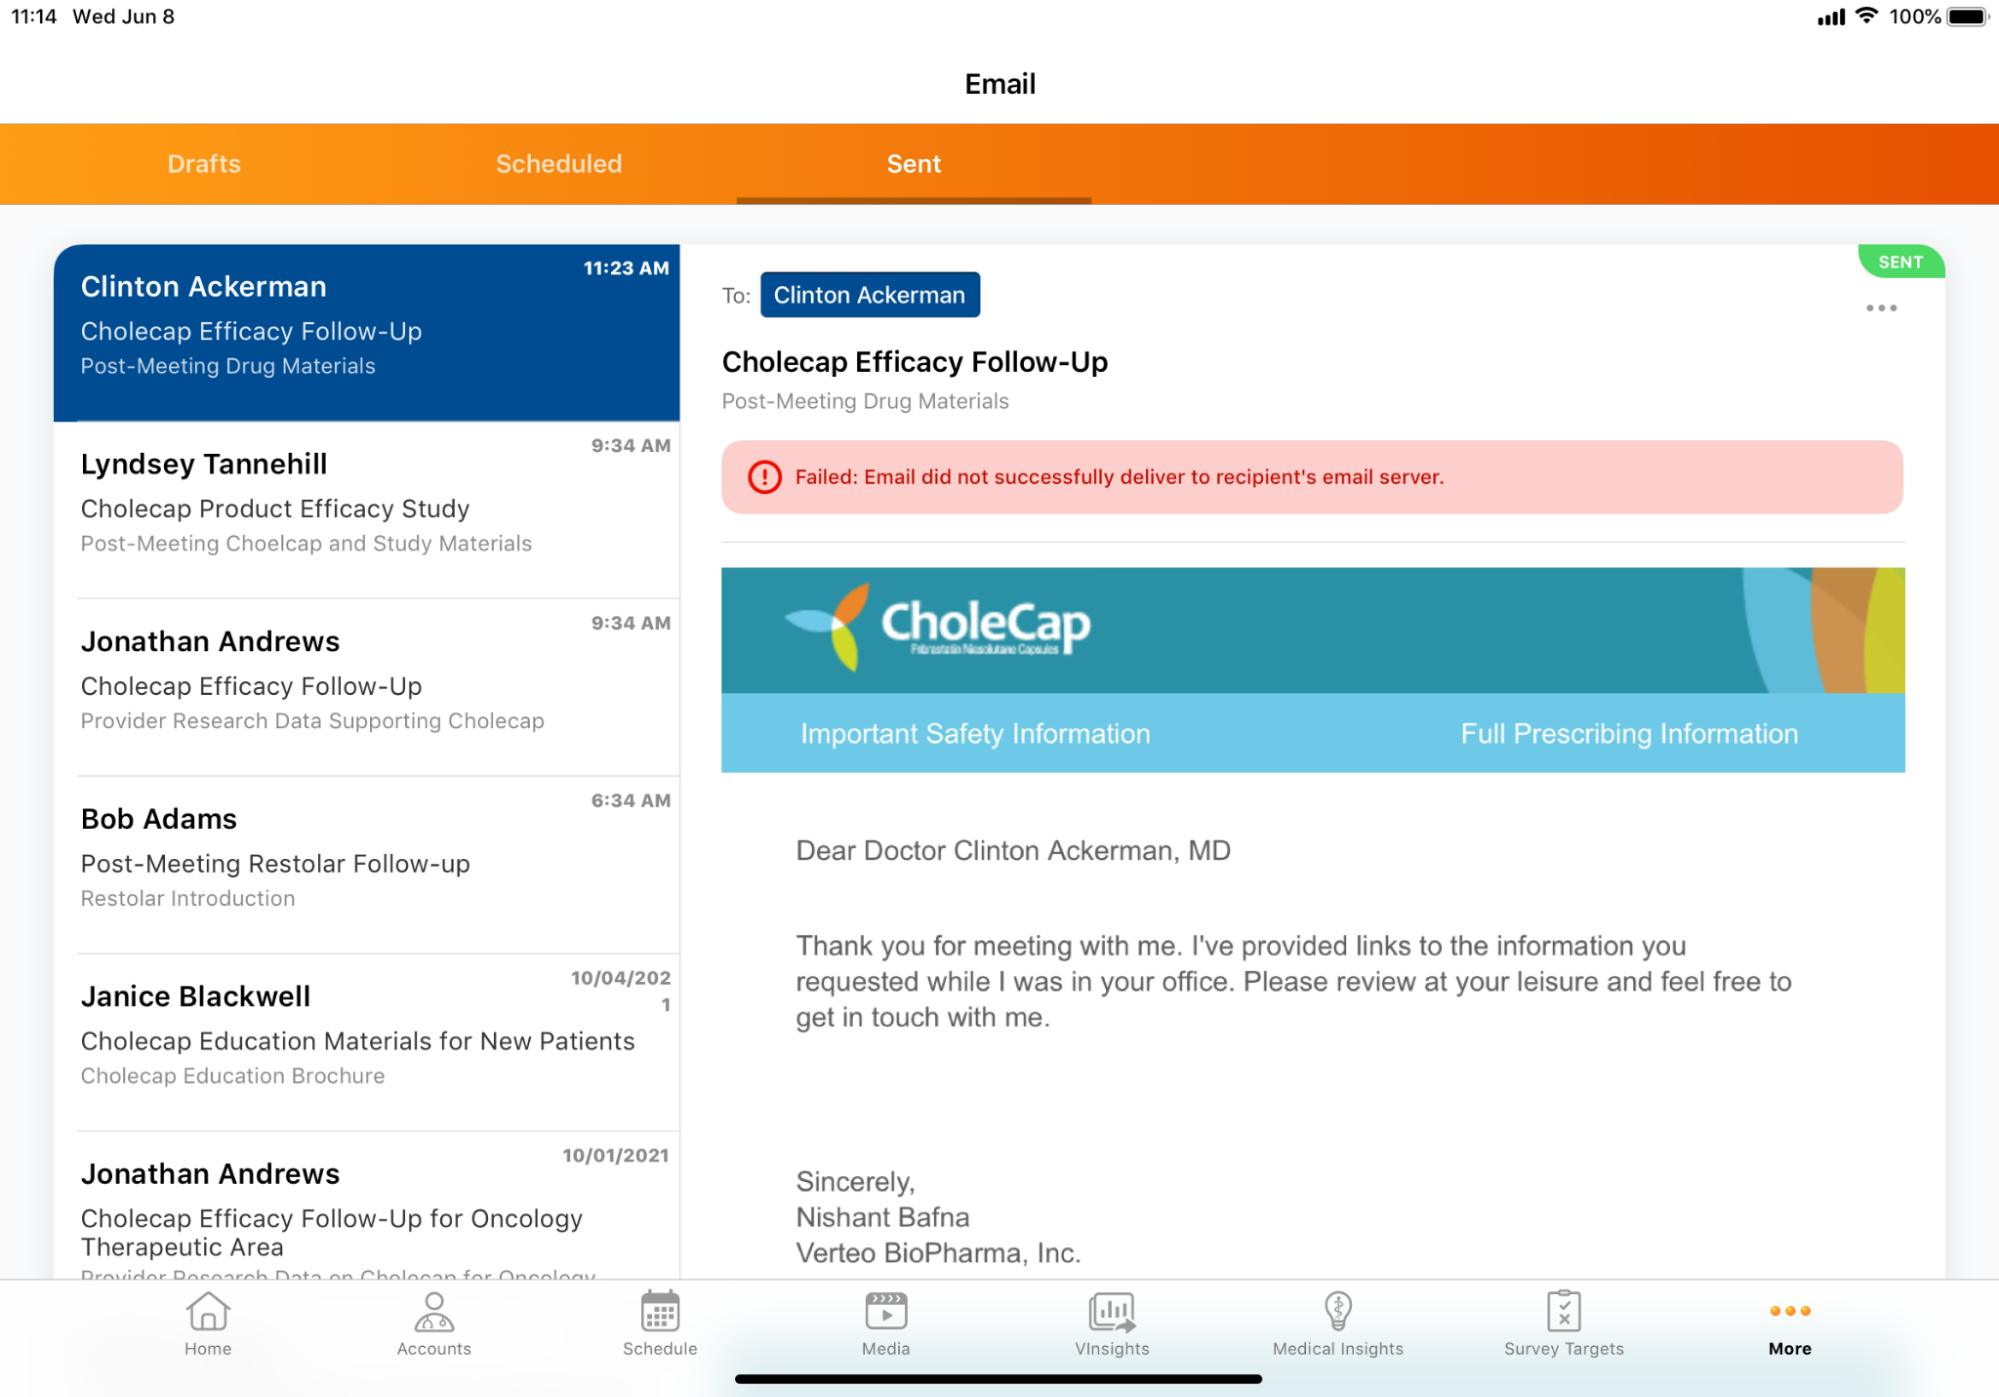
The Sent folder displays each individual recipient as a single row in the side panel. The Preview also displays status messages, for example sent email errors. Error messages display for sent emails with Bounced, Failed, and Rejected statuses.
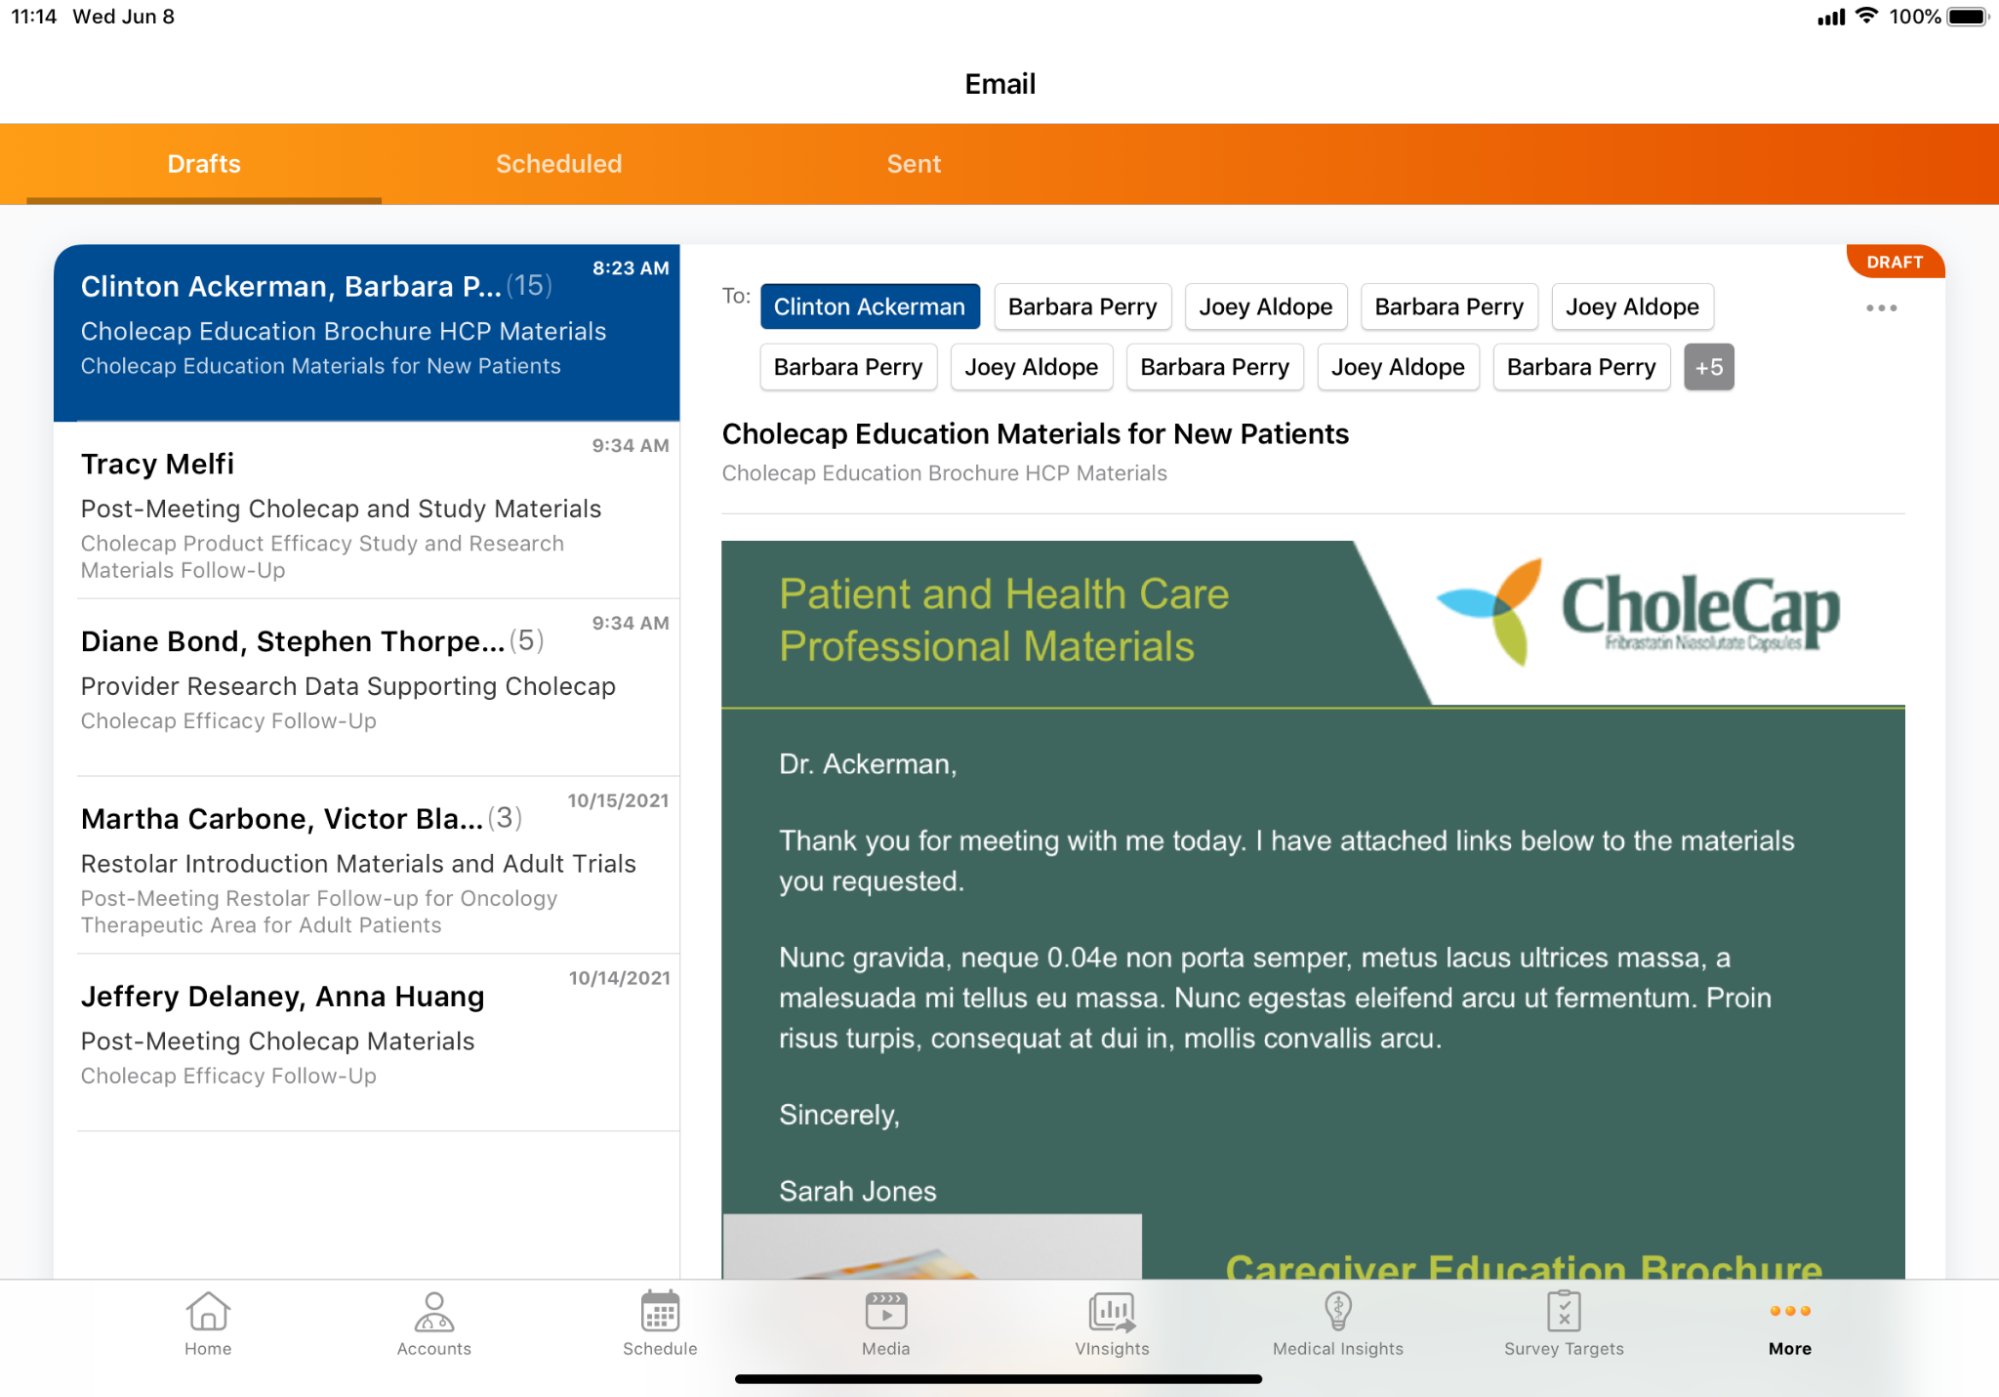
If an email has multiple recipients, the Drafts and Scheduled folders display the recipients as a single row in the side panel. The Scheduled folder also displays the time a message will be sent.
| Drafts Folder | Scheduled Folder |
|---|---|
|
|
If an email has multiple recipients that exceed the width of the list window, the number of recipients displays in place of the truncated list of names. Select the count indicator to view the hidden recipient names. To view how an email displays for a specific recipient, select the recipient's name in the Preview window.
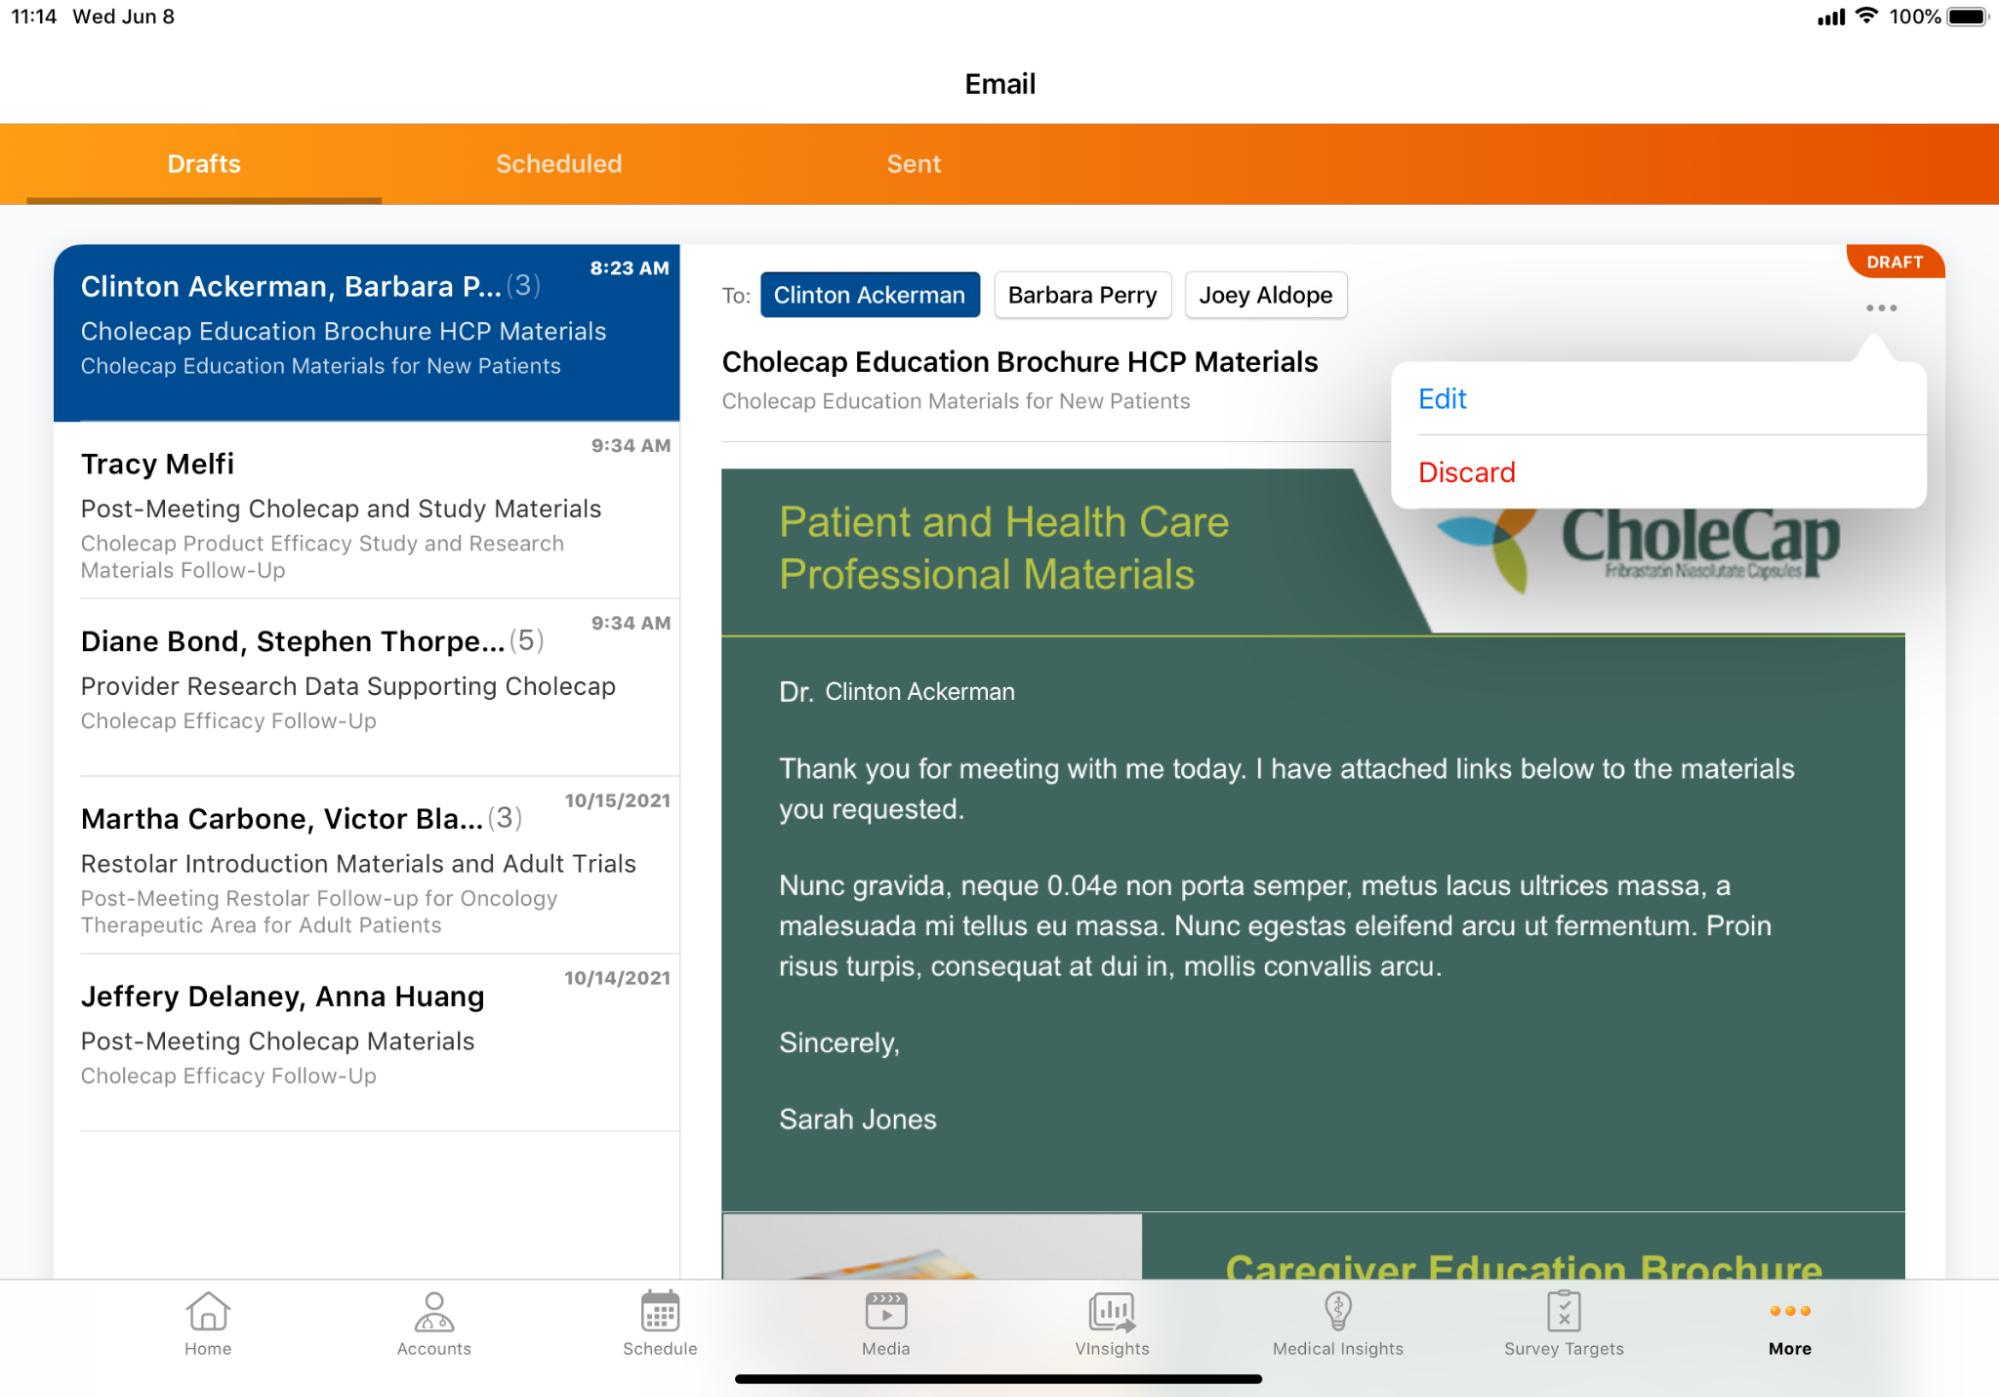
Editing Drafts or Scheduled Emails
Users are prevented from sending a draft or saving edits to a scheduled email if any errors are present. For details, see Composing Approved Emails. Approved Email performs validation of consent/content based on the latest information any time the user accesses an existing email. Within the Send Email screen, alerts continue to display for applicable errors, for example:
- Consent
- Invalid recipient fields (for example, missing email addresses)
- Allowed/restricted products
- Restricted words
- Required tokens
If a recipient is removed, their respective sent_email__v record is moved to discarded__v status. During the sync process, a trigger automatically deletes records found in discarded__v status.
To edit a draft or scheduled email:
- Select the row for the email in the side panel. The Preview displays on the right.
- Select the All Actions button.
- Select Edit to open the email within the Send Email screen.
- Make the appropriate edits.
To save changes made to a draft:
- Select either the Close button or ‘X’ on the individual template tab.
- Select Save Draft.
To save changes made to a scheduled email, perform the Slide to Send action.
Discarding Drafts or Scheduled Emails
To discard a draft or scheduled email:
- Select the row for the email in the side panel. The preview displays.
- Select the All Actions button.
- Select Discard.
- Select Discard to discard the message, or Cancel to retain the message.
Discarding an email moves all recipient sent_email__v records to discarded__v status. During the sync process, a trigger automatically deletes records found in discarded__v status.
If a user attempts to sync a change to a scheduled email that was sent Online, they are prevented from making the update and a sync error displays.
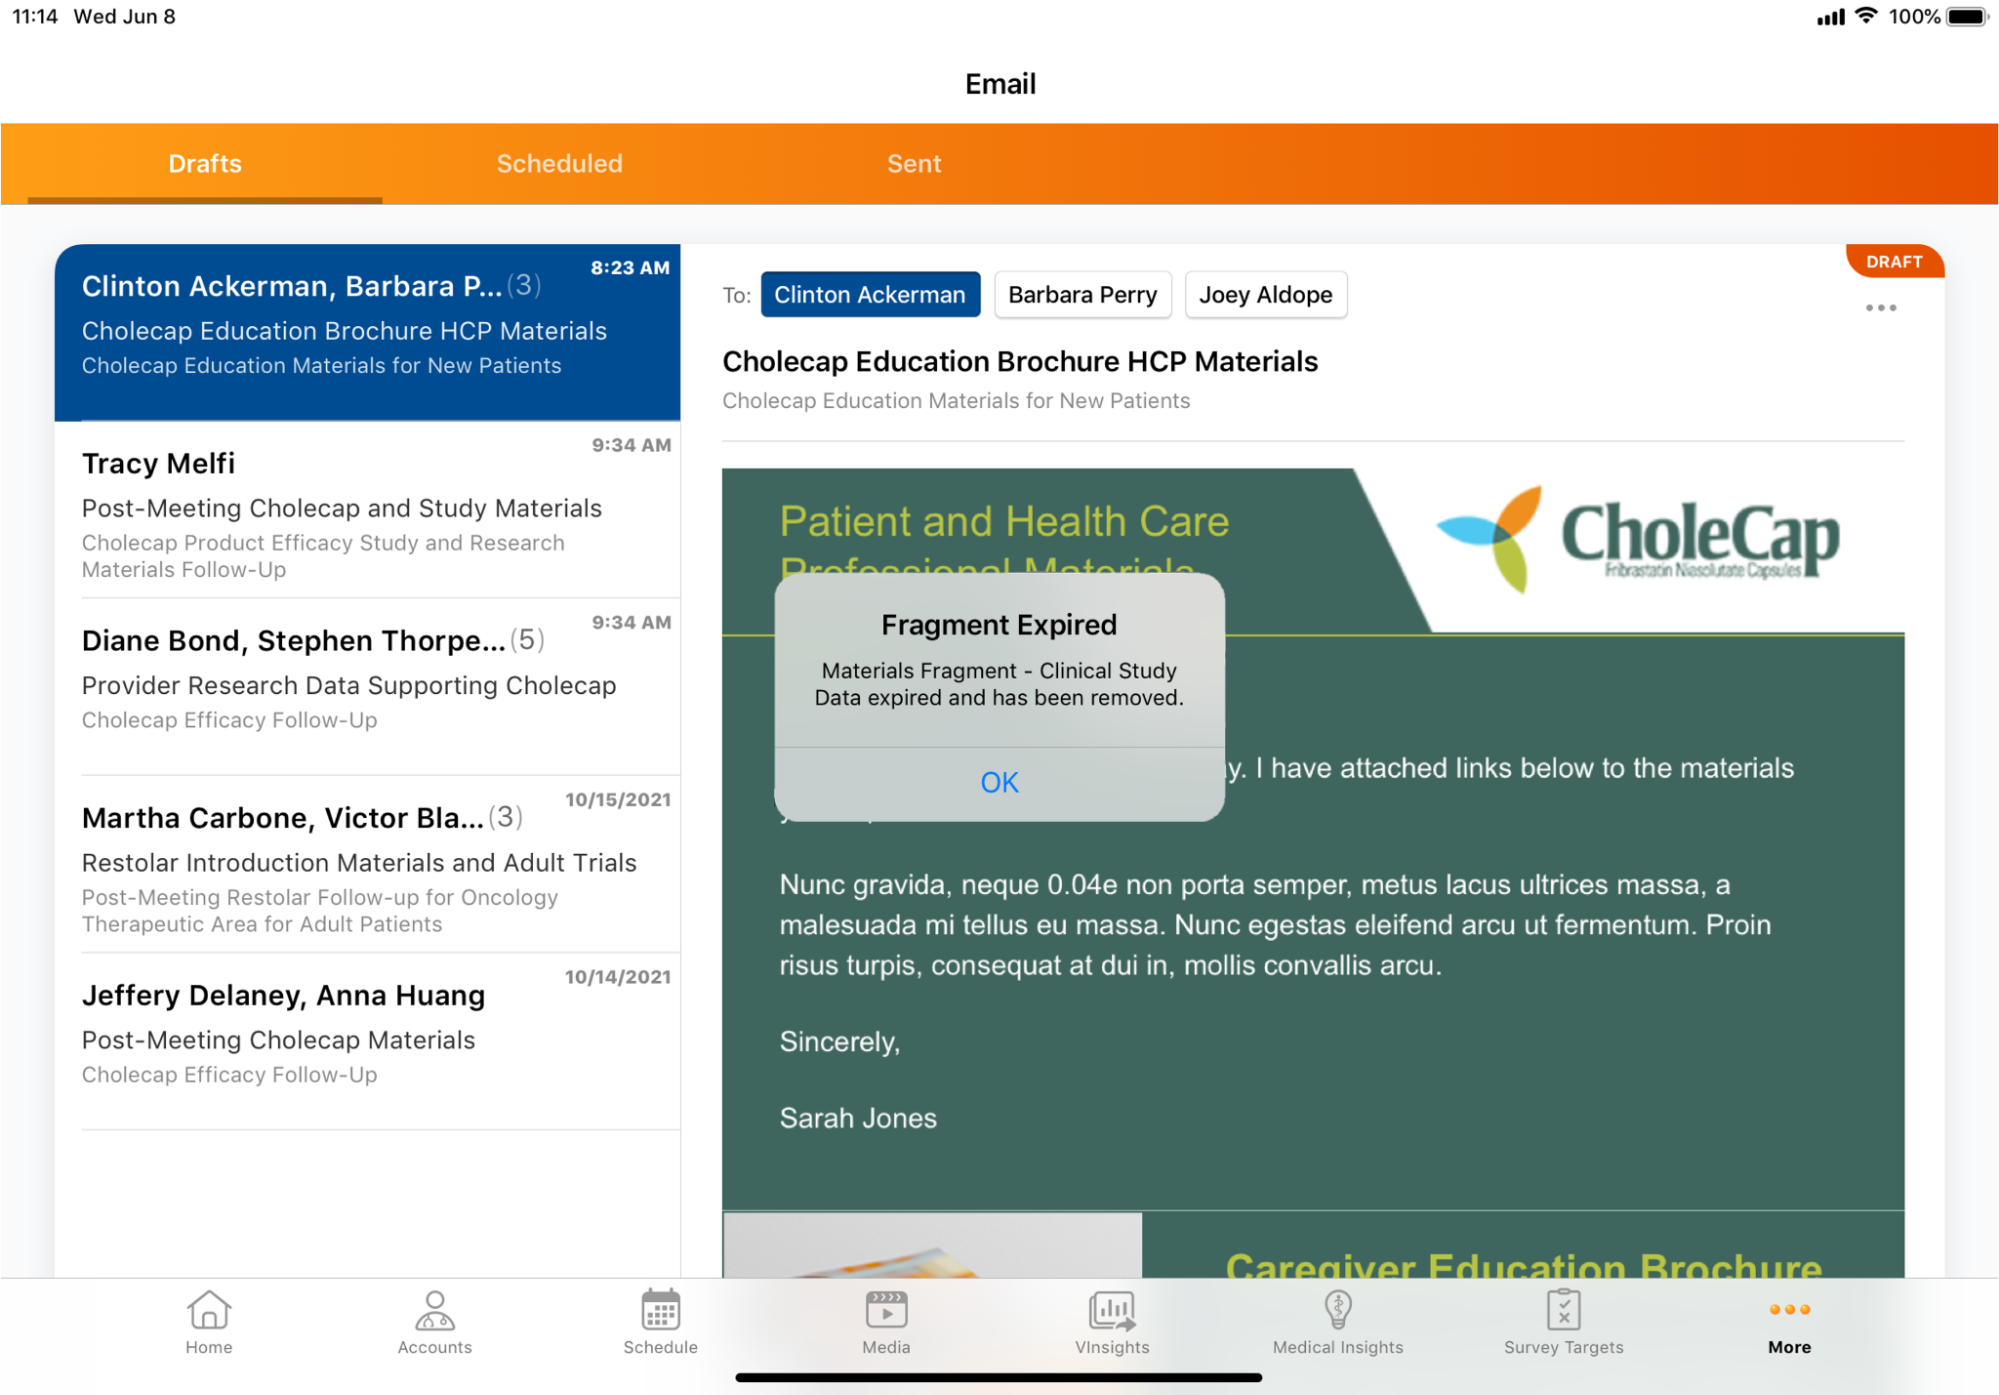
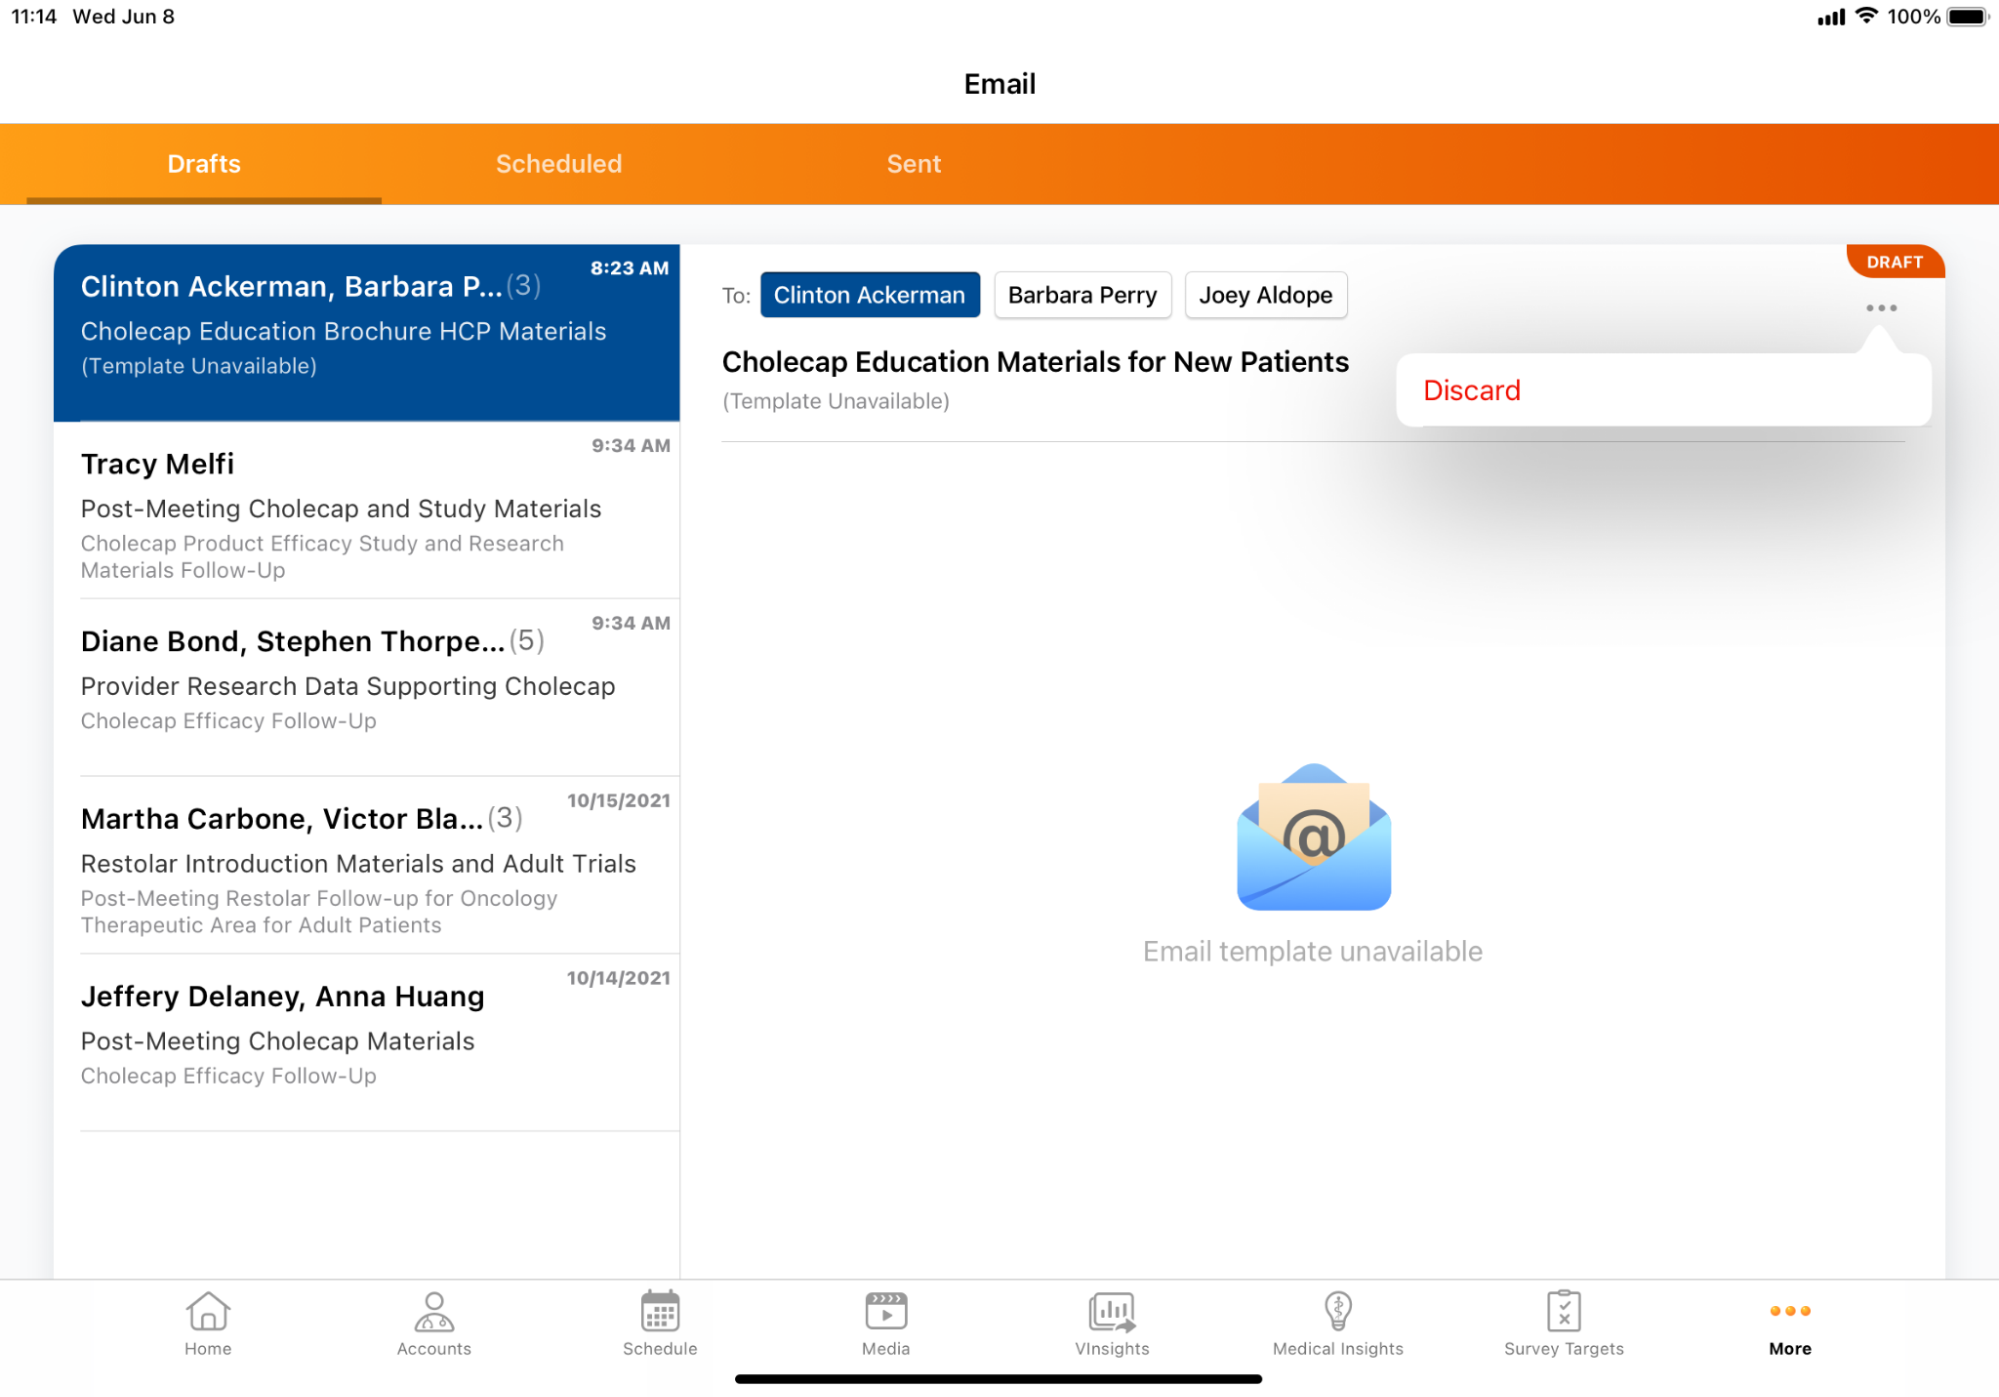
Displaying Errors for Unavailable Content
When a user no longer has access to the email fragments contained in drafts or scheduled emails, Approved Email displays an alert to notify the user.
| Scenario | Behavior |
Alert |
|---|---|---|
| Email Template expires and a new version is not available |
The preview window displays the Email template expired message. The All Actions button only displays the Discard option; editing is not available. |
|
|
Email Fragment record expires |
After selecting Edit from the All Actions button, the user is alerted that the email fragment is expired. Select OK to display the Send Email screen. The Fragment is removed. |
|
|
Email fragment record is restricted |
||
|
User no longer has access to the email template |
An Email template unavailable message displays in the Preview window. The All Actions button only displays the Discard option; editing is not available. |
|
|
User no longer has access to the related entry point record (for example, the Call record) |