Creating Approved Email Receipt Templates for Signature Transactions
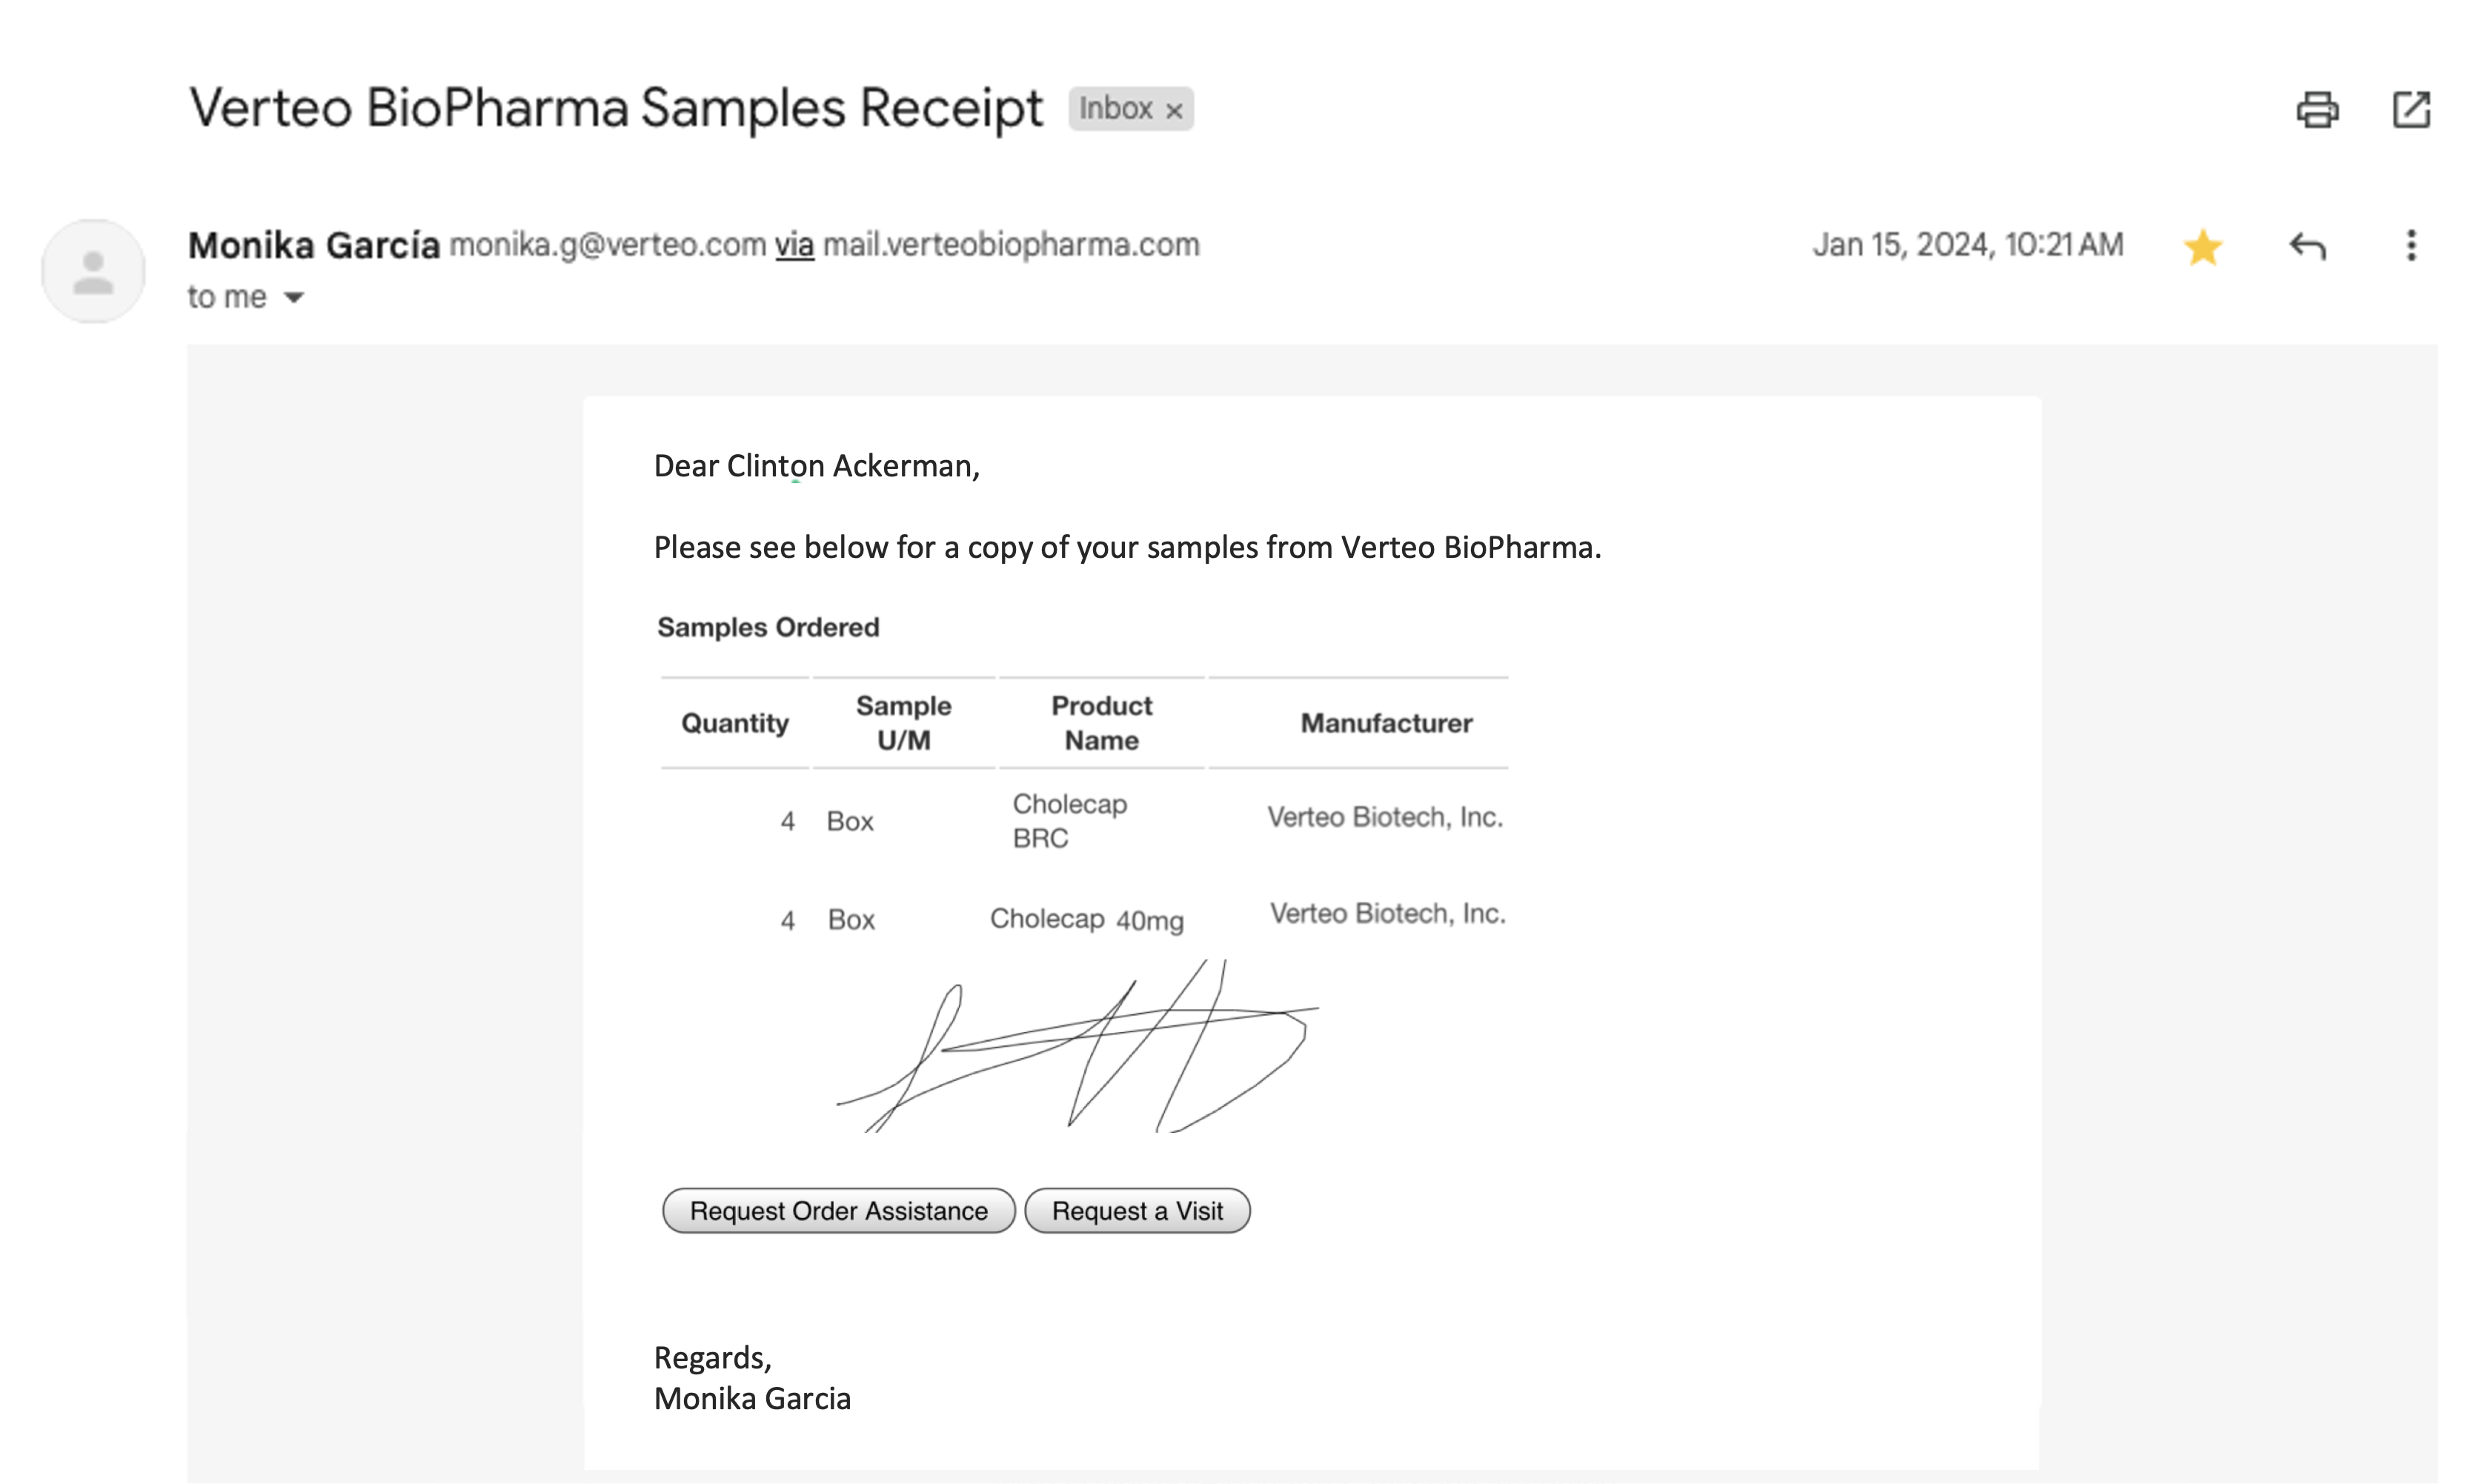
Accounts providing signatures frequently request a receipt for the items they have signed for. Approved Email provides this receipt, and can deliver receipts across many areas of Vault CRM while maintaining the approved content nature of Approved Email. Receipts include an image of the captured signature and a list of the items the HCP signed for.
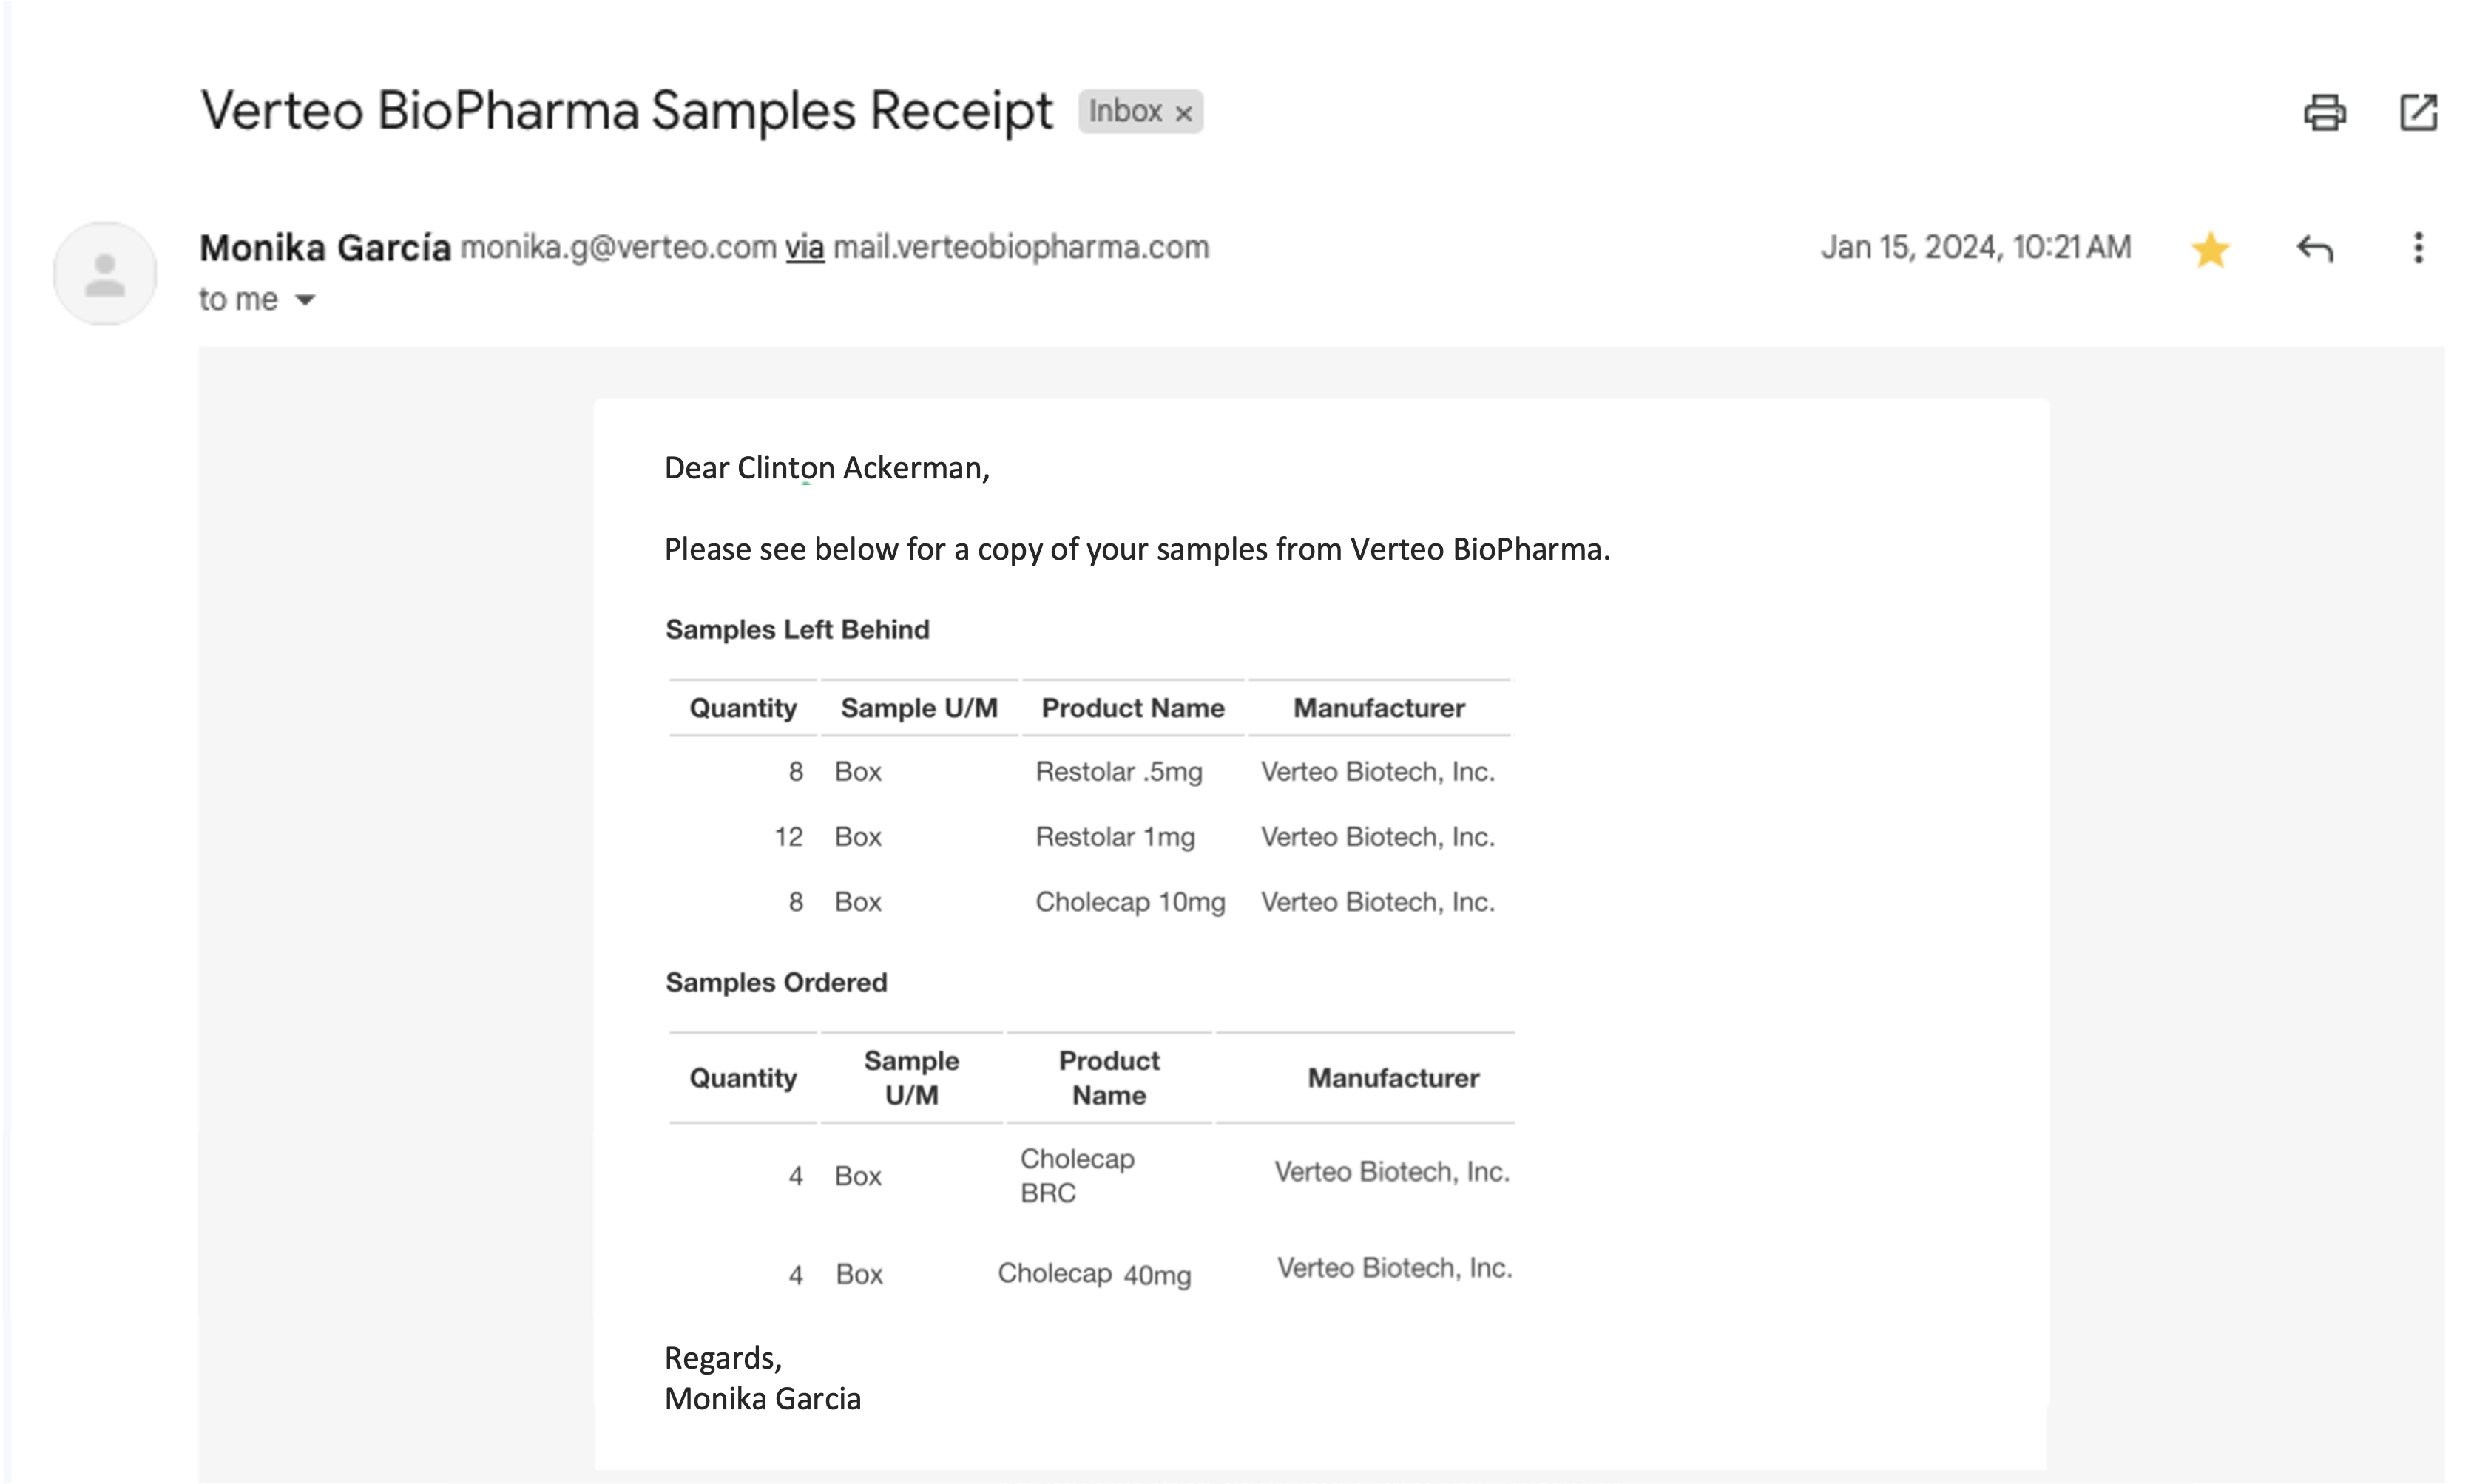
For example, a user provides product samples to an HCP during a call. The HCP signs for the sample and requests a receipt. When the call is complete, a copy of the signature and a table listing the sample items are automatically emailed to the HCP.
Users can only send the receipt email to the parent account for each signature transaction. For individual calls, the parent account is the primary account on the call. For group calls, the parent account is the selected sample recipient. Receipts are not available for samples recorded using Unique Activities on Group Calls.
Email Receipts are supported for the following transactions:
- Disbursement of call samples
- Consent capture confirmation
- Orders
(iPad and iPhone only)
Email Receipts for Orders are not supported for Child Accounts of a Business Account.
Who can use this feature?
- Content Creation Users — Browser Users (iPad, iPhone coming soon)
- Creating an Approved Email Receipt Template
- Adding Table Identifiers for Call Samples
- Associating the Receipt Template with Transactions
- Users require an Approved Email license
Configuring Approved Email Receipt Templates for
To configure this feature, ensure Configuring Approved Email is complete.
Creating an Approved Email Receipt Template as
Content Creators can create an Approved Email Receipt template. The template is used to automatically send an email containing the transaction line items and a photocopy of the signature to the HCP when an HCP selects to receive a receipt when signing for a transaction.
In PromoMats / MedComms, ensure all email templates used for receipts have an email_template_type__v field of Receipt Template.
Content creators can insert several unique tokens in Email Receipt Templates that render a table containing transaction line items and a photocopy of the signature.
Content that includes tokens with reference to API Names must be set with the appropriate content target platform. See Setting the Target Platform for Approved Email Content for more information.
Rich text tokens are not supported in receipt emails.
See Signature Transaction Receipt Tokens for the list of tokens and relevant examples.
Adding Table Identifiers for Call Samples
Table identifiers can be added to the {{insertCallSample}} token, which can be helpful if multiple tables exist in the content. Table identifiers display before each table in the email to clearly identify the table.
The tableHeader parameter can be added to any part of the token. For example:
<p>
{{insertCallSample[tableHeader=Samples Left Behind,filterProductType=Sample,Quantity_vod__c,Product_vod__r.Sample_U_M_vod__c,Product_vod__r.Name,Product_vod__r.Manufacturer_vod__c,Product_vod__r.Distributor_vod__c]}}
</p>
<p>
{{insertCallSample[tableHeader=Samples Ordered,filterProductType=BRC,Quantity_vod__c,Product_vod__r.Sample_U_M_vod__c,Product_vod__r.Name,Product_vod__r.Manufacturer_vod__c,Product_vod__r.Distributor_vod__c]}}
</p>
The example code would render table headers in the recipient’s email client as shown below.
Currency in Email Receipts
If an Approved Email Receipt references a field with a data type of Currency, the currency ISO Code and numerical value are formatted based on the following criteria:
- If the Vault is single-currency, the sent_email__v.Organization.DefaultCurrencyISOCode value is used and the number value is formatted accordingly. For example, ten thousand Canadian dollars is “$10,000.00”.
- If the Vault is multi-currency, the system checks the transaction record's CurrencyISOCode field and formats the currency and number value accordingly. If the CurrencyISOCode field does not contain a value, the sent_email__v.CreatedBy.DefaultCurrencyISOCode is used.
Associating the Receipt Template with Transactions as
After creating the Approved Email Receipt content in Vault, Content Admins must perform the following steps in Vault CRM before receipts can be sent. These steps detail how to create a Multichannel Routing record for each applicable object to make the receipt template available for transactions based on the object.
Before completing these steps, Content Creators should verify the Email Template Type in Vault is set to Receipt Template.
Users do not need to be aligned in My Setup to the Product Catalog record associated with the Email Template.
To create a Multichannel Routing record for each object that supports receipts:
- Navigate to Business Admin > Objects.
- Select Multichannel Routing.
- Select Create.
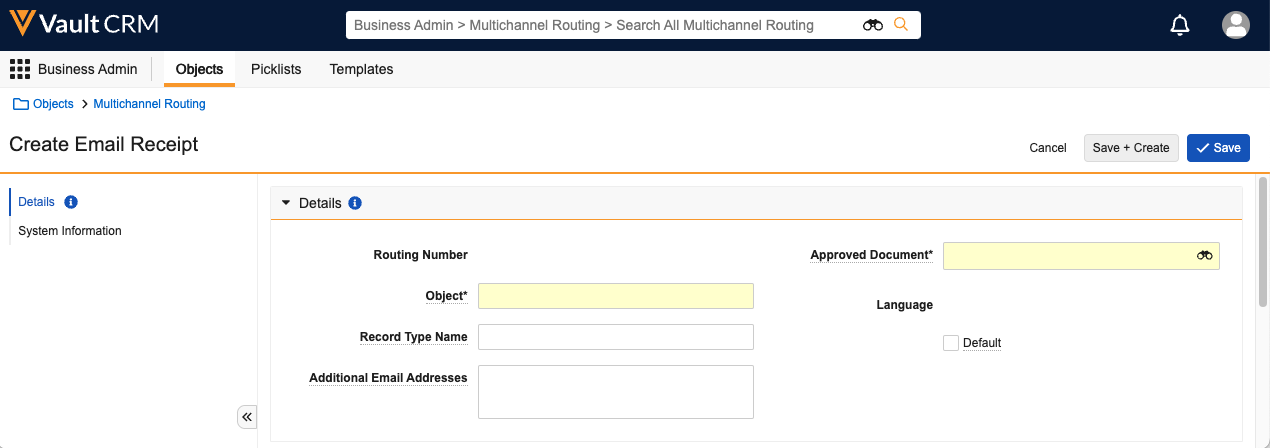
- Enter the following details:
- Object – The API name of the transaction object
- Record Type Name – The name of the Object Type
- Approved Document – A lookup field. References the Approved Email content to use as a receipt for this object/object type combination.
- Default – Select the Default checkbox if this Approved Document should be used when no account or user language matches. Only select one Default record for each object/object type combination.
- Select Save.

