Using Approved Email for Consent Confirmation
End users can send consent confirmation emails to HCPs when using double opt-in or when capturing consent using confirmation emails for any channel. Using consent confirmation emails allows users to capture consent for HCPs even when meeting remotely.
Who can use this feature?
- Business Admin Users - Browser
- Set up consent confirmation emails
- Expire pending consent records
- End Users - Browser, iPad, iPhone, Windows
- Resend consent confirmation emails
- HCPs - Browser, iPad, iPhone
- Confirm consent via confirmation emails
- Users require an Approved Email license
Configuring Consent Confirmation Emails for
Ensure Configuring Consent Capture is complete.
Setting Up Consent Confirmation Emails as
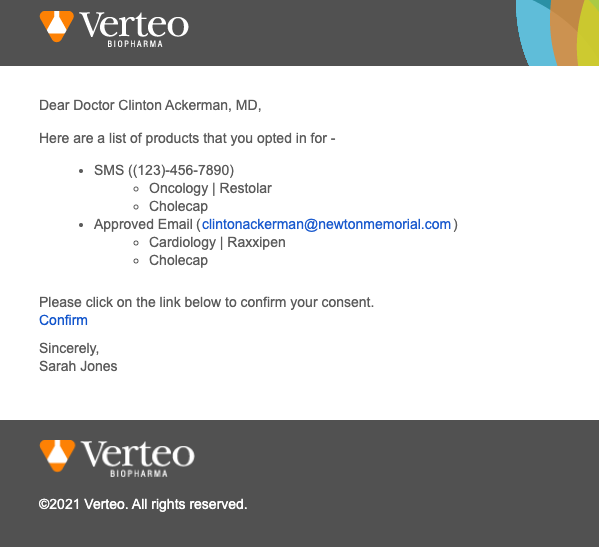
Business admins can customize the email template of the confirmation email used for double opt-in and consent via confirmation email. The email contains the list of channels for which the HCP is opting in and a link which displays a confirmation message when selected.
To properly set up a consent confirmation email, business admins must perform the following steps:
- Ensure one of the following features is configured:
- Define the confirmation message.
- Create the email content.
- Link the email template to the appropriate consent header.
Defining the Confirmation Message
- Navigate to Business Admin > Objects > Multichannel Messages.
- Select Create.
- Select the double_opt_in__v object type.
- Populate at least the following fields:
- name__v
- message_identifier__v
- consent_confirm_html_file__v — Defines the HTML for a confirmation step before confirming consent. This prevents the recipient’s systems from unintentionally confirming opt-in consent for an HCP. Include the following tokens:
- {{confirmConsent}} — Displays a confirmation button. Must use the following format:Copy
Confirmation button example
<form method="post">
                                        <input type="submit" name="{{confirmConsent}}" value="Confirm Consent">
                    </form>
Selecting this button redirects users to the confirmation message, which displays the content defined in the html_message_file__v field.
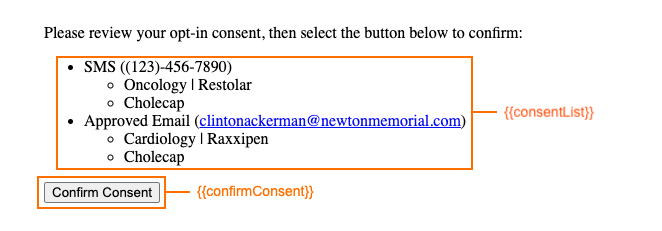
- {{consentList}} — Displays the list of consent types and lines to opt-in
- {{confirmConsent}} — Displays a confirmation button. Must use the following format:
- html_message_file__v — Defines the HTML for the confirmation message
Populating the consent_confirm_html_file__v field is optional. If the field is empty, selecting the link in the email automatically opts the user in and redirects them to the page rendering the confirmation message defined in the html_message_file__v field.
Creating the Email Content
Next, create an email template in PromoMats/MedComms with the Email Receipt email template type. The HTML of the email template must reference the message_identifier__v of the appropriate multichannel_message__v record using the {{approvedEmailAction}} token. See Tracking Multichannel Activities from Approved Emails for more information about using the token. Admins can also use the {{insertConsentLines}} token to display all opted in consent lines and their consent types in the email. Syncing the email template to CRM creates an approved_document__v record with the email_receipt__v object type and the email_html__v field populated.
To host the additional confirmation step and the confirmation message in a custom landing page, admins can include a landing page URL in the {{approvedEmailAction}} token in the email template.
Linking the Email Template and Consent Header
Finally, create a multichannel_route__v record with the appropriate object type to link the email template to the consent lines.
For double opt-in:
- Navigate to Business Admin > Objects > Multichannel Routing.
- Select Create.
- Select the double_opt_in_confirmation__v object type.
- Enter the following information:
- approved_document__v = approved_document__v record for the confirmation email template
- country__v = country__v on appropriate consent_header__v record
- language__v = language__v on appropriate consent_header__v record
- object__v = multichannel_consent__v
- record_type_name__v = object_type__v name of the appropriate consent_type__v record
For capturing consent for all channels:
- Navigate to Business Admin > Objects > Multichannel Routing.
- Select Create.
- Select the consent_confirmation__v object type.
- Enter the following information:
- approved_document__v = approved_document__v record for the confirmation email template
- country__v = country__v on appropriate consent_header__v record
- language__v = automatically populated with the language__v value from the approved_document__v record
- object__v = multichannel_consent__v
- record_type_name__v = Empty
Additionally, to define a multichannel_route__v record to use when a consent_header__v record does not have a multichannel_route__v record with a matching language__v field, select the Default checkbox.
Using the Appropriate Multichannel Route Record for Double Opt-In
The following logic determines which multichannel_route__v record with the double_opt_in_confirmation__v object type is used:
- The multichannel_route__v record matching the consent header’s language
- If one does not exist, the record matching the account’s language is used
- If one does not exist, the record matching the user’s language is used
- If one does not exist, the default record is used
Using the Appropriate Multichannel Route Record for Consent Using Confirmation Emails
If there are multiple multichannel_route__v records with the consent_confirmation__v object type for the same country, the following logic determines which record is used:
- The multichannel_route__v record matching the consent header’s language
- If one does not exist, the record matching the account’s language is used
- If one does not exist, the record matching the user’s language is used
- If one does not exist, the default record is used
- If no default record is set, the first record returned is used
Admins can enable custom sharing rules on the multichannel_route__v object for Vaults with end users in different countries using the same language. This allows users to sync only the records for their respective countries and prevents the selection of a record with the matching language but the incorrect country.
Confirming Consent via Confirmation Emails as
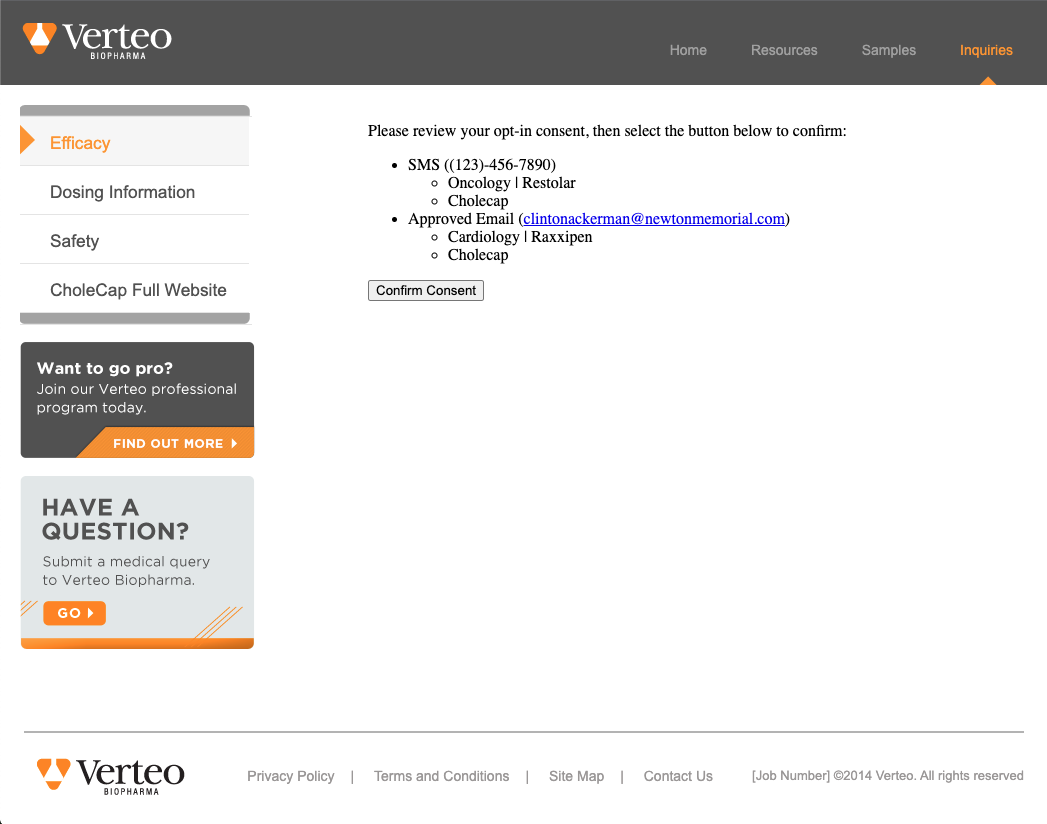
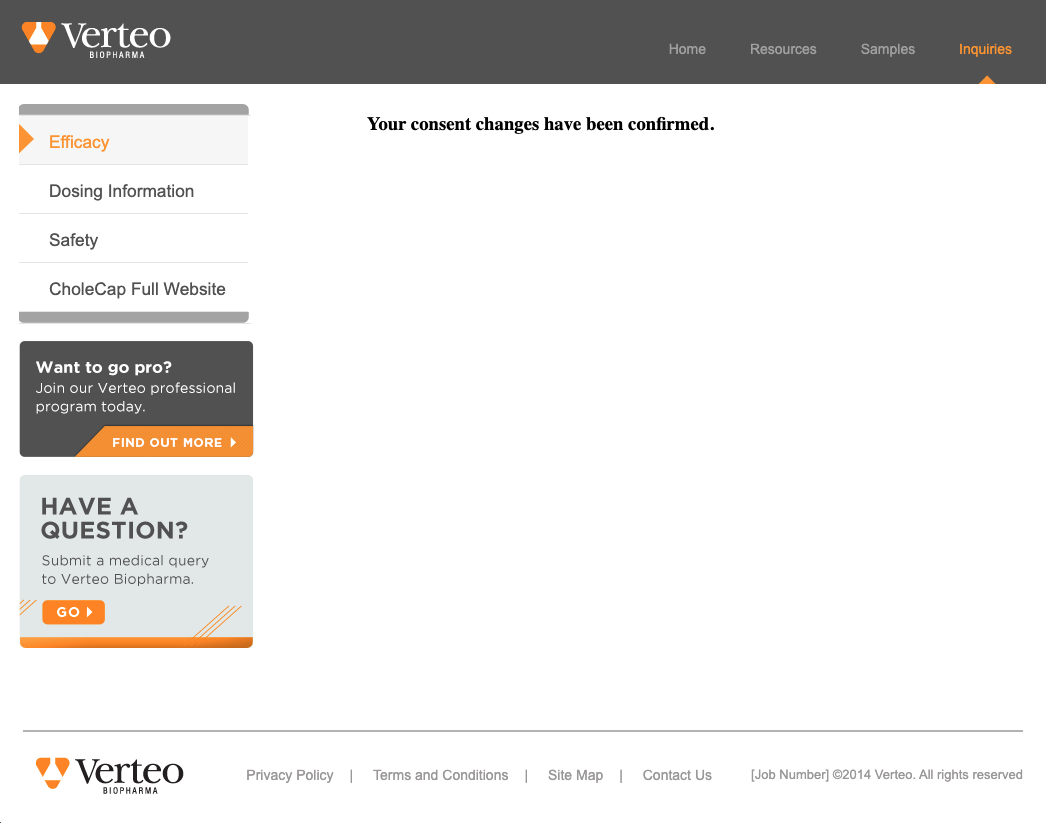
After an HCP selects the link from the confirmation email, they must select the confirmation button to confirm their consent. Opt-in consent is confirmed only after the HCP selects the button and the confirmation message displays.
Resending Consent Confirmation Emails as
End users can review and resend confirmation emails from the Consent Capture screen.
To view a sent confirmation email, select the View Email button beside the consent channel on the Consent Capture screen.
To resend a confirmation email, select the Resend Confirmation button beside the consent channel on the Consent Capture screen.
The View Email and Resend Confirmation buttons only display after an HCP opts into a consent line and receives a confirmation email.
Expiring Pending Consent Records as
Capturing consent with confirmation emails creates Opt In Pending multichannel_consent__v records. To update the consent status to Opt In, the HCP must confirm the consent via the confirmation email. If the HCP never confirms consent, the consent status remains Opt In Pending. While the consent status is Opt In Pending, the end user can resend the confirmation email but cannot capture consent for the HCP from the Consent Capture screen.
To allow end users to capture consent again, business admins can manually expire Opt In Pending multichannel_consent__v records, which reverts the consent status to the last confirmed status (Opt Out or default consent). Veeva recommends expiring Opt In Pending multichannel_consent__v records after five to seven days, since HCPs are unlikely to access the confirmation email after that time frame.
To expire a pending consent record:
- Navigate to Business Admin > Objects > Multichannel Consents.
- Select a multichannel_consent__v record with the Opt Type field set to Opt_In_Pending.
- Select Edit.
- Populate the Expiration Date field with the appropriate date. To immediately expire the record, populate the field with today's date.
- Select Save.

