OmniConnect for Patient CRM
Patient CRM must be connected to a Contact Center as a Service (CCaaS) application through OmniConnect to initiate and receive calls. Integration with a CCaaS allows Patient CRM users to receive inbound calls and place outbound calls from within Vault CRM, to display relevant caller information on the end user’s screen, and to log details of each call.
The following CCaaS applications are available to integrate with Patient CRM:
- Amazon Connect - Amazon Connect is not available for all AWS regions. Verify Amazon Connect is available for your cloud deployment region with your AWS provider before configuring this feature. Amazon Connect is compatible with the following browsers:
- Chrome
- Firefox
- Edge
- Five9 - The telephony interface is embedded within the Patient CRM OmniConnect interface. Five9 is compatible with the following browsers:
- Chrome
- Firefox
- Edge
- Genesys Cloud - The telephony interface is embedded within the Patient CRM OmniConnect interface. Genesys Cloud is compatible with the following browsers:
- Chrome
- Edge
- Firefox
Patient CRM also supports teams that do not use an integrated CCaaS provider. Patient CRM users can use an external phone to make Adherence check-in calls and capture engagement data directly in Vault CRM.
Who can use this feature?
- End Users – Browser
- Amazon Connect with OmniConnect
- Five9 with OmniConnect
- Genesys Cloud with OmniConnect
- Users require a Patient CRM License
Configuring Amazon Connect with OmniConnect for
To configure this feature:
- Ensure Configuring Patient CRM is complete.
- Navigate to Admin > Configuration > Objects > user__sys > Layouts.
- Select the user_detail_page_layout__c layout.
- Add the omniconnect_integration__v field to the General Info section.
- Select Save.
- Navigate to Business Admin > Objects > omniconnect_integration__v.
- Select Create.
- Select Amazon Connect in the Create OmniConnect Integration field.
- Select Continue.
-
Enter the following:
- Name
- Select Amazon Connect in the Integration Platform field
- Enter the dimensions recommended by Amazon in the Embedded UI fields, which designate the size of the control panel for managing calls:
- Embedded UI Height: 472
- Embedded UI Width: 412
- Enter the URL provided by Amazon in the OmniConnect URL field
- Enter the URL provided by your IT Admin into the Single Sign-On Redirect URL field to allow users to log in to OmniConnect using Single Sign On (SSO) (optional)
If users do not use SSO to log in, they must enter their Amazon Connect credentials in a separate tab after opening Patient CRM.
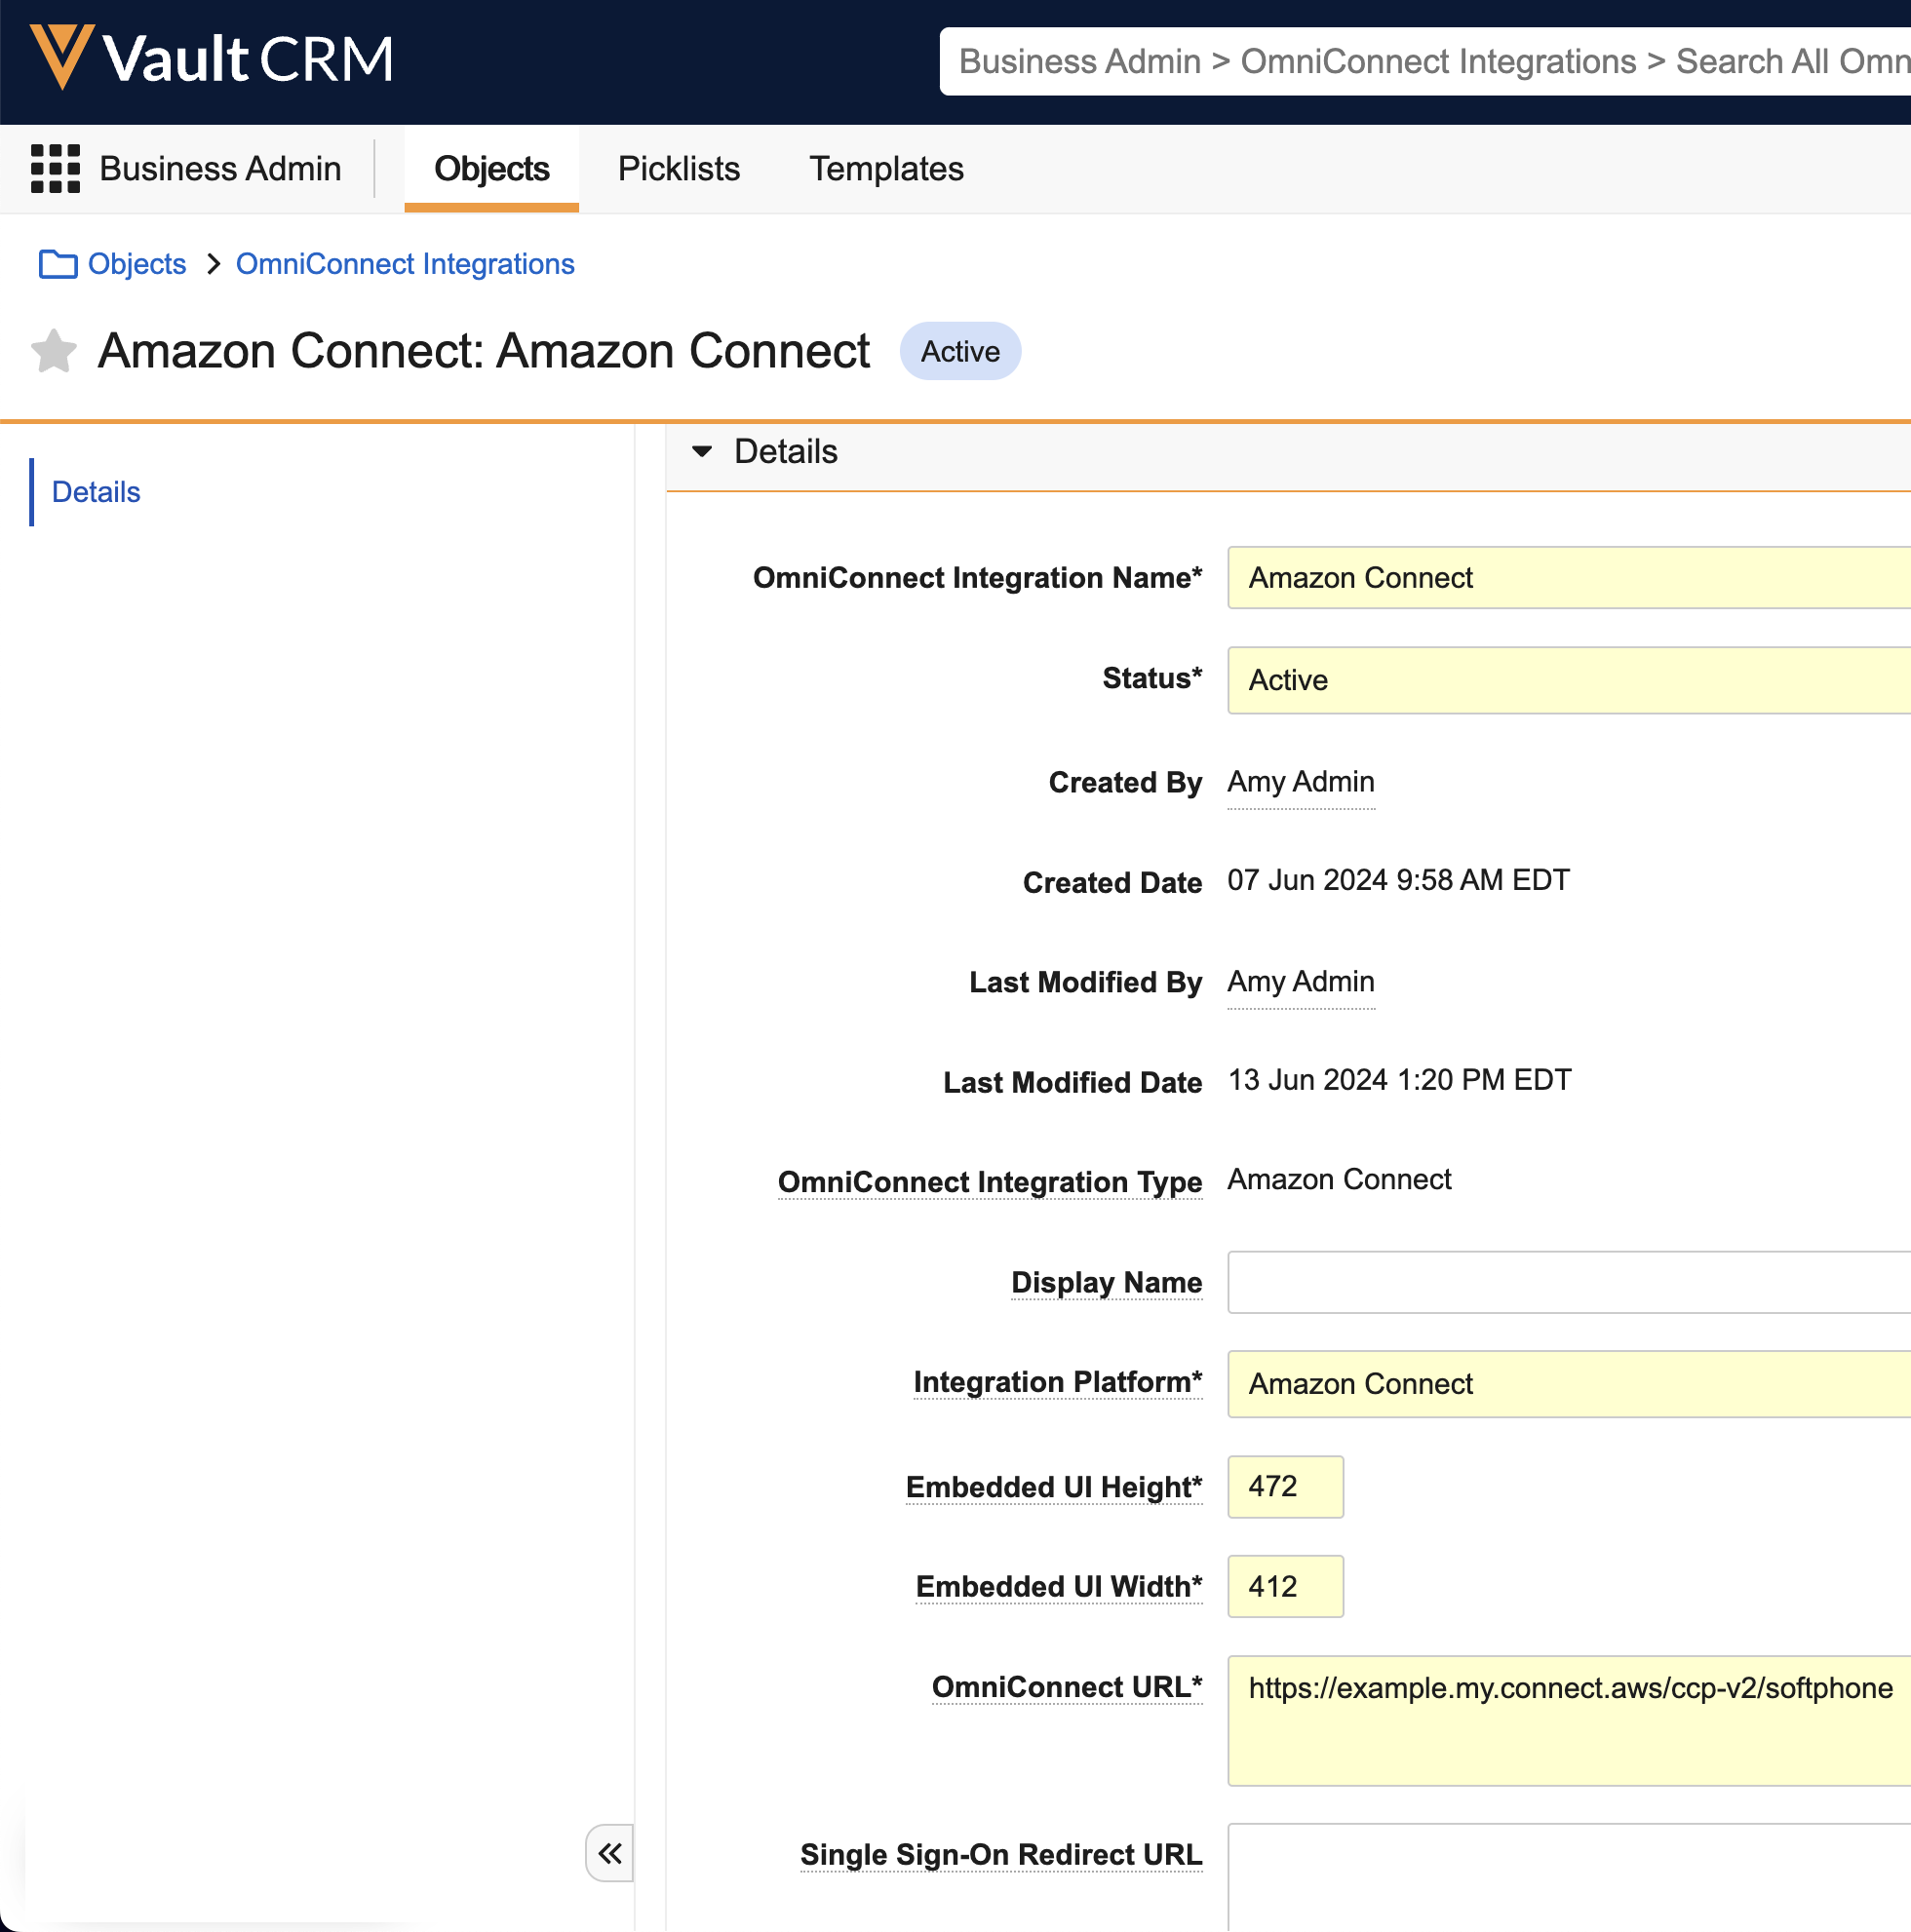
- Select Save.
For each end user:
- Navigate to Admin > Users & Groups > Vault Users.
- Select the appropriate user.
- Select the Edit icon.
-
Select Amazon Connect in the OmniConnect Integration field.
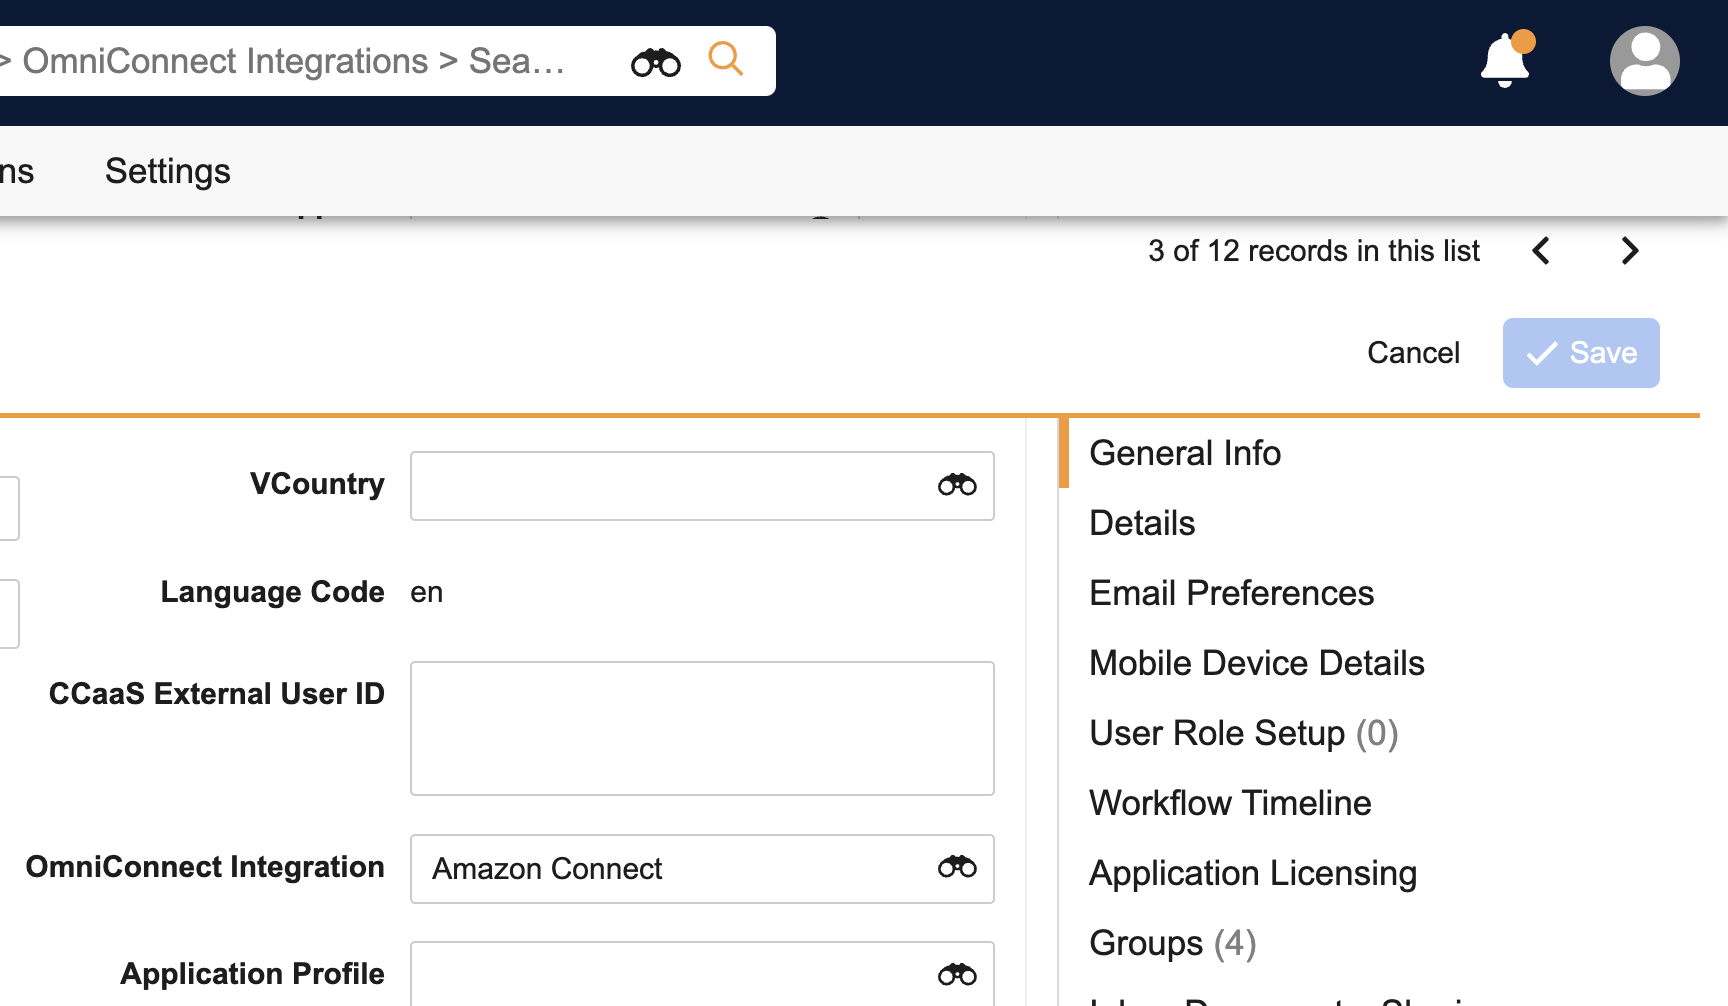
- Select Save.
Configuring Phone Numbers
The Region where your Amazon Connect instance is created determines which countries you can call by default. See Amazon Connect's documentation for more information.
To enable Patient CRM representatives to place an outbound call by selecting a phone number link:
-
Format phone numbers in the international E.164 standard, which requires:
- A ”+” symbol
- The country code (for example, 1 for the United States, 44 for the United Kingdom)
-
The national phone number (the remaining digits after the country code, without spaces or special characters)
For example, a United States phone number of (555) 123-4567 should be formatted as +15551234567 in Vault CRM.
-
Configure the country code on the following fields:
- Person Object (associate_contact__v)
- Mobile (mobile_phone__sys)
- Office Phone (office_phone__v)
- User Object (user_contact__v)
- Facetime Phone (facetime_phone__v)
- Mobile (mobile_phone__sys)
- Office Phone (office_phone__v)
- Accounts Object (account__v)
- Assistant Phone (personassistantphone__v)
- Home Phone (personhomephone__v)
- Mobile (mobile_phone_cda__v)
- Office Phone (office_phone_cda__v)
- Other Phone (personotherphone__v)
- Grant read access to Patient CRM end users for country fields on the Person, User, and Accounts objects.
Using Amazon Connect with OmniConnect as
If OmniConnect is configured, you are able to answer inbound and place outbound calls from within the Patient CRM console.
Signing In
The steps for signing in to Patient CRM when OmniConnect is configured depend on whether SSO is configured.
Using SSO
- Navigate to the SSO app.
- Select Amazon Connect in the app and follow the authentication steps.
- Open Vault CRM.
- Select the Patient CRM tab.
- Select the OmniConnect button in the lower left corner, which initially indicates a status of Not Ready. The button updates from Not Ready to Available without requiring you to sign in to Amazon Connect.
Not Using SSO
This method uses Third-Party Cookie Authentication, which is being deprecated by Google. When Amazon Connect switches to a different login method, we will update these instructions.
- Sign in to Vault CRM.
- Select the Patient Center tab.
- Select the OmniConnect button in the lower left corner, which initially indicates a status of Not Ready.
- Select the Login button.
- Enter the Amazon Connect login credentials provided by your IT Admin in the Login browser tab, then close the tab.
- Return to Patient CRM. The OmniConnect button updates to Available to indicate you are available to receive calls.
Indicating Availability for Calls
The OmniConnect button in the lower left corner enables you to indicate your availability to receive incoming calls. In this example, the button currently displays a status of Not Ready.
The OmniConnect integration allows users to freely navigate throughout Vault CRM applications while connected to live calls. The only exception is Business Admin or Admin user interfaces. Calls do not persist when navigating to those interfaces.
Select the appropriate option (Available, On a Break, In a Call) from the OmniConnect drop-down list. The text on the OmniConnect button updates to indicate the selected option.
Answering a Call
When a call comes in, an alert displays in the lower left corner with options to answer or reject the call.
When you answer the call:
- If you are in an area of Vault CRM other than Patient CRM, the display switches to the Account Search tab of Patient CRM
- A telephone icon displays on the Account Search tab
- The OmniConnect button indicates you are in a call and displays buttons for muting the call and placing it on hold
- A control panel with options for managing the call displays in the lower left corner. Select the OmniConnect button to collapse or expand the control panel as needed.
- An Account Search field auto-populated with the caller’s phone number displays
Placing an Outbound Call
Patient CRM representatives can place outbound calls using either the OmniConnect number pad or phone number links. The OmniConnect status does not have to be set to Available to place a call.
Using the Number Pad
Patient CRM representatives can place an outbound call using the OmniConnect number pad by manually selecting the numbers or pasting a phone number into the text field.
Using a Phone Number Link
If a phone number displays as a link, Patient CRM representatives can select the link to initiate a call to that number.
Phone numbers display as links as long as the user is signed in to OmniConnect and the case is not Closed or Solved.
Outbound Call Behavior
While the outbound call is ringing, the OmniConnect button displays a status of Calling. If the call is answered:
- The OmniConnect button status changes to In a Call
- A telephone icon displays on the Case tab
- If multiple Case tabs are open, the Case tab from which the call was placed moves to the right of the Account Search tab
When the call ends, the OmniConnect status changes to After-Call Work for a length of time designated in the Amazon Connect settings. You do not receive calls during the After-Call Work period.
A record of the outbound call displays in the Timeline.
A warning displays if you try to make an outbound call while already on a call.
Outbound Call Errors
Patient CRM displays an error message if an attempted outbound call fails to initiate. The error message displays the reason for the failure.
Refreshing the Browser While Not Connected to a Call
Refreshing the browser when not connected to a call results in a reload of the embedded OmniConnect user interface. The OmniConnect status temporarily reverts to Not Ready before returning to the previous state.
Refreshing or Closing the Browser While Connected to a Call
Refreshing or closing the browser tab while on a connected phone call interrupts but does not disconnect the voice connection. A warning displays that can be dismissed by the user. This is a limitation of the browsers and cannot be controlled by the Patient CRM application.
For Chrome users, if the user does nothing with the warning after 5-10 seconds, the dialog times out and the action is carried out.
Configuring Five9 with OmniConnect for
-
Ensure Configuring Patient CRM is complete.
-
Ensure Five9 is configured to properly route outbound calls.
Patient CRM does not pass a Campaign Identifier to Five9; only Skills are used.
-
Create an Omnichannel Integrations record for Five9:
- Navigate to Business Admin > Objects
- Select the Omnichannel Integrations object
- Select Create
- Select Five9 in the Create Omnichannel Integration field
- Select Continue
-
Enter the following on the Omnichannel Integrations record:
- Name - Five9
- Integration Platform - Five9
- Omnichannel URL - Enter the authentication URL provided by Five9 or by your IT Admin
- Embedded UI Height
- 536 pixels is recommended for Five9 legacy interfaces
- 600 pixels is recommended for newer versions of Five9
- Embedded UI Width
- 200 pixels is recommended for Five9 legacy interfaces
- 300 pixels is recommended for newer versions of Five9
-
Create a Five9 Case Queue:
- Navigate to Business Admin > Case Queue
- Select Create
- Enter at least the following information
- Queue - Five9
- External Queue ID - Appropriate skill-based queue
- Select Save
- Navigate to Business Admin > Objects > Console Application Settings
- Select this Queue on the appropriate Console Application Settings records for end users
-
Enable Five9 on the appropriate reps' user records:
- Navigate to Business Admin > Objects > user__sys
- Set the Veeva Omnichannel field to Five9
-
Disable automatic answer options:
- Select the embedded Five9 interface
- Navigate to Settings > Automatic Answer
- Deselect all automatic answer options
- Select Save and Close
Ensure users have microphone and speaker access enabled in their browser settings.
Using Five9 with OmniConnect as
When a user is not logged in to Five9, a Not Logged In status displays on the Omnichannel action button in the lower left of the Patient CRM interface.
To log in and manage status:
-
Select the Omnichannel action button in Service Center to expand the embedded Five9 UI.
Users must sign in from a Service Center page. Signing in while using another Vault CRM tab or page (for example, the call report modal) can result in unexpected behavior.
-
Enter the appropriate Five9 credentials. If a pop-up blocker is enabled, the login dialog does not display.
After successfully logging in, the Omnichannel button updates to Ready to indicate you are available to receive calls. The Omnichannel button reflects your current Five9 status as follows:
- Ready (green) - Available to receive calls
- Not Ready (red) - Not available for calls
- Not Logged In (gray) - User credentials are needed
Receiving Inbound Calls
End users can receive inbound Five9 calls and create cases for them directly in Patient CRM.
To answer an incoming call, select Accept in the embedded Five9 interface.
When you answer a call:
- If you are in an area of Vault CRM other than Patient CRM, the display switches to the Account Search tab of Patient CRM
- A telephone icon displays on the Account Search tab
- The Omnichannel status is updated to In A Call, and the Omnichannel modal displays buttons for muting the call and placing it on hold
- An Account Search field auto-populated with the caller’s phone number displays
Select the appropriate account to create a case, or select the + Create Case button under Can’t find the right Account?. The interface automatically navigates to the new case tab and populates the Case Queue, Case Owner, and interaction history. For more on creating cases, see Using Patient Intake Forms.
Placing Outbound Calls with Five9
To place outbound calls:
-
Ensure the status is set to Ready in the Five9 interface.
-
Select a target from an Outbound target list or view, or from the case record.
-
Select a phone number from the click-to-dial menu to initiate a call, or type the appropriate phone number in the embedded Five9 interface and select Dial. The Five9 interface initiates the call and updates your status to In Progress.
Phone numbers are displayed to the user based on the preferred_phone_search__v field on the applicable console_application_settings__v record. For more information, see Configuring Patient CRM.
New Outbound Target Activity records are created with successful click-to-dial actions:
- Start time is set to the time the call connects to Five9
- End time is set to the call entering finished Five9 state
The call must be finished before users can submit the Outbound Target Activity.
Managing Calls
Whether in an outbound call or in an inbound call, a control panel with options for managing the call displays in the lower left corner. Select the Omnichannel button to collapse or expand the control panel as needed. The following options are available:
- Hold - Place the call on hold
- Mute - Mute your audio input
- Set Disposition/End Call - End the call
Disconnecting a Call
To disconnect a call, select Set Disposition in the Omnichannel model, then select End Call.
After the call ends, the system updates the Talk Time (talk_time__v) on the Conversation (conversation__v) record.
Patient CRM uses the CallFinished event from Five9 to determine the end of a call, meaning Talk Time includes any time spent in the After Call Work status.
Configuring Genesys Cloud with OmniConnect for
To configure this feature:
- Ensure Configuring Patient CRM is complete.
- Ensure users' Genesys Cloud authentication token expiration is set for at least 8 hours (or a full workday).
- Navigate to Admin > Configuration > Objects > user__sys > Layouts > user_detail_page_layout__c.
- Add the omniconnect_integration__v field to the General Info section
- Select Save
- Navigate to Business Admin > Objects.
- Select omniconnect_integration__v.
- Select Create
- Select Genesys Cloud.
- Select Continue.
-
Enter the following:
- Name - Genesys Cloud
- OmniConnect URL - Enter the URL provided by Genesys Cloud
- Select Save
For each end user:
- Navigate to Admin > Users & Groups > Vault Users.
- Select the appropriate user.
- Select the edit icon.
- Select Genesys Cloud in the OmniConnect Integration field.
- Select Save.
Using Genesys Cloud with OmniConnect as
If OmniConnect is configured, you are able to answer inbound and place outbound calls from within the Patient CRM console using the Genesys Cloud embedded UI.
To sign into Genesys Cloud:
- Sign in to Vault CRM.
- Select the Patient Center tab.
- Select the OmniConnect button in the lower left corner, which initially indicates a status of Not Ready.
- Select the Login button.
- Enter the Genesys Cloud login credentials provided by your IT Admin in the Login browser tab.
- Select Log In.
- Close the tab.
- Return to Patient CRM. The OmniConnect button updates to Available to indicate you are available to receive calls.
Indicating Availability for Calls
The Genesys Cloud status displays in the bottom of the Genesys Cloud embedded UI. The equivalent OmniConnect action button displays the user’s current status.
|
OmniConnect Status |
Genesys Cloud Status |
|---|---|
|
On Queue |
On Queue |
|
Not Available |
|
|
Off Queue |
Available |
Select the appropriate option from the Genesys Cloud drop-down list.
Answering a Call
When a call comes in, an alert displays with options to answer or reject the call.
When a user answers a call:
- If you are in an area of Vault CRM other than Patient CRM, the display switches to the Account Search tab of Patient CRM
- A telephone icon displays on the Account Search tab
- The OmniConnect button indicates you are in a call and displays buttons for muting the call and placing it on hold
- A control panel with options for managing the call displays in the lower left corner. Select the OmniConnect button to collapse or expand the control panel as needed.
- An Account Search field auto-populated with the caller’s phone number displays
When the call ends, the OmniConnect status changes to Wrap-up. Users do not receive calls during wrap-up.
Configuring Any Phone with OmniConnect for
To configure this feature:
-
Ensure Configuring Patient CRM is complete.
-
Navigate to Admin > Configuration > Application Profiles.
-
Ensure users are included in an existing application profile, or create a new application profile for Patient CRM users.
-
Navigate to Admin > Configuration > Objects > Users > Layouts.
-
Ensure Veeva Omnichannel is added to the appropriate section.
-
Create a Veeva Omnichannel record.
-
Navigate to Business Admin > Objects > Veeva Omnichannel
-
Select Create
-
Select the Standalone Phone OmniChannel Integration type
-
Populate the Name field
-
Select Save
-
Create a Console Application Settings record.
-
Navigate to Business Admin > Objects > Console Application Settings
-
Select Create
-
Select Patient CRM as the Console Application Settings type
-
Populate the following fields:
-
Console Tab Access - Adherence
-
Console Application Profile - Select the profile created for Patient CRM users
-
Select Save
-
Navigate to Business Admin > Objects > user__sys.
-
Set the Veeva Omnichannel field to Standalone Phone on the appropriate user__sys records.
See Configuring Patient CRM for more information on creating Console Application Settings records.
Using Any Phone with OmniConnect as
If OmniConnect is configured, end users can capture and track outbound activities using any phone, including non-integrated phone systems, from within the Patient CRM console.
See Managing Patient Adherence Check-Ins to learn more adherence check-in calls.

