Managing All Active Cases in Service Center
The All Active Cases view in Service Center allows reps to easily monitor workloads, triage incoming cases, redistribute ownership, and ensure operational coverage across a team. Reps can view, sort, and filter active cases across multiple owners directly in the console, rather than navigating away to individual queues or personal dashboards.
Who can use this feature?
- Service Center Reps - Browser
- Navigating the All Active Cases
- Managing Case Owners in All Active Cases
- Users do not require an additional license (If other licensing is required, use that snippet instead)
Configuring All Active Cases in Service Center for
 Service Center Reps
To configure this feature:
- Ensure Configuring Service Center is complete.
- Navigate to Admin > Users & Groups > Permission Sets.
- Select the appropriate permission set.
- Select the Objects tab.
- Grant the following permissions:
Object Object Permission Object Types Fields Field Permission console_application_settings__v R All applicable object types all_active_cases_columns__v Read case__v CRE account__v case_owner__v Read
Edit permission is required for case reassignment.
- Ensure end users have the required Tab and Page permissions:
- Select the Tabs tab
- Ensure View permission is enabled for the Service Center tab collection
- Select the Pages tab
- Ensure View permission is enabled for the Service Center page
- Optionally, configure the column headers for the All Active Cases grid view:
- Navigate to Business Admin > Objects > console_application_settings__v
- Select the appropriate Service Center record
- Enter case__v field API names in the All Active Cases Columns field in the order they should display, separated by double semicolons. For example, case__v.fieldname1__v;;case__v.fieldname2__v;;case__v.fieldname3__v
- Select Save
Default All Active Cases Columns
If the All Active Cases view's columns are not customized, the following columns display by default:
- Case Number
- Case Owner
- Subject
- State
- Severity
- Queue
- Account
- Product
- Category
- Sub Category
- Type
- Created Date
- Last Modified Date
Navigating the All Active Case View as
Service Center Reps
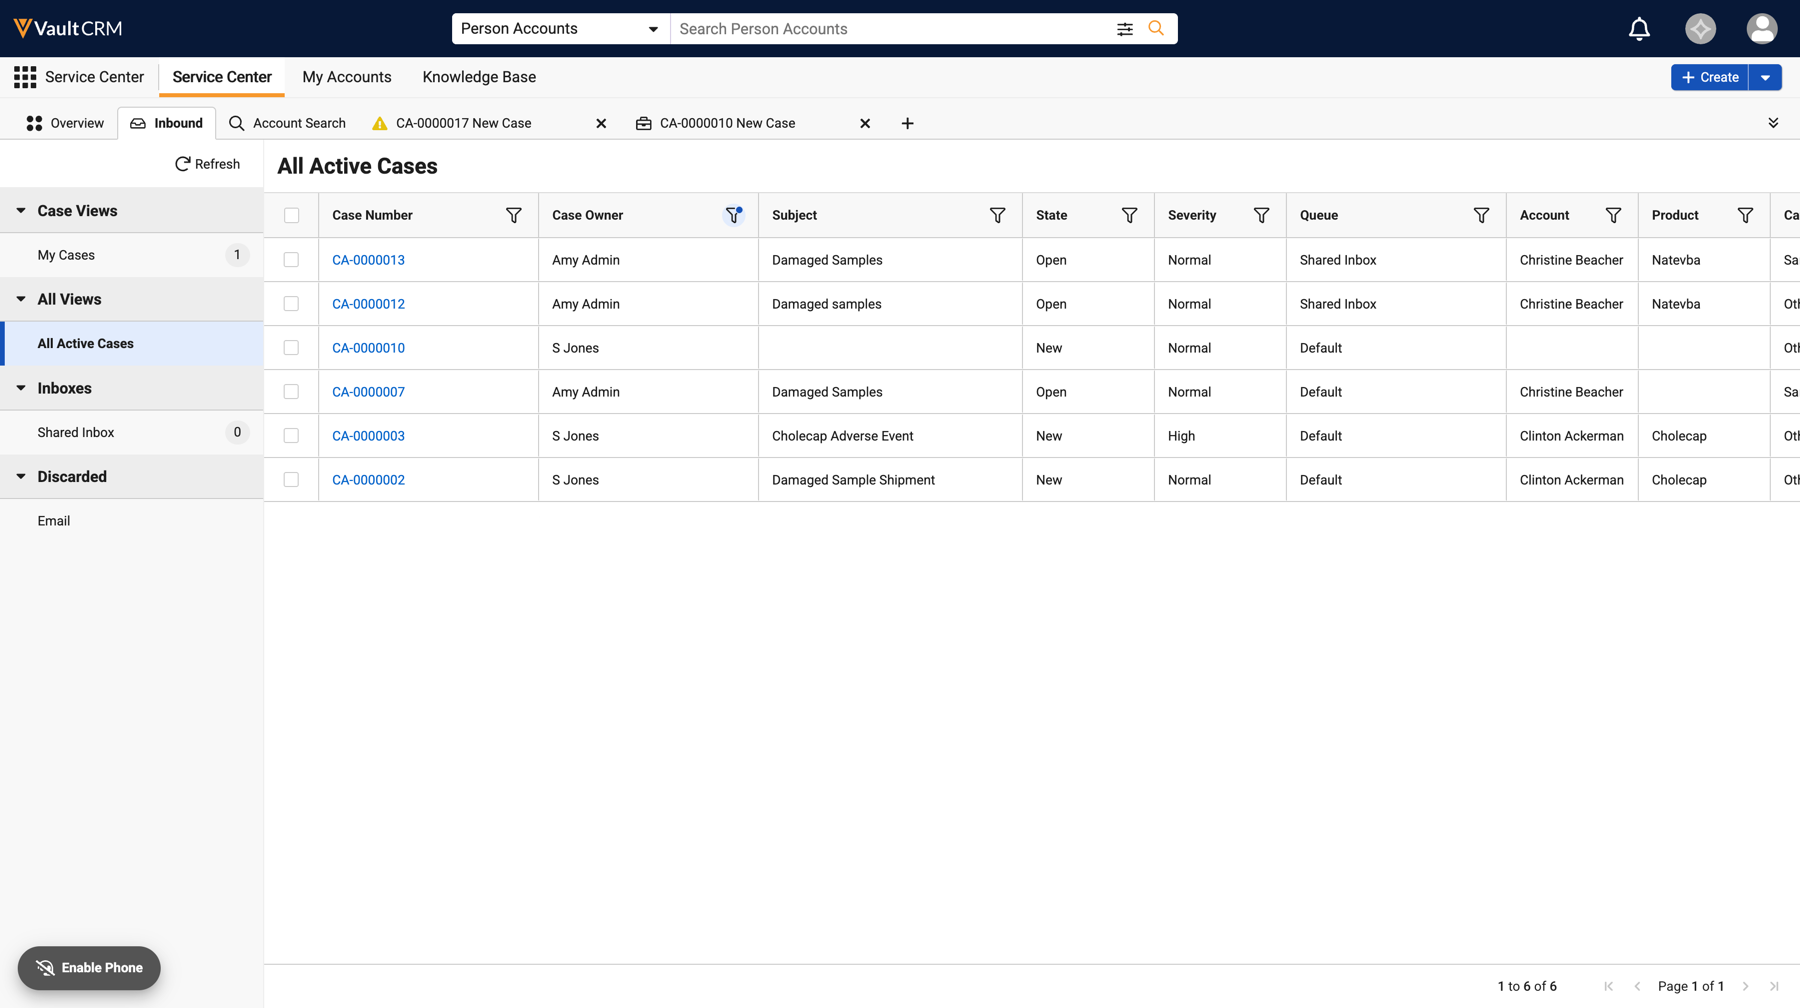
The All Active Cases view displays cases in the New, Open, Pending, On Hold, Escalated, and Solved states. Closed and Canceled state cases are not displayed in this view.
To access the All Active Cases view:
- Navigate to the Inbound tab in Service Center.
- Expand All Views in the left-hand pane.
- Select All Active Cases.
Viewing and Filtering Cases
Cases are sorted in descending order by Case Number by default, ensuring newest cases are displayed first.
- Select the Case Number link to open the case in a new tab
- Select the Filter icon corresponding to each column to apply a filter to the displayed cases. Multiple columns can have an active filter. Only cases that match all applied filters display.
Previewing a Case
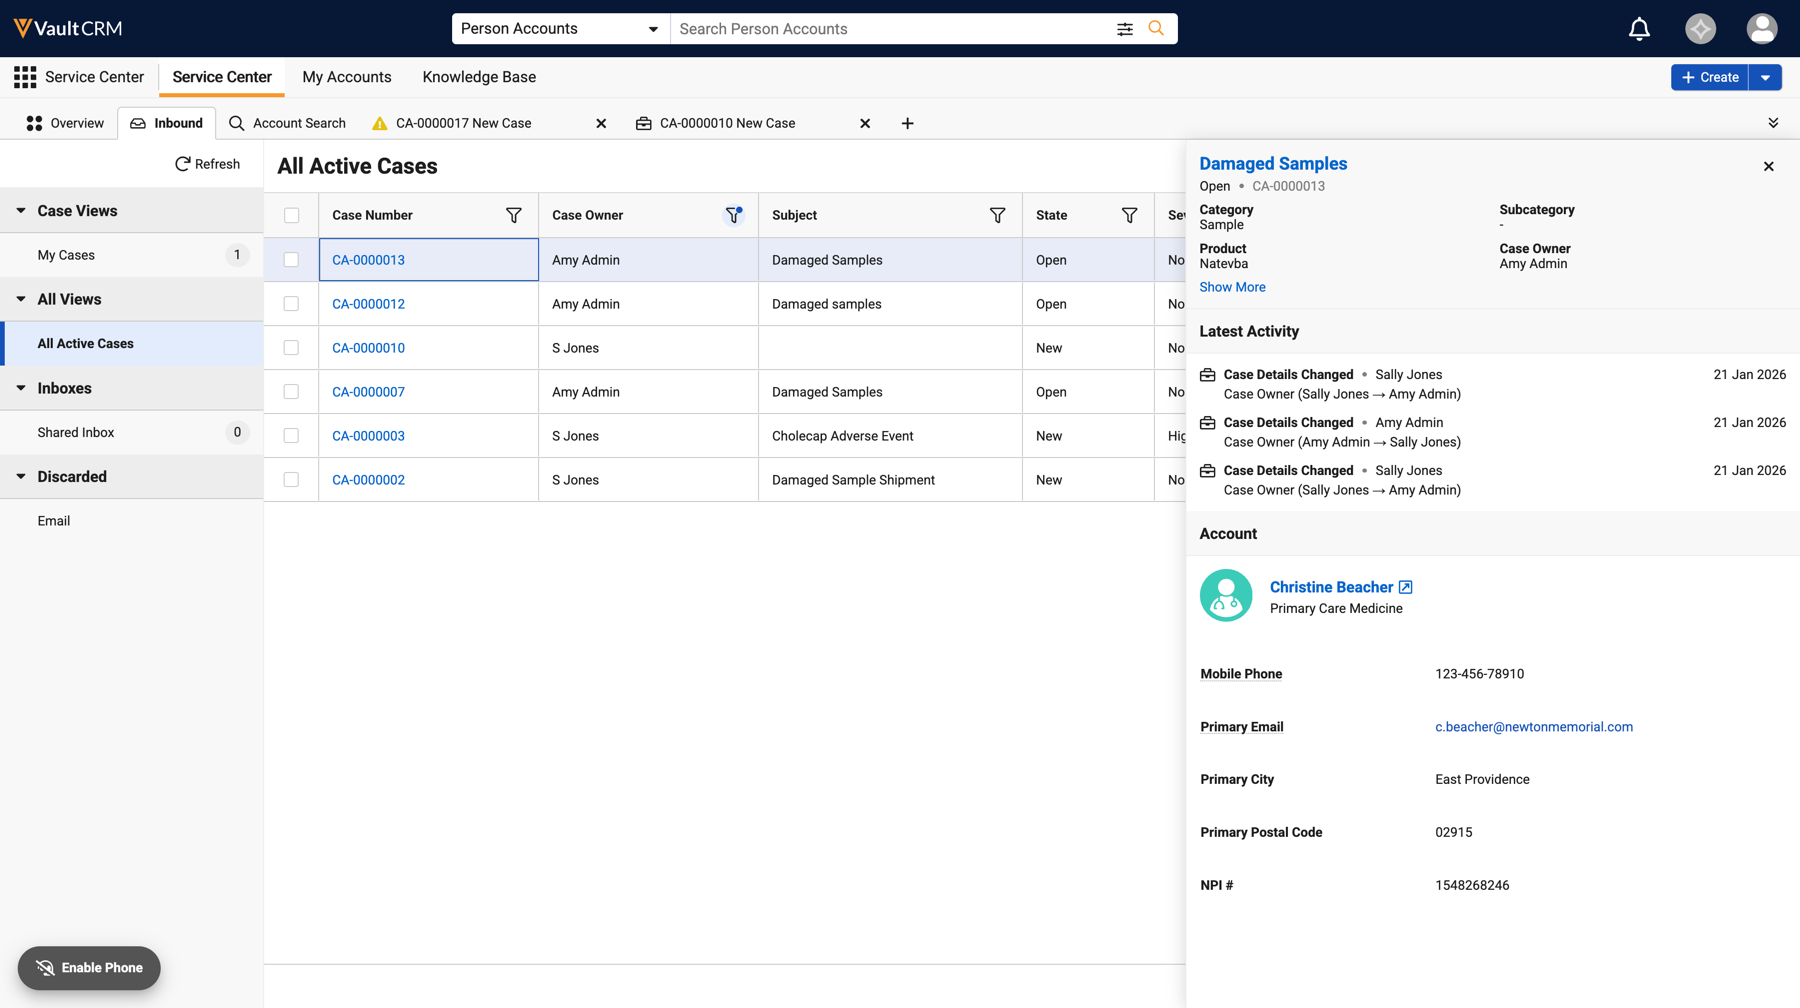
Select a case row, other than the Case Number link, to open the Case Summary panel and display the corresponding Case Detail fields. The displayed fields can be customized via the Preferred Case Details field, see Displaying Preferred Case Details for more information.
The Case Summary also displays the following sections for a quick summary:
- Latest Activity - The three most recent timeline entries associated with the case
- Account - Information via the associated Account record
Managing Case Owners in All Active Cases as
Service Center Reps
If granted the necessary permissions, Service Center reps can update the Case Owner for cases individually or in bulk to help with work redistribution to ensure cases receive the attention required.
Updating a Case Owner to Another User
To update a Case Owner to another user:
- Navigate to the Case Inbox tab > All Views > All Active Cases.
- Select the checkbox for each case.
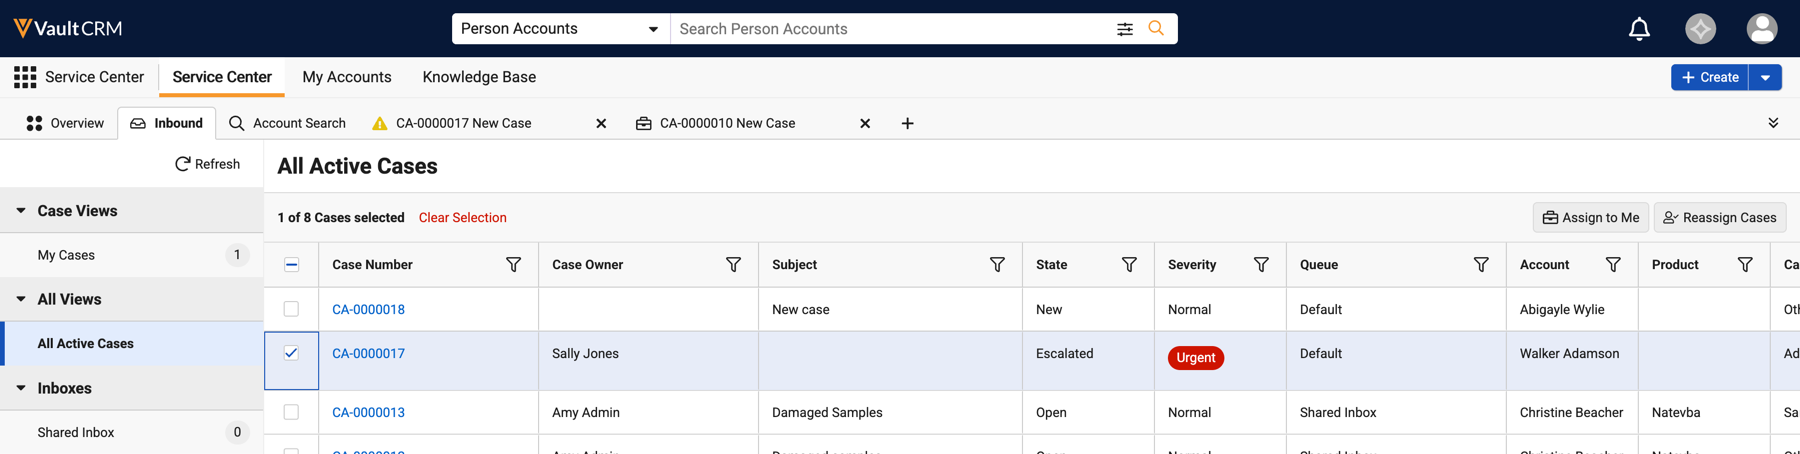
- Select Reassign Cases.
- Select the new Case Owner in the Search User modal.
- Confirm the reassignment.
Assigning Yourself as the Case Owner
To assign yourself as Case Owner:
- Navigate to the Case Inbox tab > All Views > All Active Cases.
- Select the checkbox for each case.
- Select Assign to Me.
- Confirm the reassignment.