Using the Account Details Screen
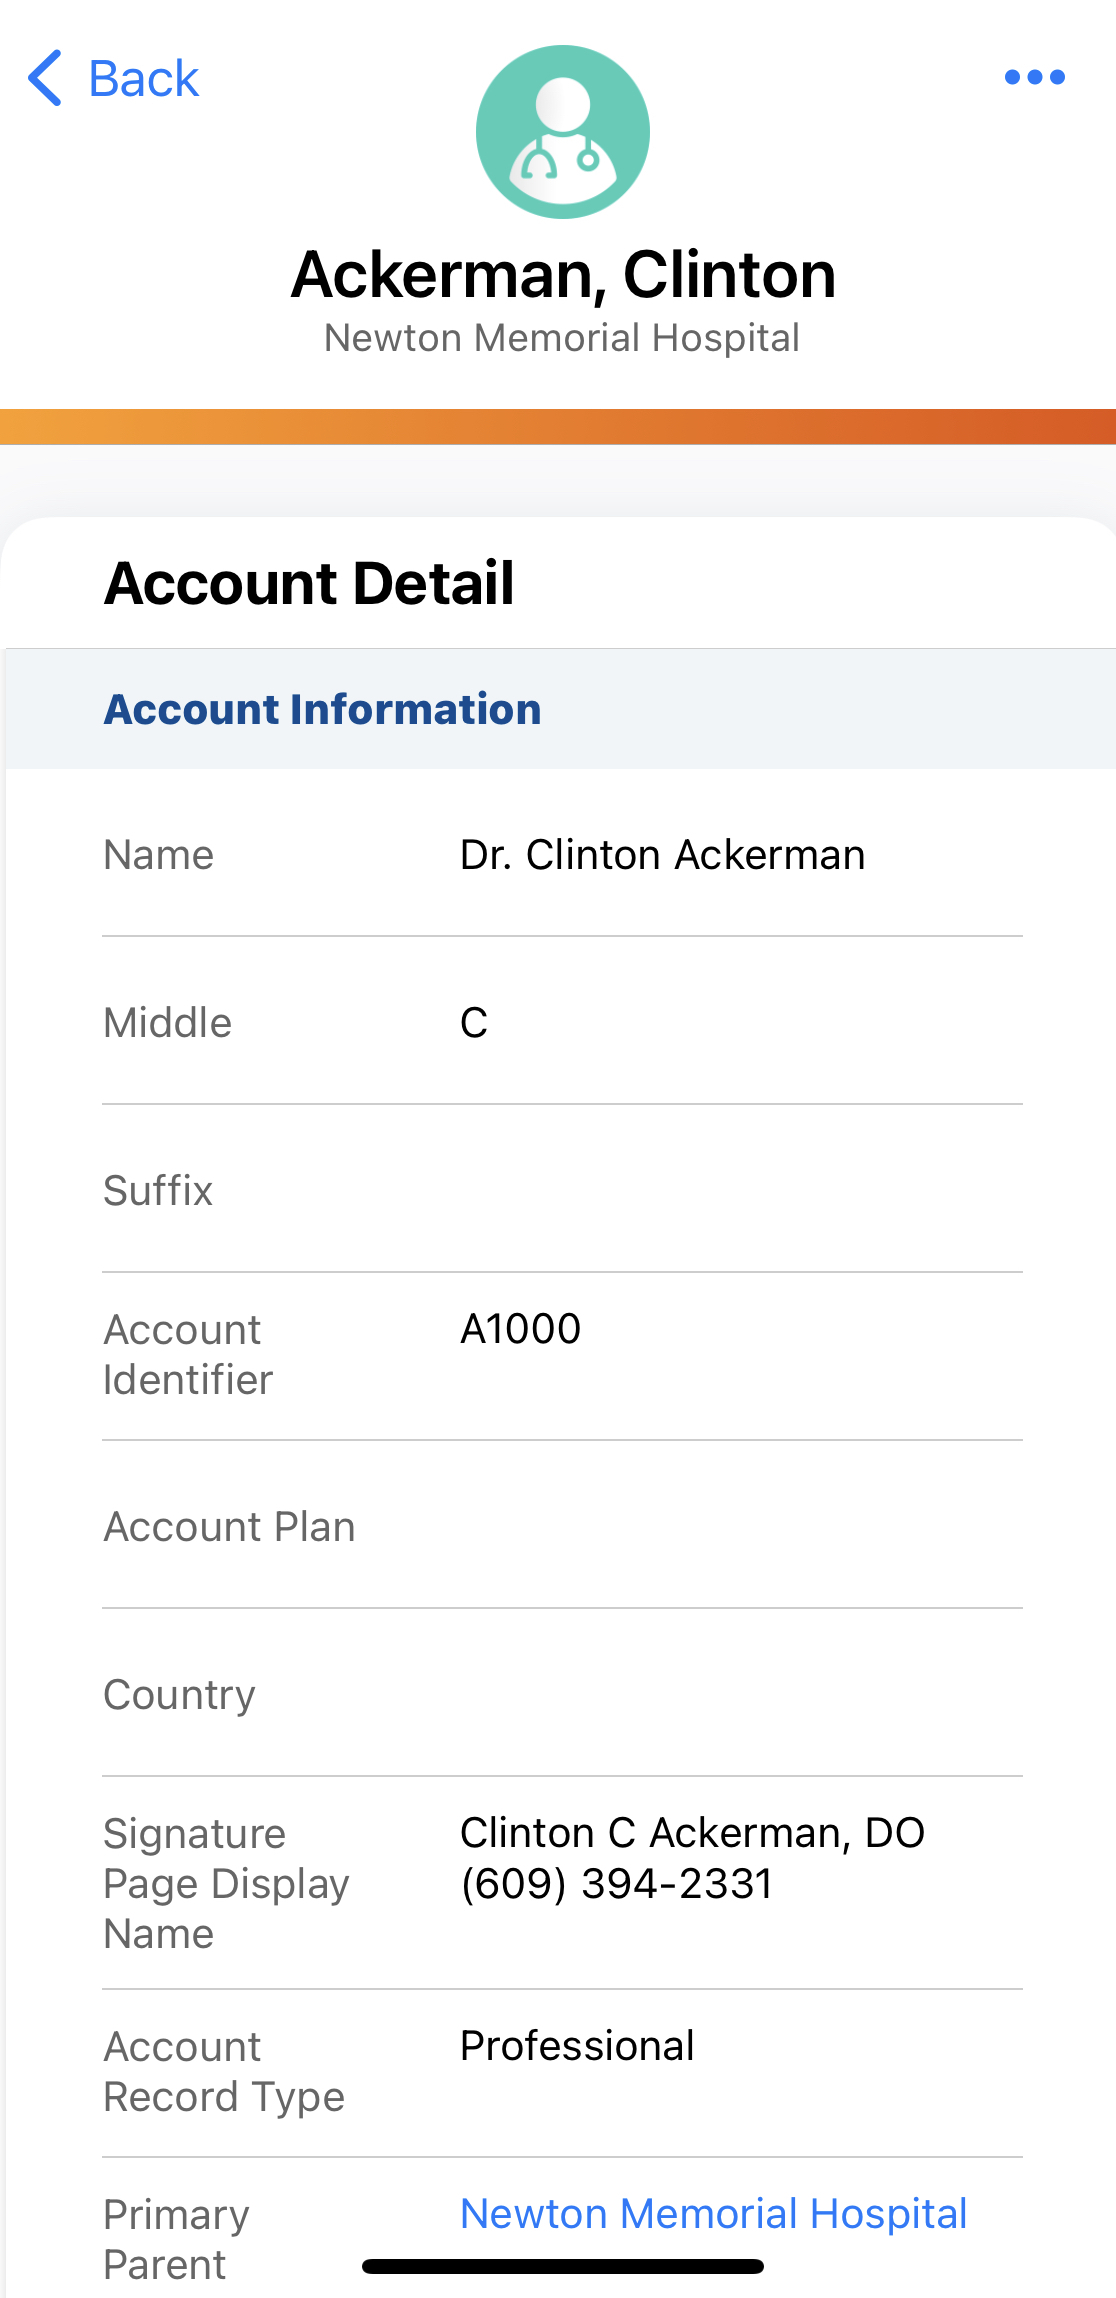
The Account Details screen is a source for all account information, for example, location, specialty, orders, and affiliations. Selecting an account name on the My Accounts screen displays the Account Details screen.
In Detail view, the left side of the Account Details screen contains related lists, for example, Addresses or Medical Inquiries. The right side displays the sections, fields, and layout defined by the account layout. Actions and operation buttons are available in the tabs.
If users are unable to access record detail pages, verify the country__v field on the user's user__sys object is populated. The country__v field is required for all users.
Who can use this feature?
- End Users — Browser, iPad, iPhone, Windows
- Using the Account Details Screen
- Formula Fields
- Users do not require an additional license
Configuring the Account Details Screen for
To configure this feature, ensure Configuring Accounts is complete.
Setting a Different Default View for Accounts
By default, when a user navigates to an account in Vault CRM, the account detail screen displays information about the account’s calls, territories, multichannel activities, and more. However, this information may not be the most relevant for all end users.
To allow users to view customized account information after navigating to an account, admins can configure one of the following options to display instead of the Account Detail Page:
- Account Timeline - Displays a chronological history of all activities involving an account. This enables users to view an account's history, including any calls, medical events, or Approved Emails they have received.
- X-Pages Account Profile - Displays account information, for example, a combined view of an account’s calls, medical inquiries, and sent emails. Content creators can customize the X-Page to meet end users’ needs.
- X-Pages KOL Profile - Displays KOL Profile information, for example, medical events, clinical trials, and emails sent to the KOL. Content creators can customize the X-Page to meet end user’s needs.
If an X-Pages KOL Profile is not configured as the default display, the default display for accounts is determined by the default_account_profile__v Veeva Setting:
- For Commercial Vault CRM, populate the setting with either 1 or 3
- For Medical Vault CRM, populate the setting with either 0 or 1
|
Value |
Commercial |
Medical |
|---|---|---|
|
0 |
Account Detail |
Timeline |
|
1 |
Timeline |
Timeline |
|
2 |
Account Detail |
Account Detail |
|
3 |
Timeline |
Account Detail |
Using the Account Details Screen as
Select the All Actions button to access the following object actions from the Account Details screen:
- Edit - Opens the account edit window, enabling the user to modify account information.
- Record a Call - Creates a call and opens the call report page. This action is available if the user is permitted to create calls for the account.
- Start Media - Opens the media player. This action is available if the user is permitted to create calls for the account.
- New Inventory Monitoring - Creates a new inventory monitoring record for the account
- Ratings - Opens the Advanced Product Metrics screen. This option displays only when detail groups and detail topics are in use.
- Email Opt In - Allows accounts to opt-in for Approved Email
- Send Email - Allows users to send Approved Emails to the account
Users can conduct the following actions from the navigation bar:
- View Hierarchy – Opens the account hierarchy window illustrating the parent and child relationships of the current account
- Sphere of Influence – Opens the Sphere of Influence window, displaying affiliated accounts in an intuitive graphical format
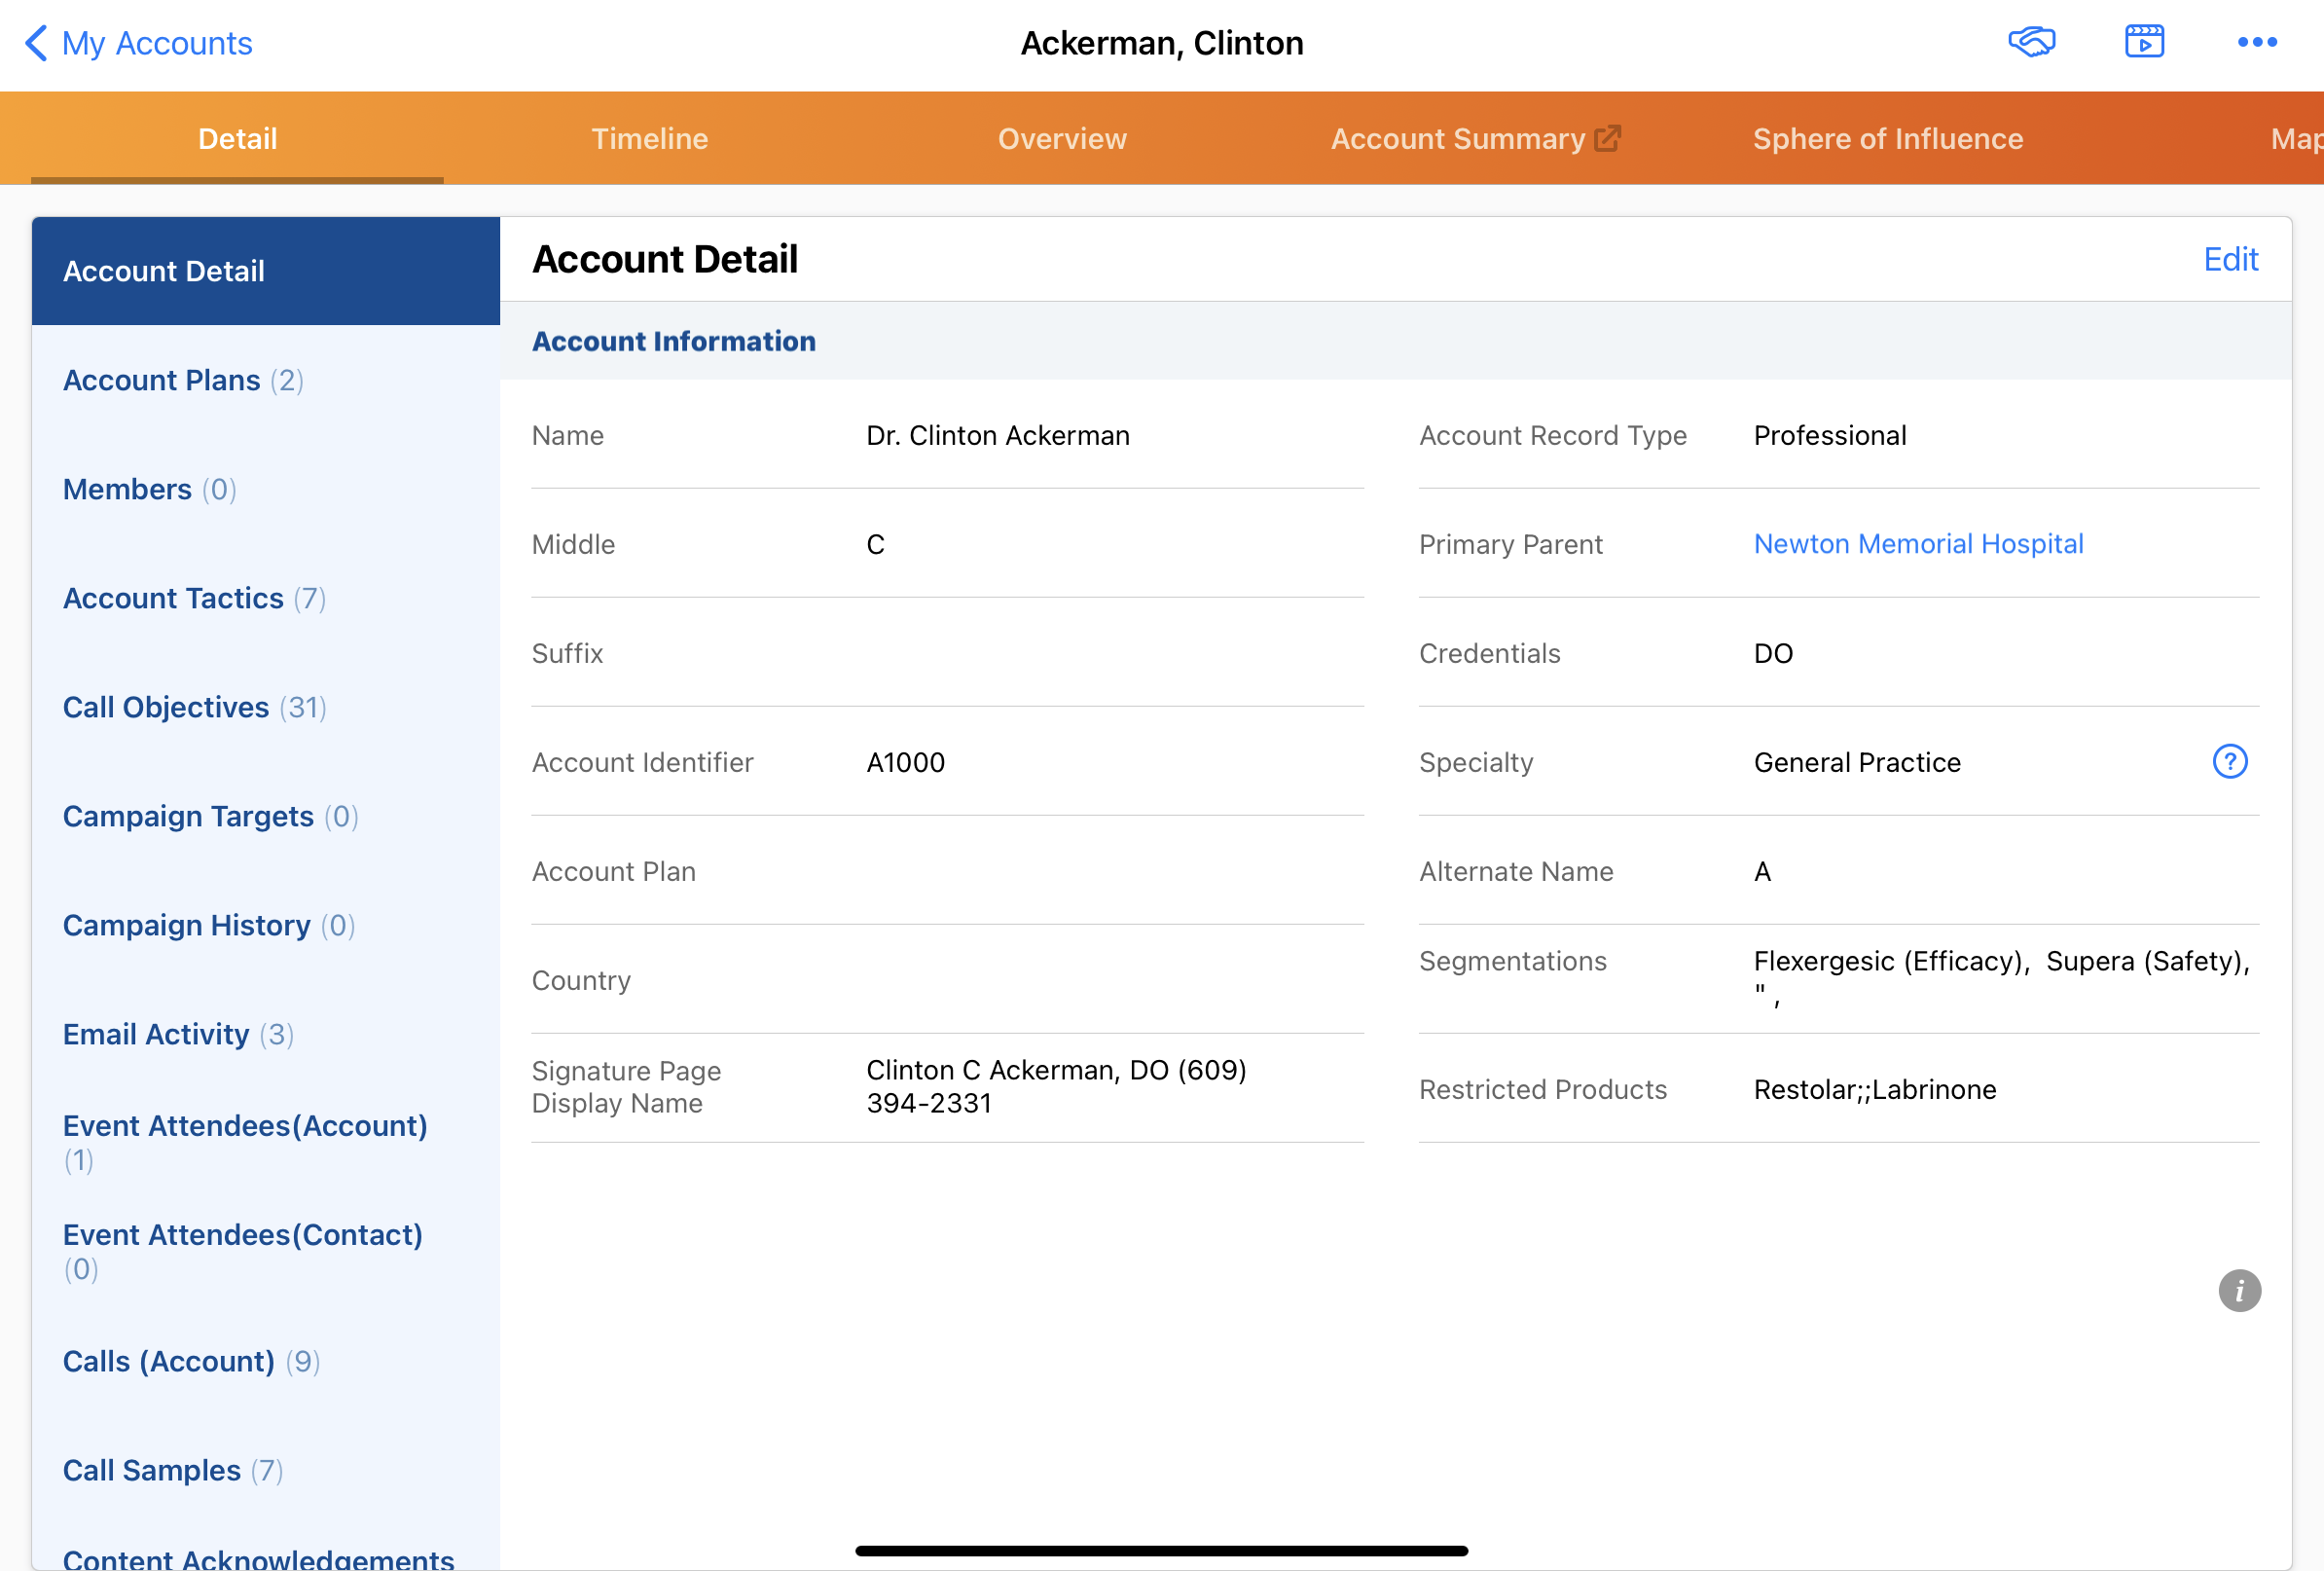
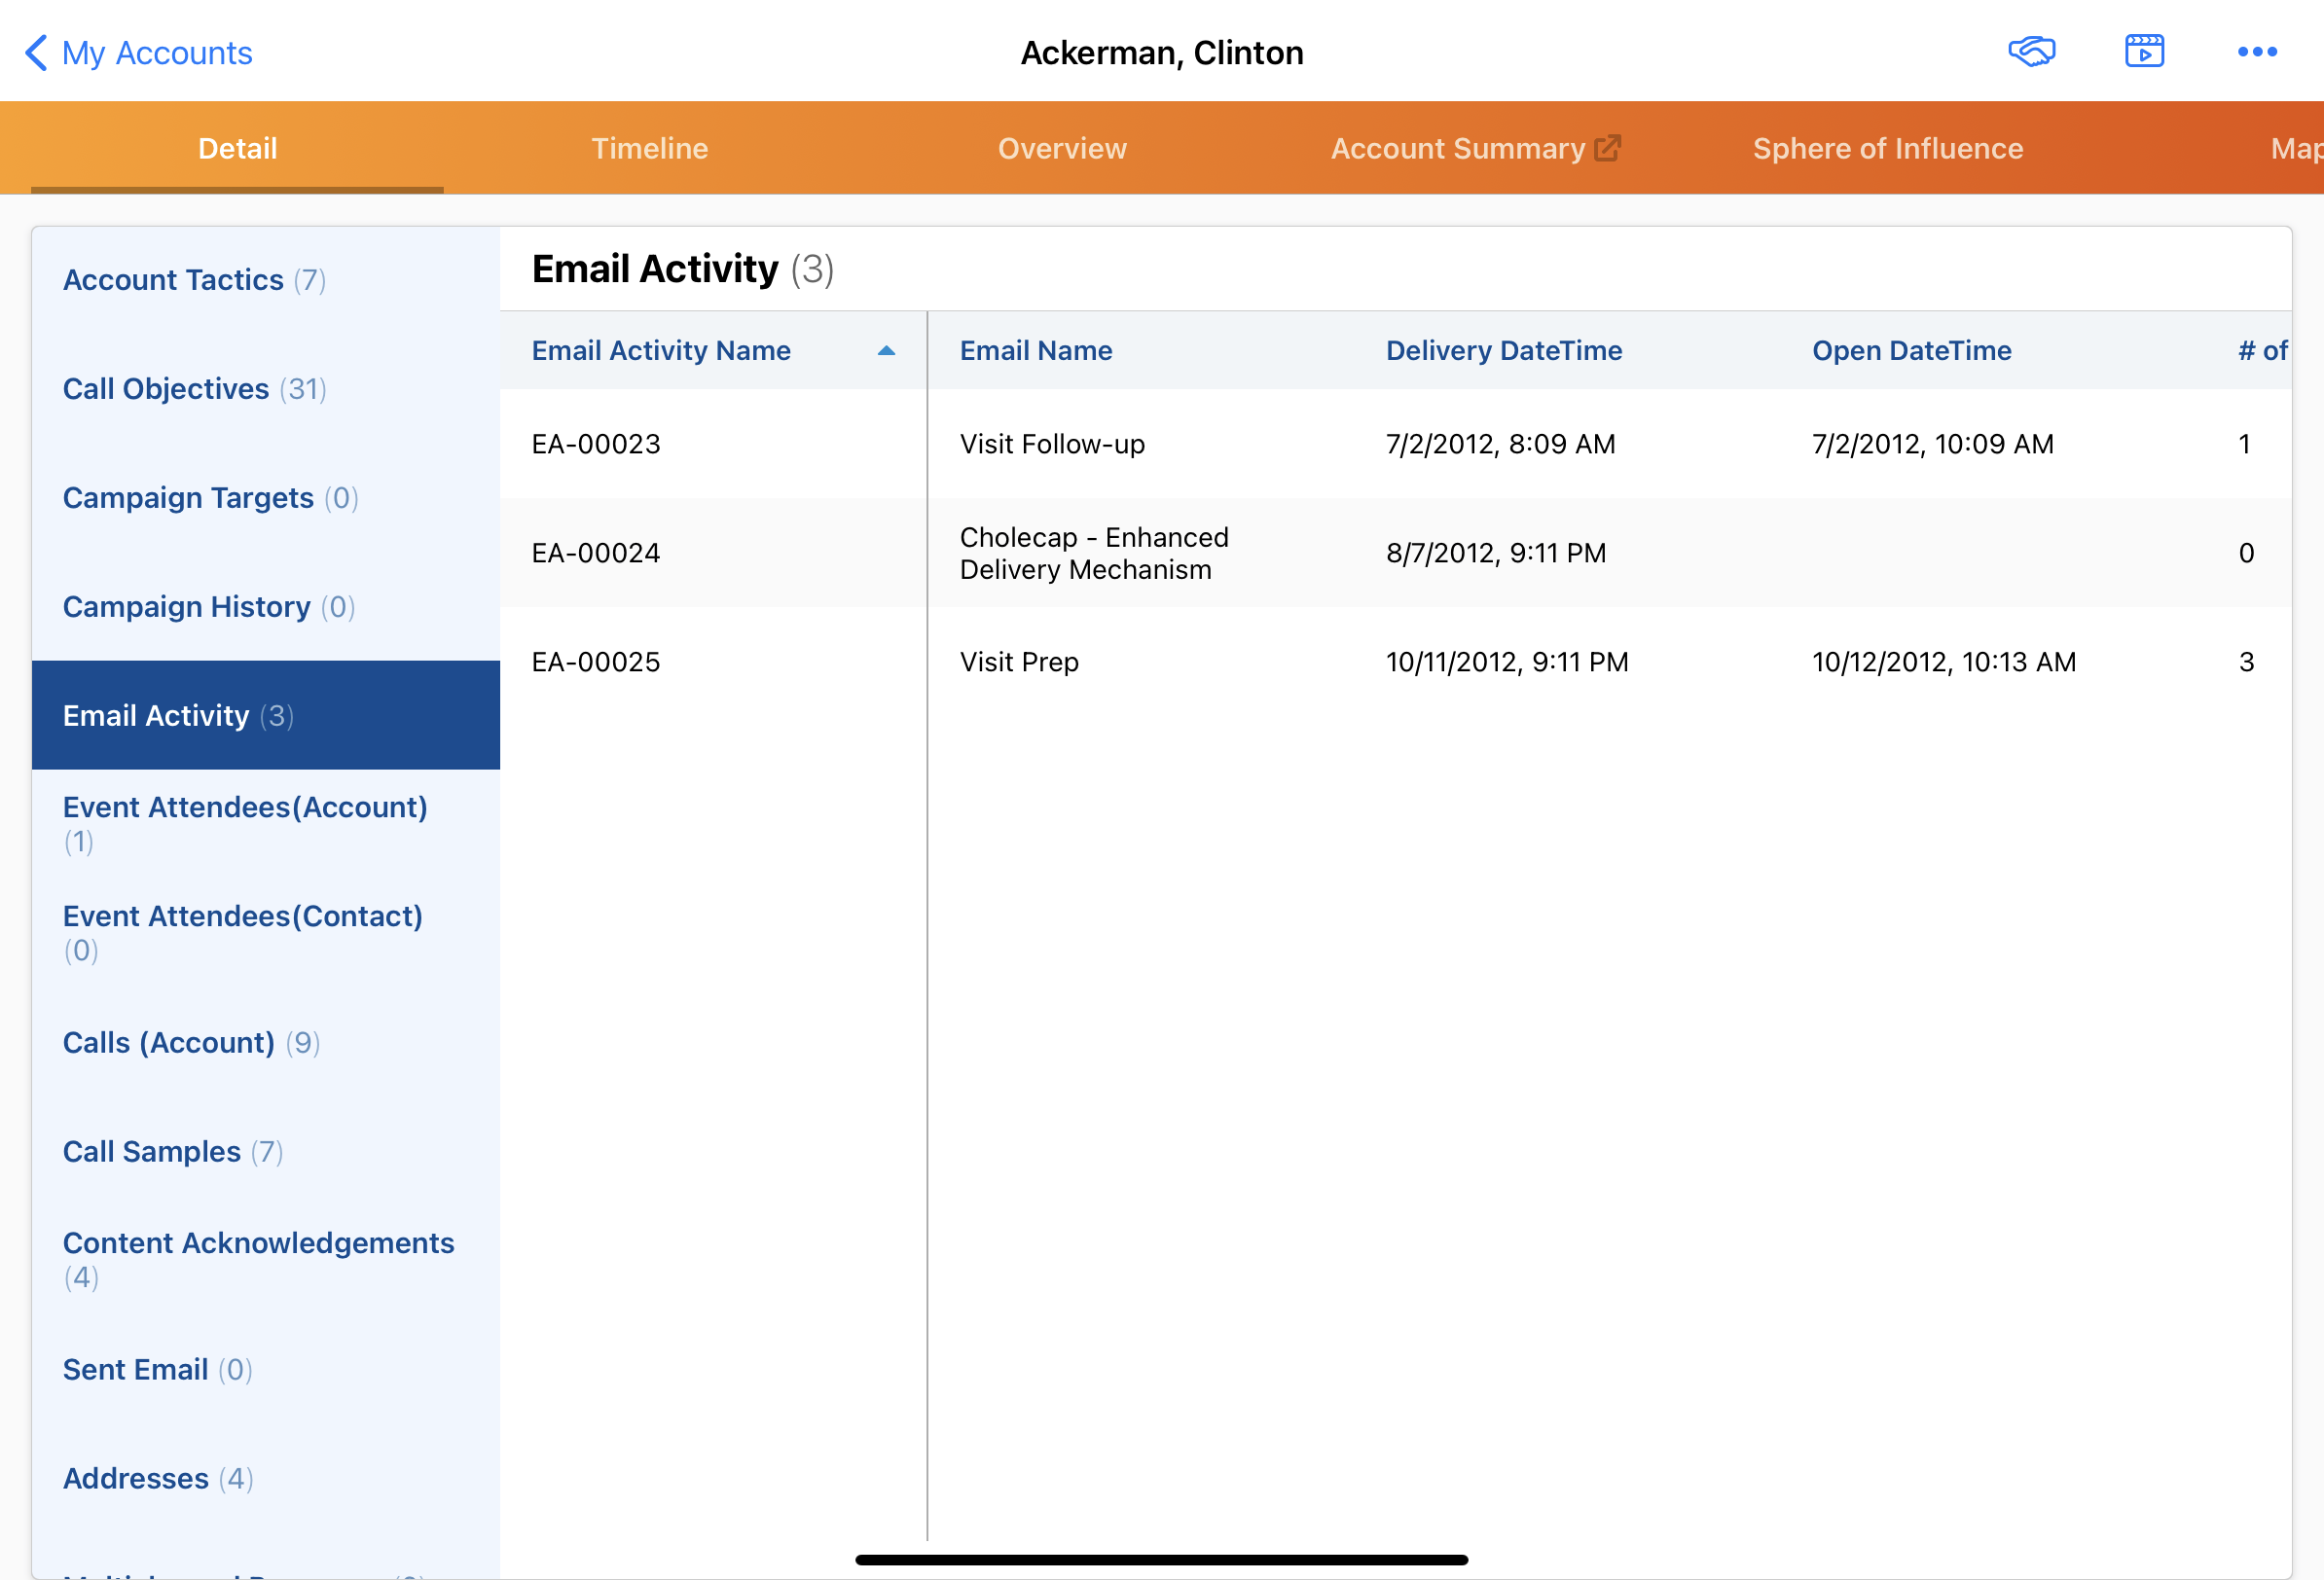
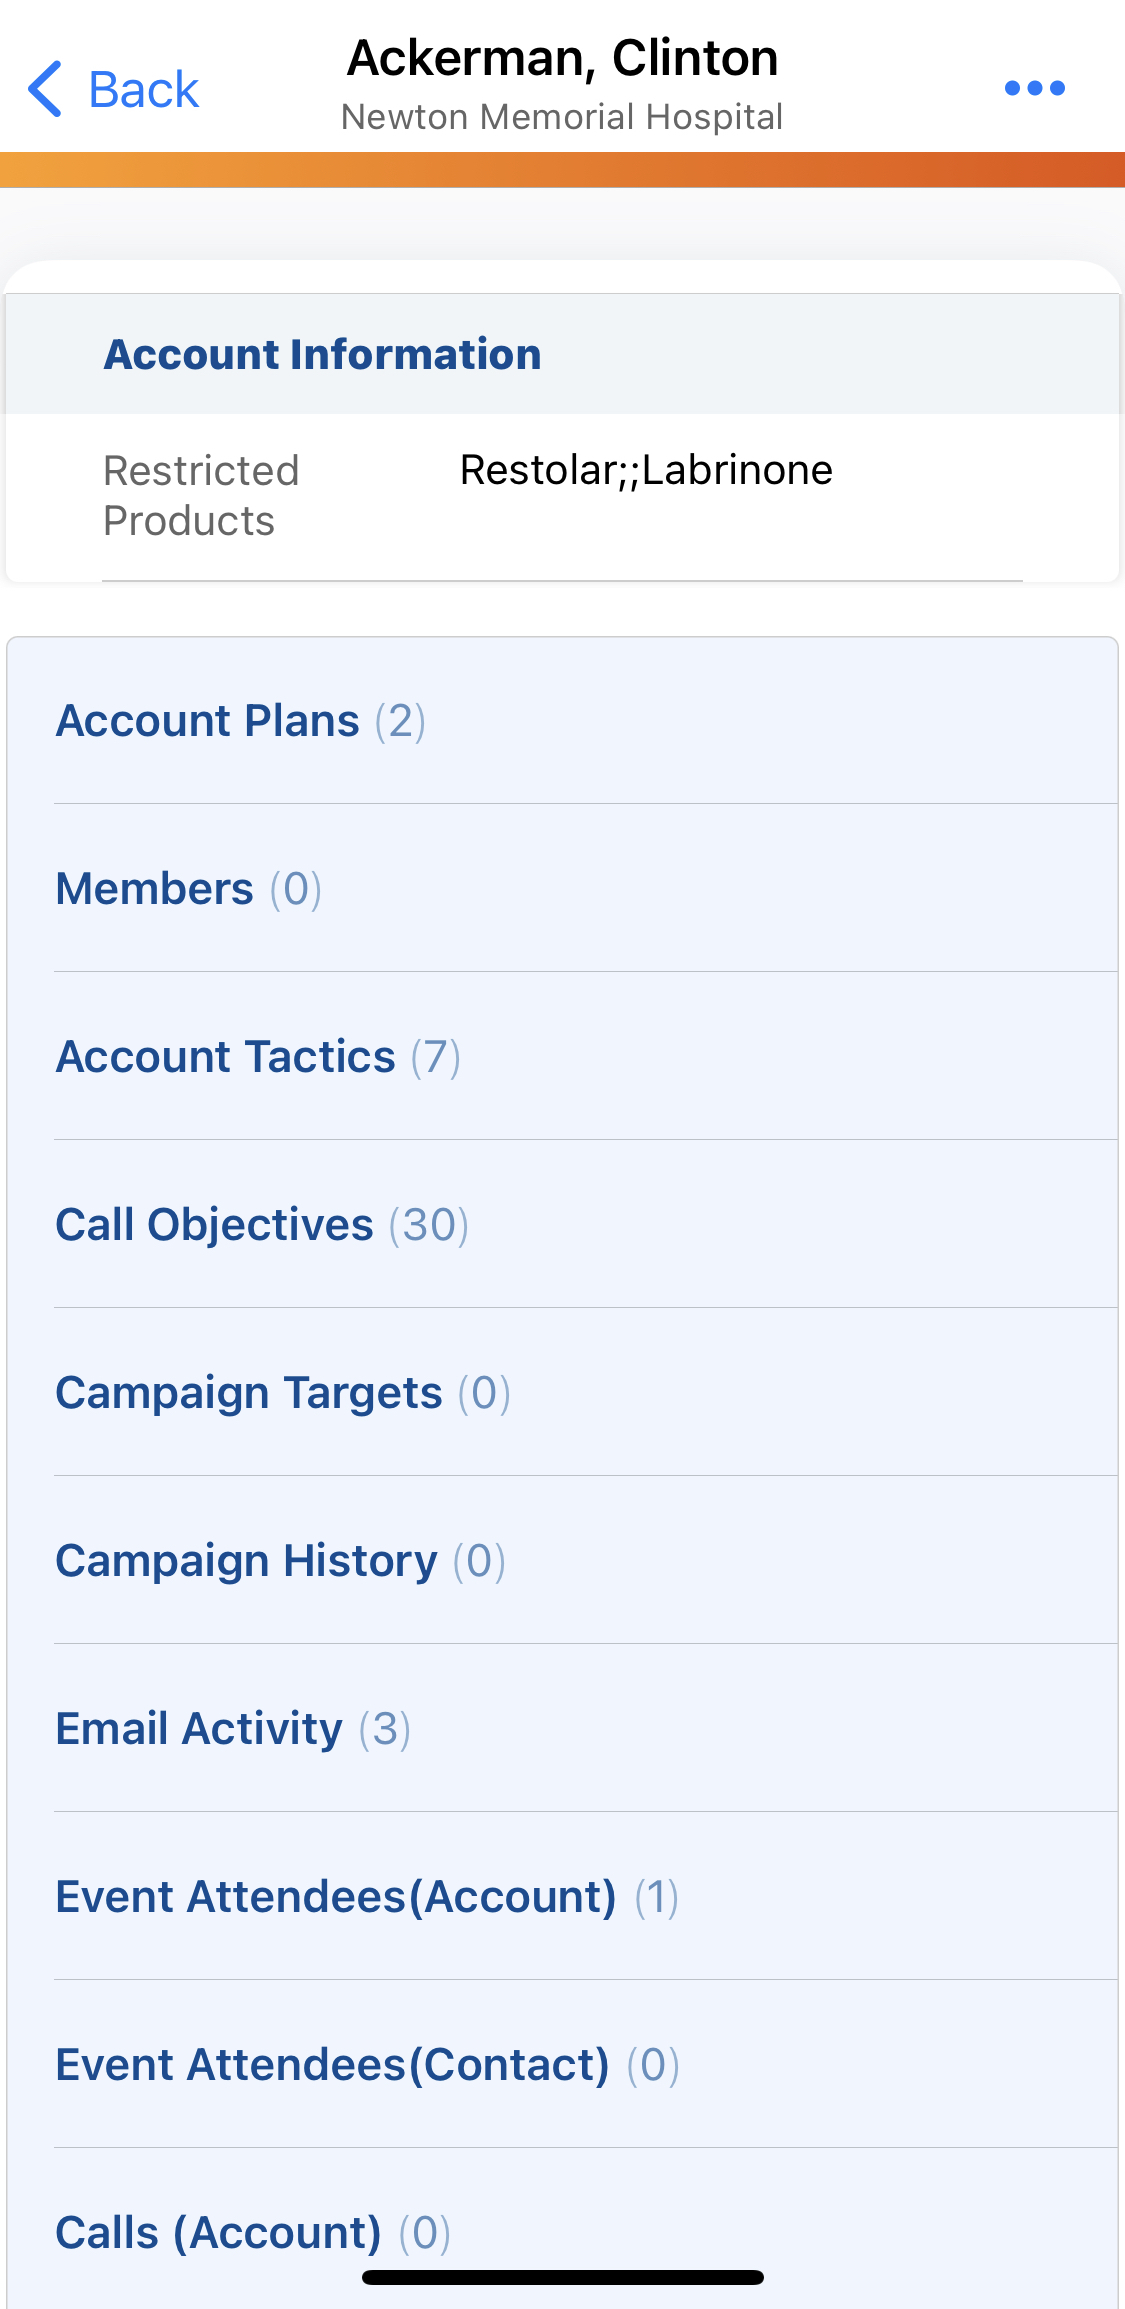
Detail view displays related lists. The number of records in each related list displays beside the list name. All related lists added to the Account layout are represented, even if they do not have rows. Custom objects linked to the Account object can be exposed as related lists.
Selecting a related list displays the records in the list. Users can select a row to display the record details showing the sections, fields, and layout as configured in the layout of the object. To sort list contents, select the column header. Select the column header once to sort data in ascending order and again to sort data in descending order.
Formula Fields
Formula fields are evaluated on the server and synchronized to the device as text values. If any data used in the calculation for a formula field is changed, the updated field value is applied the next time the user syncs.
When a Formula field value changes, the change is synced when the systemmodstamp is updated on the record.

