Using the Service Center Outbound Tab
The Service Center Outbound tab allows Service Center Representatives to create and manage their target lists, make outbound calls to targets, and record and track their progress, all from within Service Center. The structured workflow of engagement states also allows managers to track progress and performance.
Who can use this feature?
- Business Admin Users - Browser
- Configuring Preferred Phone Numbers
- Service Center Representatives - Browser
- Using the Outbound Tab
- Editing an Outbound Target List
- Deactivating a Target List
- Using the Outbound Tab for Calls to Targets
- Users require a Service Center license
Configuring the Outbound Tab for
To configure this feature:
-
Ensure Configuring Service Center is complete, including the selection of a default queue.
-
Ensure Using Veeva Omnichannel for Service Center is configured.
-
Navigate to Admin > Configuration > Application Configurations > Application Profiles.
-
Select Create:
- Enter Service Center Outbound in the Label field
- Enter service_center_outbound in the Name field
-
Select Save.
-
Ensure the Outbound Application Profile is assigned to users:
- Select the Users tab
- Select Add
- Select the appropriate user(s)
-
Select Save.
-
Navigate to Business Admin > Objects.
-
Select the console_application_settings__v object.
-
Select Create.
-
Create a new Service Center Console Application Settings Type:
- Enter Service Center Outbound in the Name field
- Select Service Center Outbound for the Console Application Profile
- Select Outbound for the Console Tab Access
-
Select Save.
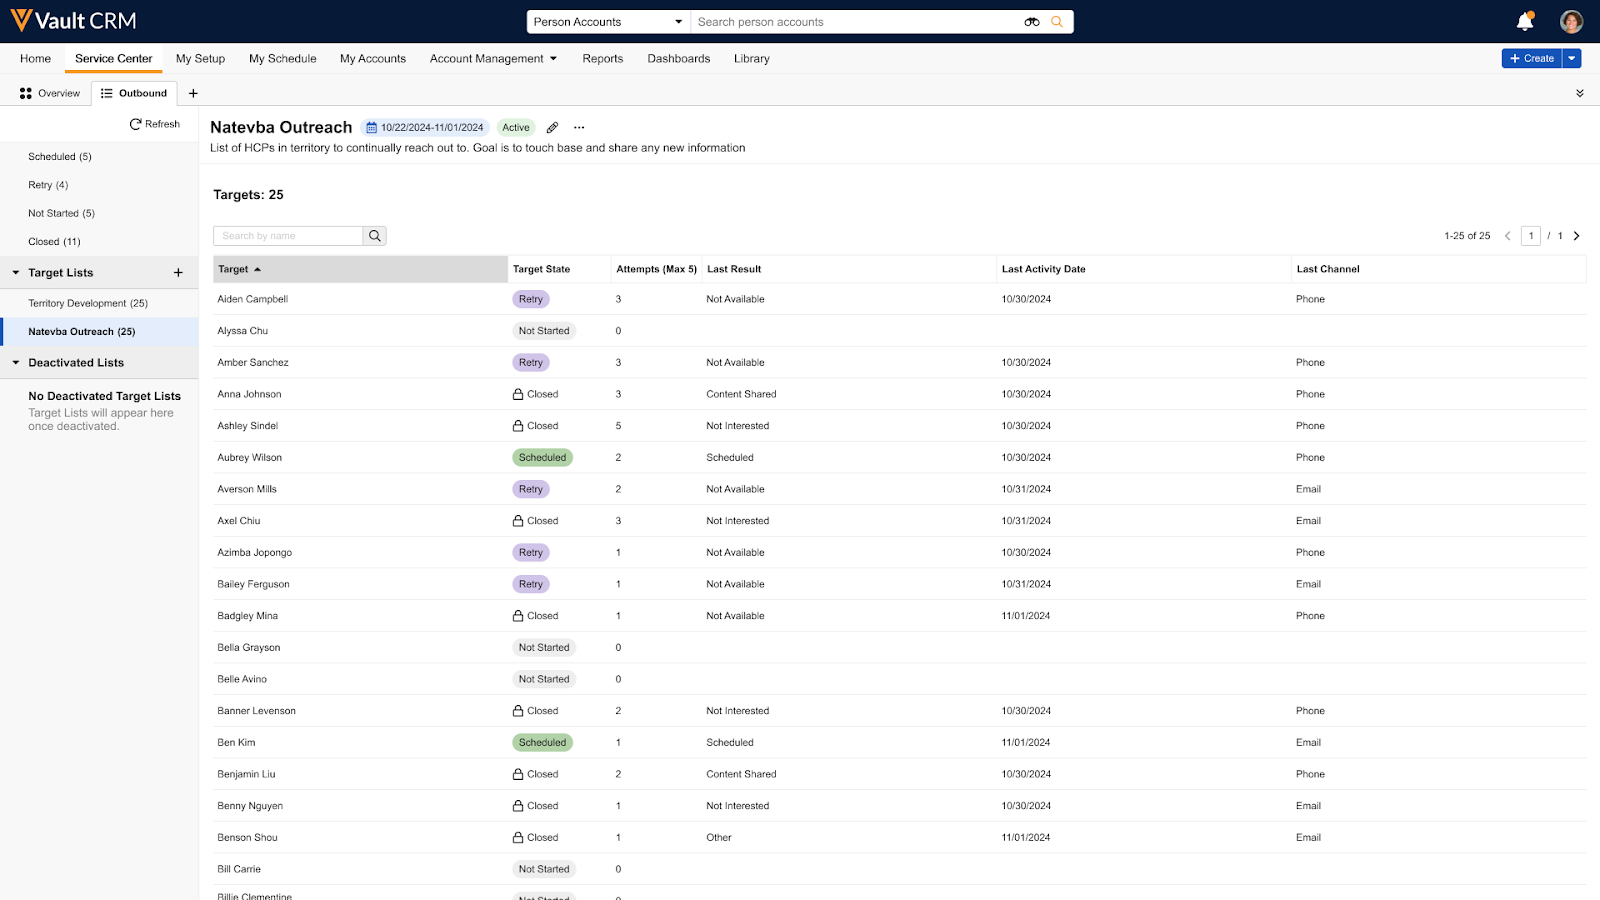
Using the Outbound Tab as
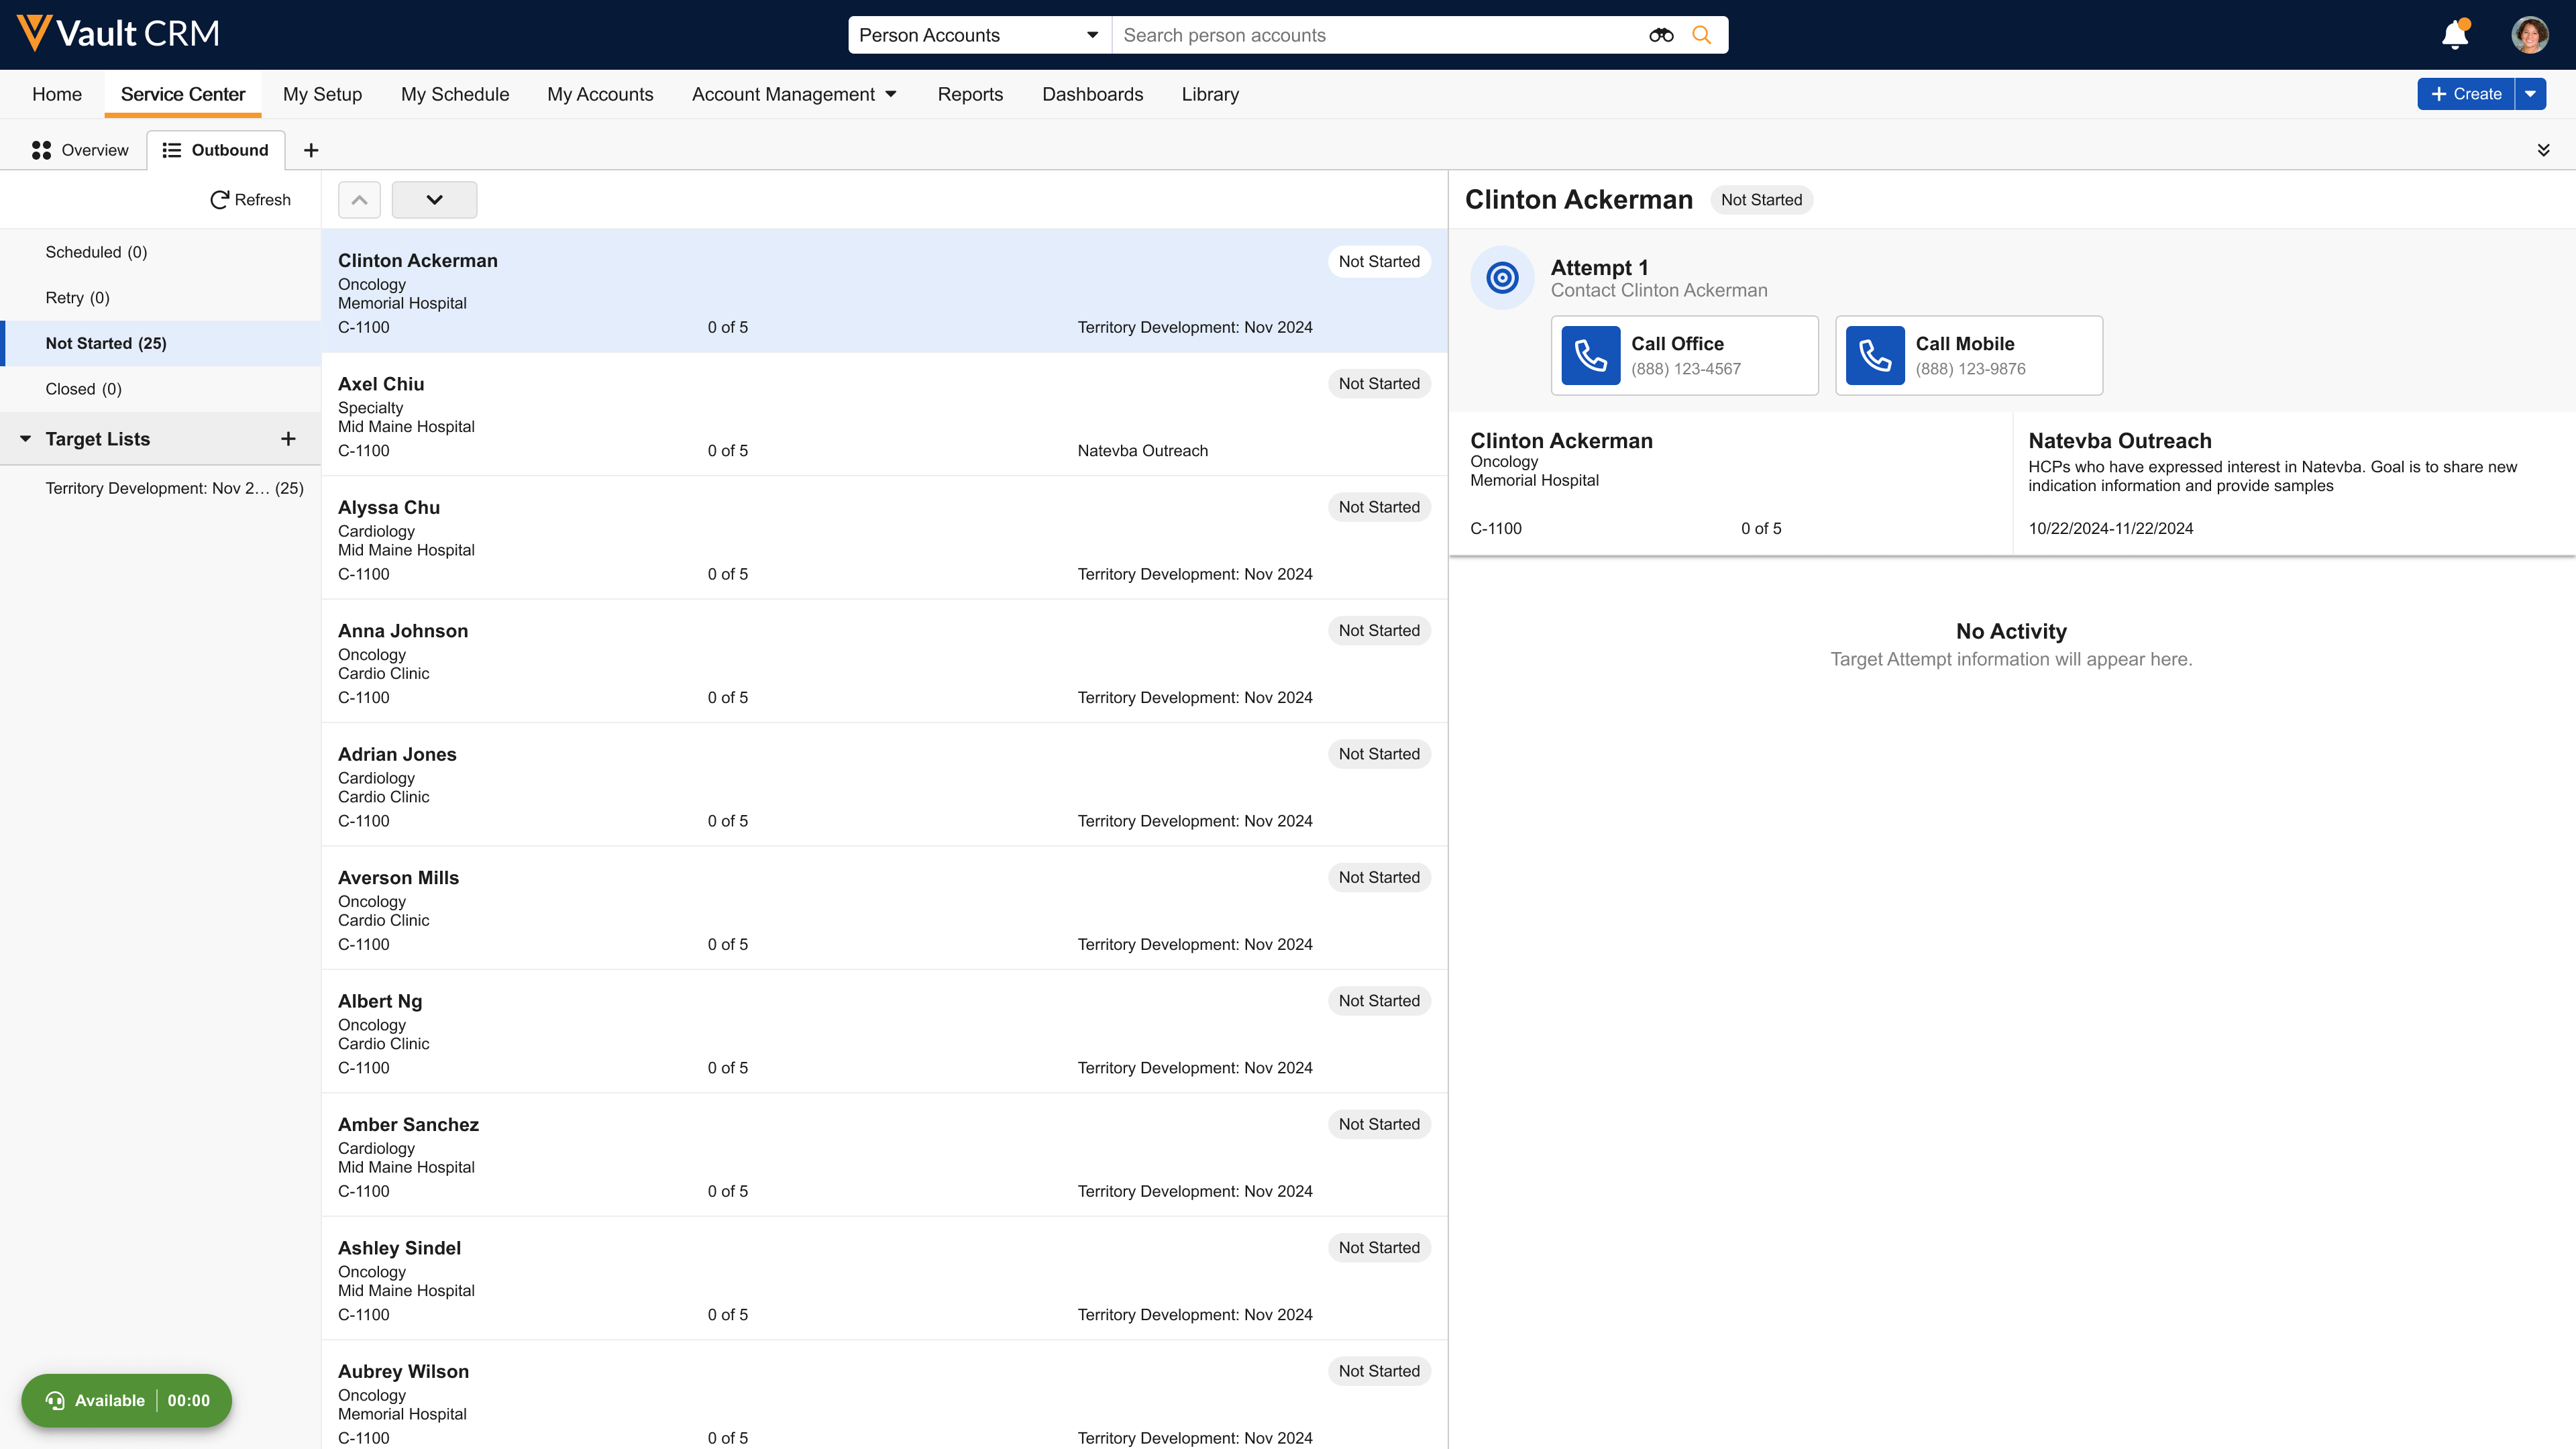
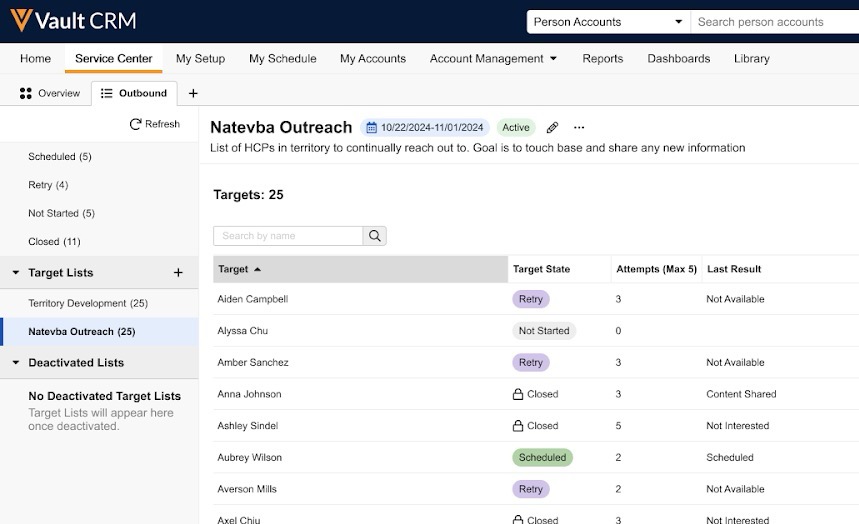
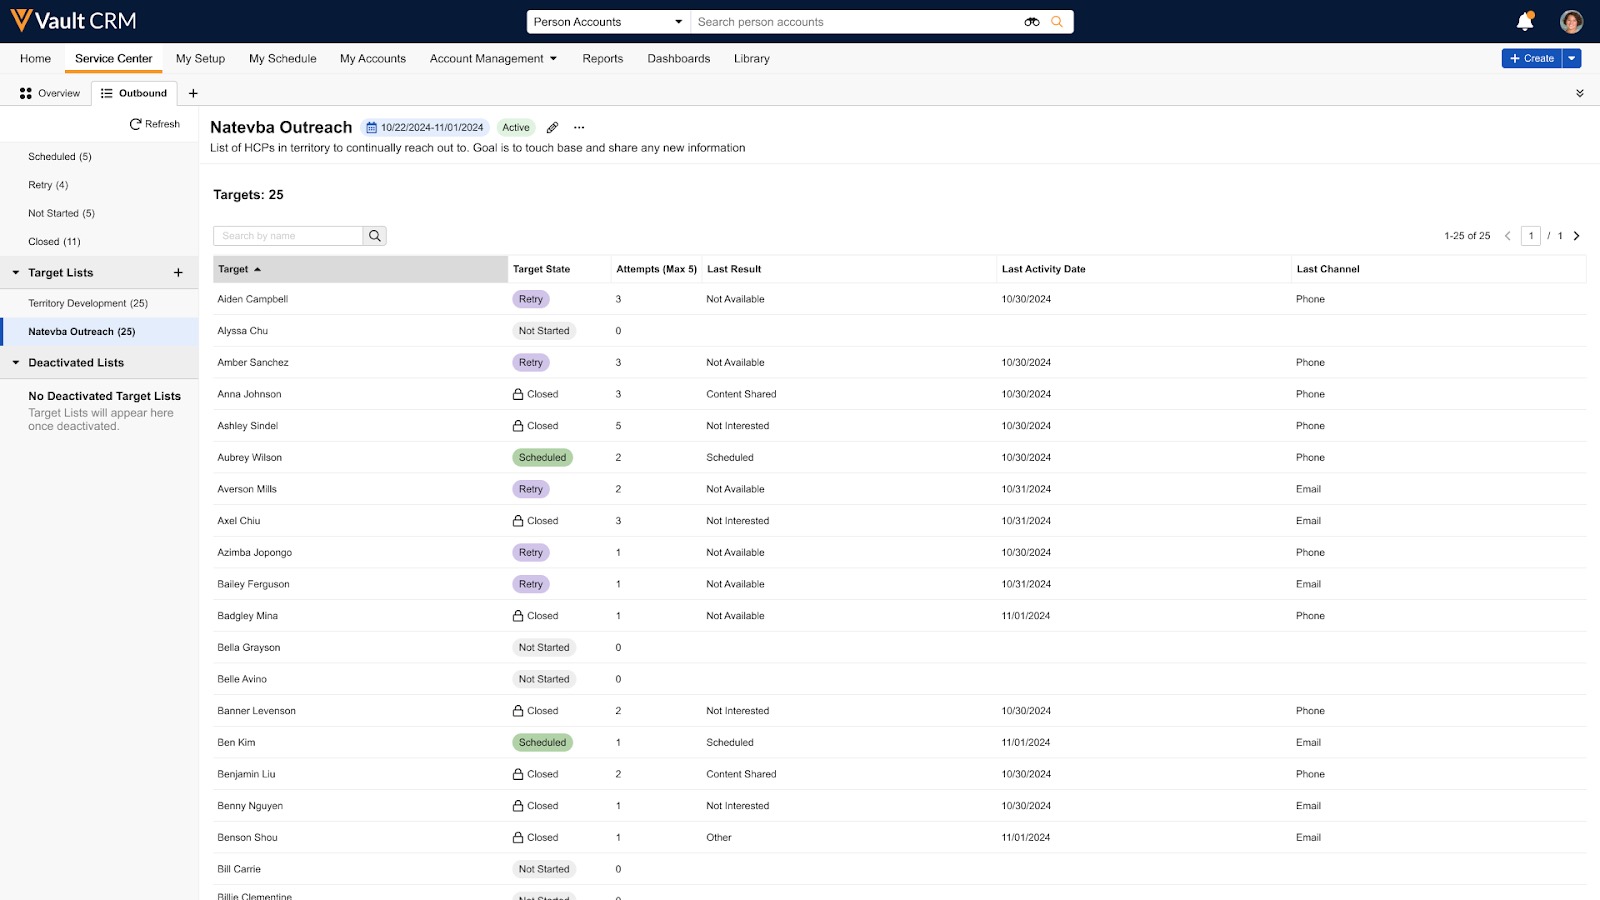
Service Center Representatives can view high-level details about any selected target from the Outbound tab including the number of call attempts, recent activities, and current lifecycle state.
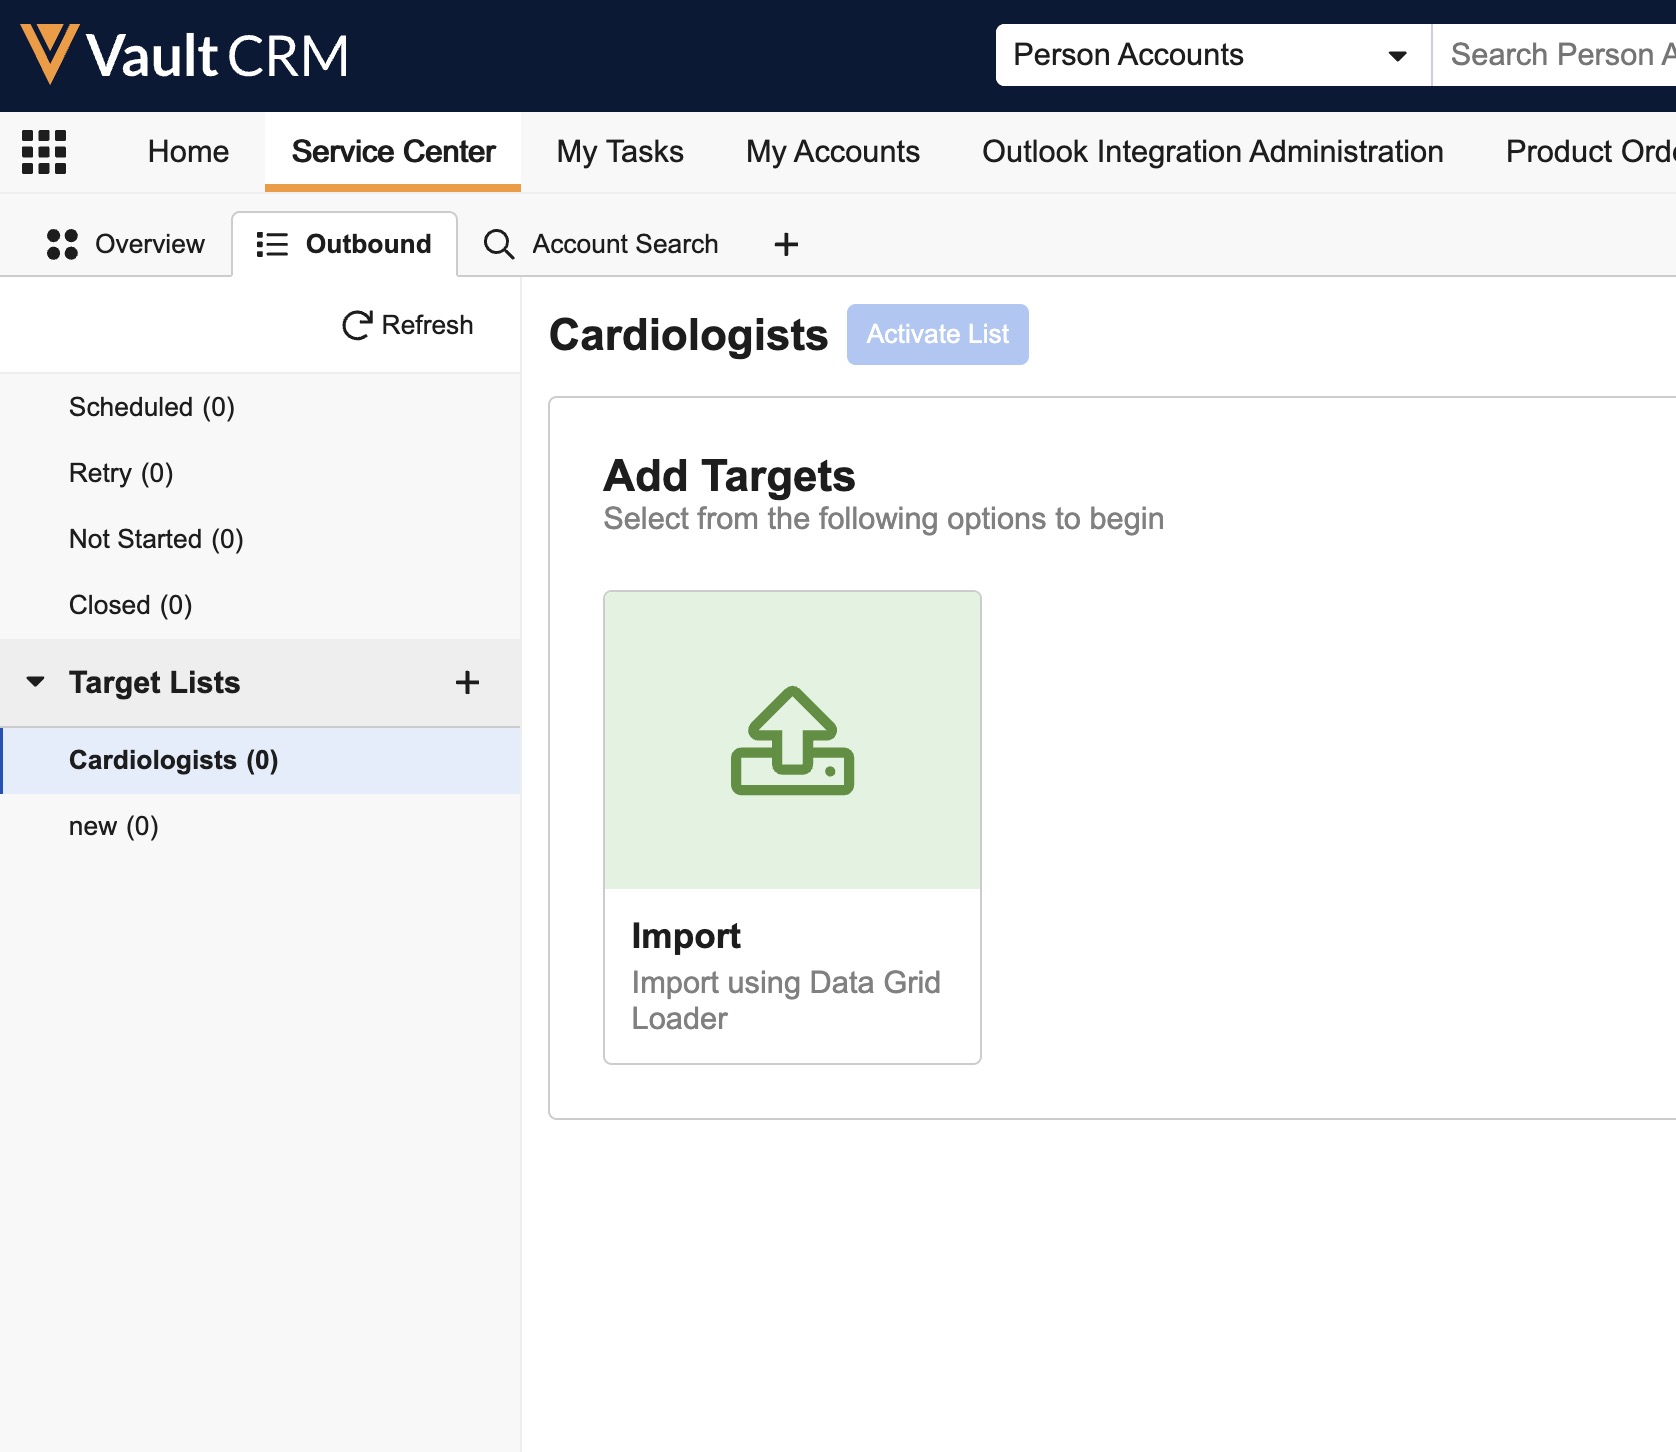
Before Service Center Representatives can interact with their accounts, they must create a Target List and add targets.
To create a Target List:
-
Navigate to Service Center > Outbound.
-
Select the + icon next to Target Lists if this is not your first Target List. Otherwise, skip to next step.
-
Select Create Target List:
- Enter a name for the target list (required)
- Enter a description (optional)
- Enter a start date (optional, but recommended)
- Enter an end date (optional)
.png)
-
Select Create.
To add targets to a Target List:
- Create an Account View of the records to add to the Target List.
- Add the Account Global ID column to the view.
- Select Save.
-
Select Export > CSV from the All Actions (...) menu.
-
Open the .csv file in any supported app. The Global ID column displays.
-
Edit values in the Global ID column to remove all leading digits before the Vault CRM record ID. For example, 199955_V4T000000003234 must be edited so that only V4T000000003234 is listed.
-
Save the file.
-
Navigate to Service Center > Outbound.
-
Select the appropriate target list.
-
Select Import.
-
Select Paste Data to paste files from the .csv file you have copied to your clipboard, or drag the .csv file to the page to add the exported data.
-
Select Upload to CRM. Data is validated to ensure proper format.
-
Select Close. The new target list displays in the left pane in Service Center.
-
Select Activate List. All records are now active and are moved to Not Started status.
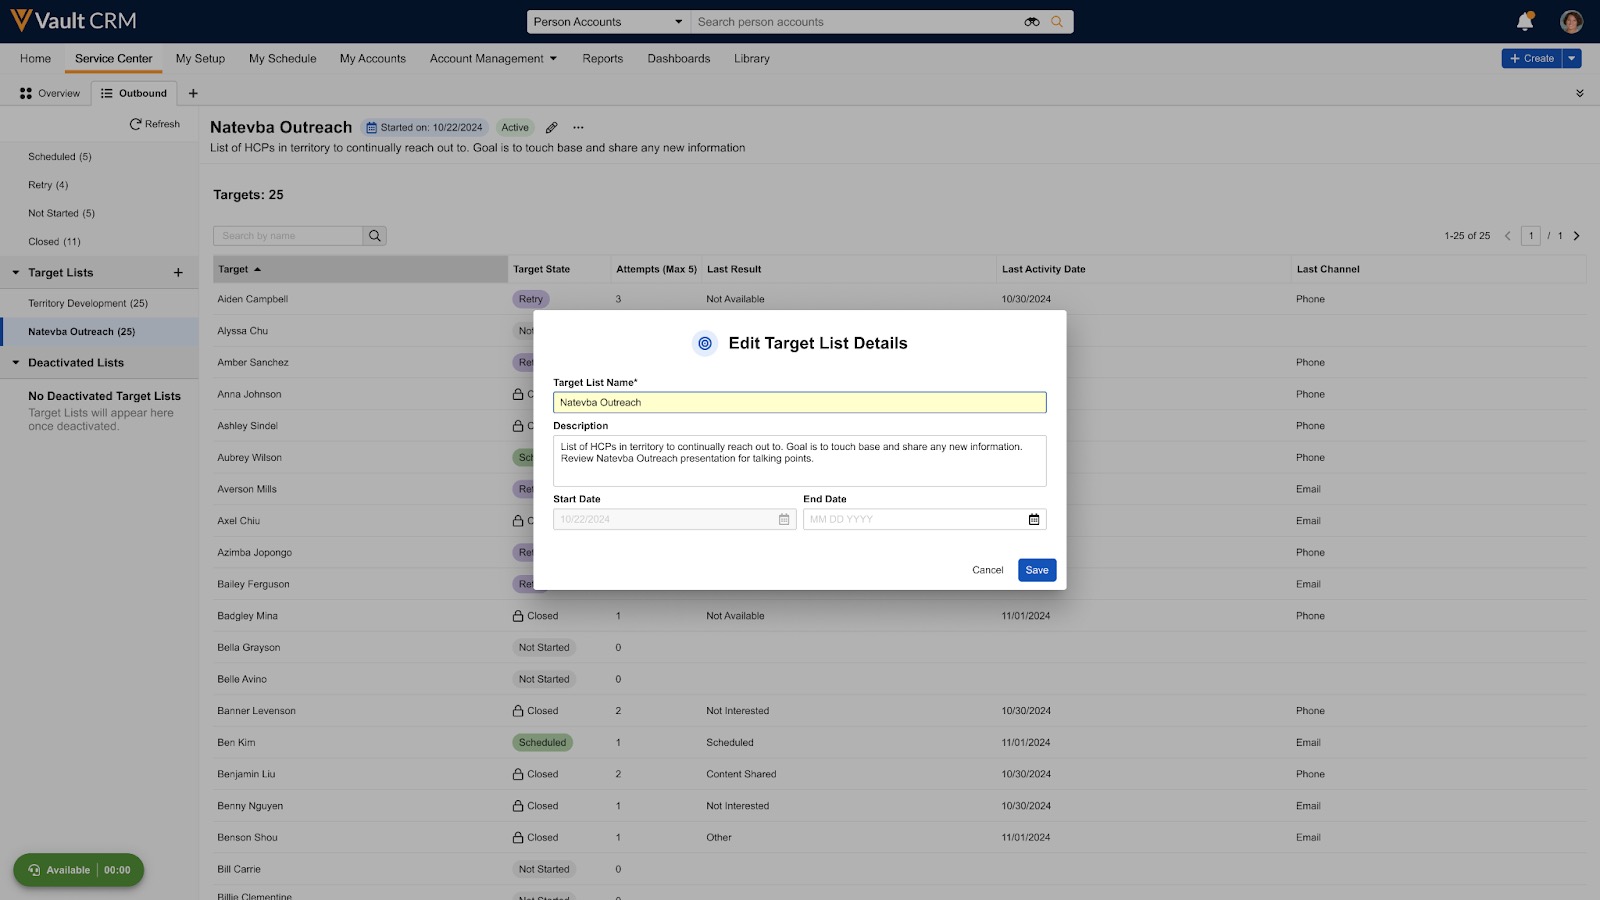
Editing an Outbound Target List as
Target Lists exist in three states:
- Active (includes reactivated Target Lists) - Service Center Representatives can edit the Name, Description, and End Date of a Target List in this state. The Start Date cannot be changed.
- Inactive - Service Center Representatives can edit the Name, Description, Start Date, and End Date of a Target List in this state, and can remove/restore removed targets
- Deactivated - Service Center Representatives cannot edit Target List details of a Target List in this state
To edit the details of a target list:
-
Select the Service Center tab.
-
Select the Outbound tab.
-
Select a Target List. The selected target list displays in the right-hand pane.
-
Select the Edit icon.

-
Update the Target List Name and Description fields as needed.
-
Update the Start Date and/or End Date as needed.
The Start Date is automatically set as the date the list was activated. The Start Date cannot be updated for active target lists.
-
Select Save.
To remove individual targets from an inactive Target List:
- Open an inactive Target List.
- Hover over the target you want to remove from the target list.
- Select Remove Target.
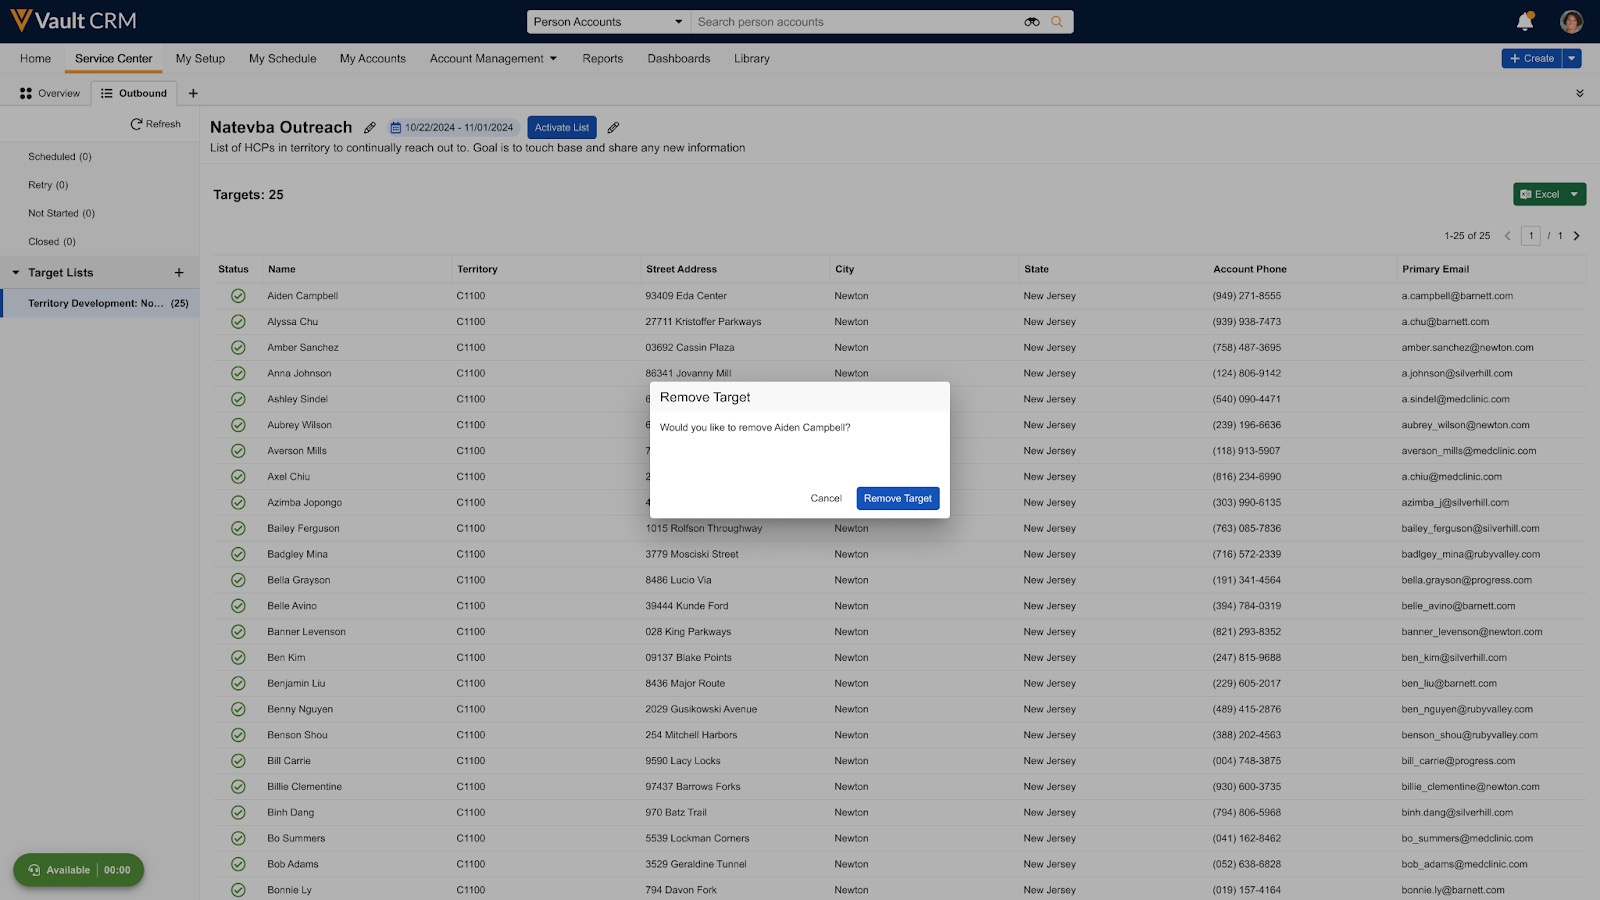
- Confirm Remove Target.

The removed target remains in the list but displays as inactive. Removed targets can be re-added to the target list as long as the list is inactive.
Deactivating a Target List as
Target Lists are automatically deactivated when the Service Center Representative completes all target activities and all Target List records are closed. However, Service Center Representatives can also manually deactivate an unfinished but obsolete Target List and the associated individual targets, which removes the Target List from the active queue. This allows Service Center Representatives to focus on actionable targets.
All outbound target activities in a Target List must be in Not Started, Retry, or Closed status before Service Center Representatives can deactivate the Target List. Target Lists with scheduled activities cannot be deactivated.
To deactivate a Target List:
- Select the Service Center tab.
- Select the Outbound tab.
- Select an active Target List to deactivate. The selected Target List displays in the right-hand pane.
- Select the All Actions (...) menu.
- Select Deactivate List.
- Confirm deactivation. The Target List moves from the active queue to the Deactivated Lists section. All targets in the deactivated Target List with a status of Not Started and Retry are set to Done.
To view a summary of targets in the deactivated Target List, select the list from the Deactivated Lists section. Deactivated Target Lists display for 30 days from the date of deactivation.
Configuring Preferred Phone Numbers as
Business admins can customize which phone number fields are prioritized for outbound target activities.
To configure preferred phone numbers:
- Navigate to Business Admin > Objects.
- Select the Console Application Settings object.
- Select the Default object record.
- Select the Edit icon.
- Specify up to five preferred phone fields using "object.field" notation in the Preferred Phone Search field. For example, account__v.office_phone_cda__v;;address__v.phone_cda__v;;address__v.custom_phone__c. Standard (__v) and custom (__c) fields are supported.
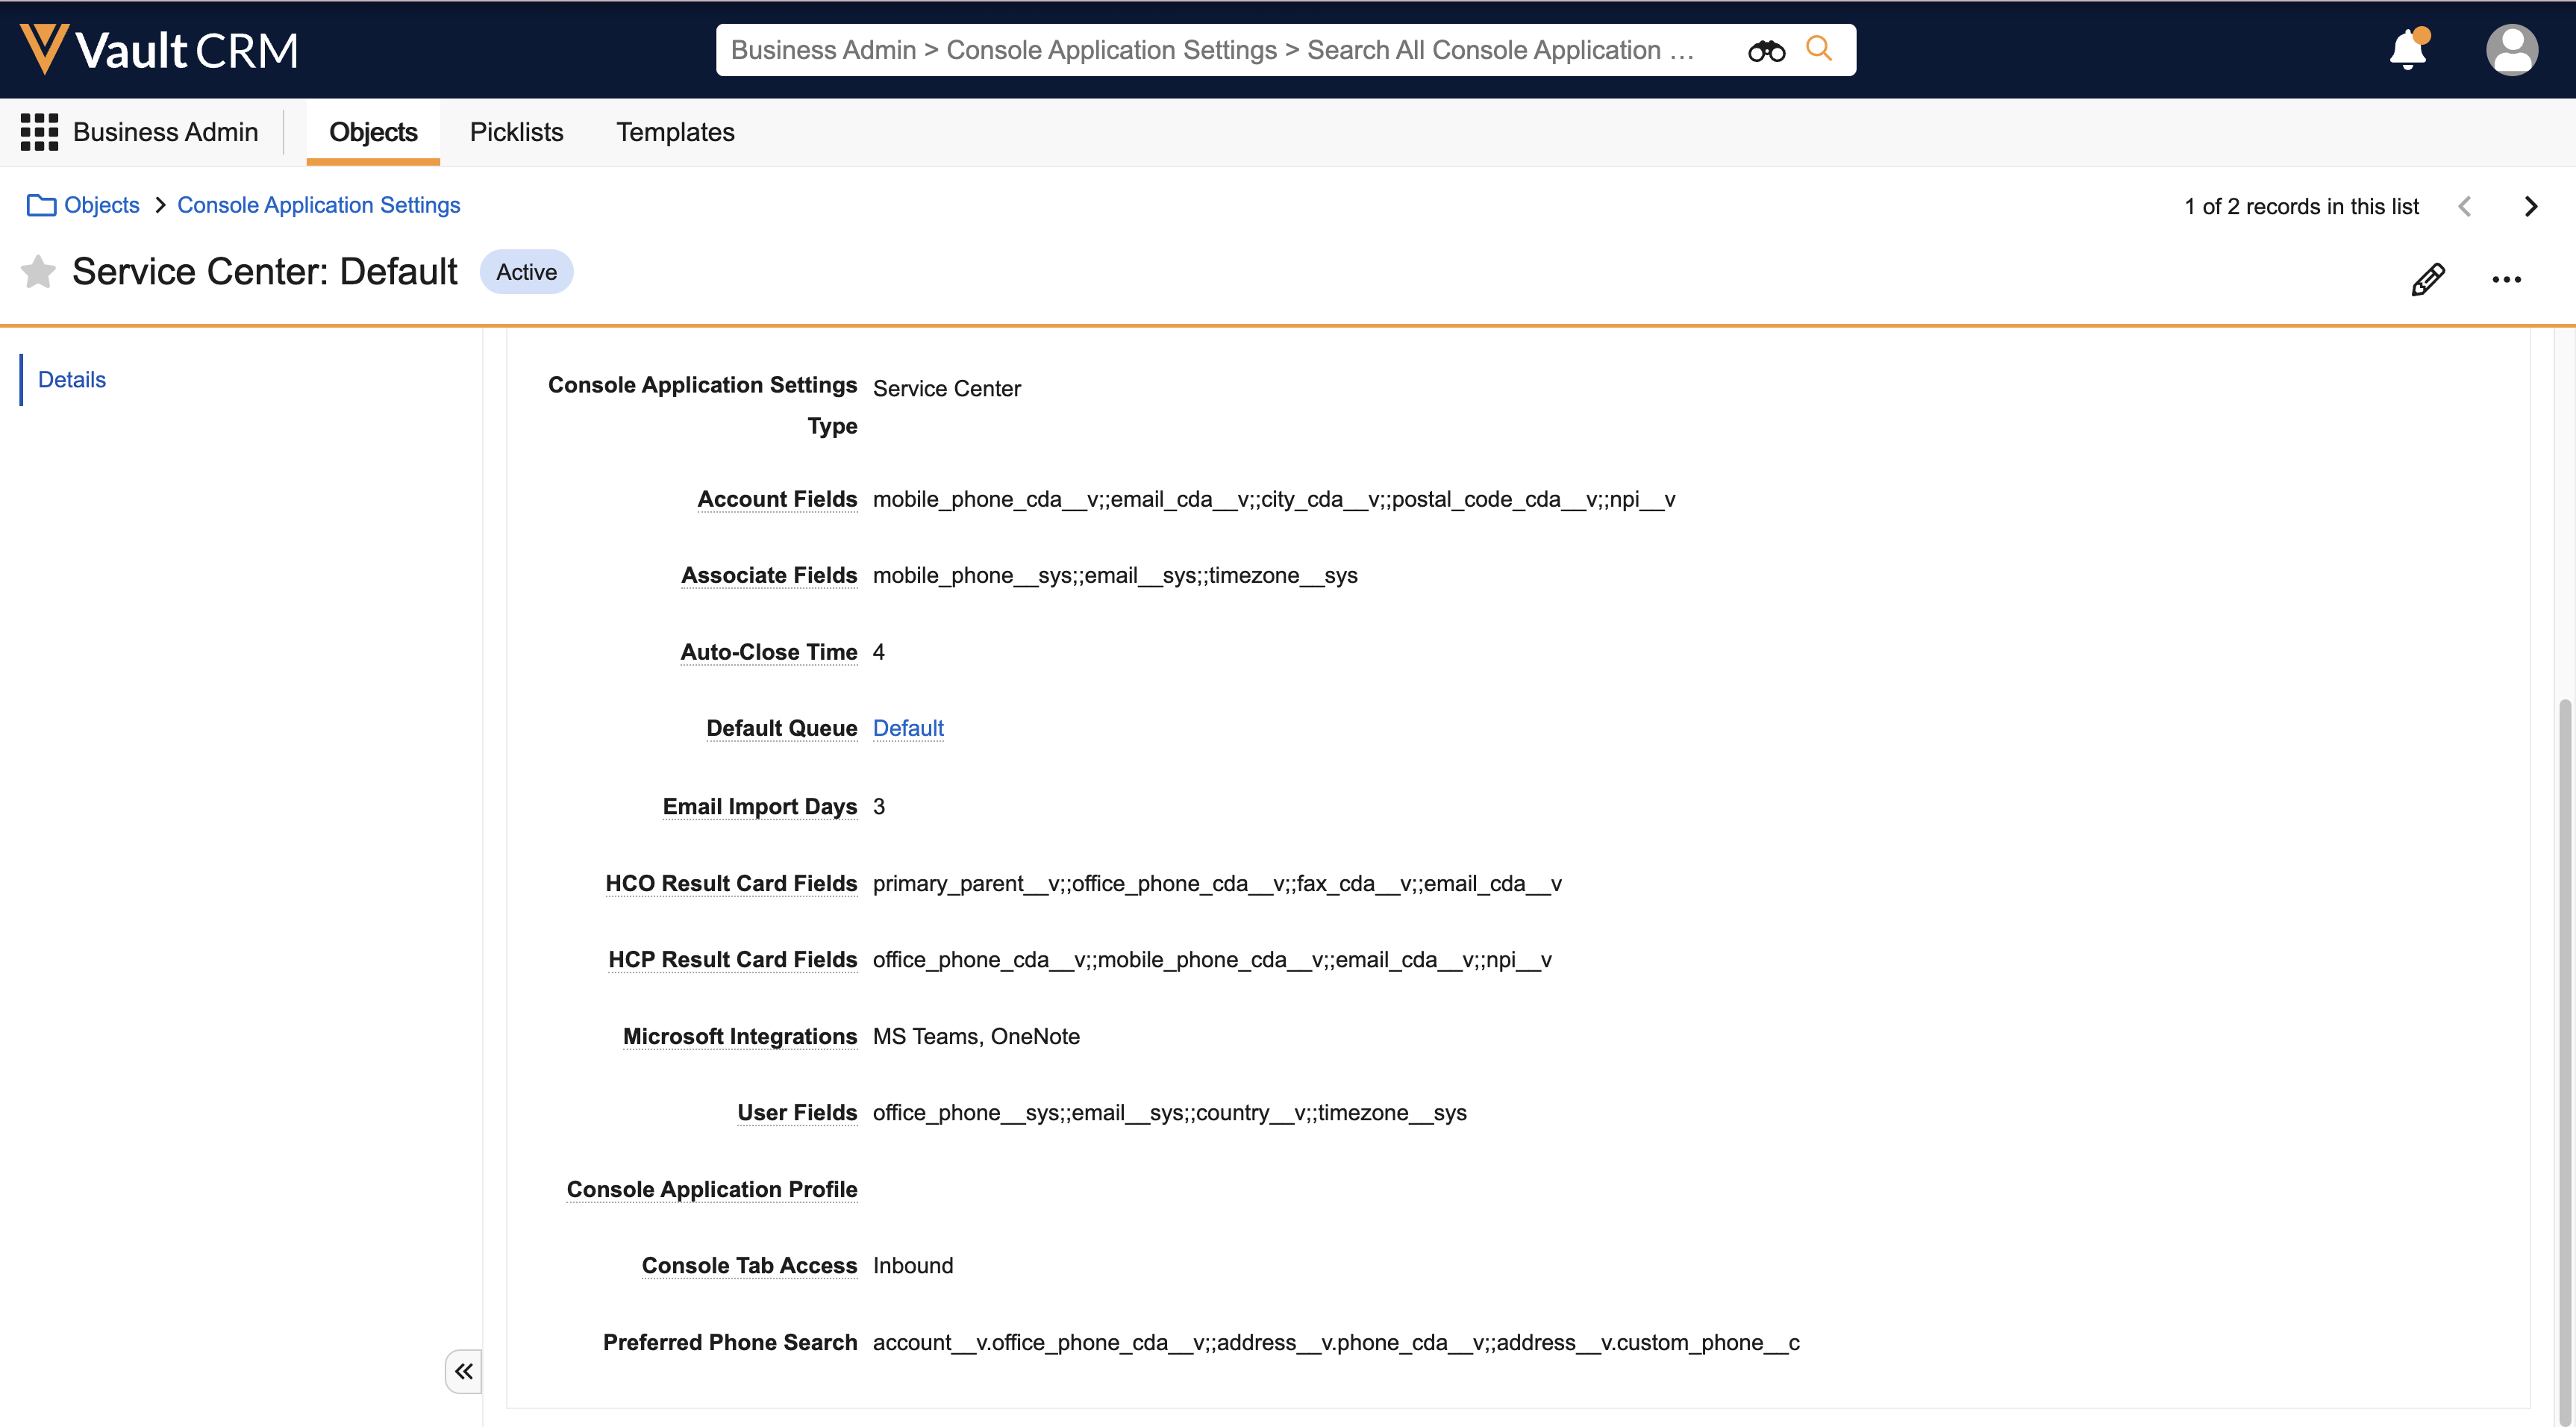
- Select Save.
Using the Outbound Tab for Calls to Targets as
Service Center Representatives initiate calls to targets then document the outcome after a call is complete. Service Center Representatives do not need to create a call report for unsuccessful calls, saving them time and effort which can instead be applied to reaching more targets.
Available phone numbers for the target display, organized by their object type. If a phone object type is not available for the target, that category does not display. Phone numbers display in the following order:
- Account
- Account Primary Address
- Primary Parent Account
- Primary Parent Account Primary Address
When Service Center Representatives initiate a call, the Target Activity Guide for the selected target displays with current call information, account information, and a full, chronological view of all their activities related to a target, starting with their first attempt to contact an HCP.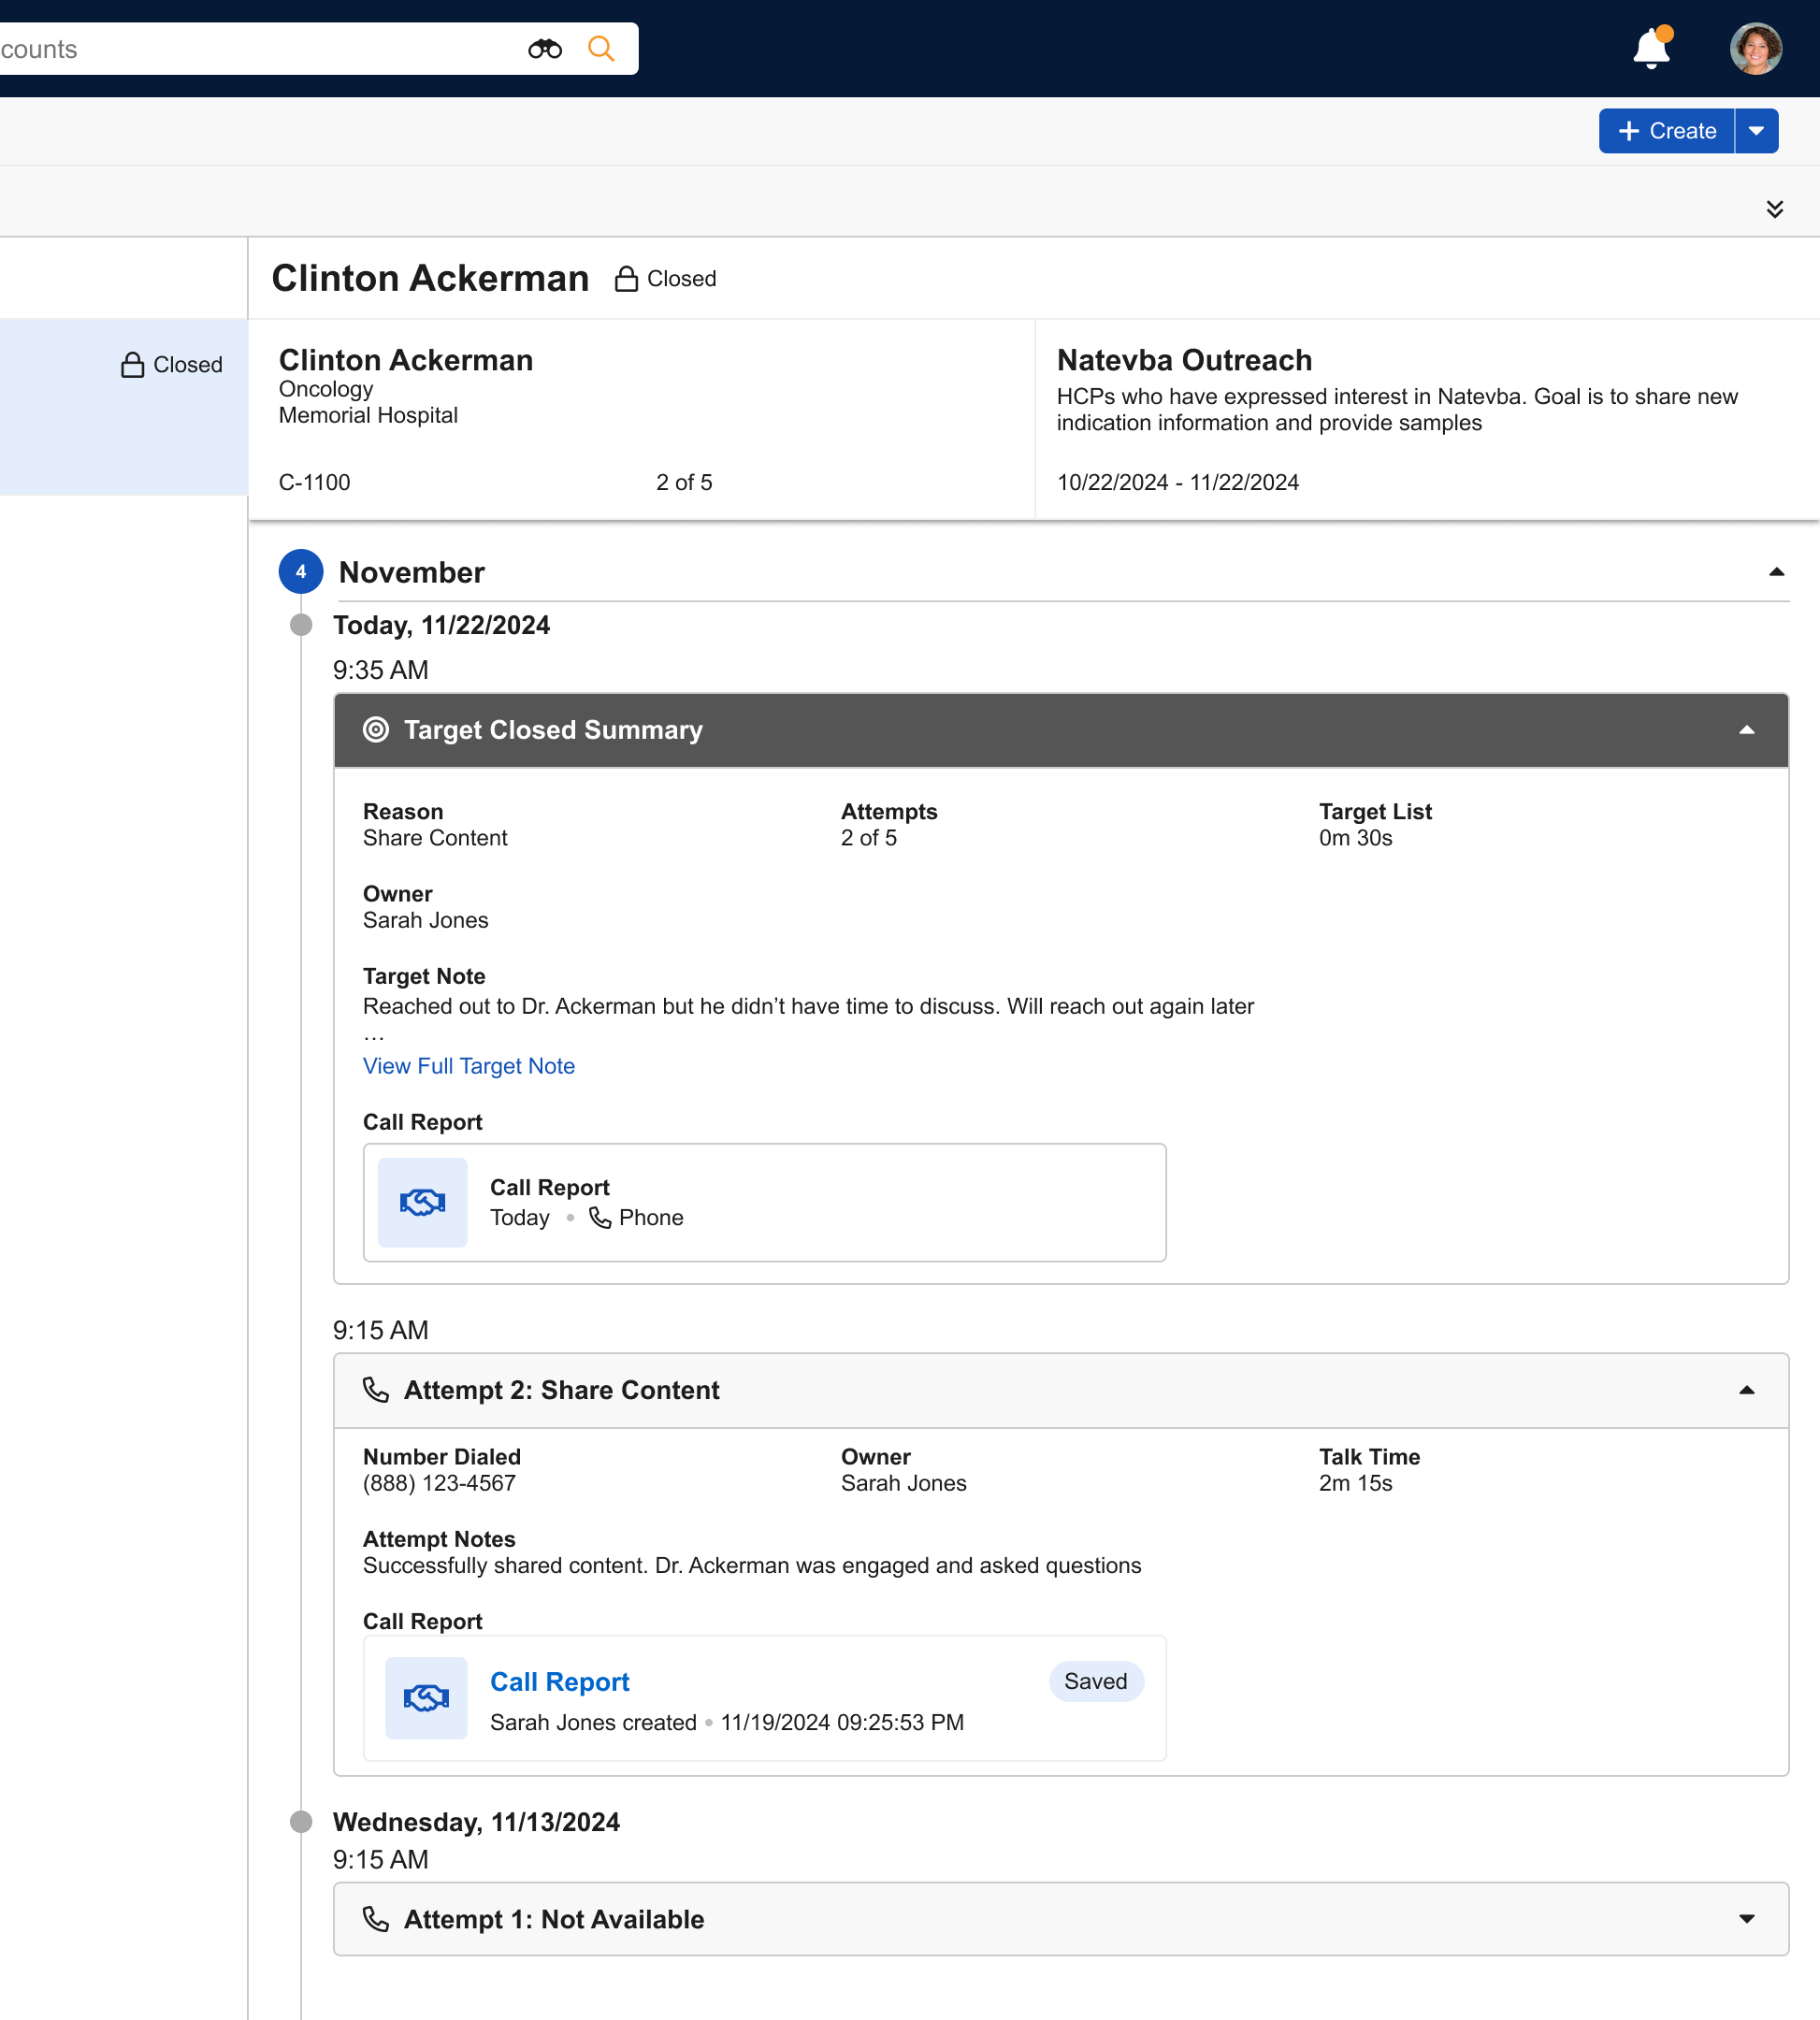
To initiate a call:
- Log into Omni Connect.
- Select the Outbound tab.
- Navigate to the Not Started.
- Select a phone number from the drop-down list to initiate a call.
The Timeline Activity view is updated with the current attempt in progress. Updates continue to post as the interaction proceeds. -
Select whether the target was reached and a corresponding value from the picklist (required):
- No (select reason):
- Not Available
- Voicemail
- Wrong Number
- Yes (select reason):
- Schedule
- Shared Content
- Do Not Call
- Not Interested
- Other
-
Enter target attempt comments. This step is optional.
-
Select Submit. The Submit action is not available while a call is active.

Once a call record is submitted, the target state automatically adjusts based on the outcome recorded:
- Not Started - This is the default state
- Retry - User did not reach the target and selected No. Maximum five retry attempts to reach the target before the target state moves to Closed
- Scheduled - User reached the target and scheduled a followup call. Similar to a pending state.
- Closed - Target was reached, or the maximum number of retries was met. Activity for the target is complete.

