Using My Cases for Service Center Inbound
To better prioritize their work and drive cases toward resolution more effectively, Service Center Reps can access My Cases from the Inbound tab to view a centralized hub of their assigned cases. This provides a launch point for a Service Center Rep’s work throughout the day. When Service Center Reps select My Cases, a time-sorted list of case cards displays, providing a visual representation of the cases assigned. This allows Service Center Reps to better prioritize their work and drive cases toward resolution more effectively.
Who can use this feature?
- Service Center Reps - Browser
- Using My Cases for Service Center Inbound
- Users require a Service Center license
Configuring My Cases for Service Center Inbound for
To configure this feature:
- Ensure Configuring Service Center is complete.
- Ensure Using the Service Center Inbound Tab is configured.
Using My Cases for Service Center Inbound as
Service Center Reps can view and manage their assigned cases from My Cases. When Service Center Reps select My Cases from the Inbound tab, a list of their active cases displays with the first case already highlighted.
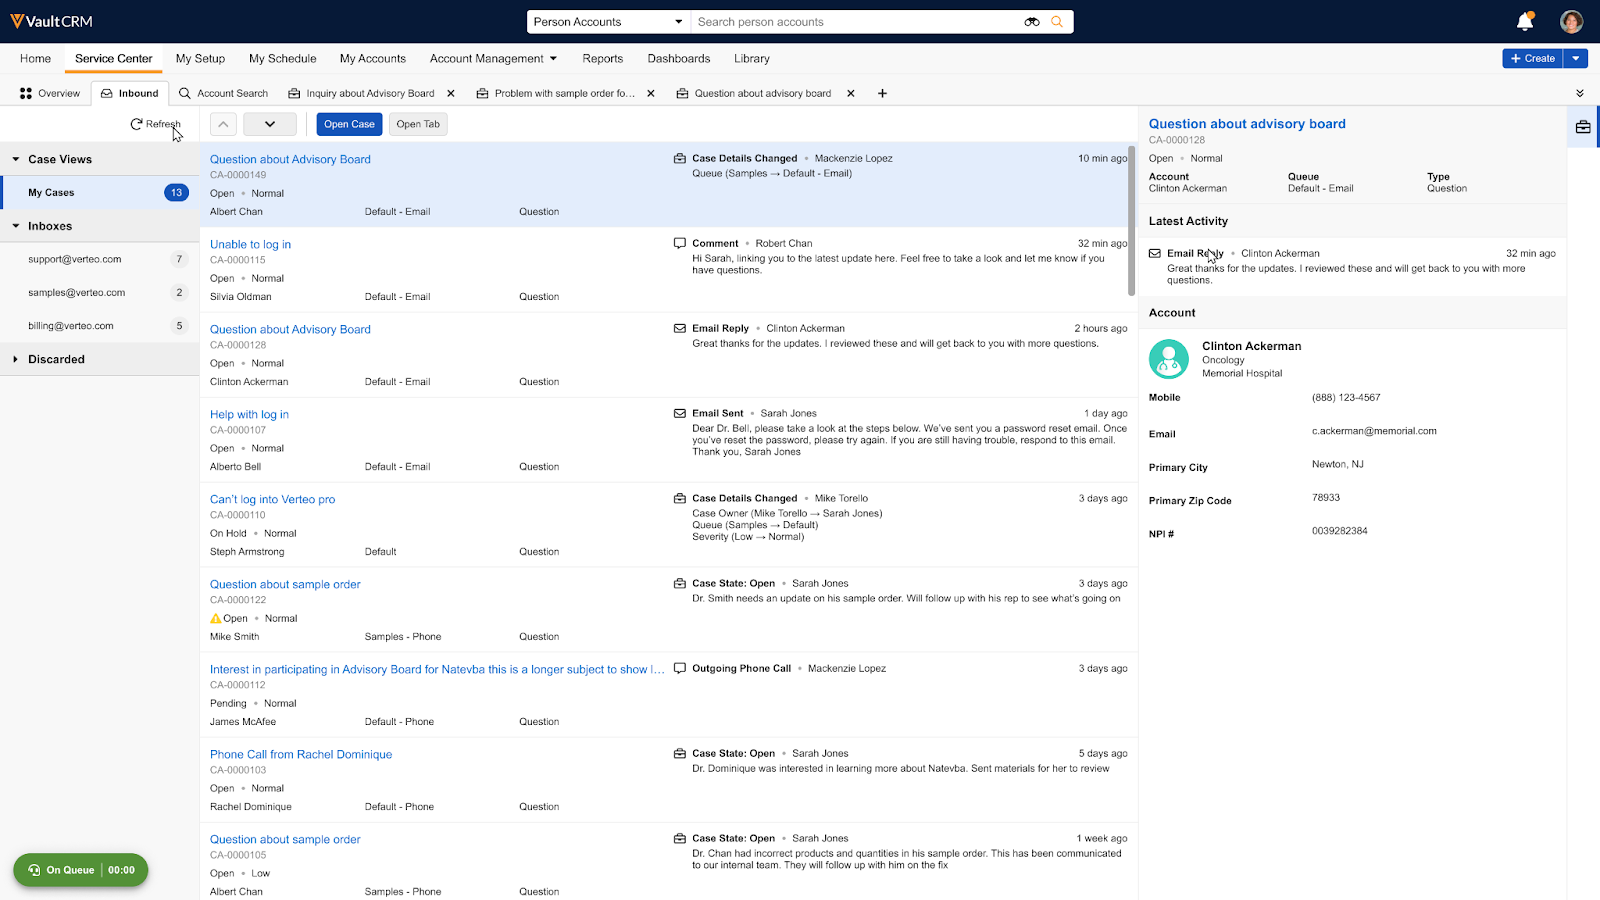
A list of all active cases assigned to the Service Center Rep displays. The total number of active cases displays next to the My Cases label. Each item in the case list is an active case card. A preview of the first case’s details automatically displays to the right.
Viewing Case Cards
Each case card displays the following information:
- Case Subject - Title of the case
- Last Update - Icon and description of the most recent activity. For example, a status change or a new conversation. This also includes who performed the action and a relative timestamp. For example, "A few seconds ago" or "5 minutes ago.”
- Case Number
- Severity - Special icon that displays for cases with a High severity
- State - Current case lifecycle state. A special icon appears next to the state if the case is escalated.
- Account - Associated account's formatted name
- Case Queue - Name of the assigned queue
- Case Type - Type of case
Case cards display active cases with the most recently updated cases first, with two exceptions:
- Cases with an Escalated state always display at the top of the list. If there are multiple escalated cases, they are sorted by their creation date.
- Initially, 15 cases are loaded. As the Service Center Rep scrolls, more cases load automatically.
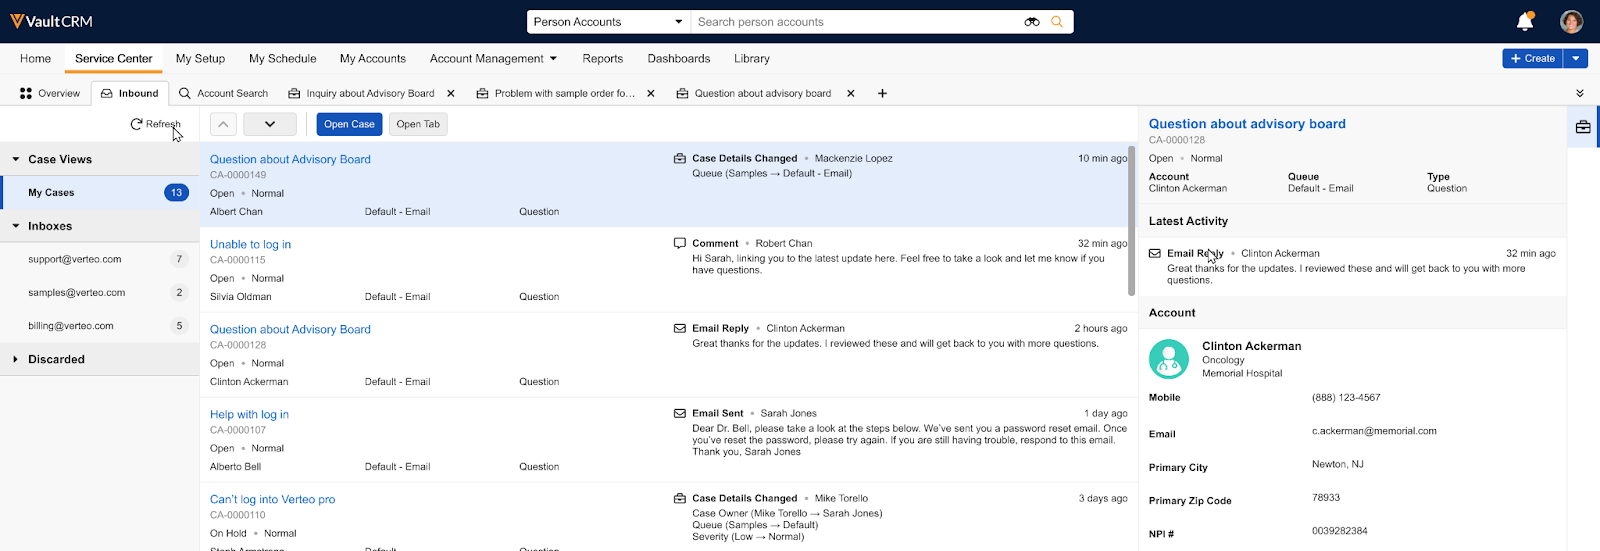
Viewing Case Previews
Service Center Reps can select any case card in the My Cases list to display its preview. The preview pane to the right displays that case’s three most recent timeline events (for example, status changes, comments, or conversations), account details, and the latest email, if available. The following case__v fields always display:
- Category (case_category__v)
- Product (product__v)
- Owner (case_owner__v)
- Queue (case_queue__v)
Viewing Cases
To open and display a case in focus:
- Highlight a case in the active case list.
- Select the Open Case button. The case opens and automatically switches focus to the new tab.
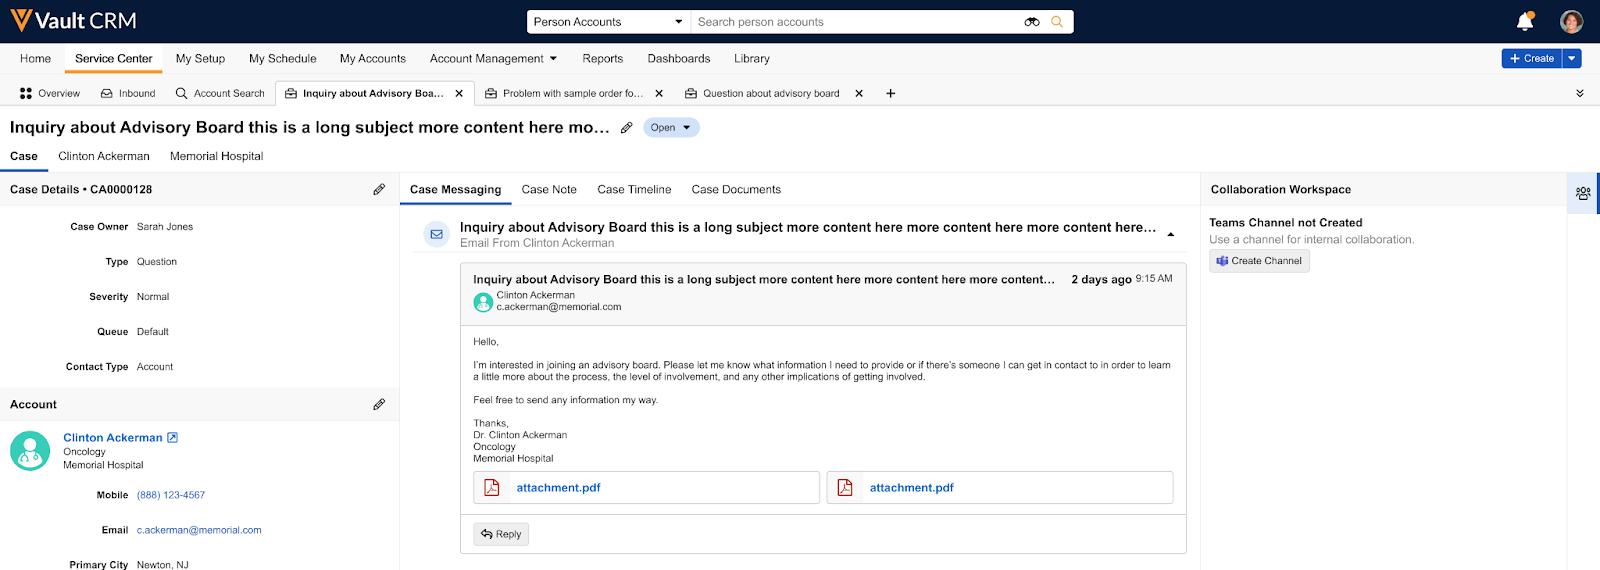
Viewing Case Messages
When a Service Center Rep selects a case with an email conversation associated with it, the Case Messaging tab displays by default as the left-most tab in the case's center pane. The system automatically scrolls to the most recent message in the thread. If the case does not have any associated emails, the Case Notes tab displays by default. The header of the email thread in the Case Messages tab displays a count of the total number of messages in the conversation.
The Case Messaging tab in the open case's center pane provides a comprehensive, threaded view of the entire inbound email conversation, including attachments, if any. This allows Service Center Reps to quickly understand the context and history of an inquiry without navigating away from the case. Each message displays key information, including the subject, sender, and date.
Service Center Reps can reply to any email message within a case thread, regardless of the sender. The reply is sent to the sender of the specific email message selected. After sending the reply, a success notification displays briefly.
If the Account on the case is changed or the email address on the associated account is updated or deleted, a banner displays on the Case Messages tab warning users of mismatched account information.
Viewing Case Notes
Information related to a case is available in the Case Notes tab. When a Service Center Rep creates a case, the initial comment entered becomes the first case note. Service Center Reps can use Case Notes to document a customer's intent, concerns, and questions, and to capture information that adds context. Case Notes can also be used for multiple parties to communicate during case triage and resolution by adding comments.
To edit a case note:
- Open the desired case. The Case Note modal automatically displays for cases not in a Solved or Closed state.
- Enter or edit text in the rich text field.
- Select Save. Each save action creates a new version of the case note and a corresponding entry on the case timeline. Users can view all previous versions from the Version History section of the Case Notes tab.
Users can collaborate on a case by adding comments to the note. Comments display in a single thread with the most recent comment at the bottom.
To add a comment:
- Navigate to the Case Notes tab.
- Select Comment in the Replies section.
- Enter comment text.
- Select Save.
Viewing Case Details
In the left pane, the following key fields display by default:
- is_escalated__v, if the case is escalated
- case_owner__v
- product__v
- case_queue__v
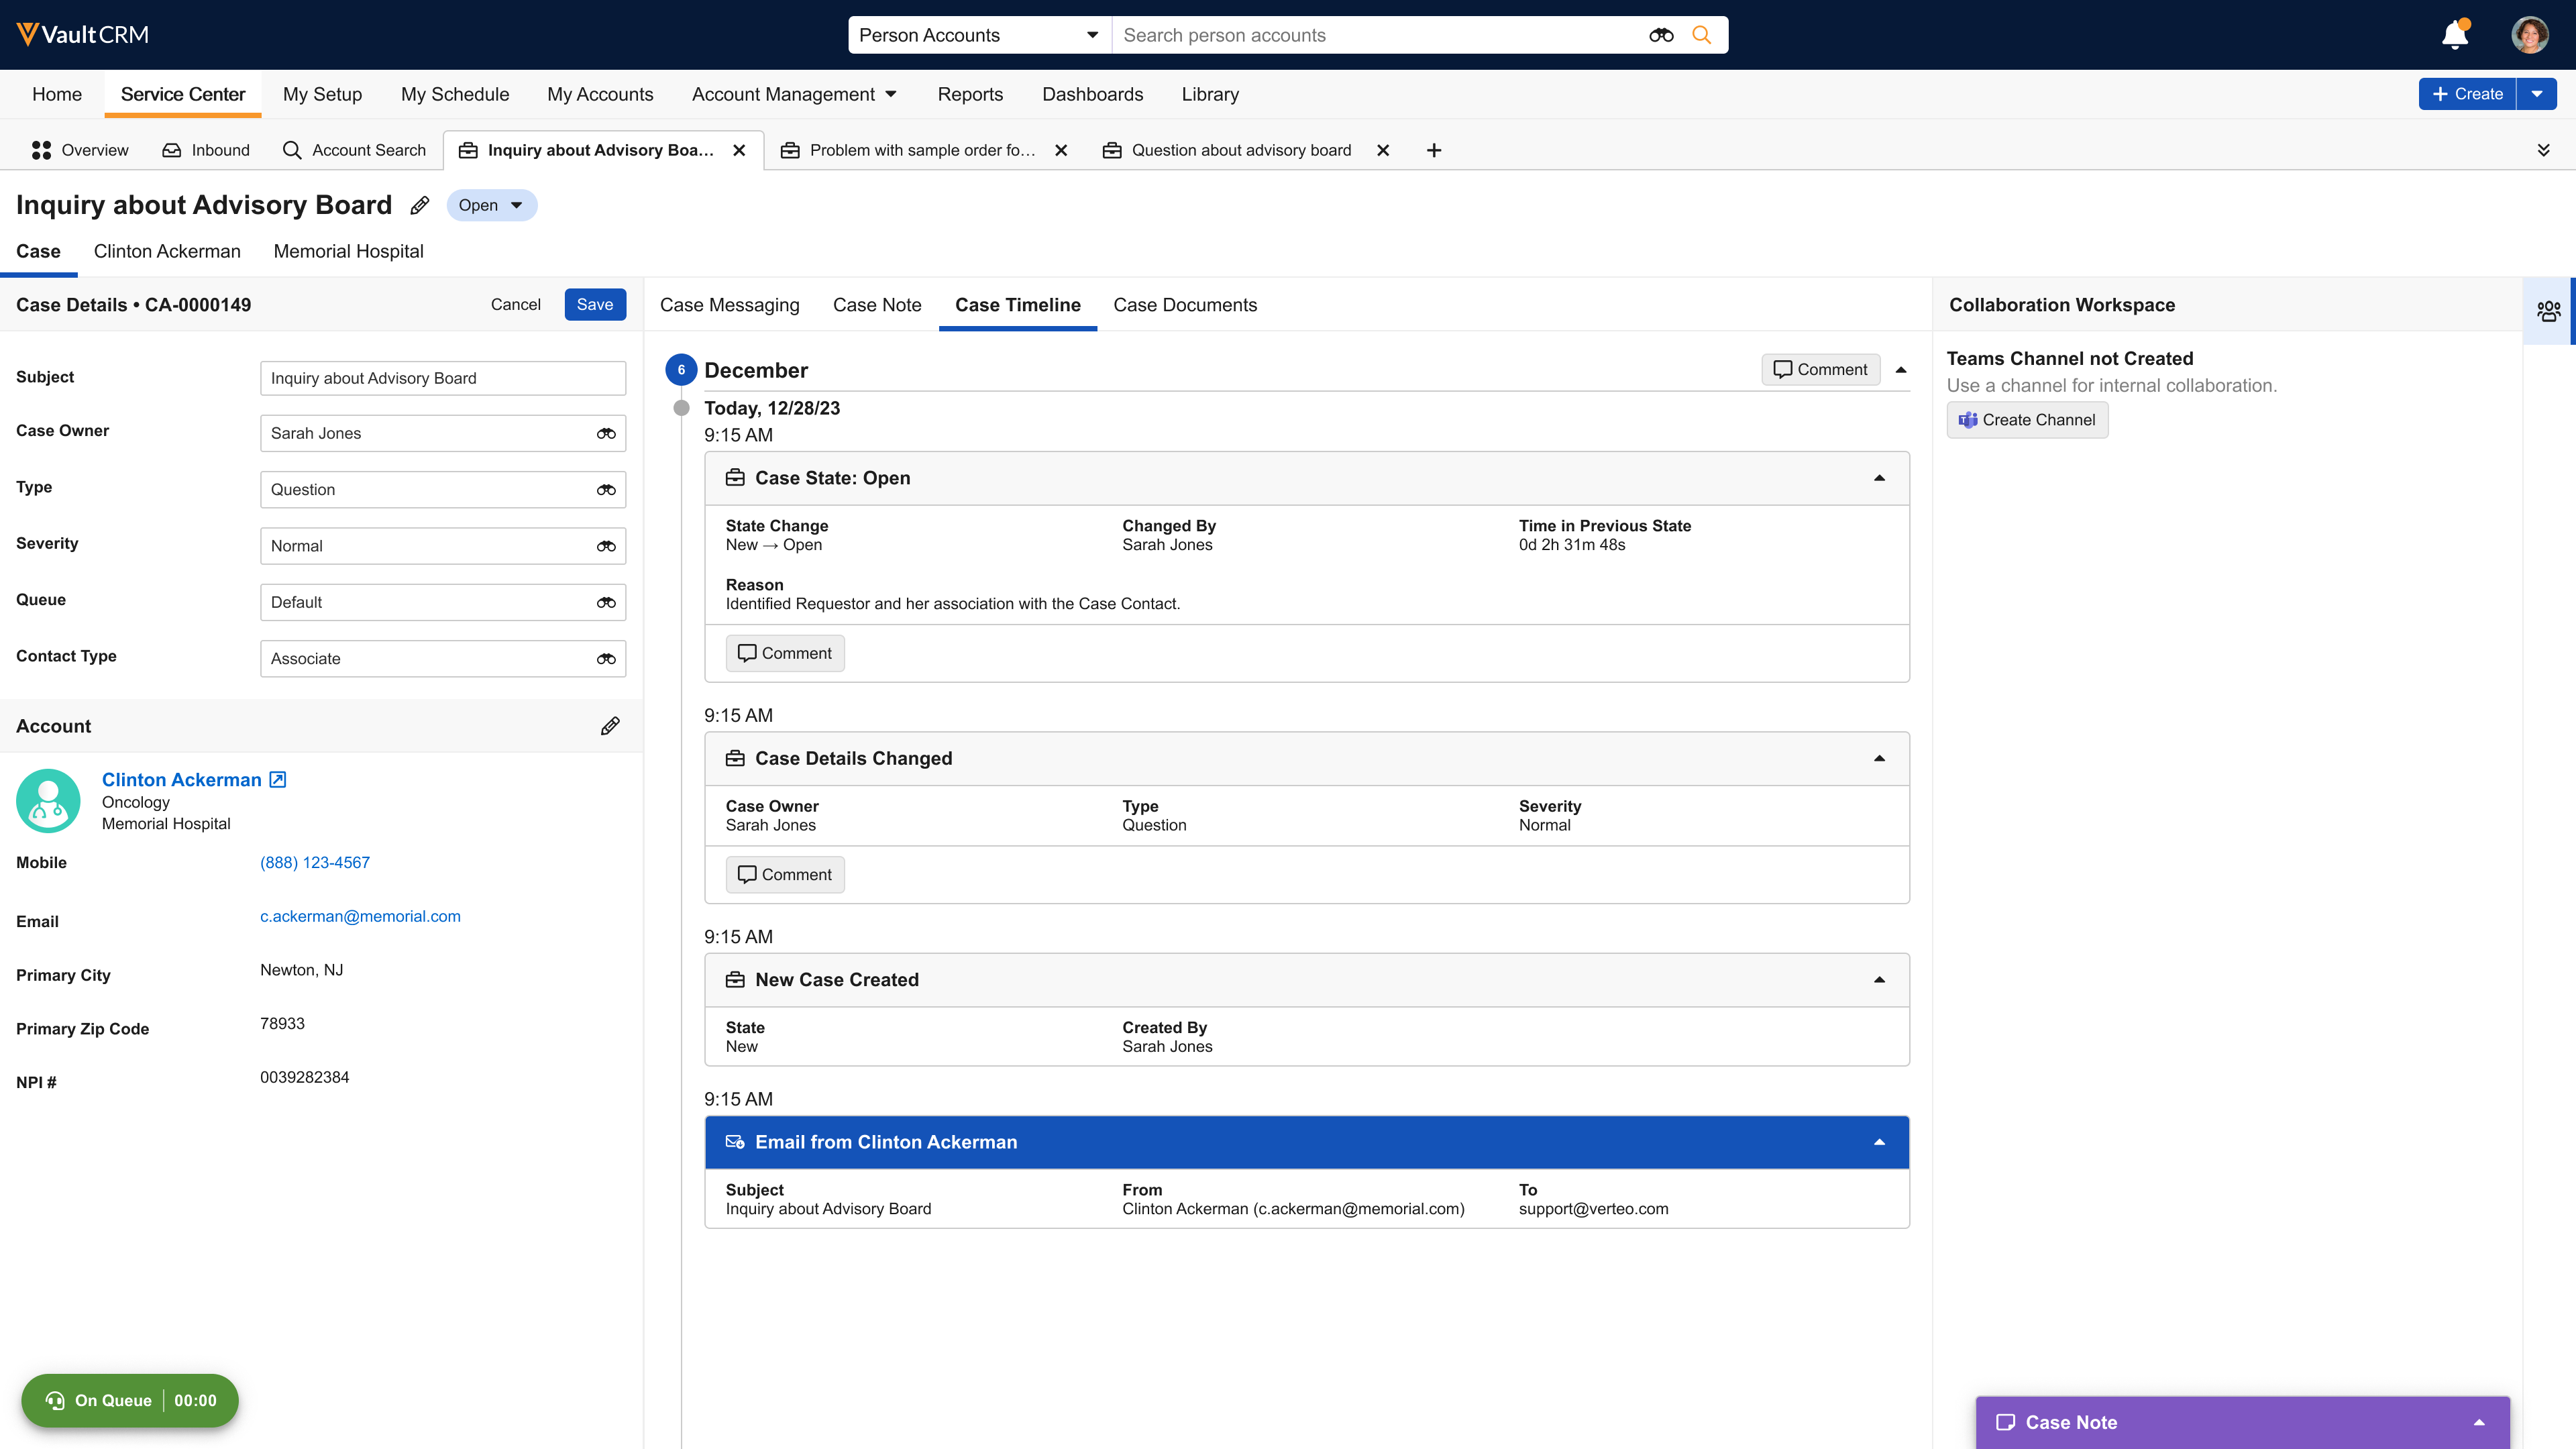
Viewing the Case Timeline
The Case Timeline tab displays the most relevant, or actionable, updates used to assist Service Center Reps in determining their next action. Case timeline events are view-only.
The following events display:
- Case Detail Change (for example, case owner, case queue, or case severity change)
- Case State Change
- Conversation
- Comment