Segments and Flows in Campaign Manager
Marketing users can divide the targets of their campaign or journey into segments based on supported account__v fields, each of which can be assigned a distinct and unique flow. This enables more flexible, targeted, and relevant campaigns and journeys.
Multi-action journeys use the Builder sub-tab, which has planned future support for branching by field values instead of segmentation.
Who can use this feature?
- Marketing Users – Browser
- Defining Segmentation Fields
- Defining Segments
- Defining Flows
- Users require a Campaign Manager license
Configuring Segments for
To configure this feature, ensure Configuring Campaign Manager is complete.
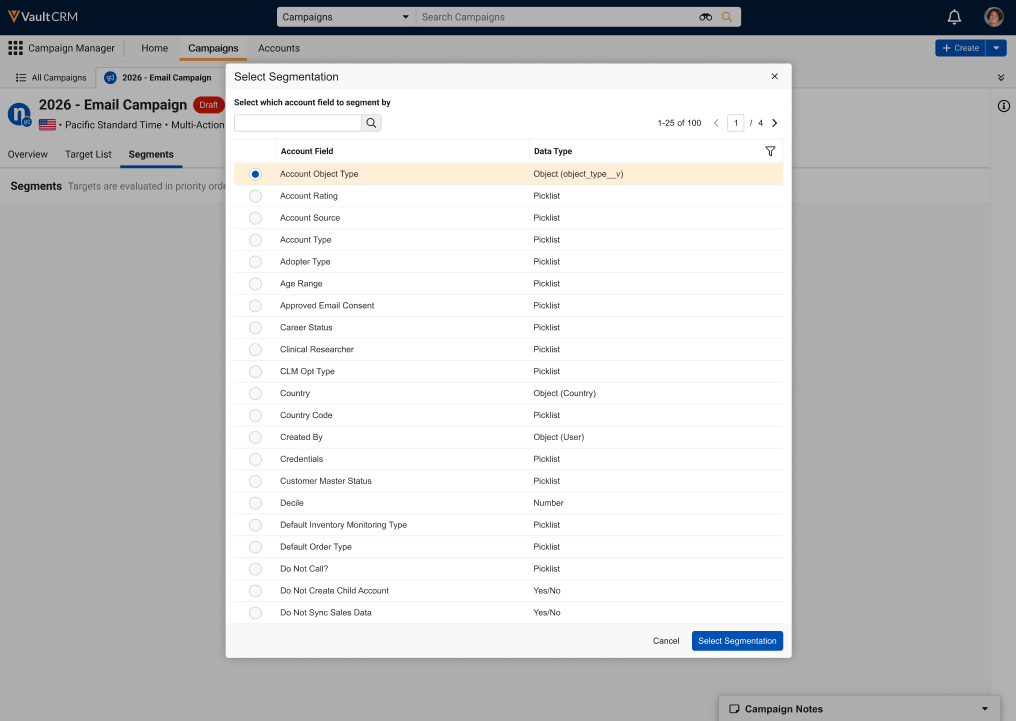
Defining Segmentation Fields
Marketing users can define which account__v field is used to define segments of targets for their Multi-Action Campaign or Journey.
To define segmentation fields:
- Navigate to the Overview tab of the appropriate campaign or journey.
-
Select the Select Segmentation tile in the Define Segments section.
-
Search for and select the appropriate account__v field to use as the basis for segmentation. The following field types are supported:
- Picklist
- Yes/No
- Object
- Number
Marketing users must have at least Read permission to fields for them to display in the list.
-
Select the Select Segmentation button.
The Segments sub-tab displays, enabling marketing users to define segment criteria.
Defining Segments as
Once a segmentation field has been selected, marketing users can determine the criteria by which their targets are divided into segments:
- Navigate to the Segments sub-tab.
-
Select Edit Segments.
After initially defining the segmentation field, the Segments sub-tab automatically displays in Edit mode.
-
Edit the default segment with the appropriate information:
- Segment Name
-
Target – The criteria for the segment. The following operators are supported, based on the field type of the segmentation field:
Operators
Supported Field Types
is/is not
- Picklist
- Yes/No
- Object
is any of/is none of
- Picklist
- Object
is blank/is not blank
- Picklist
- Object
- Number
is equal to/is not equal to
Number
is less than/is greater than
Number
- Assigned to – Select the appropriate flow to assign the segment to. See Defining Flows for more information.
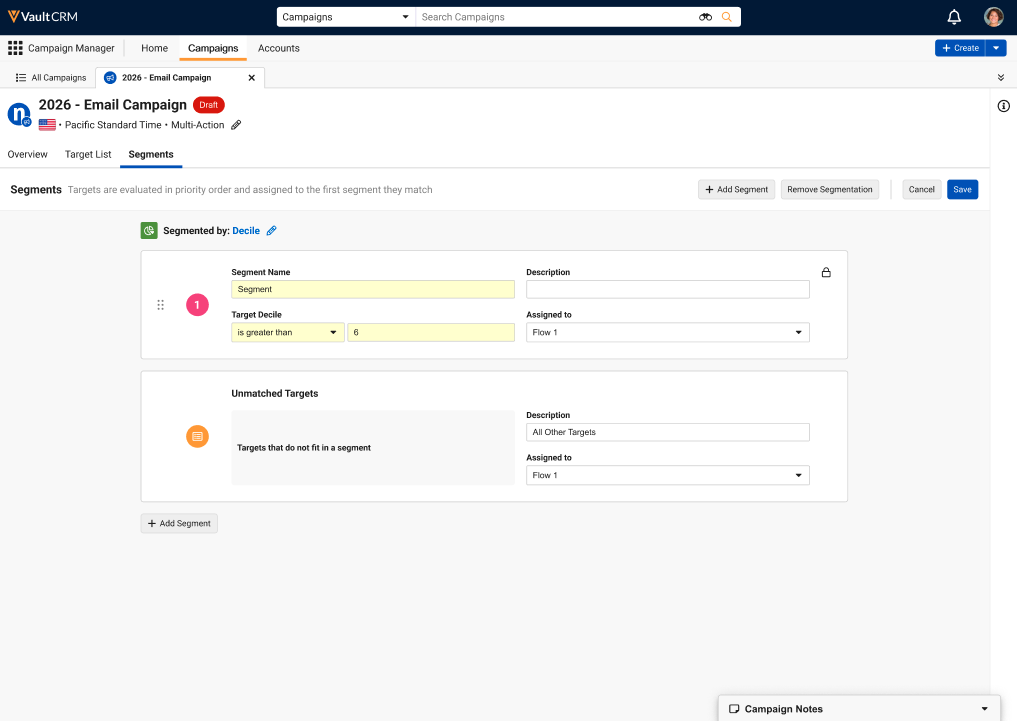
- Select the + Add Segment button to repeat this process for as many segments as required.
- Drag and drop the segment cards into the appropriate order.
- Ensure the final, Unmatched Targets segment, representing targets that do not fit in any of the defined segments, is assigned the appropriate flow.
- Select Save.
Targets are automatically assigned to the first segment they match to, even if they also match other segments.
Defining Flows as
Different segments can have different primary and follow-up actions, separated into flows.
To create a flow:
- Navigate to the Add Details section.
-
Select the appropriate channel for the default flow’s primary action. Available channels are:
Specific channel availability is still dependent on using a campaign versus a journey.
-
Add all appropriate follow-up actions, as needed.
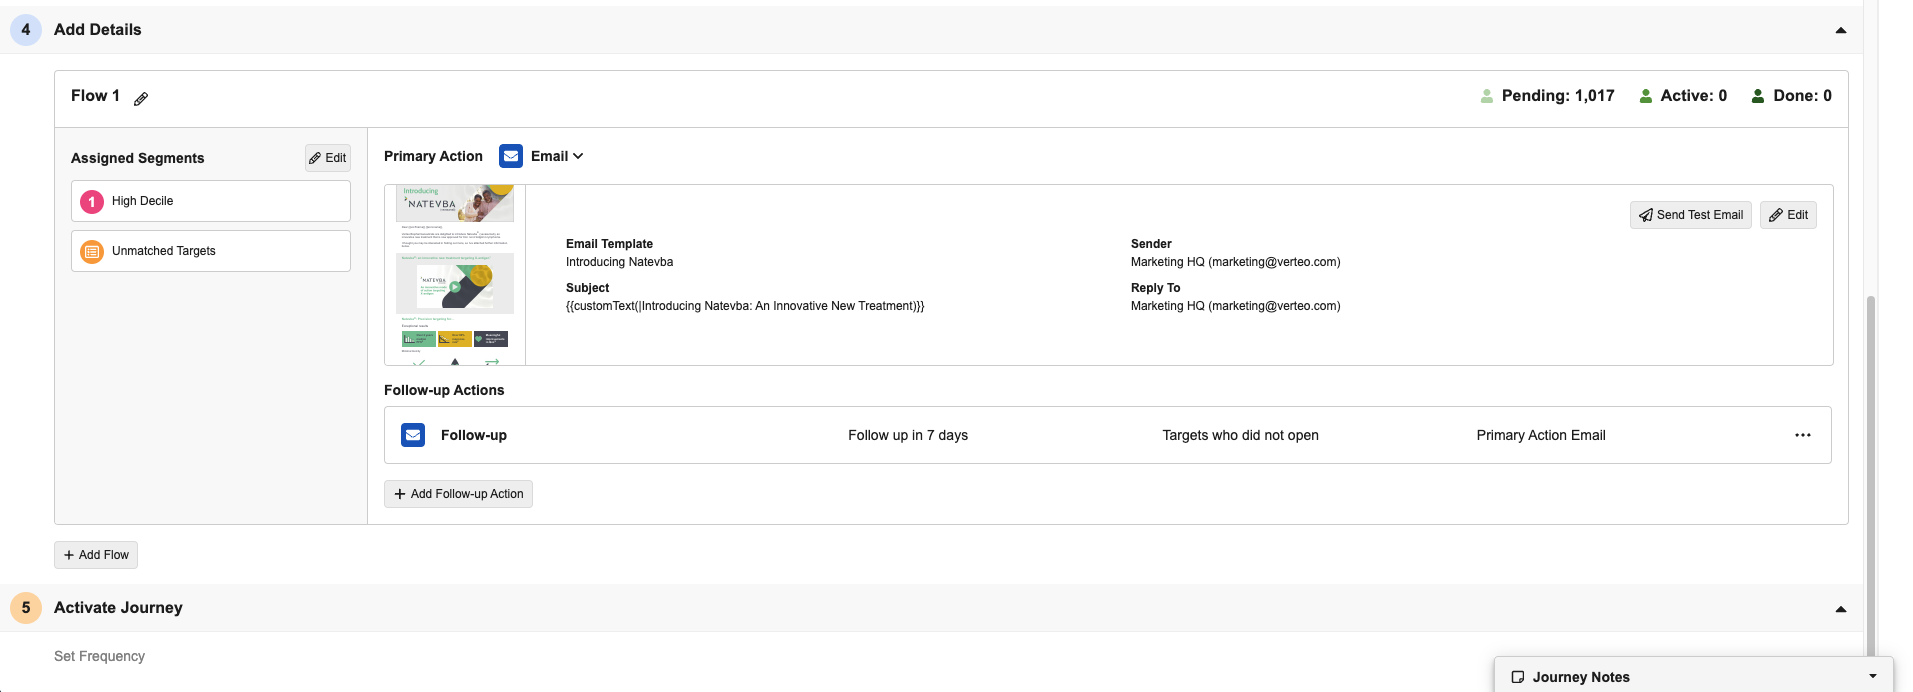
- Select the pencil icon to rename the flow, if necessary.
-
Select the + Add Flow button to create an additional flow.
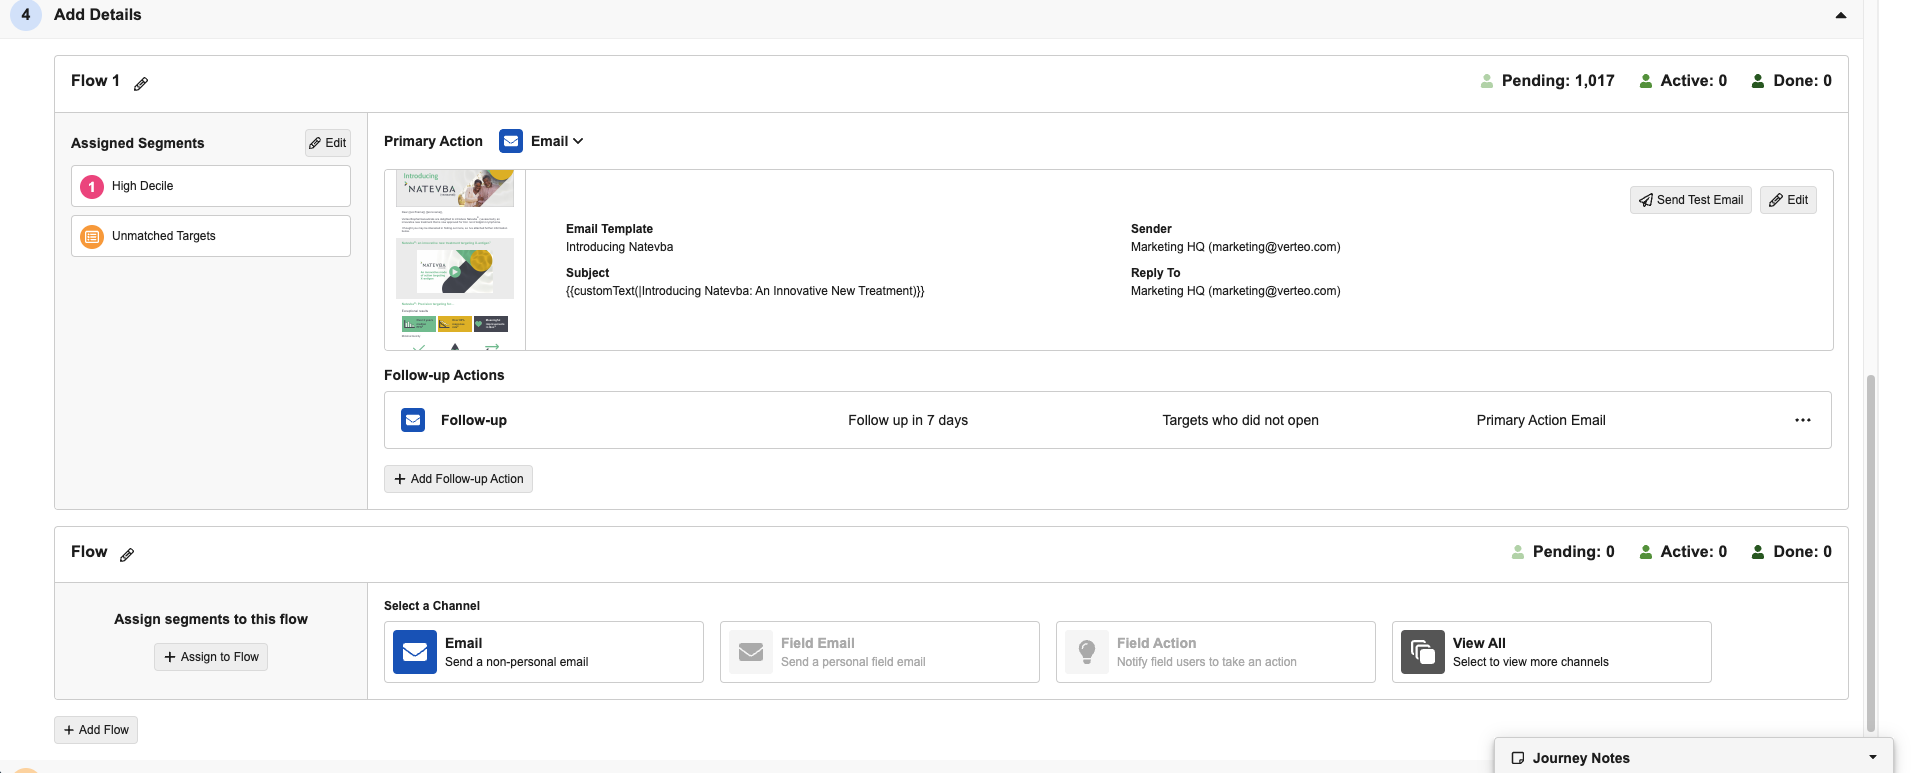
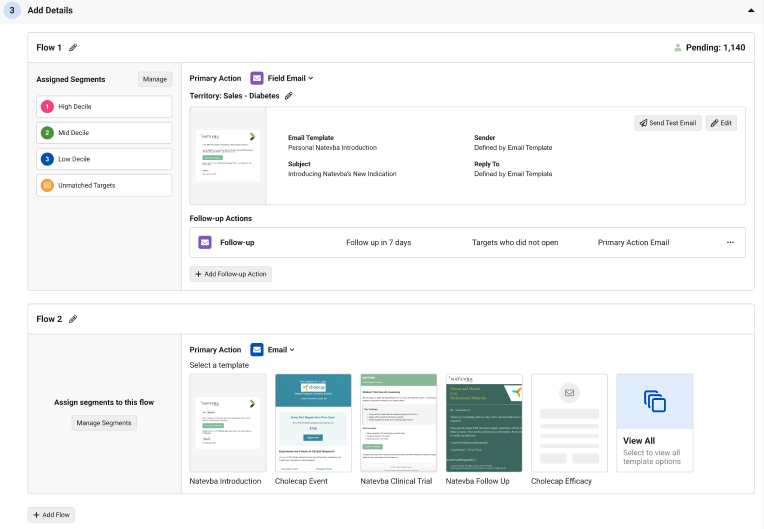
- Define the new flow’s name, primary action, and follow-up actions in the same manner as the default flow.
-
Select Assign to Flow to display the Assign to Flow modal.
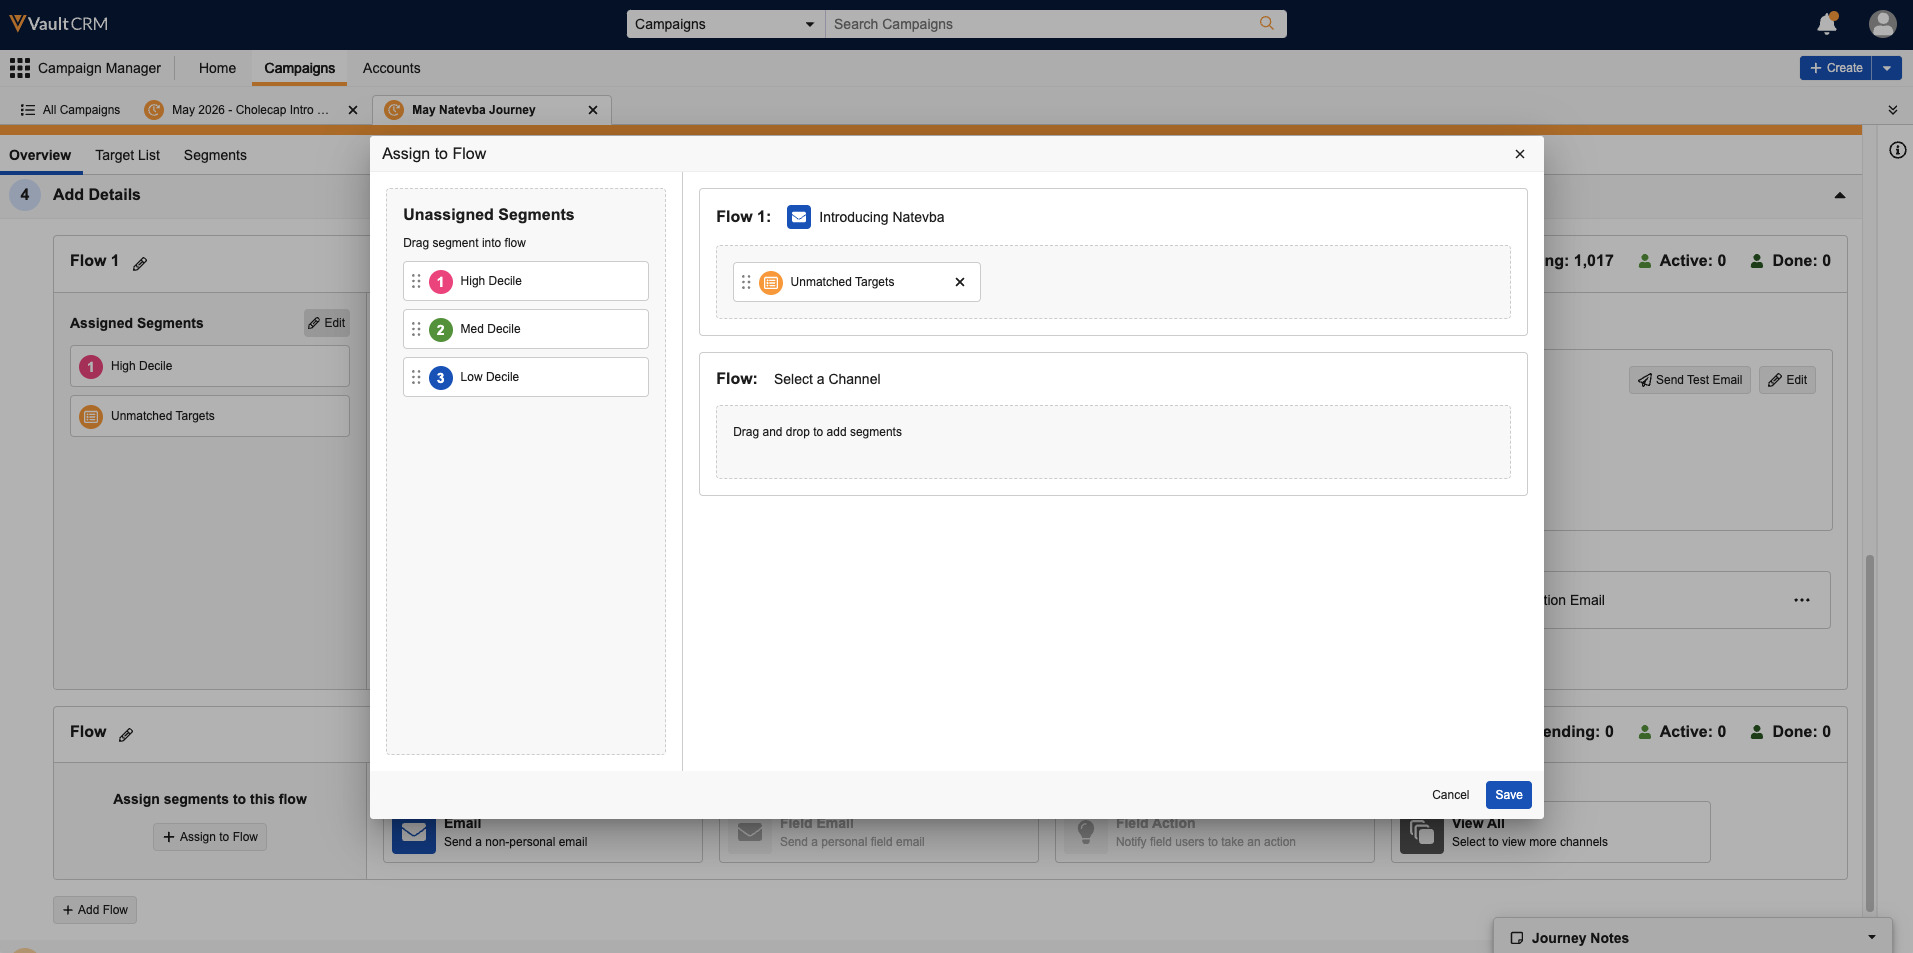
-
Drag and drop each segment to the appropriate flow.
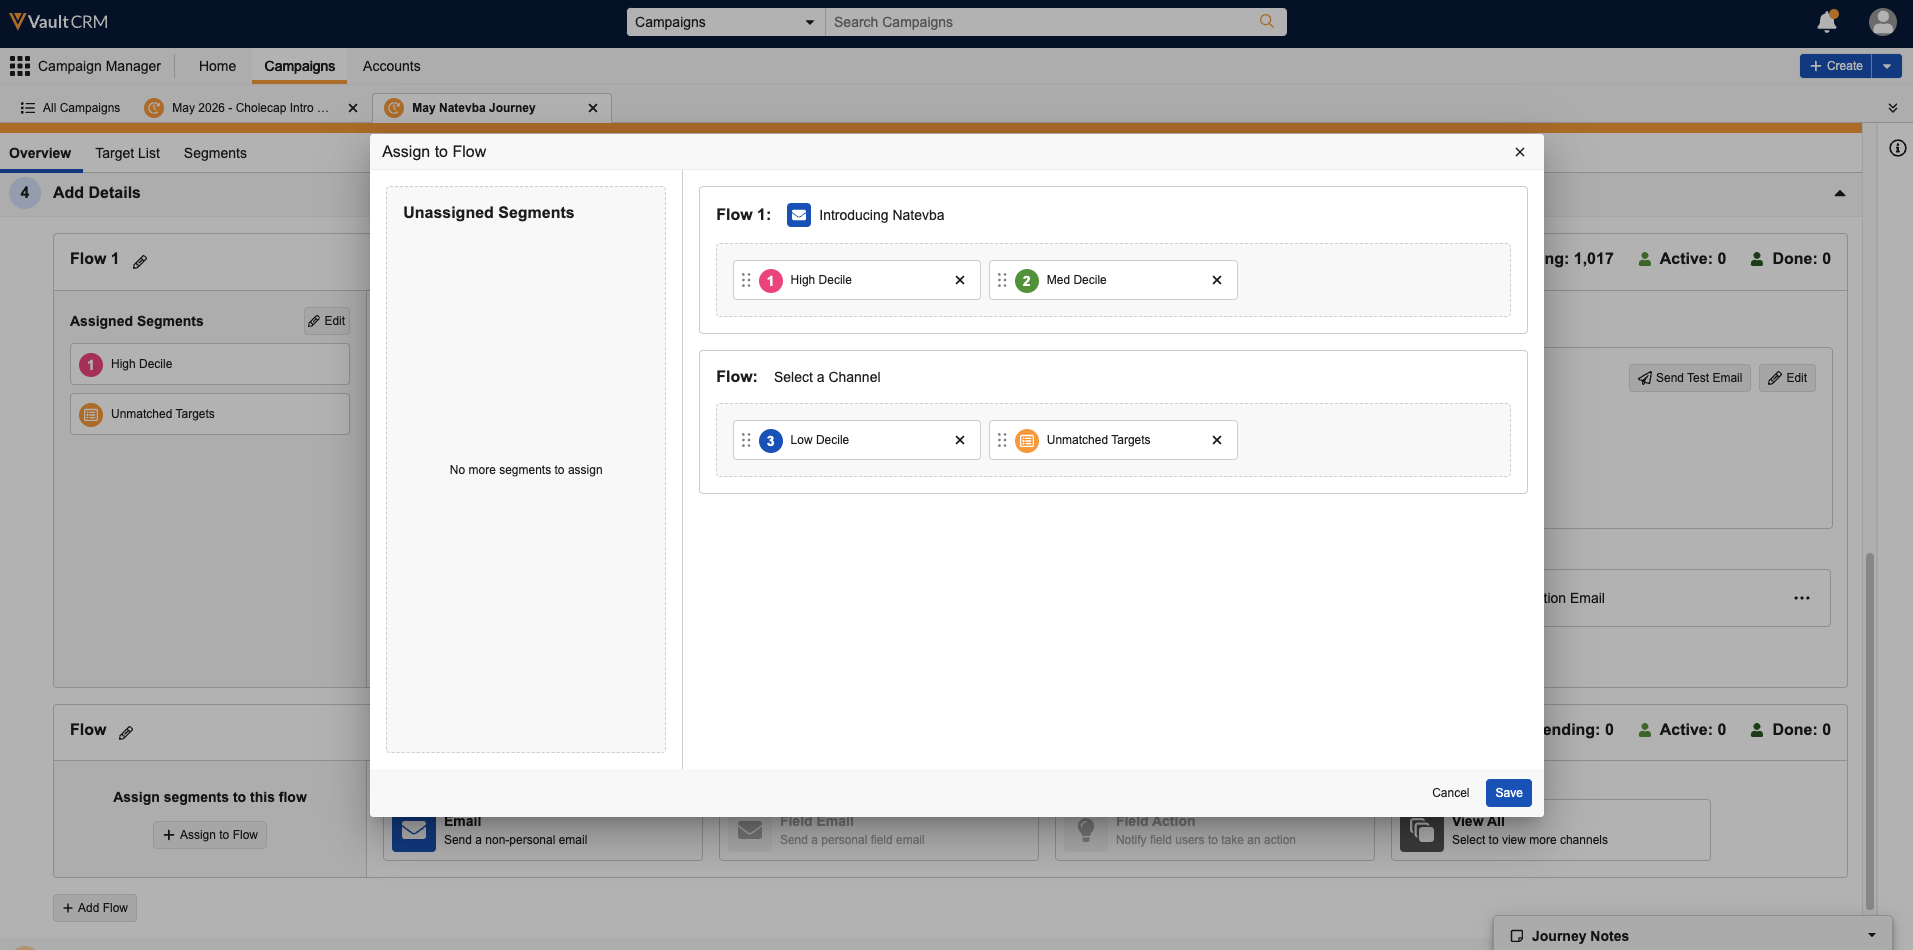
- Select Manage Segments to display the Segments sub-tab.
- Select Edit Segments.
- Edit each segment’s Flow field to assign the appropriate flow.
- Select Save.

