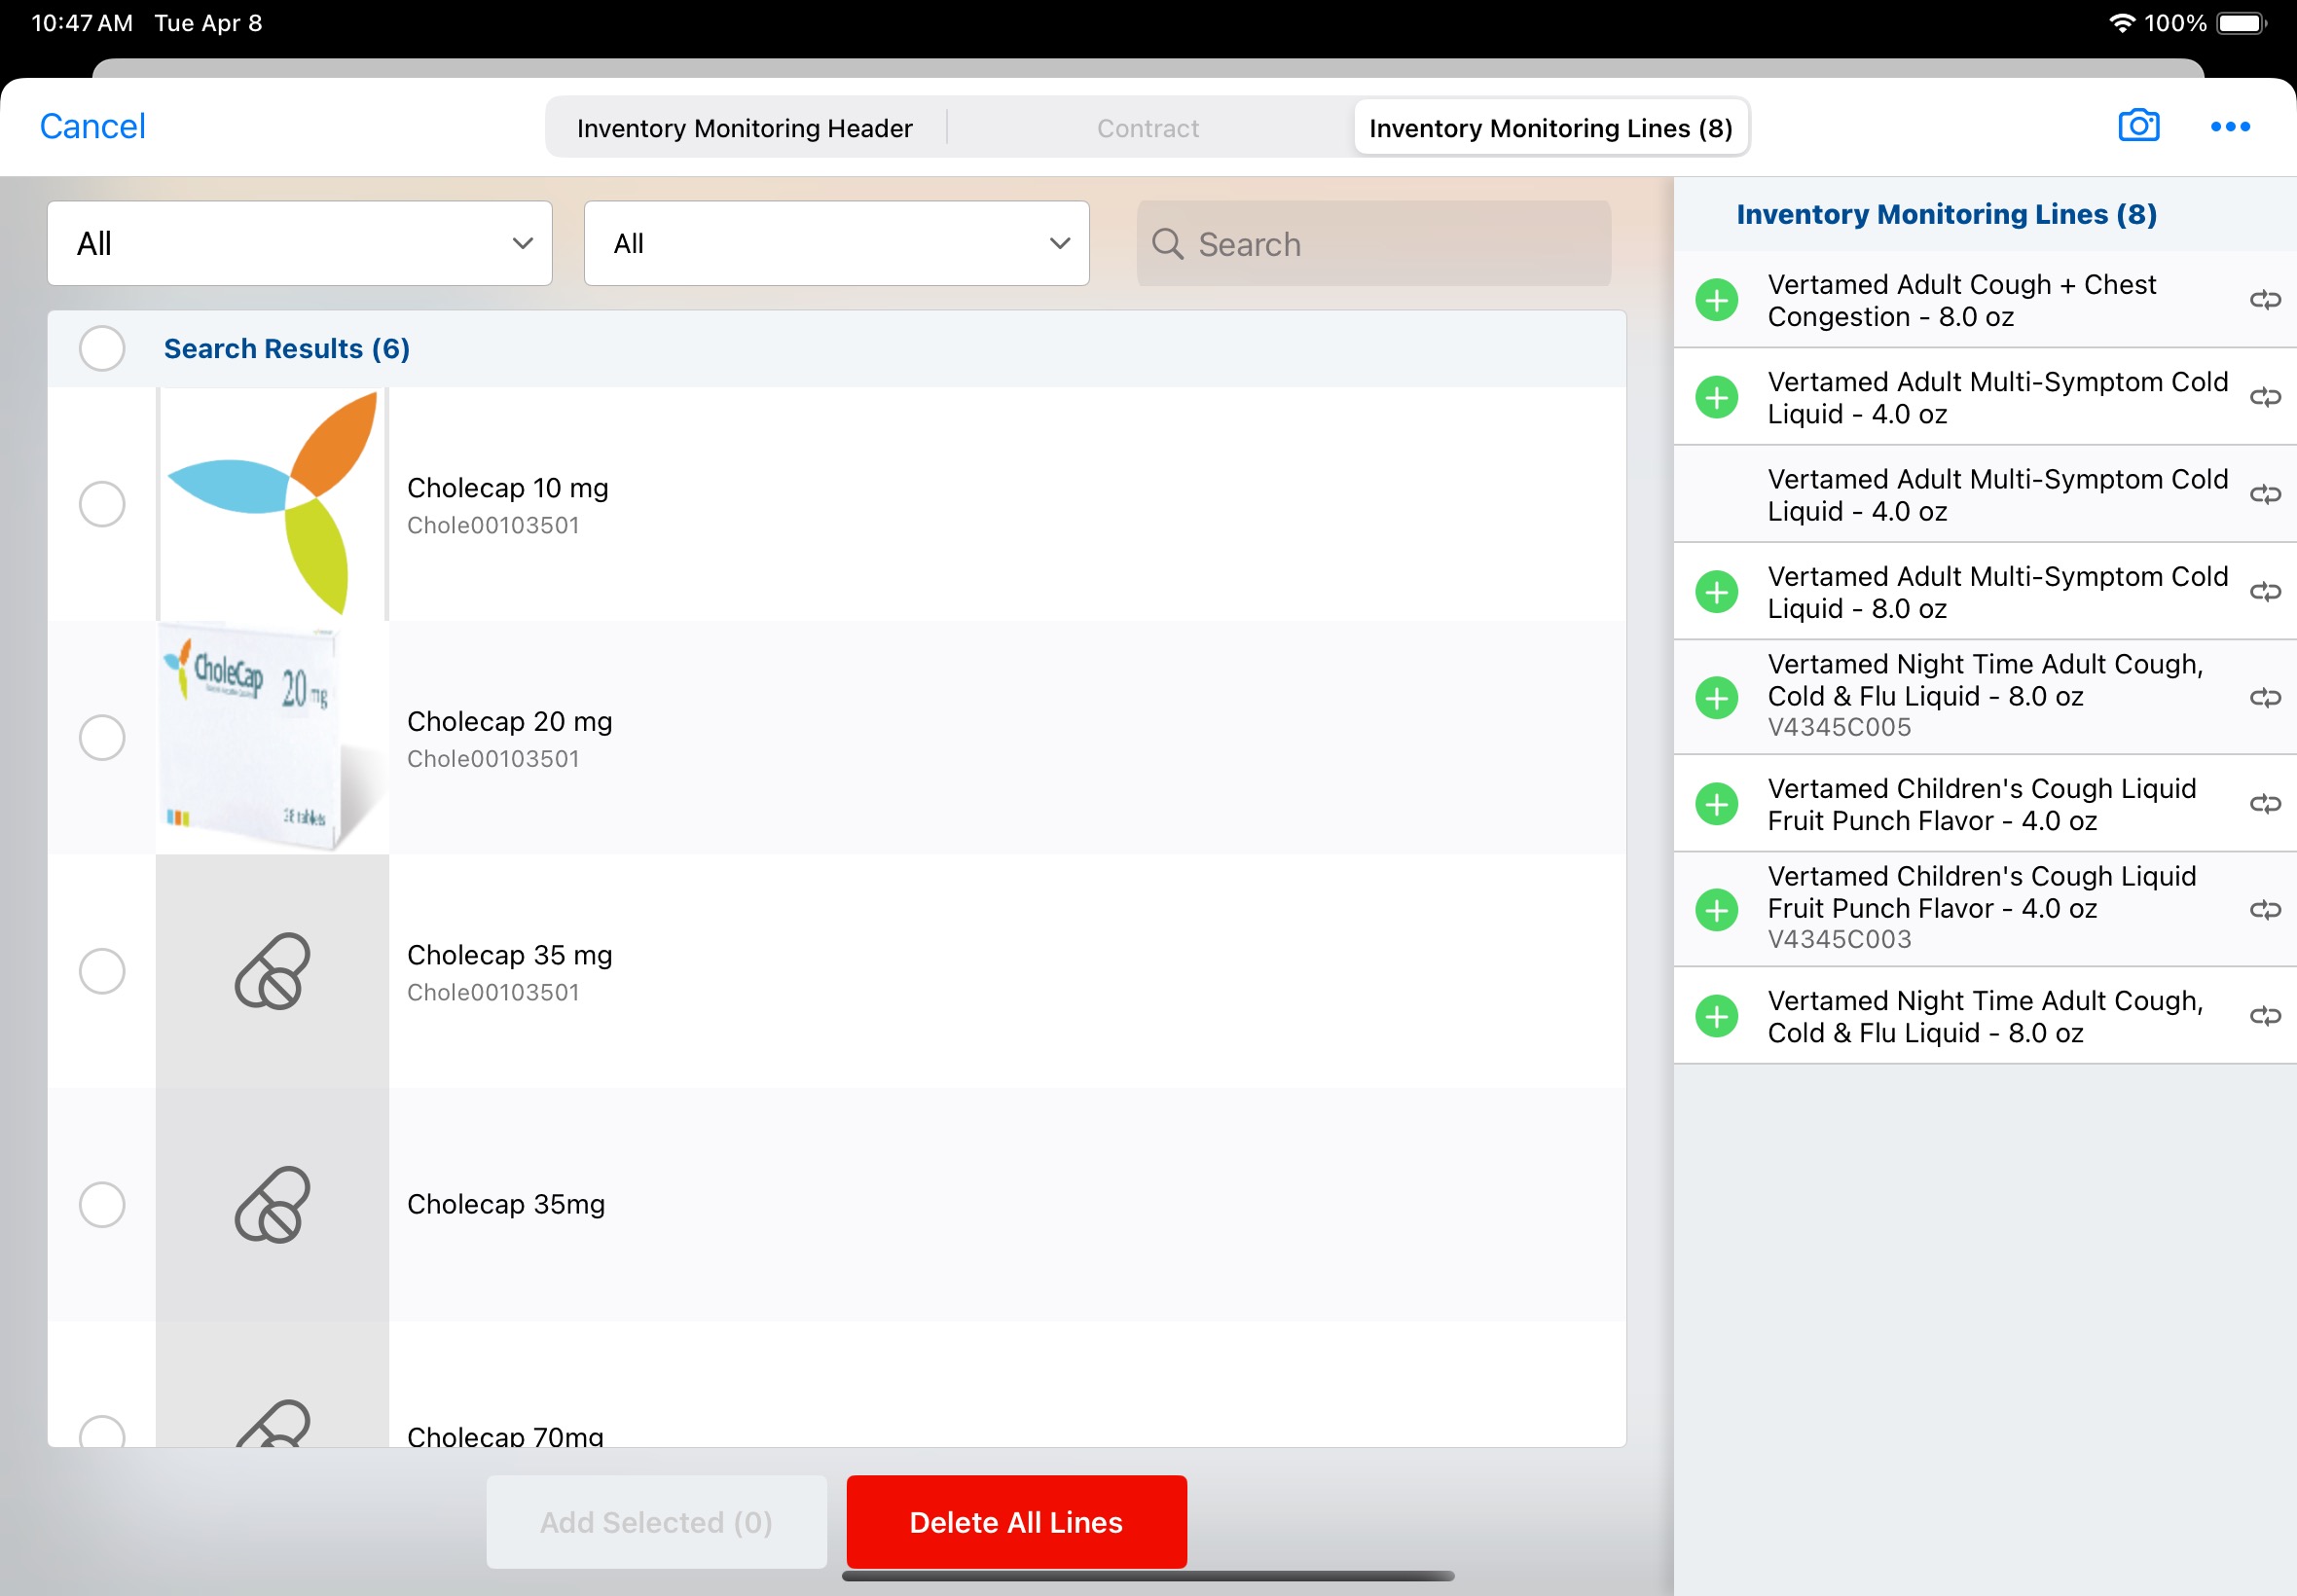
Using Inventory Monitoring
End users can create inventory monitoring records from the following entry points:
End users can view inventory monitoring records from the Account Timeline.
Who can use this feature?
- Business Admin Users - Browser, iPad
- Using Inventory Monitoring
- End Users - Browser, iPad
- Using Inventory Monitoring
- Users do not require an additional license
Using Inventory Monitoring as
Each account for which Inventory Monitoring information can be recorded must have an Inventory Monitoring Type assigned. See Enabling Accounts for Inventory Monitoring.
Each product for which Inventory Monitoring information can be recorded must have Inventory Monitoring enabled. See Enabling Products for Inventory Monitoring.
Inventory Monitoring records contain the object header information for an Inventory Monitoring. For example, the account and date for which the record was captured, object type, contract, and status.
When editing an inventory_monitoring__v record on Browser, end users can change the object type until the record is submitted. This allows users to select an object type other than the account’s default.
Inventory Monitoring Lines contain the individual product information and the data captured during Inventory Monitoring. For example, facing quantities, product position, and pharmacy inventory. Fields display based on the layout assigned. Admins can add custom fields to layouts as needed.

To create an inventory monitoring record from My Accounts:
- Navigate to My Accounts.
- Select Create Inventory Monitoring from the All Actions menu for an account enabled for Inventory Monitoring.
- Complete the appropriate fields on the Inventory Monitoring Header tab.
- Select the Inventory Monitoring Lines tab.
- Select from available products to add them to the Inventory Monitoring Lines.
- Capture values for the products in the Inventory Monitoring Lines.
- Select Add on the existing Inventory Monitoring Line for a product to add additional Inventory Monitoring Lines for the same product. This is used when products display in multiple positions, for example, front of counter or open shelf, at the account, and unique information should be captured for each position. This step is optional.
- Select Save or Submit.
To create an inventory monitoring record from Account Details:
- Navigate to My Accounts.
- Select an account enabled for Inventory Monitoring.
- Navigate to the Inventory Monitoringings related object section.
- Select Create.
- Complete fields as needed on the Inventory Monitoring Header tab.
- Select the Inventory Monitoring Lines tab.
- Select from available products to add them to the Inventory Monitoring Lines.
- Select products and capture values for the products in the Inventory Monitoring Lines.
- Select Add on the existing Inventory Monitoring Line for a product to add additional Inventory Monitoring Lines for the same product. This is used when products display in multiple locations at the account and unique information should be captured for each location. This step is optional.
- Select Save or Submit.
To create an inventory monitoring record from a Call Report:
- Navigate to My Accounts.
- Select the Record a Call action for an account enabled for Inventory Monitoring.
- Select Create Inventory Monitoring from the All Actions menu.
- Complete the appropriate fields on the Inventory Monitoring Header tab.
- Select the Inventory Monitoring Lines tab.
- Select from available products to add them to the Inventory Monitoring Lines.
- Select products and capture values for the products in the Inventory Monitoring Lines.
- Select Add on the existing Inventory Monitoring Line for a product to add additional Inventory Monitoring Lines for the same product. This is used when products display in multiple locations at the account and unique information should be captured for each location. This step is optional.
- Select Save or Submit.

